Highlights
- To perform a full restore of all your data using Google Backup, you need to turn on the Android phone and log in to the Google account that was used to take the backup.
- You can restore photos and contacts individually from Google Backup using the Google Photos or Google Contacts apps.
- To back up your Android data, tap on your phone's Settings > Google > Backup and ensure you enable the option to backup to Google Drive.
It is never fun to lose critical files from your Android phone due to a system crash, a problematic update, or performing a factory reset on the device. You may have changed to another device and all your contacts, apps, photos, and settings have to be put back in place. Although you may be able to get all that information back manually, it may take a long as it is not an easy thing to do. Luckily, there is an easy fix for this, and that is to use the Google Backup, where all your data will be restored while you are setting up the device.
In this guide, you will learn how to restore your Android Phone using Google Backup, how to restore data like photos and contacts, how to back up your phone and its contents, and how to use Google Backup to restore your phone with all the settings available.
How to Restore Android Phone from Google Backup
If you've switched to a new Android phone or had to wipe your device, restoring all your old data can seem a Herculean task. You can transfer everything to your new phone. Well, in this case, Google Backup comes to the rescue as it provides fallbacks for your apps, contacts, photos, and settings.
It doesn't matter whether you are configuring a new phone or just looking for erased information, the Google Backup saving option is indeed a great option to avoid wastage of time and labor. Here's how you should do an Android phone restoration through Google Backup:
Step 1. Firstly, grab your Android device, whether it is a new phone or an old phone that is reset to factory settings. Unfortunately, Google would not allow you to restore all the backup data unless the device is being set up.
Step 2. Next, follow the rest of the on-screen instructions for setting up the device. When it prompts you to log in to your Google account, ensure that you do this at that point. It has to be the exact same account that you used when you were backing up your old phone.
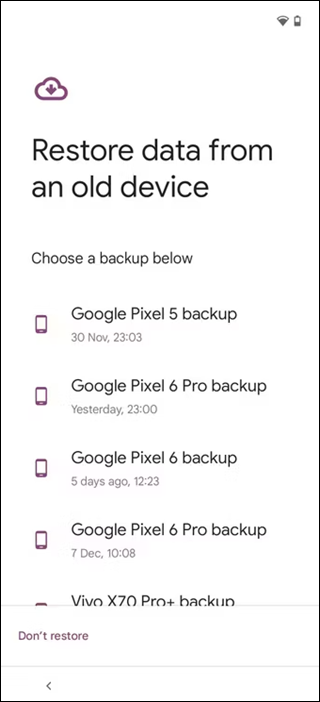
Step 3. When you sign in to your phone, it will check for any known devices that can be restored & also will check for any backups made on those devices. It will ask if you wish to restore this phone using that backup data.
![available backups]()
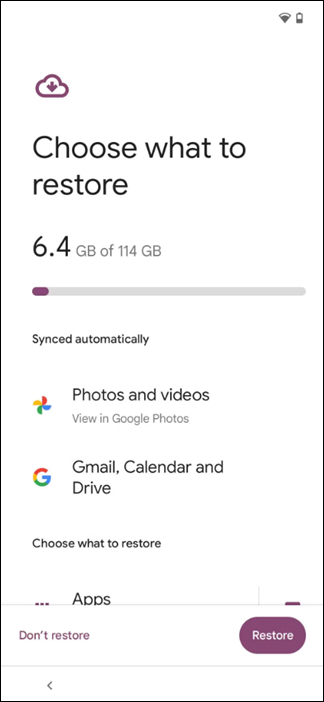
Step 4. Now, select the backup file you want to restore, choose what to copy, and tap on "Restore."
![choose what to restore]()
Step 5. Wait for the restoration process to complete. Depending on the size of the backup and your internet connection, this could take some time.
Step 6. After the data restoration, you will find your apps, settings, and preferences restored.
How to Restore Selective Data from Google Backup
If you only need to restore specific data like photos or contacts from your Google Backup, there's no need to restore everything. You can selectively retrieve only the files or information you want. Here's how you can do it:
Restore Photos
Step 1. Start by opening the Google Photos app on your Android phone.
Step 2. Next, sign in with the same Google account that was used to back up your photos.
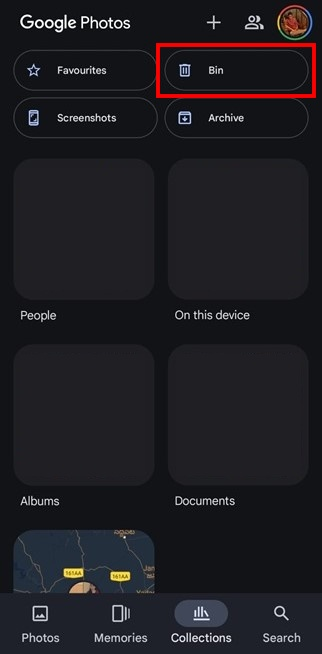
Step 3. Once signed in, tap on the "Collections" section at the bottom of the screen. Now, select the "Bin" option to find the recently deleted photos.
![tap on bin]()
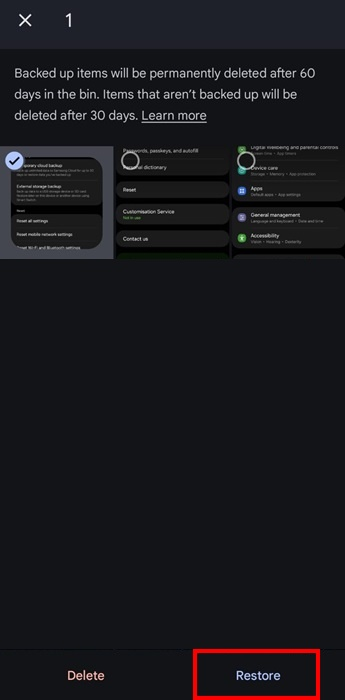
Step 4. To restore the photos, tap on the ones you want and hit "Restore" if they're in the trash. Otherwise, they will already be synced back into your Google Photos library.
![tap on restore]()
Restore Contacts
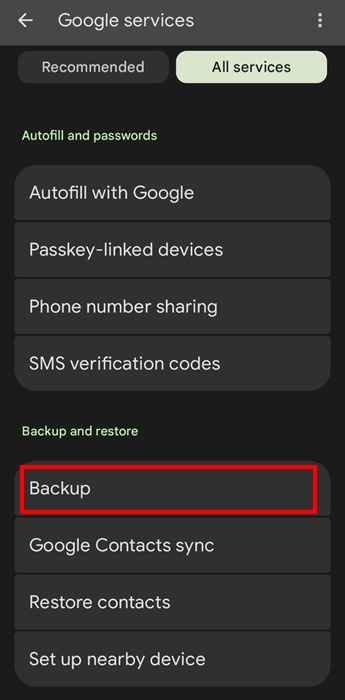
Step 1. Open the "Settings" app on your Android phone. Next, tap on "Google," then select "All services."
Step 2. Now scroll down and tap "Restore contacts."
![tap on restore contacts]()
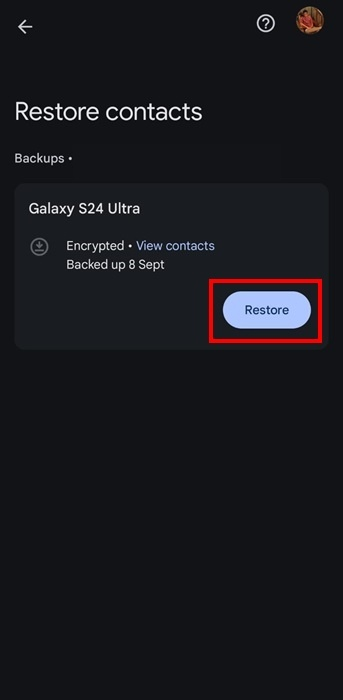
Step 3. Now, select the recent restore that contains the contacts you want to restore. Tap the "Restore" button to begin the process.
![select restore file]()
Step 4. Wait for the restoration to complete. Your contacts will be restored and synced to your phone.
How to Back Up Data on Android Device
Backing up your data is essential to ensure that you don't lose important information when switching devices or resetting your phone. Google Backup offers an easy way to keep your apps, settings, and files safe, so you can restore them later. Here's a step-by-step guide to back up your data on an Android device.
Step 1. Start by opening the "Settings" app on your Android phone.
Step 2. Next, scroll down and tap on "Google" to access Google services settings.
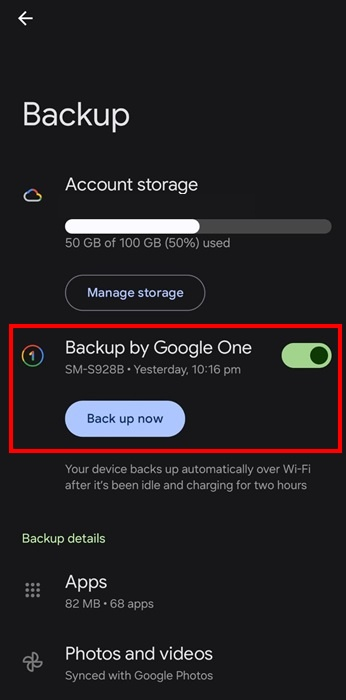
Step 3. Now, select "Backup" from the list of options. This will take you to the Google Backup settings.
![tap on backup]()
Step 4. After enabling the toggle "Backup by Google One," tap "Back up now" to manually start the process if you want an immediate backup.
![tap on back up now]()
Step 5. Wait for the backup to complete. You'll then be able to see when the last backup was created and the specific data categories that were included.
How to Back Up and Restore Android Data Without Google Backup
While Google Backup is widely used for its simplicity and seamless integration, it comes with limitations. Users often find the process too rigid, as it doesn't allow much control over selective backups or restores. Additionally, some find Google Backup lacking in flexibility when dealing with large amounts of data or cross-platform transfers. This situation can lead to Google Backup feeling more like an unprofessional application since it lacks features that offer more nice usability.
If you have such problems, EaseUS MobiMover offers a more effective and user-friendly method of performing backup and restore functions without the usual troubles. It is a cross-platform manager that lets you back up and restore your Android phone entirely without Google Backup support.
- Comprehensive Data Backup: Back up everything, including the device's contacts, messages, photos, videos, and application data.
- One-Click Restore: It furnishes the capability of restoring the backed-up data on any Android device with just a click.
- Cross-Platform Compatibility: It works on both Android and iOS devices, enabling data cuts across operating systems.
- Selective Backup and Restore: In comparison to Google Backup or Google Drive, the backup and restore selection is more accurate for its users.
- User-Friendly Interface: Designed to be straightforward and intuitive, making the process easier for those who find traditional backups complicated.
Here is how to back up Android phone to computer with EaseUS MobiMover.
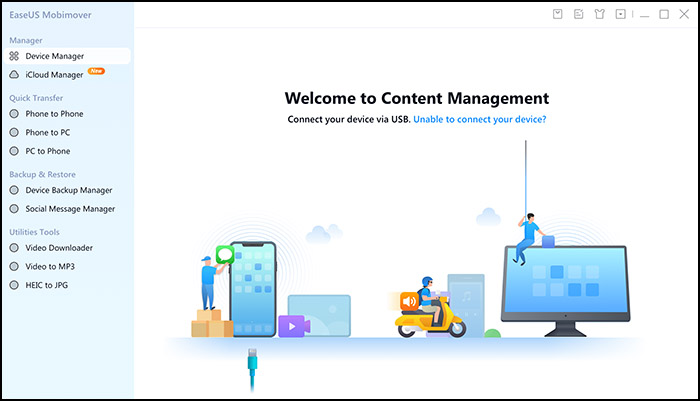
Step 1. Launch EaseUS MobiMover on your computer and connect the device to the computer via a USB cable. On your Android, allow debugging from the pop-up window to allow MobiMover access to files.
![connect the device to computer and allow debuging on the device]()
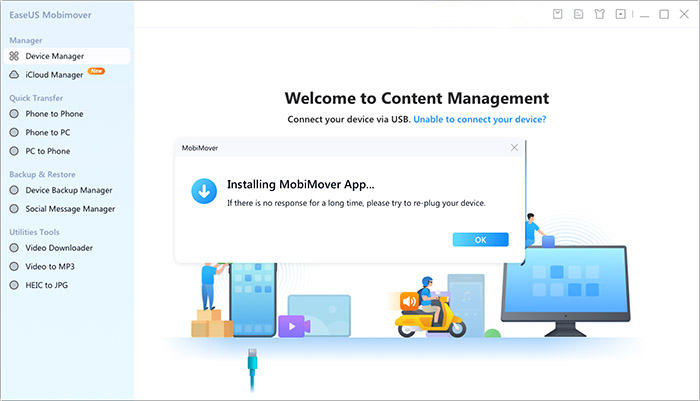
Step 2. Then, it will automatically install a mobile MobiMover app on your phone for a smooth transfer. Now tap "Allow" on your phone to allow the two required permissions shown on the screen to get file permissions. Click "OK" to dismiss.
![install MobiMover app]()
Step 3. Now, on your computer, click "Phone to PC" > "Start" from MobiMover.
![click Start in MobiMover]()
Step 4. Then you can select the file categories to transfer from Android to PC or Mac computer. Now choose photos, videos, music, messages, contacts, app data, or other files that appear on the screen to transfer. Here you can choose the location where you want to store the files, such as desktop, external hard drive, or USB flash drive. When you're done, click "Transfer" to start the process.
![select files to transfer]()
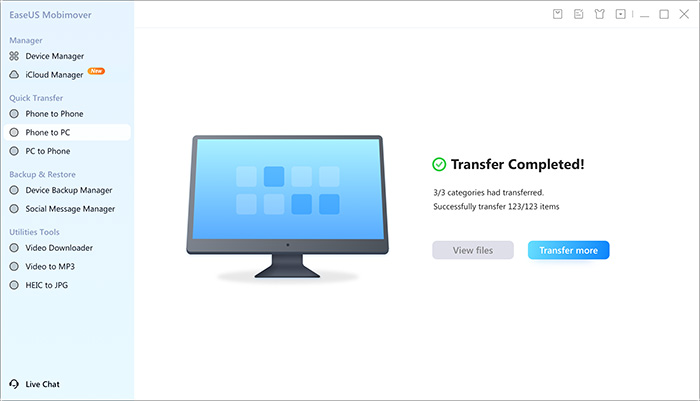
Step 5. Just wait a few minutes, the process will be completed. You can view the transferred files now or click "Transfer More" to copy other files.
![the process is complete]()
Conclusion
It's important that you perform a restore and backup of your Android phone to ensure that your information is secure, whether you are changing your device or if you are trying to recover from a factory reset. Nonetheless, a number of reasons, such as the lack of options and flexibility on the Google Backup, can make a recovery an intricate, painfully long process.
While the above method may be effective and convenient, those who are looking for an even easier way with more control will be pleased to discover a healthy and graphical alternative: EaseUS MobiMover. EaseUS MobiMover comes with a few clicks hard drive that is capable of backing up and restoring Android data and managing selective data storage; this makes the backup resolution easier which makes it recommended to recover an Android phone from the Google backup.
FAQs on How to Restore Android Phone from Google Backup
1. How do I manually restore an Android phone from Google Backup?
If you want to turn on your Android backup without the help of your Google apps, change the phone's language and go through the initial procedures that require you to sign in to Gmail. It will check for a backup option and ask you whether you want to restore it or not. You just need to choose the backup file and follow the steps shown on the screen to finish the things.
2. How do I find my Google backup?
You can find your Google backups by going to the Settings on your Android phone. Navigate to Google > Backup, where you'll see details about the last backup, including which apps and data were saved. Alternatively, you can view your backups by visiting drive.google.com and looking for the "Backups" option in the side menu.
3. Why can't I restore my Android phone from Google Backup?
If you can't restore Android phone from Google Backup, there may be a few reasons. Ensure you're logged into the correct Google account and that a backup exists. Also, check that your phone is connected to a stable internet connection. In some cases, backups may become corrupt or incomplete, which could prevent a successful restoration.
Share this post with your friends if you find it helpful!