It is important for Android users to manage files efficiently. In particular, the internal storage of the device tends to get filled up with pictures, applications, and similar other files after some time, which eventually causes other problems. Fortunately, SD cards bring a solution to this problem, as they enable one to have extra space. With this blog post, you will learn how to move files to SD card on Android devices, hence contributing to better managing the available storage space.
Adding SD cards is an economical method of increasing the memory of the Android device. They are simple to fit and increase the space available so that one can take and store more pictures, videos, applications, and many more without worrying about space. This allows you to feel good knowing there is a way out when your phone storage gets full. Whether you are a technology person or simply trying to free up space, the points made in this post will help you better understand your Android storage. With that, let's begin.
How to Move Files to SD Card on Android with Computer
It is crucial to organize files, apps, games, and information on your Android device as the phone works on the storage system. Poor organization or storage such as this can cause the phone to lag or become slow, contribute to app crashes, and also lead to loss of files. As an efficient data transfer software, EaseUS MobiMover will assist you in performing this task. With this software, you can smoothly transfer files from Android to a PC, a Mac, USB flash drives, external hard disks, and SD cards. Thanks to its simple user interface and rapid transmission of files, EaseUS MobiMover is one of the best tools for Android storage management. It also allows a single-click file transfer, file management, and backup services, among other functions that keep your data in good order.
Benefits of EaseUS MobiMover:
- Easy user interface that can be understood by all.
- High-speed file transfers to save you time.
- Supports a wide variety of file types, including photos, videos, and documents.
- Easy user interface that can be understood by all.
EaseUS MobiMover simplifies and quickens the process of whether a user wants to back up data or perform information transfer.
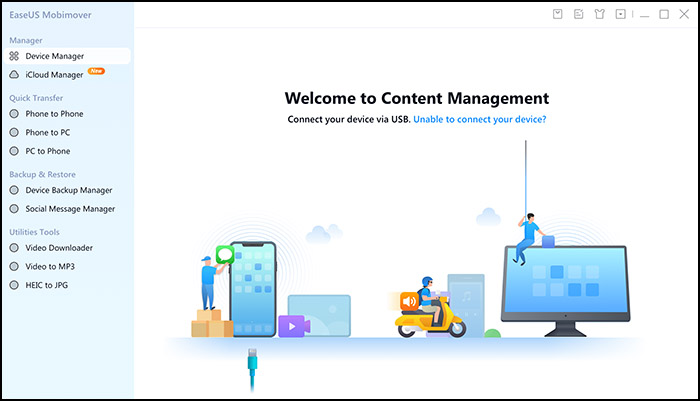
Step 1. Launch EaseUS MobiMover on your computer and connect the device to the computer via a USB cable. On your Android, allow debugging from the pop-up window to allow MobiMover access to files.
![connect the device to computer and allow debuging on the device]()
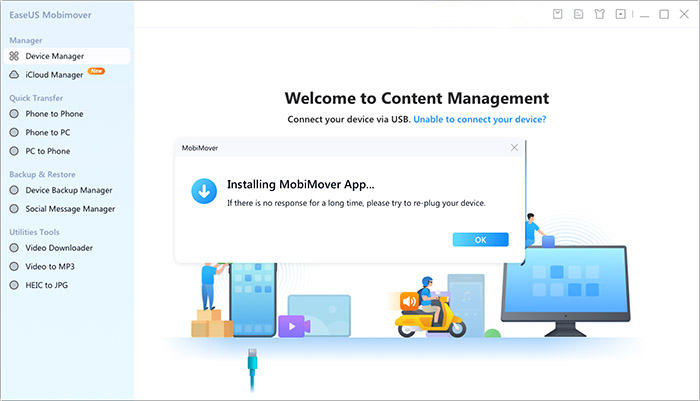
Step 2. Then, it will automatically install a mobile MobiMover app on your phone for a smooth transfer. Now tap "Allow" on your phone to allow the two required permissions shown on the screen to get file permissions. Click "OK" to dismiss.
![install MobiMover app]()
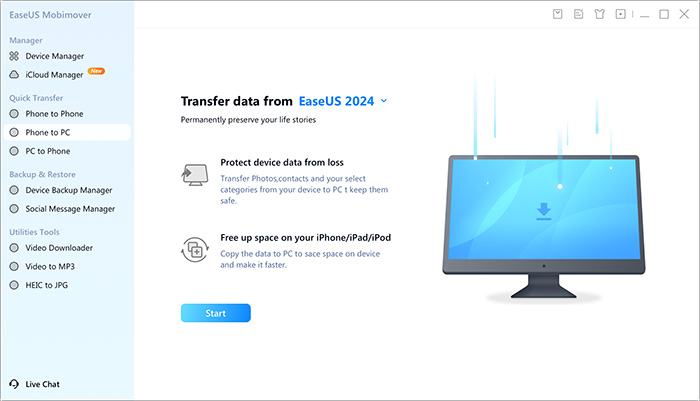
Step 3. Now, on your computer, click "Phone to PC" > "Start" from MobiMover.
![click Start in MobiMover]()
Step 4. Then you can select the file categories to transfer from Android to PC or Mac computer. Now choose photos, videos, music, messages, contacts, app data, or other files that appear on the screen to transfer. Here you can choose the location where you want to store the files, such as desktop, external hard drive, or USB flash drive. When you're done, click "Transfer" to start the process.
![select files to transfer]()
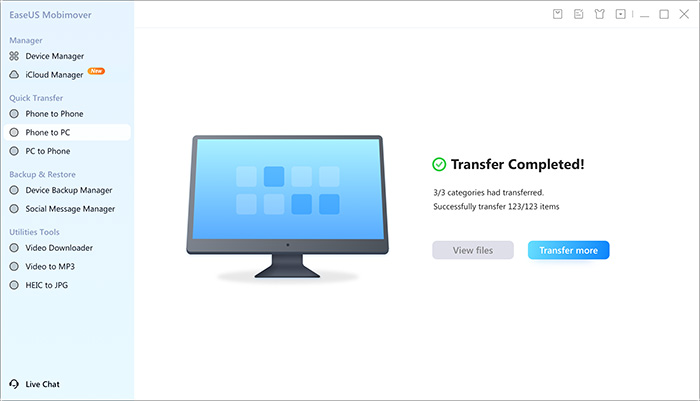
Step 5. Just wait a few minutes, the process will be completed. You can view the transferred files now or click "Transfer More" to copy other files.
![the process is complete]()
How to Save Photos to SD Card on Android via Gallery App
In this case, removing some unnecessary programs from the device and structuring the memories is required. The solution to this problem is easy: moving the images to the SD card with the Gallery app. To achieve this, do the following:
Step 1. Open the Gallery app on your Android device.
Step 2. Select the photos you want to move.
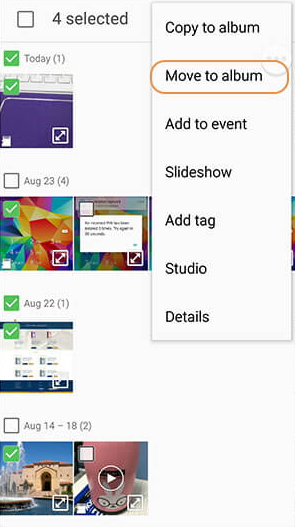
Step 3. Tap the "More" or "Options" button (the three vertical dots symbol is the most common one)
![how-to-move-files-to-sd-card-on-android-phone-move-to-album.png]()
Step 4. Choose "Move to album" or "Move to SD card."
![how-to-move-files-to-sd-card-on-android-phone-apps.png]()
Step 5. Select the destination folder on your SD card and confirm the transfer.
How to Move Files to SD Card with Files by Google
Files by Google is a multifunctional application designed to help you efficiently manage your Android storage. You can follow the steps outlined below to transfer files to your SD card using Files by Google:
Step 1. Open the Files by Google app on your Android device.
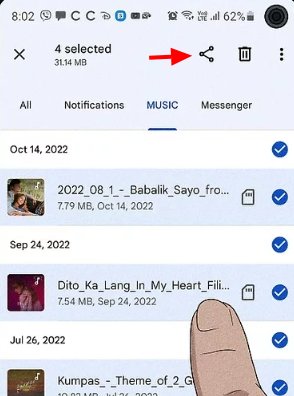
Step 2. Navigate to the "Browse" tab and select the files you want to move.
![how-to-move-files-to-sd-card-on-android-phone-select-files-google.png]()
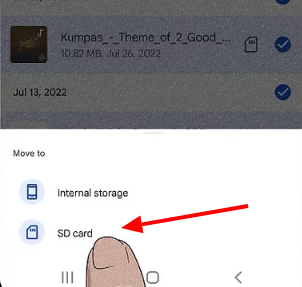
Step 3. Tap the "Move to" button.
Step 4. Choose "SD card" as the destination.
![how-to-move-files-to-sd-card-on-android-phone-files-google-to-sd.png]()
Step 5. Select the folder on your SD card where you want to move the files and confirm the transfer.
How to Transfer Apps to SD Card from Android
Moving apps to your SD card can free up valuable internal storage space. Here's how you can use this method to transfer apps to your SD card:
Step 1. Open the "Settings" app on your Android device.
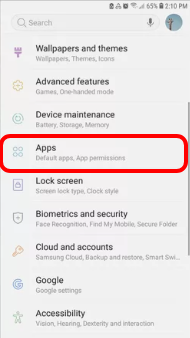
Step 2. Navigate to "Apps" or "Application Manager."
![how-to-move-files-to-sd-card-on-android-phone-apps.png]()
Step 3. Select the app you want to move.
Step 4. Tap "Storage."
![how-to-move-files-to-sd-card-on-android-phone-apps-storage.png]()
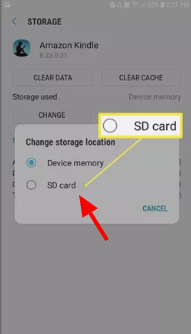
Step 5. Choose "Change" and select "SD card" as the new storage location.
![how-to-move-files-to-sd-card-on-android-phone-apps-storage-sd.png]()
Step 6. Confirm the transfer.
How to Transfer Contacts from Android to SD Card
Backing up your contacts to an SD card ensures you have a copy in case of data loss. Here's are the steps you can use to transfer contacts to your SD card:
Step 1. Open the "Contacts" app on your Android device.
Step 2. Tap the "More" or "Options" button (usually represented by three vertical dots).
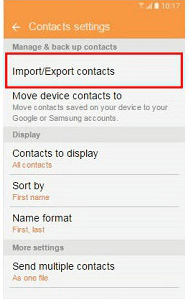
Step 3. Choose "Import/Export."
![how-to-move-files-to-sd-card-on-android-phone-contacts-export.png]()
Step 4. Select "Export to SD card."
![how-to-move-files-to-sd-card-on-android-phone-contacts-export-sd.png]()
Step 5. Confirm the export process and wait for it to complete.
Conclusion
All in all, it is quite clear that efficient storage management techniques within your Android device will be essential in achieving optimal device efficiency and usefulness. As these applications and other media files get bigger with time, they distract many internal storage spaces of the device and even slow down its operation because there is less space left for new objects. Using other tools, such as EaseUS MobiMover, the Gallery app, and Files by Google, can make file management easier. These apps let you quickly copy files such as your images, contacts, and even apps to your SD card, helping you utilize the little internal memory that you have for major apps and critical updates.
When you apply these storage management techniques, the level of satisfaction obtained from your Android device will improve tremendously, and even the level of storage or space will be managed intelligently for a longer period. Today, if you dedicate a little effort to optimizing your device, it will result in positive changes when you use it, and you will be able to appreciate the use of a fast and responsive smartphone!
How to Move Files to SD Card on Android FAQs
Here are the answers to some of the most commonly asked questions about relocating files to the SD card on an Android phone.
1. How do I move files from internal storage to SD cards on Android?
You can do it easily with the help of the Files by Google app or the file manager built into your device. First, choose which files you would like to transfer and go to "Move to". Finally, choose your SD card as the destination. This simple process helps you free up internal storage and organize your files efficiently!
2. Why are my files not moving to SD card?
If your files are not transferring to your SD card there are various possible reasons like marketed marketable space in the SD card being used up, the SD card could have been damaged, or perhaps the file is not compatible with the SD card. Make sure the SD card is in the correct file system and has adequate storage prior to carrying out the file transfer.
3. How to change the SD card in a Samsung phone?
To remove the SD card in a Samsung phone, first turn off the device. After that, find the side or back of the phone for the SD card slot. Slowly take out the SD card that is already in place and replace it with a new one while ensuring that the card is well positioned in the slot. Lastly, switch your device back on, and when it is powered on, confirm whether or not the new SD card needs formatting.

