Backing up photos on your Android device is crucial for preserving your memories and ensuring that your cherished images are safe from accidental loss or device failure. With the increasing reliance on smartphones for photography, having a reliable backup strategy is more important than ever.
Fortunately, there are several effective methods to back up your photos, ranging from built-in options like Google Photos to third-party applications and manual transfers to computers. Whether you're looking to free up space on your device or keep your data safe while switching devices, backing up your photos has never been easier.
How to Backup Android Photos to Computer with Ease
Backing up photos on an Android device is essential for preserving your memories and ensuring you don't lose important images. Here are several effective methods to back up your photos to your computer, USB flash drive, or external hard drive.
Method 1. Back Up Photos on Samsung/Google/Motorola
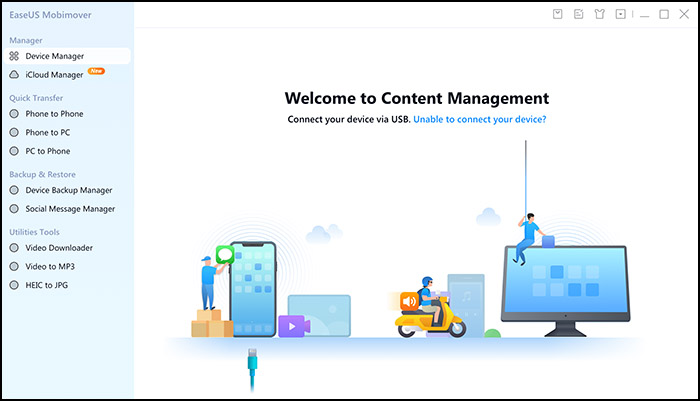
EaseUS MobiMover is a versatile, user-friendly software for seamless data transfer between mobile phones and computers. It supports various file types, including photos, music, videos, messages, contacts, etc. This application is compatible with both Windows and Mac systems, making it accessible to a wide range of users.
With its intuitive interface, MobiMover allows you to export photos and videos directly to your computer or back up your whole device (iPhone, Samsung, Google Pixel, Motorola)in one click. For example, it can transfer photos from Android to the external hard drive.
Now, let's see how to back up pictures on Android to your computer or other external storage devices.
Step 1. Launch EaseUS MobiMover on your computer and connect the device to the computer via a USB cable. On your Android, allow debugging from the pop-up window to allow MobiMover access to files.
![connect the device to computer and allow debuging on the device]()
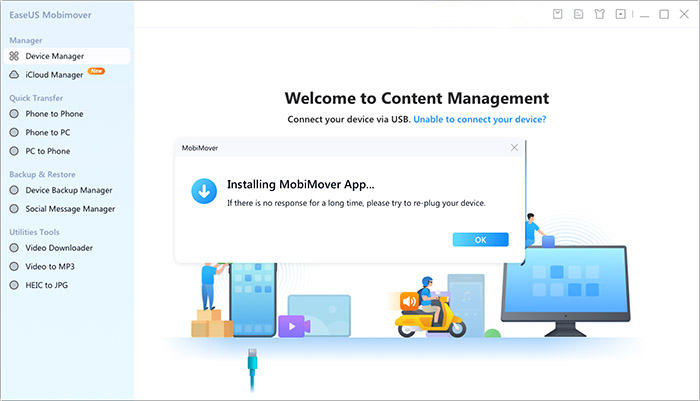
Step 2. Then, it will automatically install a mobile MobiMover app on your phone for a smooth transfer. Now tap "Allow" on your phone to allow the two required permissions shown on the screen to get file permissions. Click "OK" to dismiss.
![install MobiMover app]()
Step 3. Now, on your computer, click "Phone to PC" > "Start" from MobiMover.
![click Start in MobiMover]()
Step 4. Then you can select the file categories to transfer from Android to PC or Mac computer. Now choose photos, videos, music, messages, contacts, app data, or other files that appear on the screen to transfer. Here you can choose the location where you want to store the files, such as desktop, external hard drive, or USB flash drive. When you're done, click "Transfer" to start the process.
![select files to transfer]()
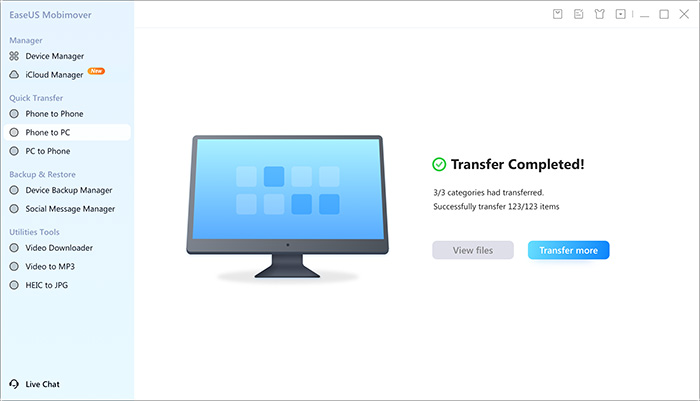
Step 5. Just wait a few minutes, the process will be completed. You can view the transferred files now or click "Transfer More" to copy other files.
![the process is complete]()
Additionally, it can transfer photos from Android to iPhone and back up WhatsApp messages, further enhancing its utility. Whether you're looking to free up space on your device or want a reliable way to organize your media files, EaseUS MobiMover offers a practical solution that simplifies the process of managing your digital content.
Method 2. Copy and Paste Photos to PC Manually
You can also manually move photos from your Android device to a computer. In this method, you don't need to download any third-party software. All you need is a compatible USB cable to connect your device. Follow the steps below to back up pictures on Android.
Step 1. Connect your Android device to your Windows computer.
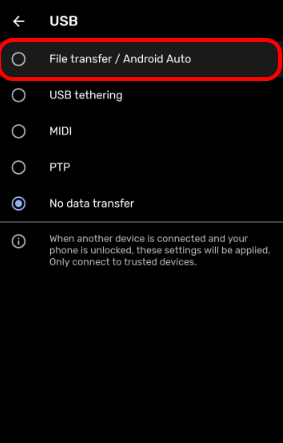
Step 2. On your phone, unlock the device and trust this computer. Select File Transfer mode when prompted.
![android-file-transfer-could-not-connect-to-device-file-transfer-usb.png]()
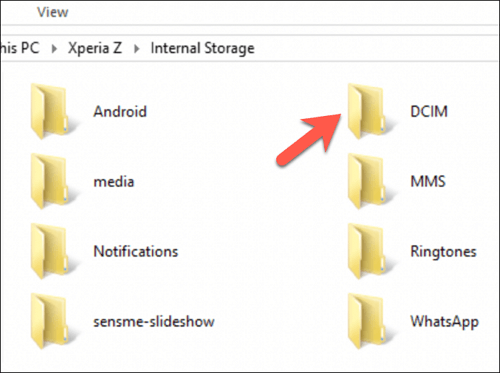
Step 3. Open the file explorer on your computer, locate your device, and navigate to the DCIM folder (where photos are stored).
![android-dcim-folder.png]()
Step 4. Copy and paste or drag and drop the desired photos into a folder on your computer.
How to Backup Photos on Android Phone to Cloud Services
If you want to back up Android photos to cloud services instead of your computer or other storage devices, the following methods perfectly meet your demand. One benefit of saving photos to the cloud is that new pictures will be uploaded automatically. Thus, you don't need to back them up manually.
Method 1. Google Photos
Google Photos is one of the most popular options for backing up photos on Android devices, and it is pre-installed on most Android phones. Follow these steps:
Step 1. Open the Google Photos app and sign in with your Google account.
Step 2. Tap on the Menu icon (three lines) at the top right corner.
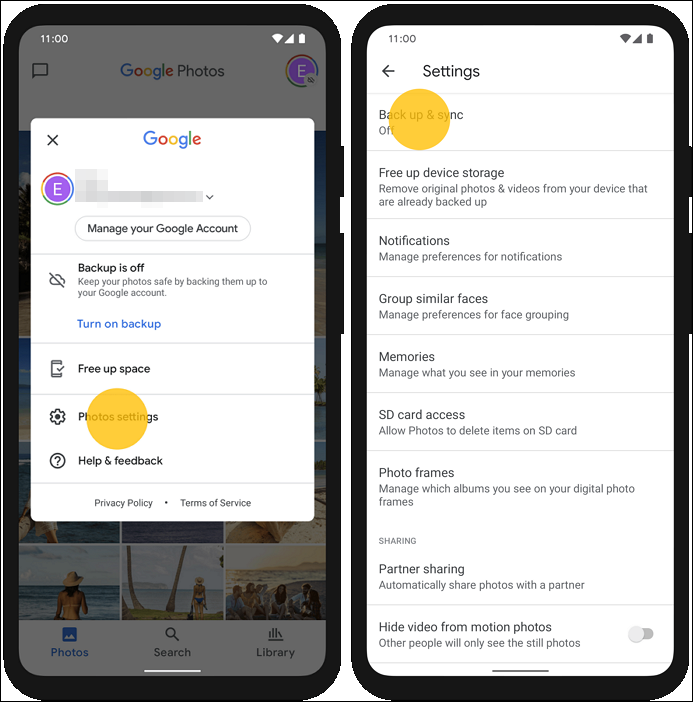
Step 3. Select Settings > Back up & sync. Enable the option.
![google-photos-backup-sync.png]()
Step 4. Adjust settings for Upload size, Mobile data, and Roaming options as needed.
Step 5. You can check the backup status at the top of the app to see if all photos have been backed up or are pending.
Method 2. OneDrive
For users who prefer Microsoft services, OneDrive is a viable option. To back up your Android photos using Microsoft OneDrive, you need to have the OneDrive app installed and be signed in with your Microsoft account. Follow these steps to set up photo backup on your Android device:
Step 1. Install the OneDrive app on your device and create an account if you don't have one.
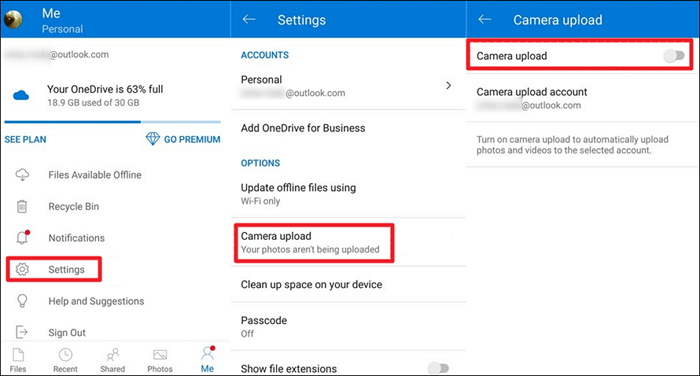
Step 2. Once you sign in with your account, tap Me to locate Settings.
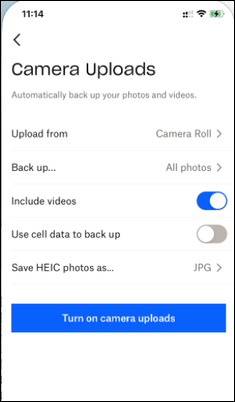
Step 3. Select Camera Upload and enable the option.
![onedrive-camera-upload.png]()
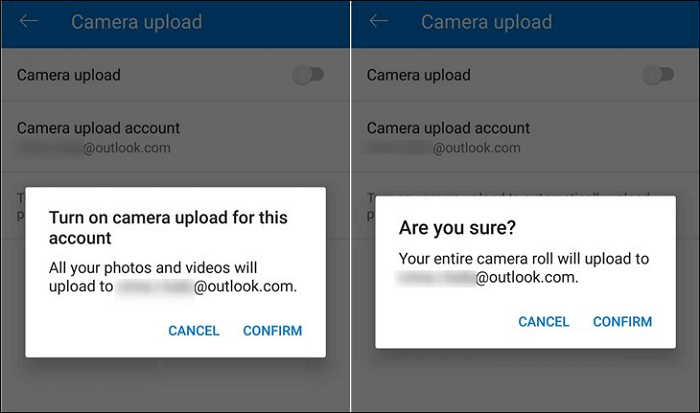
Step 4. Confirm the action, and it will upload the entire camera roll to OneDrive.
![confirm-onedrive-camera-upload.png]()
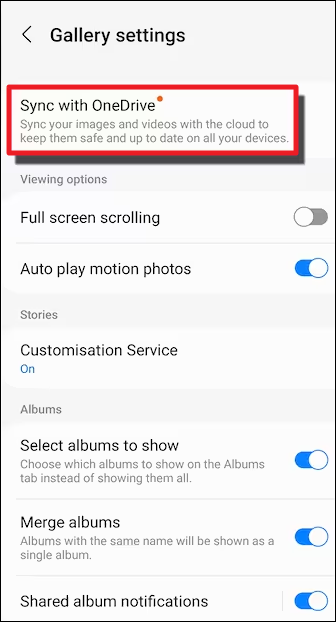
You can also transfer photos to OneDrive using the following path: Go to the Gallery app on your Samsung phone, tap More > Settings > Sync with OneDrive. Tap Continue and sign in with your Microsoft account.
![samsung-gallery-sync-with-onedrive.png]()
Method 3. Dropbox
Another tool you can use is Dropbox, which allows both automatic and manual photo uploads. To set it up:
Step 1. Download and install the Dropbox app from the Google Play Store.
Step 2. Open the app and log in.
Step 3. Tap Account, then go to Settings.
Step 4. Enable Camera Uploads to automatically back up photos.
Step 5. Choose what types of files to upload (photos only or videos) and adjust any other settings as necessary.
![dropbox-camera-uploads.png]()
Conclusion
That's all for how to back up photos on Android. These methods provide flexibility depending on whether you prefer local backups or cloud backups.
- For local backups, you can choose EaseUS MobiMover to back up Android photos only or other files, such as videos, messages, contacts, etc. You can also use File Explorer to drag and drop pictures from your Android internal storage to your computer.
- For cloud backups, you can use Google Photos, OneDrive, and Dropbox. Once you've uploaded images to the cloud, you can access your pictures from any device with an internet connection, and many cloud services provide automatic backup features.
FAQs
1. How do I back up photos on a Samsung?
Samsung provides its own backup service called Samsung Cloud, which seamlessly integrates with your device.
- Go to your device's settings.
- Tap on Accounts and Backup.
- Tap on Samsung Cloud to manage your cloud storage.
- Select Gallery and toggle on the switch to sync and back up your images.
- You can choose to sync over Wi-Fi only or also while on mobile data.
2. Does Google Photos back up all your photos?
Google Photos can back up all your photos and videos automatically on your Android device or tablet, but you need to configure the backup settings correctly. To enable the backup option, you should go to Photos Settings> Back Up & Sync. Once activated, the app will continuously upload your media files to the cloud.