Highlights:
- Stolen Device Protection is not available on iPad. Therefore, you can not enable it on your iPad device even if it runs iPadOS 17.3.
- To protect your iPad from theft, you can have a regular backup of your iPad data, set a difficult passcode, enable two-factor authentication to protect your Apple ID, and mark your device as lost.
- Even though the Stolen Device Protection feature does not work for iPads at the moment, it is most likely you can access this function in the later iPadOS updates. Let's look forward to it.
Apple is introducing a new feature with iOS 17.3 called Stolen Device Protection, which aims to protect Apple devices from thefts, telling by the name. However, many users wonder, 'How do I enable Stolen Device Protection on iPad?' 'Is Stolen Device Protection available on iPad?' You can get the answer right now.
Is Stolen Device Protection Available on iPad?
Actually, the Stolen Device Protection is not available on iPad at the moment; it is only for iPhone models running the latest iOS 17.3. According to the iPadOS Updates information released by Apple Support, the latest iPadOS 17.3 didn't include the Stolen Device Protection feature. But it is most likely that you can get this protection mechanism on your iPad in the near future. Even though the device protection does not work on iPad, you can have a basic understanding of how it works on iPhone:
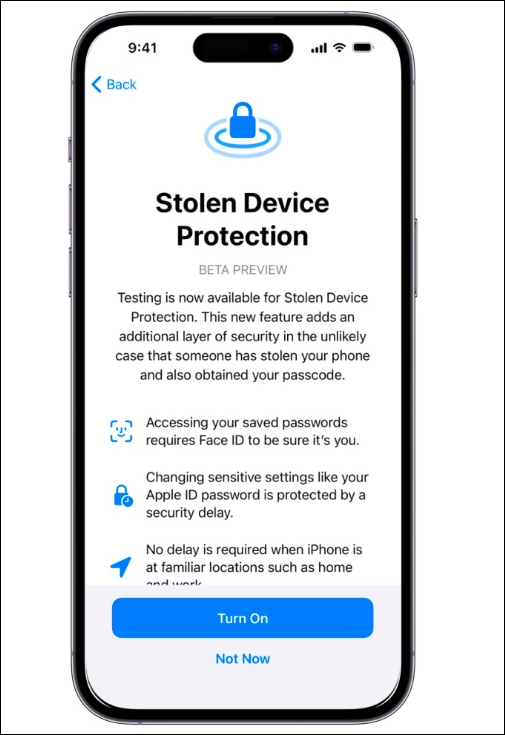
The Stolen Device Protection increases the security of Apple ID by reducing the importance of passcodes, which thefts can easily get over one's shoulder. With this feature on, when you are away from familiar locations such as the workplace and home, some actions require authentication with Face ID or Touch ID and no passcode alternative. Therefore, it limits certain features to that only you can access. It also includes a feature called Security Delay, which requires you to wait an hour and have a second Face ID or Touch ID authentication when changing your Apple ID password.
![stolen device protection]()
Stolen Device Protection Alternatives to Protect iPad
You cannot use Stolen Device Protection on iPad now; then, how can you protect your device or iOS data from theft? Don't worry! There are some built-in security protection for iPads that you can utilize to prevent your iPad from being stolen or lost.
Action 1. Safeguard iPad Data
What is the most important thing on iPad? The essential data on iPad, of course, such as photos, videos, contacts, notes, emails, documents, etc. Once the iPad is stolen or lost, all the personal data is at risk of information leakage. Then, how can you protect all the data? iCloud is a good choice, but it only provides 5 GB of free storage, which is too small to store all the files. EaseUS MobiMover is recommended to back up your iPad to Windows, Mac, laptop, or the external hard drive. Thus, once your iPad is lost or stolen, you can erase your device without losing anything. EaseUS MobiMover is a powerful data transfer tool that ensures users' privacy stays private and the transfer process is smooth and fast.
Main Features of EaseUS MobiMover:
- Back up iPad to the computer without iTunes. Having a regular backup of your iPad is the most secure way to protect your data from theft since you can erase your iPad remotely while maintaining everything on your computer.
- Transfer data between mobile devices. It can transfer photos from iPad to iPad without losing quality. It supports data transfer not only between iOS devices but also between iOS and Android devices.
- Download YouTube videos to iPad. It can be a video downloader that is able to save online videos to your device over 1,000 websites.
- Batch convert HEIC to JPG. Windows does not support certain formats of pictures, and that's why this tool comes to help convert the picture format to JPG.
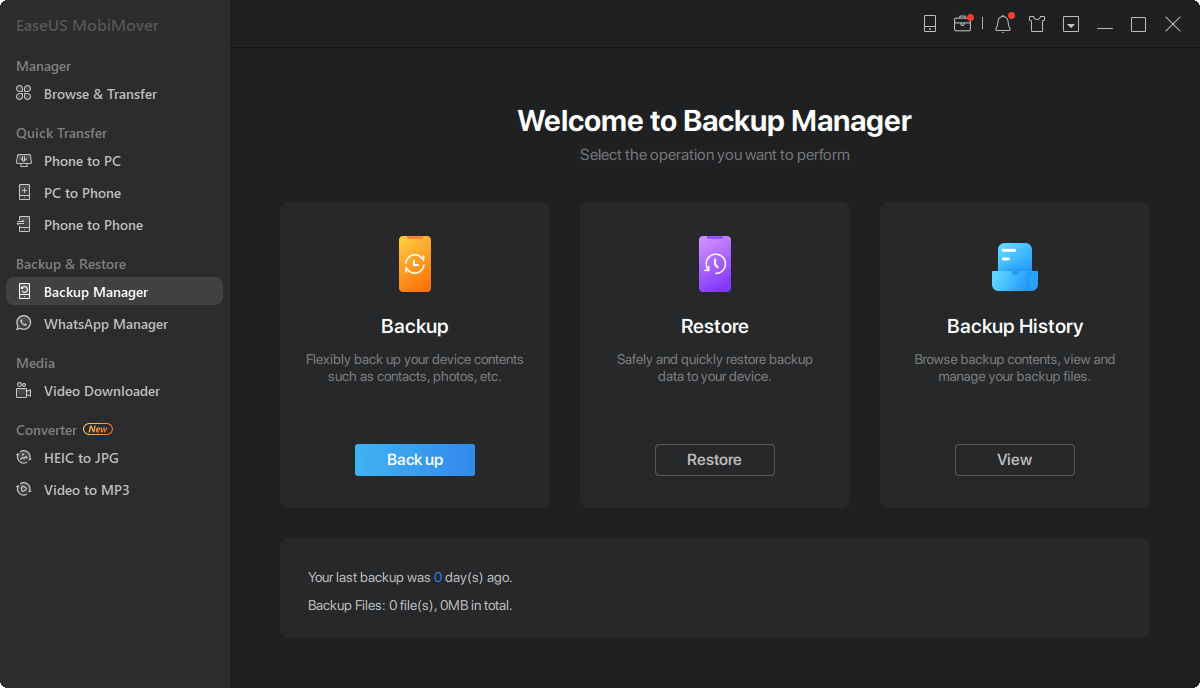
Step 1. Connect your iPhone/iPad to your PC with a USB cable and click "Trust" on your device. Then launch EaseUS MobiMover and click "Backup Manager" > "Back up".
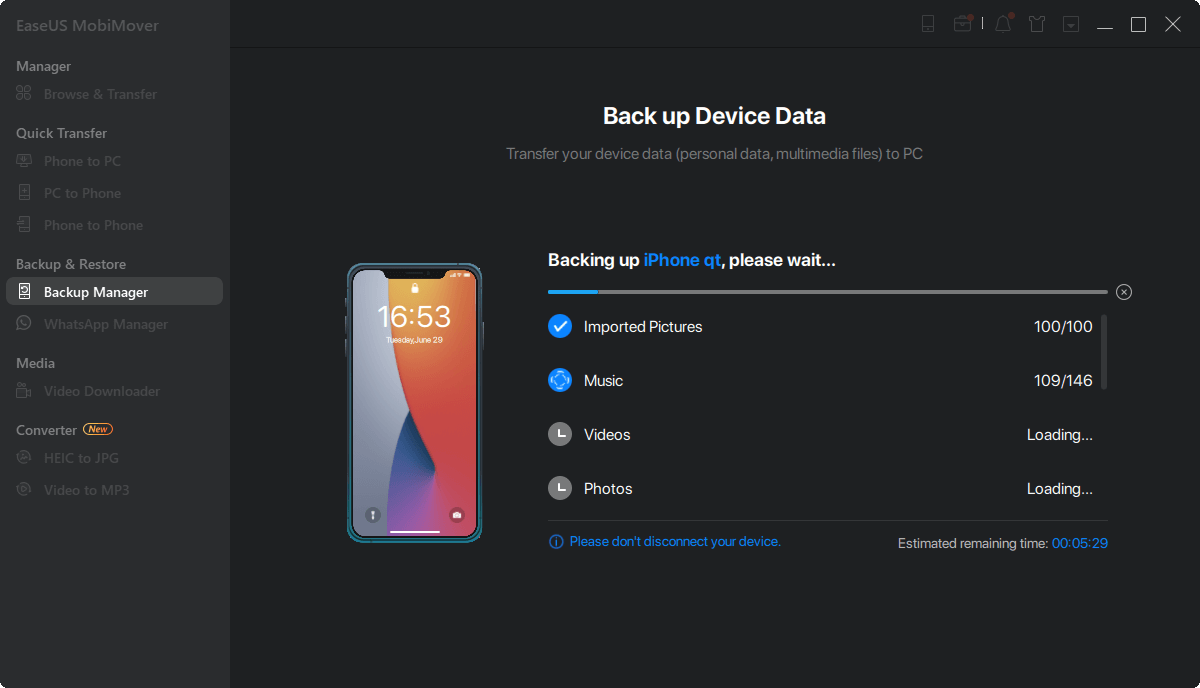
Step 2. Check the types of files you need to backup. Afterward, click the backup button to start backing up your iPhone or iPad.
Step 3. Depending on the size of the content, the time the backup will spend varies. Wait patiently for the backup to complete.
Action 2. Set Lock Screen
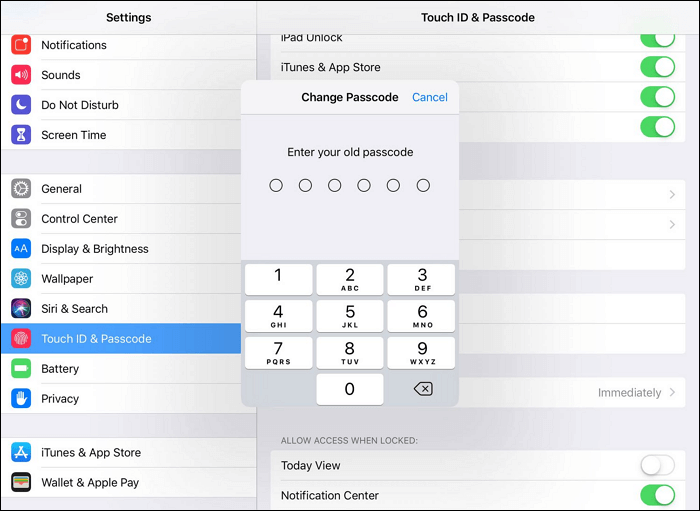
1️⃣It is essential to have a passcode to lock your screen; otherwise, anyone else can access your iPad without your permission. Go to Settings > Face ID & Passcode/ Touch ID & Passcode > Turn on Passcode or Change Passcode if you have a simple password.
![change passcode on ipad]()
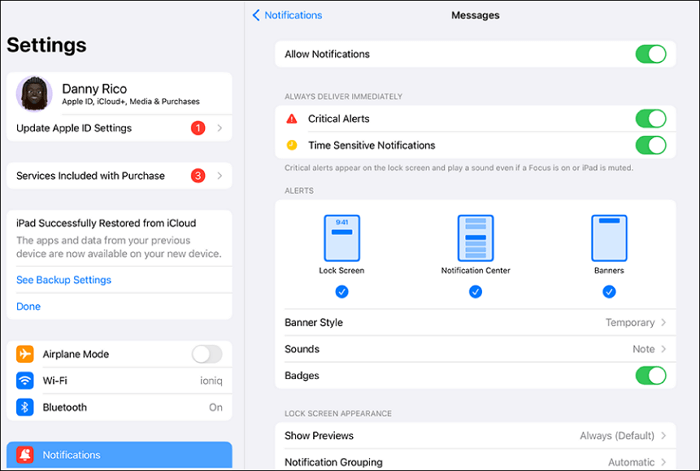
2️⃣If someone picks up a lost iPad with default settings, the notifications on the lock screen could reveal personal details about the iPad owner. Snippets of emails, messages from social media accounts, calendar reminders, and more are visible to the unauthorized, even if the iPad has a passcode. Thus, hiding sensitive notifications is essential. Go to Settings > Notifications and select the apps that can be displayed on the lock screen. The notification settings vary for different applications, but most have an option to hide them from the lock screen.
![notification on ipad]()
Action 3. Secure Apple ID
The Apple ID is linked to so many services, such as the App Store, Apple Music, iMessage, iCloud, FaceTime, and more. When the device is lost or stolen, it is essential to protect your Apple ID. To maximize the security of your Apple ID, do not let others use or know your Apple ID and password, even your family members (you can choose to share your purchases or calendars by setting up a Family Sharing). Despite not co-using your Apple ID with others, you can also:
1️⃣Enable two-factor authentication.
Two-factor authentication is available on iOS 9/iPadOS 13 and later, and you can go to Settings > User Name > Sign-in & Security > Turn on Two-Factor Authentication. When you create an Apple ID on a device running iPadOS 13.4/iOS 13.4 and later, the authentication is automatically on. Once enabled, only you can access your account with a trusted device, even though someone who knows the Apple ID password cannot use the account on a new iPad or iPhone. This is because when you sign in to the account on another device, it needs information besides the password - the 6-digit verification code displayed on your trusted devices.
![two factor authentication]()
2️⃣Add Account Recovery Contacts.
Another way to protect your Apple ID or iCloud account from unauthorized use is to add Account Recovery Contacts. An account recovery contact is your trusted one who can verify your identity and help you reset your Apple ID password when you lose access to your account. Go to Settings > User Name > Sign-in & Security > Account Recovery > Add Recovery Contact. Then, follow the onscreen instructions to fill out all the essentials.
![add account recovery contact]()
Also Read:
Action 4. Mark iPad as Lost
If your iPad has already been lost or stolen, you can find your lost device with Find My. If you don't think you can get the stolen device back, you can also use this feature to lock your device and protect your data. Find My turns on automatically when you set up iCloud on your iPad or iPhone. Find My is on, and then the Activation Lock is on as well. The former is to locate and protect your lost device, and the latter is to prevent someone, especially the thief, from reactivating your device (it works even if you've erased your iDevice).
1️⃣How to Enable Find My.
Although it is automatically on, in case you turn it off accidentally, you can follow the instructions to double-check the option status. On your iPad, go to Settings > User Name > Find My. Tap the Find My iPad, Find My Network, and Sent Lost Location to turn them on.
2️⃣How to Find Lost iPad.
On your other Apple devices with the Apple ID signed in:
- Open Find My > Devices. And choose the lost iPad, and you can locate it on the map.
- If you are close, you can tap the Play Sound option.
![find lost ipad]()
3️⃣How to Mark iPad as Lost.
You can use your iPhone or Mac that has your Apple ID signed in, or you can sign in to iCloud.com web.
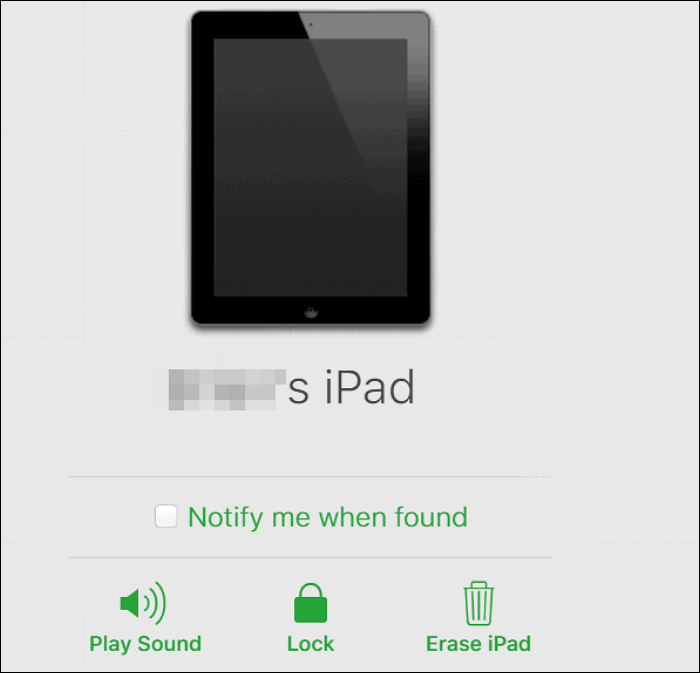
- On the website, select your lost device, and you can find three options: Play Sound, Mark as Lost/Lost Mode, and Erase This Device.
- Click Mark as Lost > Activate. Then, you are able to see a list of what will happen after you mark this device as lost.
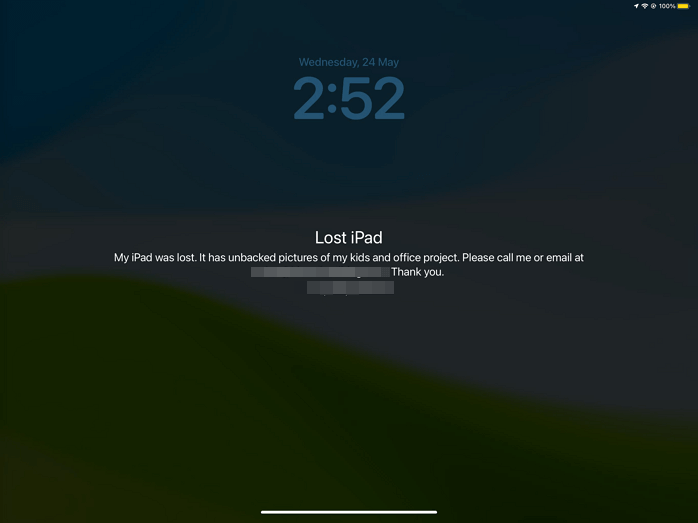
- You can choose to Leave a Message, which allows you to leave a phone number to be displayed for anyone who finds the iPad.
![mark ipad as lost]()
- Tips:
-
If you can't get your lost or stolen iPad back, it is suggested to erase your iPad remotely through iCloud Find My. In this way, all the photos, videos, keywords, and more saved on your device will be gone, and the thief will not access any personal data. If you have a backup of your iPad, you will lose nothing. In case you don't know how to back up your iPad, you can revert to Action 1.
Also Read:
Conclusion
Now, you know the Apple Stolen Device Protection feature is not available on iPad, but you have learned several other ways to protect your iPad data, secure your Apple ID, and how to find your lost iPad. One thing to notice is that if you consider the iPad data way more important than the device itself, you'd better back up your iPad and save the backup file somewhere else, such as your USB, external hard drive, or computer. One useful tool for iPad backup and data transfer is EaseUS MobiMover.
FAQs
1. Should I turn on Stolen Device Protection?
Yes, iPhone users are supposed to turn Stolen/Lost Device Protection on to prevent thieves from accessing the settings and main functions of the lost device. To some extent, this feature safeguards the owner's personal data. For people who love to travel or who go to work by public traffic, such as subways, it is better to enable this feature.
2. How do I get Apple Stolen Device Protection?
On your iPhone running iOS 17.3 and later, go to Settings > Face ID & Passcode. Enter the passcode for your lock screen, and scroll down to locate Stolen Device Protection. You can choose to toggle it on or off.
 NEW
NEW HOT
HOT