Many iPhone users record important audio, meetings, or reminders with the built-in Voice Memos app. However, when you want to back up, edit, or simply free up storage, it becomes necessary to transfer voice memos from iPhone to computer. Luckily, there are several easy ways to do this on both Windows 10/11 PCs and Mac.
Quick Answer:
To transfer voice memos from iPhone to a computer, you can:
1️⃣Without iTunes: Use EaseUS MobiMover or iCloud Drive to copy files in bulk.
2️⃣With iTunes: Sync all voice memos to your PC.
3️⃣Share One by One: Share via Email, AirDrop, or Google Drive.
4️⃣With iCloud: Upload memos to iCloud and download them on your computer.
These methods works on both Windows 10/11 PCs and Mac.
| Methods |
Best for |
Pros |
Cons |
| EaseUS MobiMover |
Bulk transfer |
Fast, all file types, no iTunes needed |
Software required |
| iTunes |
Sync all memos |
Official Apple method |
Can't select individually |
| Share Sheet |
Few memos |
Simple, no extra tools |
One by one only |
| iCloud |
Small number of memos |
Wireless, easy |
Must enable iCloud, slower |
Method 1. Transfer Voice Memos from iPhone to PC Without iTunes on Windows 10/11
Transfers voice memos in bulk with one click | up to 20 files for free transfer per day
If you want to move multiple voice memos from your iPhone to a Windows 10 or 11 PC without using iTunes, a dedicated iPhone transfer tool - EaseUS MobiMover is an easy workaround. This method is ideal if you need to back up recordings, free up space, or edit audio files on your computer. With the right tool, you can transfer voice memos in bulk, manage other iPhone files, and ensure everything stays organized.
Why choose this iPhone voice memos transfer tool:
- Bulk transfer: Move multiple voice memos at once, saving time compared to transferring one by one.
- Manage iPhone storage: View all your voice memos on PC and choose to delete them in bulk. The same goes for everything else on your iPhone.
- No iTunes required: Avoid the complexity of iTunes syncing and its file format limitations, especially when you have dozens of voice memos to move.
- Support for other file types: Transfer photos, videos, music, contacts, and more in addition to voice memos.
- Quick and reliable on Windows 10/11: Optimized for modern PCs, ensuring faster transfer and fewer connection issues.
- Safe backup: Keep a copy of your voice memos on your PC to prevent accidental loss or device damage.
To transfer voice memos from iPhone to PC for free, follow the steps below:
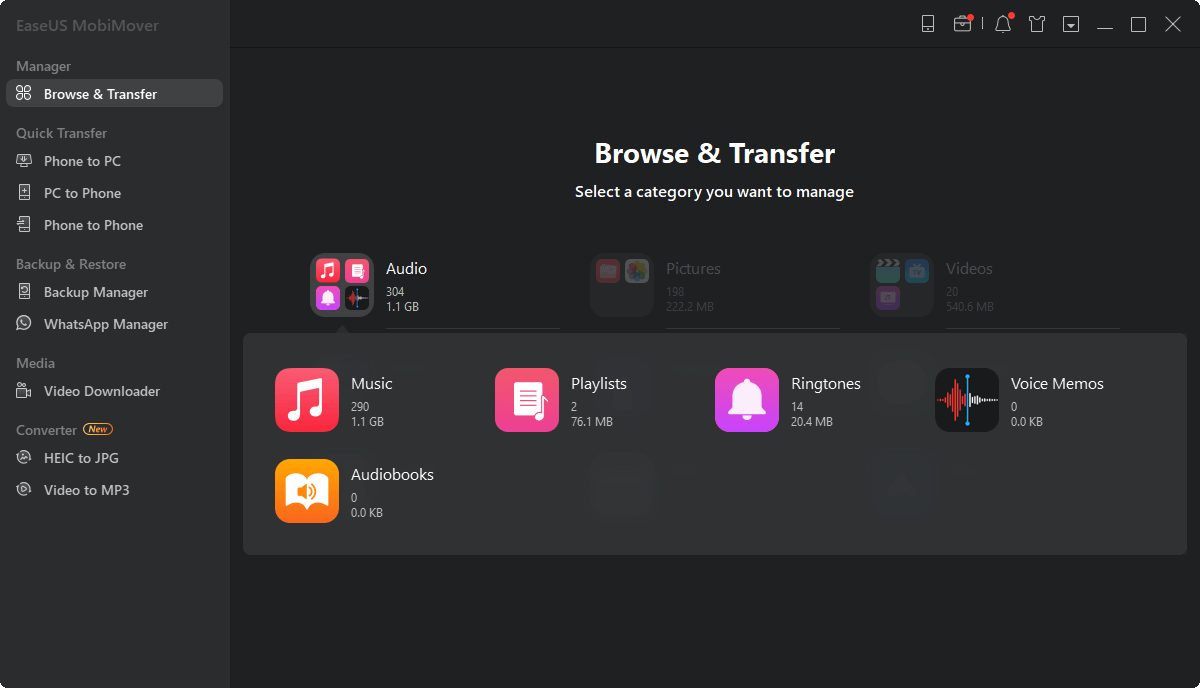
Step 1. Have your iPhone connected to the computer > Launch EaseUS MobiMover > Click "Content Management" on the main screen of EaseUS MobiMover > Click "Audio" > Select "Voice Memo."
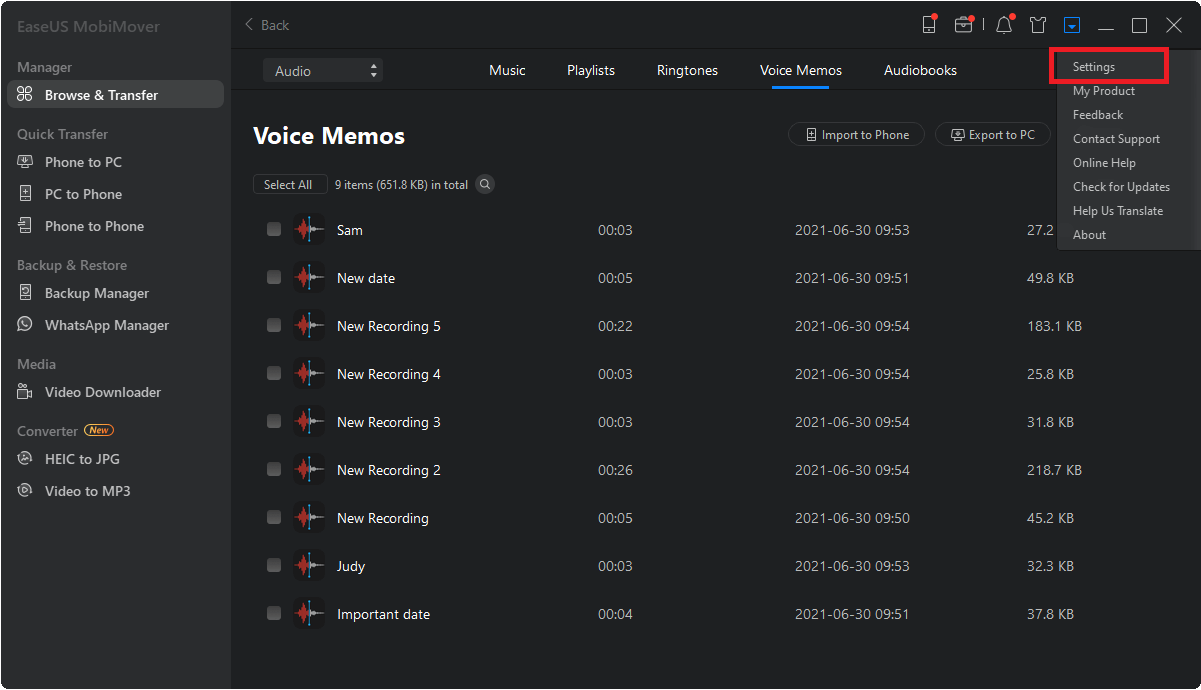
Step 2. From the listed voice memos, select your desired items > Click the "Settings" button to set a location on your PC to house the transferred items.
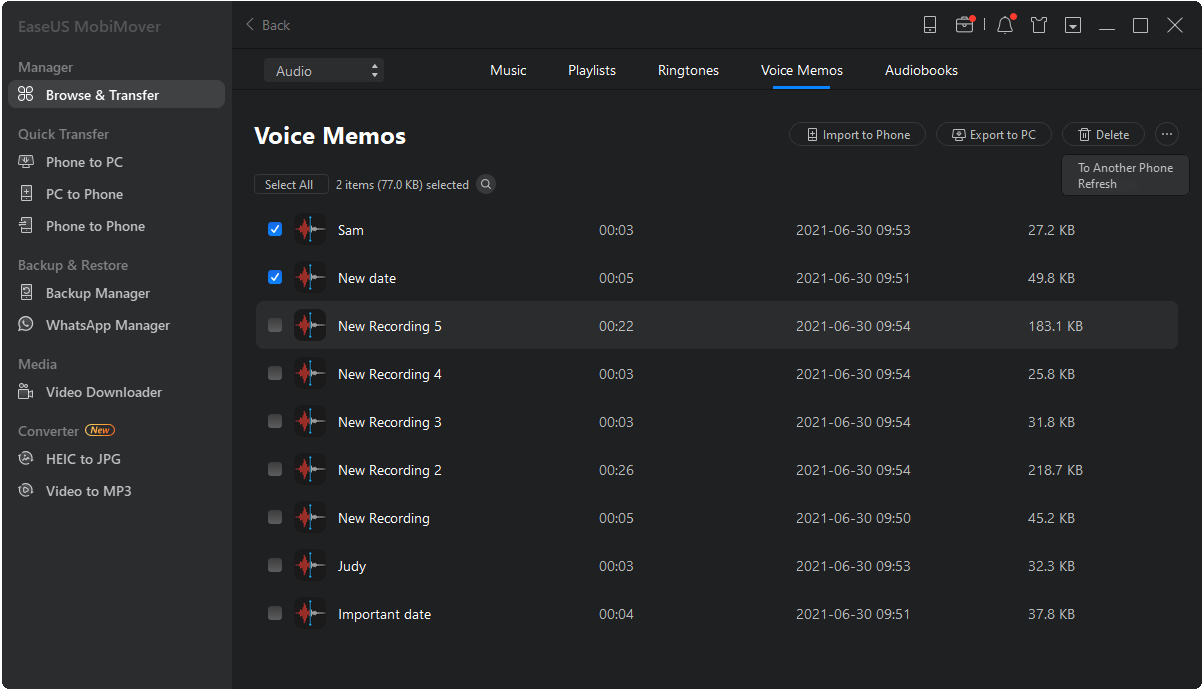
Step 3. Click "Transfer to PC" to start tranferring. Please don't disconnect the connection between your iPhone and the PC until the process accomplishes.
By following these steps, you can efficiently transfer your voice memos from iPhone to a Windows 10 or 11 PC without iTunes. To get started, download EaseUS MobiMover for free and enjoy a quick, reliable, and user-friendly transfer process.
Method 2. Transfer Voice Memos from iPhone to Computer with iTunes
Transfer all memos
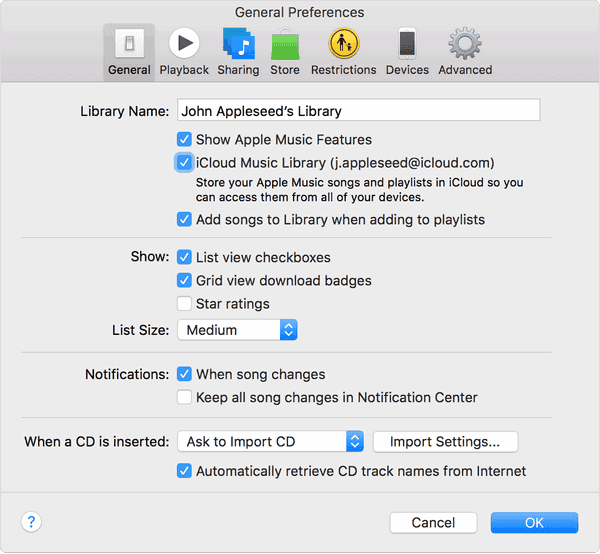
If you want to move multiple or all voice memos to your PC or Mac, then iTunes is a good option. First, make sure you've downloaded the latest version of iTunes on your computer, and then follow the steps below to learn how to transfer voice memos from iPhone to PC Windows 10.
Step 1. Connect your iPhone to the computer via a USB cable and open iTunes.
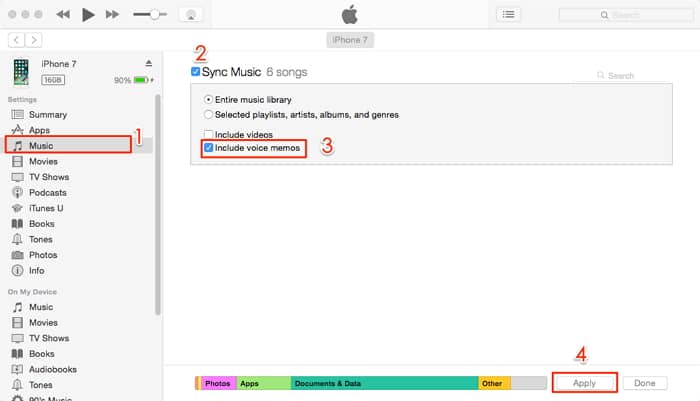
Step 2. Click on your device icon and select the "Music" option from the sidebar.
Step 3. Check the "Sync voice memos" box. Ignore this step it's already checked.
Step 4. Select "Include Voice Memos" > "Apply" to confirm.
![Sync Voice Memos from iPhone to Computer]()
Once the process completes, you can find your voice memos in a folder named Voice Memos on your computer in .m4a, or MP4 audio, format. You can open them on iTunes or other media players.
Method 3. Download Voice Memos from iPhone via the Share Sheet
Transfers voice memos one by one
By using the voice memos' built-in Share feature, you can send individual voice memos from your iPhone to any other services like Mail, Google Drive, OneNote, Gmail, etc. Later, you can receive these items by signing into the account of these services on any device. Moreover, if your target device is an AirDrop-supported iOS device like a Mac, iPad, or iPhone, the Share feature also allows you to transfer the voice memos to it via AirDrop.
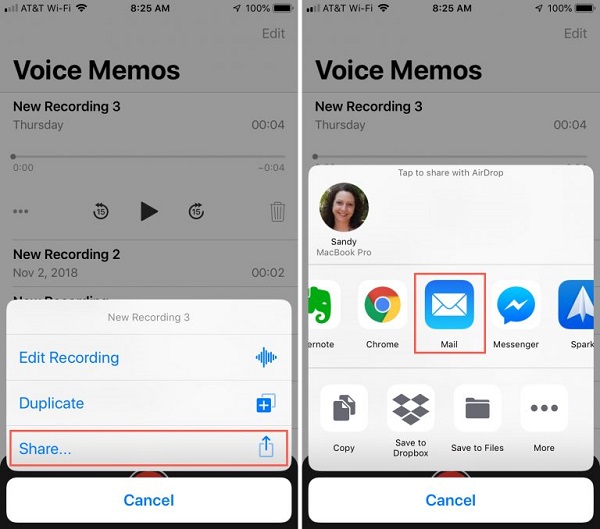
Here's how to get voice memos off iPhone via the Share Sheet:
Step 1. Open the Voice Memos app on your iPhone and click the voice memo you want to export.
Step 2. Now you could see more options under the item, click the "More" icon and choose "Share."
Step 3. Then, you can either choose to send the memos via Email, AirDrop, Google Drive, etc.
Step 4. Later, you can go to check the voice memos on your target device and then download the voice memos. Or click the "Accept" on the target iOS device to start transferring the voice memo on iPhone to another device.
![How to download voice memos from iPhone without iTunes]()
Important Notice:
- You can transfer only one voice memos at a time.
- To use a service, you need to have its app installed on your phone.
Method 4. Transfer Voice Memos from iPhone to PC with iCloud
With iCloud Drive on, you are able to share documents and other supported files across your devices over WiFi. However, although iCloud Drive sync all voice memos from your iPhone to PC at once, you need to add the items to iCloud Drive one by one, which could be time-consuming if you have lots of pieces to transfer. Given that, this tip is also better suited for users who intend to move a few voice memos from iPhone to the computer.
Here's how to transfer voice memos from iPhone to PC Windows 11 via iCloud:
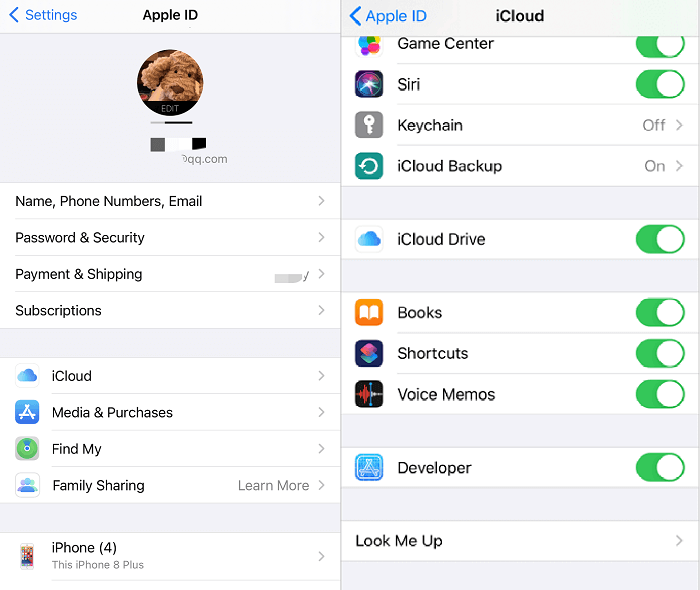
Step 1. Go to "Settings" > [your name] > "iCloud" and toggle on "Voice Memos".
Step 2. On your PC, open a browser and sign in with the Apple ID you use on the iPhone.
Step 3. Choose "Voice Memos" and now you can see the audio files from your iPhone.
Step 4. Download the voice memo from your iPhone to your PC.
![How to transfer voice memos from iPhone to computer with iCloud]()
The Bottom Line
Now you not only know how to move voice memos from iPhone to the computer but also learn other information about voice memos.
It's obvious that EaseUS MobiMover or iCloud is the best choice if you attempt to copy multiple items. If you'd like to transfer one or several files, using email or AirDrop is the quickest solution.
Use the method you prefer to download voice memos from your iPhone with ease.
FAQ on How to Transfer Voice Memos from iPhone to Computer
- 1. Where are voice memos stored on Windows after transfer?
-
After transferring voice memos from your iPhone to a Windows 10/11 PC with EaseUS MobiMover, you can select the "View files" from the bottom to navigate to the folder where the voice memos are saved in now.
- 2. Are voice memos saved to iCloud?
-
Yes, if iCloud Drive is enabled and Voice Memos sync is turned on, your voice memos are automatically uploaded to iCloud. You can access them from any device signed in with the same Apple ID, including Windows PCs via iCloud.com. Keep in mind that each memo must be added individually if you are not using bulk transfer methods.
- 3. Do voice memos expire on iPhone?
-
No, voice memos do not expire automatically on iPhone. They remain stored on your device until you manually delete them or back them up to iCloud or a computer. However, if your device runs out of storage, it’s a good idea to transfer or back up memos to avoid accidental loss.
- 4. Where are voice memos stored on an iPhone?
-
Voice memos are saved in the Voice Memos app on your iPhone. Each recording is stored locally on your device and can be played, edited, or shared directly from the app. If iCloud sync is enabled, the recordings are also backed up to iCloud automatically.