What's the Easiest Way to Transfer Photos from iPad to iPad?
The easiest way to transfer photos from iPad to iPad is by using a reliable iPad transfer tool. EaseUS MobiMover can help you transfer all photos from iPad to iPad in one click. It is easy to use and the transfer speed is fast. EaseUS MobiMover is compatible with all iPad models. If you want to save time, just try EaseUS MobiMover to facilitate the data transfer.
Switching iPads can be amazing, but it also can be a complete pain. Not only because you have to make sure that all of your iPad data is backed up, but you also have to find ways to transfer your precious pictures to the new iPad. Apart from switching devices, many cases require you to transfer photos between iPads. Whatever the case is, this guide will show you five easy methods to get the job done.
How to Transfer Photos from iPad to iPad with EaseUS MobiMover
If you're looking for a convenient and flexible way to transfer photos, don't miss this professional iPhone transfer software - EaseUS MobiMover. It allows you to transfer photos or albums with one click. Compared with other competitors, EaseUS MobiMover is more flexible and faster. You can use it to transfer many different file types between two iOS devices, like contacts, photos, music, voice mails, voice memos, ringtones, and movies.
Apart from transferring photos from iPad to iPad, EaseUS MobiMover also supports data migration from iPhone to iPhone, iPhone to iPad, and iPad to iPhone. Thus, whenever you want to transfer data from iPad to iPad or from iPhone to iPhone, you can apply this tool to get things done. Begin experiencing this outstanding iOS data transfer tool now!
Install EaseUS MobiMover on your computer and follow the steps below to copy photos from one iPad to another within minutes.
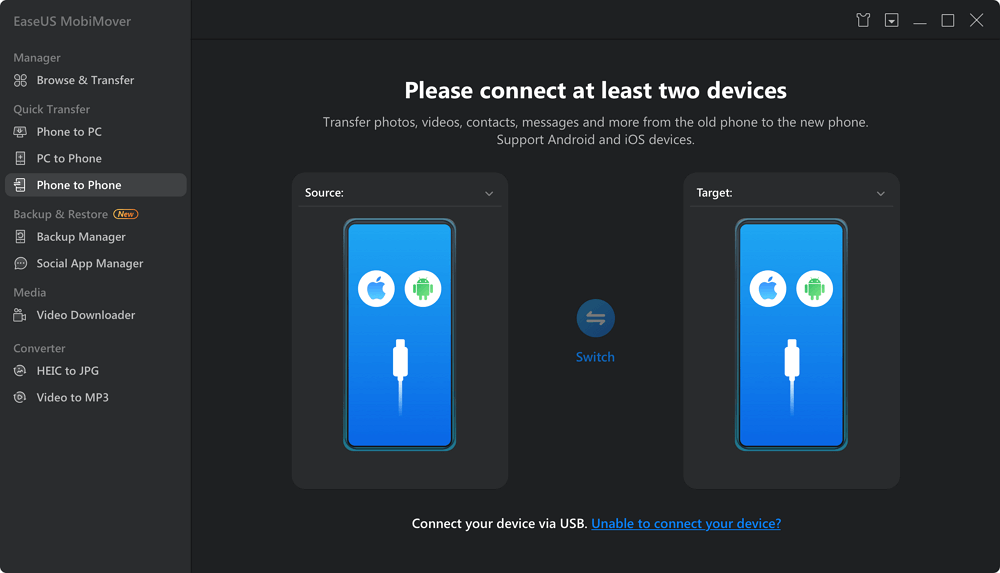
Step 1. Connect both of your iOS devices to your computer (Mac/PC). Launch EaseUS MobiMover, and choose "Phone to Phone" on the screen. Correctly check your source device and target device, and click the "Next" button to continue.
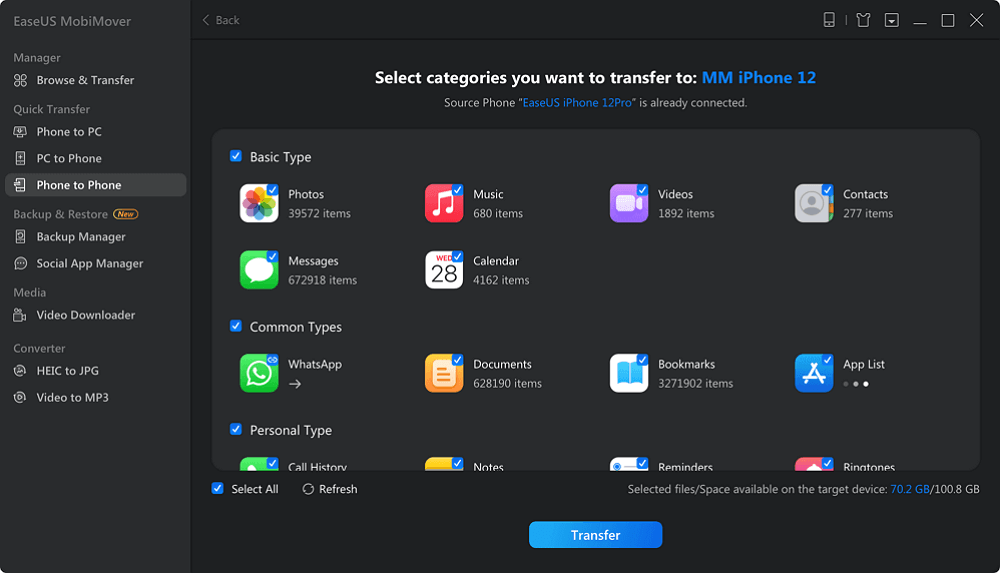
Step 2. Check the category/categories you want to transfer from your source device to target device. As you can see, in addition to photos, you can also copy videos, audios, contacts, messages, and more between your iDevices.
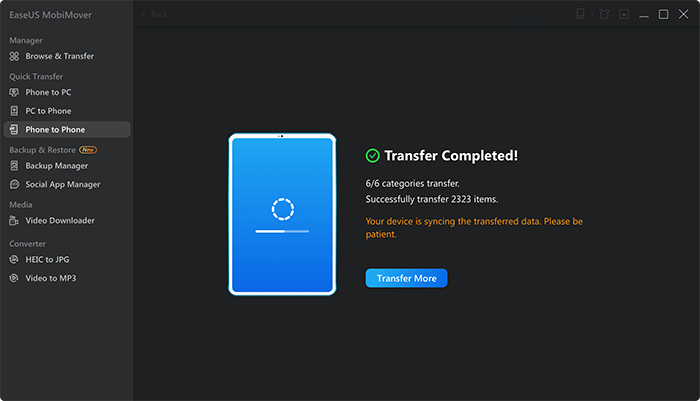
Step 3. After checking the settings, click the "Transfer" button to start moving photos between your devices. When it has completed, go to the "Photos" app on your target device to check the newly imported items.
You can transfer data from iPhone to iPad or iPad to iPhone using the same steps above.
How to Transfer Photos from one iPad to Another Wirelessly via AirDrop
AirDrop is a feature embedded in all iOS and macOS devices that allows users to transfer files between two iOS or macOS devices. It doesn't require any USB connection. All you need is to place two iPads within 30 feet of each other and enable AirDrop, Bluetooth, and WiFi features on your device. Then, you can follow these steps to airdrop photos from one iPad to another.
Step 1. Turn on AirDrop on both iPads in the control center by sliding up on the iPad screen.
Step 2. Go to the Photos app on the source device, and tap the "Select" option in the upper-right corner.
Step 3. Choose the photos you want to share, and tap the "Share" button in the lower-left corner.
Step 4. Tap AirDrop under the selected photos, and choose the other iPad recognized by its device name.
Step 5. Tap the "Accept" button on the target iPad to accept the photos.
![AirDrop Photos from iPad to iPad]()
More topics relevant to AirDrop transfers are AirDrop photos from iPhone to Mac and AirDrop music from Mac to iPhone. If needed, link to the related page to get detailed info.
How to Transfer Photos from iPad to iPad Using iCloud
With iCloud services, you can sync photos from one iPad to another quickly and wirelessly just by turning on the iCloud Photo Library on your device. Before starting, there are some preparations you need to do. (Using iCloud is also recommended when you need to transfer apps from iPad to iPad.)
- Connect both of your iPad to a stable WiFi network
- Sign in to both iPads with the same iCloud account
- Make sure your iCloud account has enough storage space
After the preparations, perform the steps below on both of your iPads to wirelessly transfer pictures.
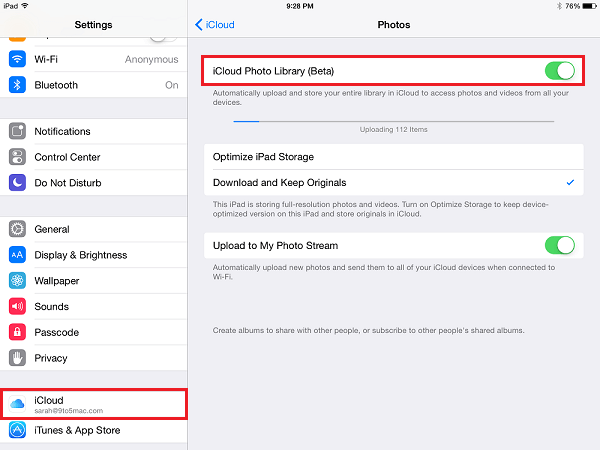
Step 1. Enable iCloud Photo Library on the source iPad: Open the Settings > [your name] > iCloud > Photos. Switch on the "iCloud Photo Library."
Step 2. Make sure you've signed in to the same iCloud account on the target iPad. Then repeat Step 1 on the target iPad. After that, all photos will be synced from your old iPad to your new iPad.
![Enable iCloud Photo Library on iPad]()
Note: If iCloud fails to sync photos from iPad to iPad, then you can check these tips to fix the "iCloud photos not syncing" issue.
How to Transfer Photos from iPad to iPad with My Photo Stream
If you don't have enough free storage space on your iCloud, then you can take the assistance of My Photo Stream to transfer your images. Being different from the iCloud Photo Library, My Photo Stream offers you unlimited storage space. But it has two disadvantages:
- It only lets you sync the last 30 days of photos you've taken.
- There is a limitation of only 1,000 pictures.
- The quality of the images would be compressed during the process of sync.
Here is how to transfer photos from iPad to iPad with My Photo Stream.
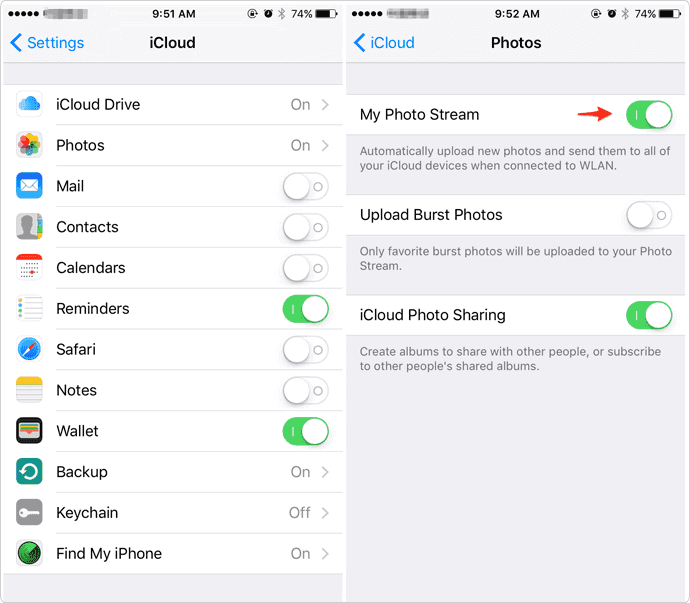
Step 1. Go to the Settings on your source iPad > [your name] > iCloud.
Step 2. Turn on the iCloud Drive > From the available apps, choose the Photos.
Step 3. Turn on the "My Photo Stream" option. Once your photos are uploaded, you can go to the target iPad and apply the same process to turn on the My Photo Stream. Then all of the recently taken photos will be synced to another iPad.
![Turn on My Photo Stream]()
How to Transfer Photos from iPad to iPad via iTunes
iTunes is the second-to-last method to transfer photos from iPad to iPad. We don't recommend you to use this method since it is a little bit complex to operate. First of all, you need to sync all photos from the iPad to the computer via iTunes. Then, sync them to another iPad in the same way.
How to transfer photos from iPad to iPad via iTunes.
Step 1. Connect your source iPad to your computer > Launch iTunes on your computer.
Step 2. Tap "Trust this Computer" on your iPad if asked.
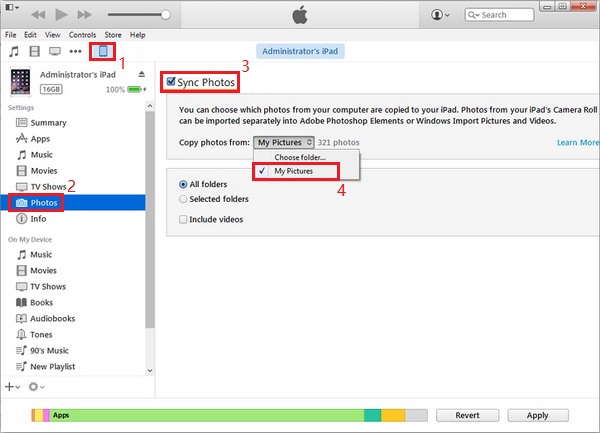
Step 3. From the iTunes panel, select your iPad icon > Choose the "Photos" option. From here, you can choose to sync your photos with iTunes.
Step 4. When the process completes, disconnect your iPad and connect the target iPad to your computer. Then, you can repeat the above-listed steps to sync photos to your target iPad.
![Sync Photos from iPad to iPad]()
How to Import Photos from iPad to iPad with Email
In this part, we'll demonstrate a wireless way to transfer photos from one iPad to another iPad. That is by using Email, and all you need is an Email address. With Email, you can transfer one of two photos. If you have a large number of pictures to transfer, the process might be tedious, so you'd better use Method 1.
Here is how to transfer photos from iPad to iPad with Email.
Step 1. Go to the Photos App on the iPad you want to transfer photos from.
Step 2. Tap the Select option in the upper right corner.
Step 3. Choose the photos you want to share, and then tap the Share button in the lower-left corner.
Step 4. Tap Email under the selected photos. The operations will send you to the Email sending interface.
Step 5. Enter the email address, and check the attached photo files. Finally, tap the "Send" to transfer photos from your iPad to another one.
Step 6. Open the other iPad, and go to Email to check the mail with the photos.
Can I Transfer Photos from iPad to iPad Using Bluetooth
Actually, iOS devices don't allow Bluetooth transfer. Instead, it uses AirDrop to transfer files between different iOS or macOS devices. So if you see any guide or post claiming that you can transfer photos from iPad to iPad using Bluetooth, that's not true.
Try to Transfer Photos from iPad to iPad Now!
By reading this post, we hope you have mastered how to transfer photos from iPad to iPad. As you can see, of all options, EaseUS MobiMover is the easiest and quickest way to get the job done.
The next is Airdrop, which allows you to transfer less than 500 pictures at once. The third and fourth options are iCloud Photo Library and My Photo Stream, each of which offers different options for transferring photos. Following iCloud is iTunes, which is the official way provided by Apple. The last option is Email.
There is always a way to suit your needs. By the way, all of these methods mentioned can also be applied to transfer photos from iPhone to iPad or share photos on iPhone.
Share this post with your friends if you find it helpful!