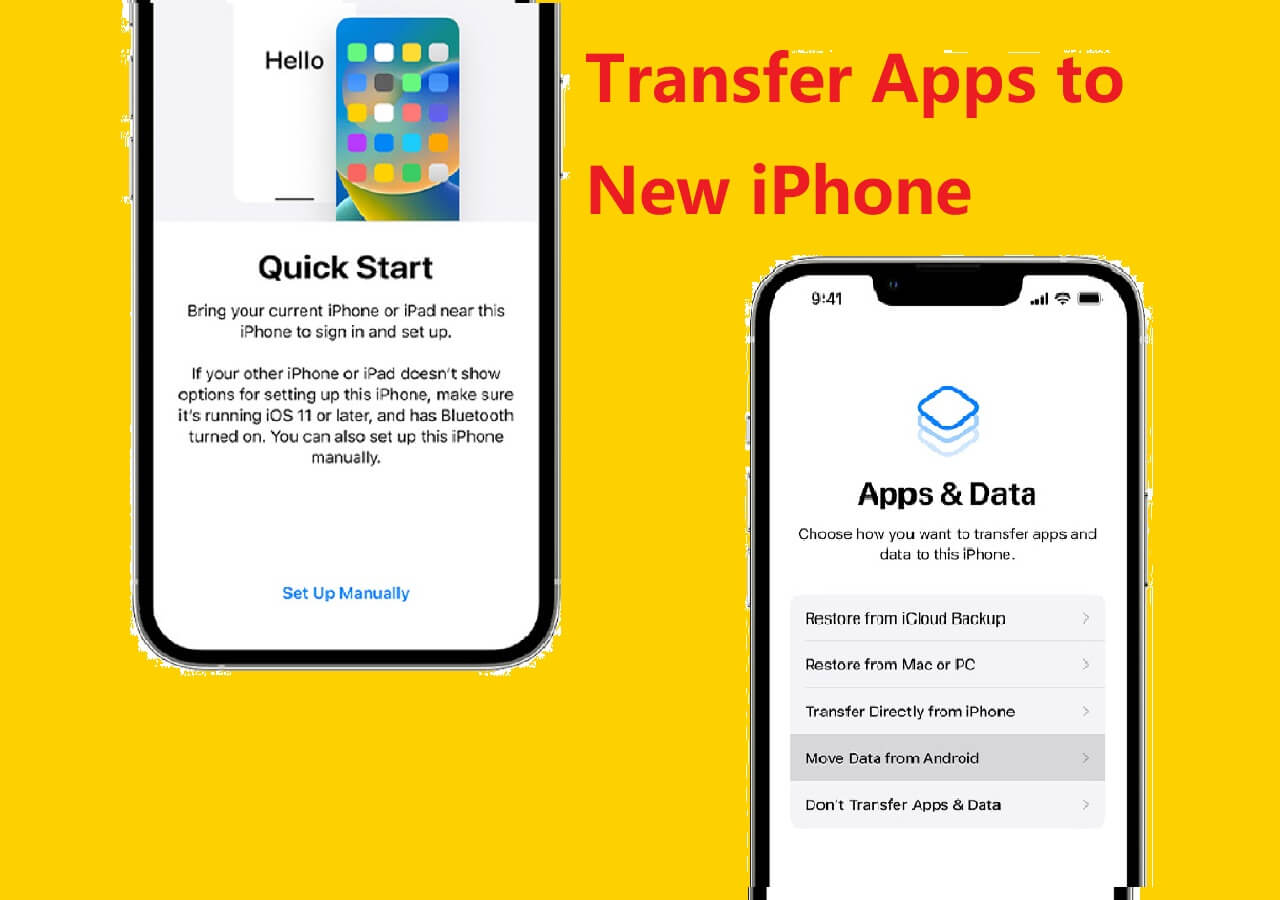
According to a recent survey, over 30% of iPhone users may accidentally skip the data transfer process from backup or from old phone during setup. As a senior tech blog writer, here in this guide, I will provides five effective solutions on how to transfer to iOS after setup, mainly from Android. Let's get right to it now!
Can I Use Move to iOS After Setup
Can you still use Move to iOS after setup? No, the "Move to iOS" app is specifically designed to be used during the initial setup of a new iOS device or after resetting an existing iOS device to factory settings. If you have already completed the setup process on your iPhone or iPad, you won't be able to use the "Move to iOS" app directly from your device's regular settings.
However, if you need to transfer data after your device has been set up, you can reset your iOS devices and come back to the "Apps & Data" screen to transfer photos from Android to iPhone and other files. Let's see how to use Move to iOS after setup in detail!
![Move data from Android]()
How to Use Move to iOS After Setup
When you've already set up your new iOS device and missed the iOS Setup Assistant to move data from Android, you can still use "Move to iOS" if you are willing to erase your iOS device and start the setup process again.
The app is designed for transferring data from Android to iPhone during the switch. Once connected, contacts, message history, photos, videos, web bookmarks, mail accounts, calendars and other content stored on your old Android can be seamlessly transferred to your iPhone.
As for compatibility, "Move to iOS" supports a broad range of Android devices running 4.0 or later, which covers most Android devices today. On the iOS side, it is compatible with devices running iOS 9 or later, ensuring that nearly all current iOS devices can receive data from Samsung, Motorola or other Android devices.
Here's how to use Move to iOS after setup step by step:
Step 1. Back Up Your iOS Device
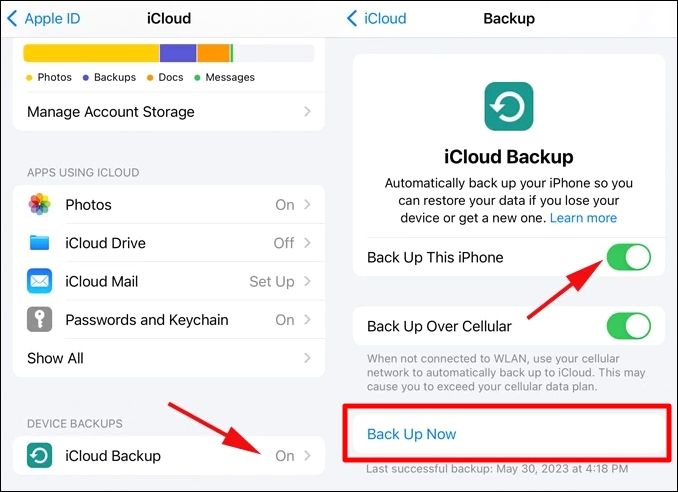
Before erasing all content from your iOS device, make sure to back up any important data to iCloud or your computer to avoid losing data. You can back up by going to Settings > [your name] > iCloud > iCloud Backup > Back Up Now.
![backup iPhone now]()
Step 2. Factory Reset Your iOS Device
To reset your device, go to Settings > General > Transfer or Reset iPhone (or iPad) > Erase All Content and Settings. Confirm the action. This will erase everything on your device and return it to its initial state, just like it came out of the box.
![factory reset iPhone from Settings]()
Step 3. Start the Setup Process
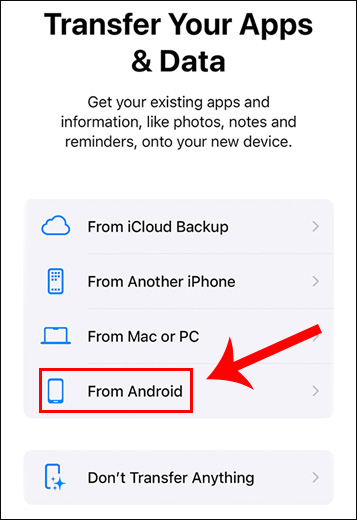
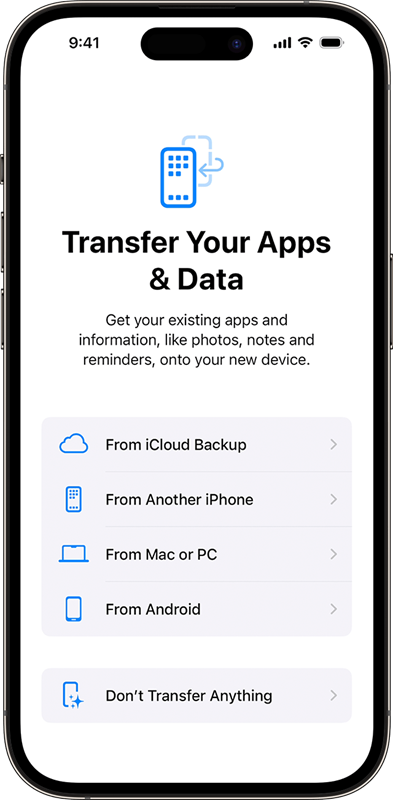
After the device resets, it will start up with the "Hello" screen. Follow the on-screen instructions to set up your iPhone until you reach the "Apps & Data" screen. On the "Apps & Data" screen, choose the "From Android" option.
![Apps & Data screen]()
Step 4. Use Move to iOS
- On your Android device, open the Google Play Store and download the "Move to iOS" app.
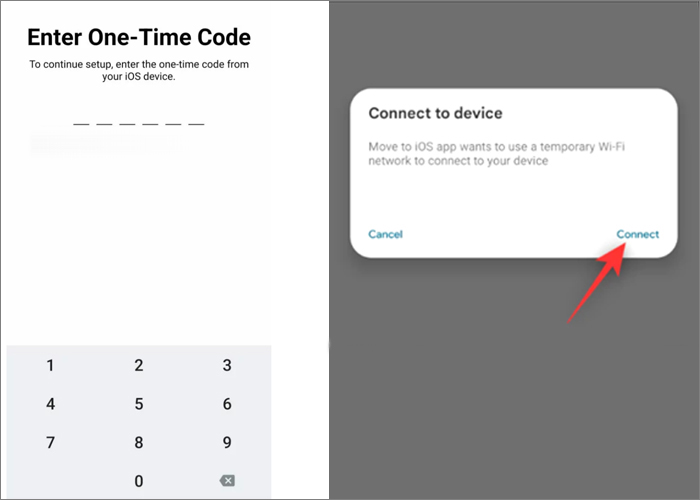
- Open the "Move to iOS" app on your Android device and follow the on-screen instructions. You'll need to enter a code displayed on your iOS device.
- Connect your Android device to the temporary Wi-Fi network created by the iOS device.
![enter the code to connect two devices]()
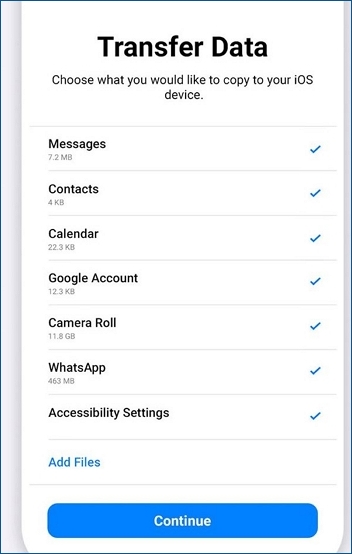
- Choose the content you want to transfer from your Android device. This can include your Google Account information, Chrome bookmarks, text messages, contacts, photos, and videos.
- Start the transfer and wait until the data transfer process is complete. Keep both devices near each other and plugged in until the transfer is finished.
- Once the transfer is complete, you can continue setting up your iOS device. If you had backed up other data to iCloud or iTunes, you can restore it during this setup.
![select files of types to transfer to iOS]()
Note that the "Move to iOS" app requires a Wi-Fi connection to function properly. The app works by creating a private Wi-Fi network between the Android device and the iOS device.
How to Transfer to iOS After Setup Without Resetting (Third-party App)
Can you transfer data from Android after setting up iPhone without Move to iOS? Yes, except for Move to iOS, there's a lot of methods available to transfer to iOS after setup. First of all, EaseUS MobiMover is recommended here. This Android to iPhone transfer app is exceptionally user-friendly, catering to non-technical users perfectly. It supports all iOS devices and 99% of Android phones, such as Samsung Galaxy, Google Pixel, Motorola and other phone devices.
How does it work efficiently? It works on computer, supporting Windows and macOS systems. When both phone devices are connected to the computer via USB cables, this phone transfer app recognizes the devices, accesses and transfers data accordingly.
- transfer data from Android to iPhone without resetting
- transfer to iOS after setup without losing data
- support transferring contacts, text messages, photos, videos, music files, voice memos, and documents at once.
- available to transfer 1000+ photos or other files one time with one click in a few minutes without crash.
Compared to Move to iOS after setup, the EaseUS phone transfer app is easier to get started and more effective to move all various data types from Android to iPhone after setup without resetting the device. It offers a free trial version to let you experience the ease of using it to transfer files from Android or iPhone. You can click below to download it on your computer for free.
To transfer to iOS after setup using the EaseUS software:
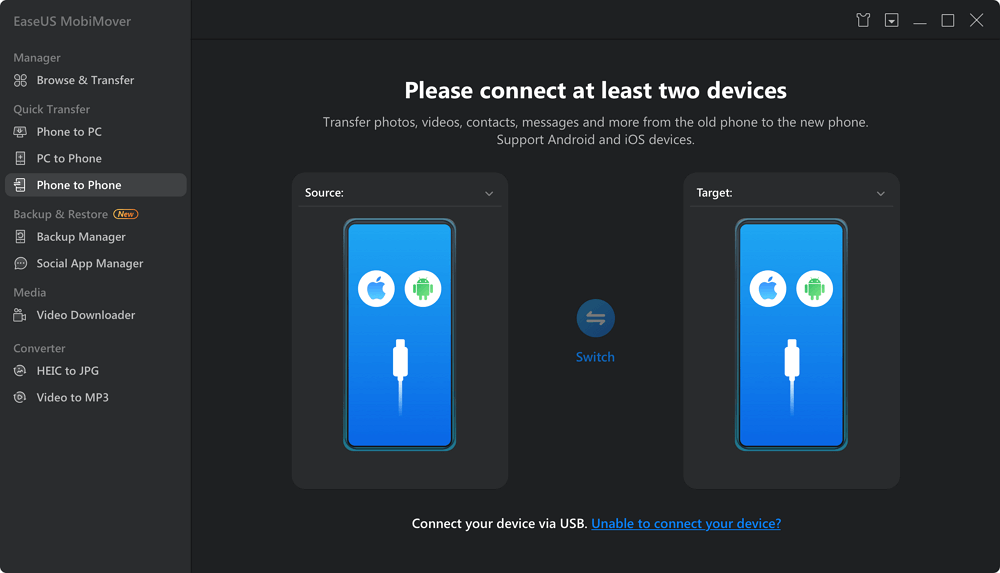
Step 1. Launch EaseUS MobiMover, choose Phone to Phone transfer mode, and connect your mobile devices to your computer. Follow the on-screen instructions to trust this computer and enable USB debugging on your Android phone. Switch your Android phone as the source device and your iPhone as the destination.
![connect your device to computer]()
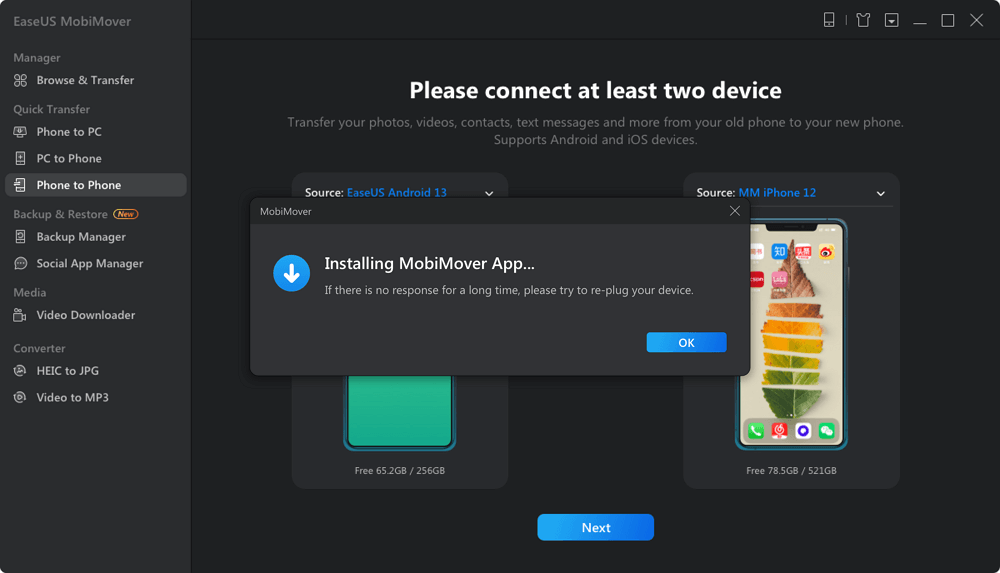
Step 2. Click Next, and EaseUS MobiMover will be downloaded to your Android. Follow the guide to turn off Find My iPhone via Settings. (You need to set MobiMover as your default SMS app temporarily when it is asked, but this software will guide you to set it back to Messages after the transfer.)
![install the app to your android]()
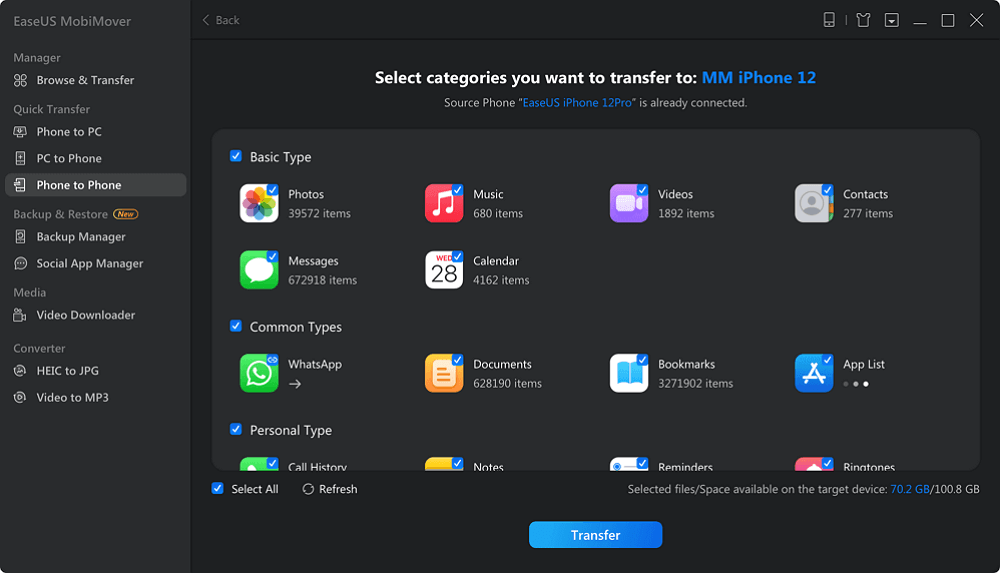
Step 3. Select the files you want to transfer, and from the lower right, you can see whether you have enough space to store the transferred files.
![select files]()
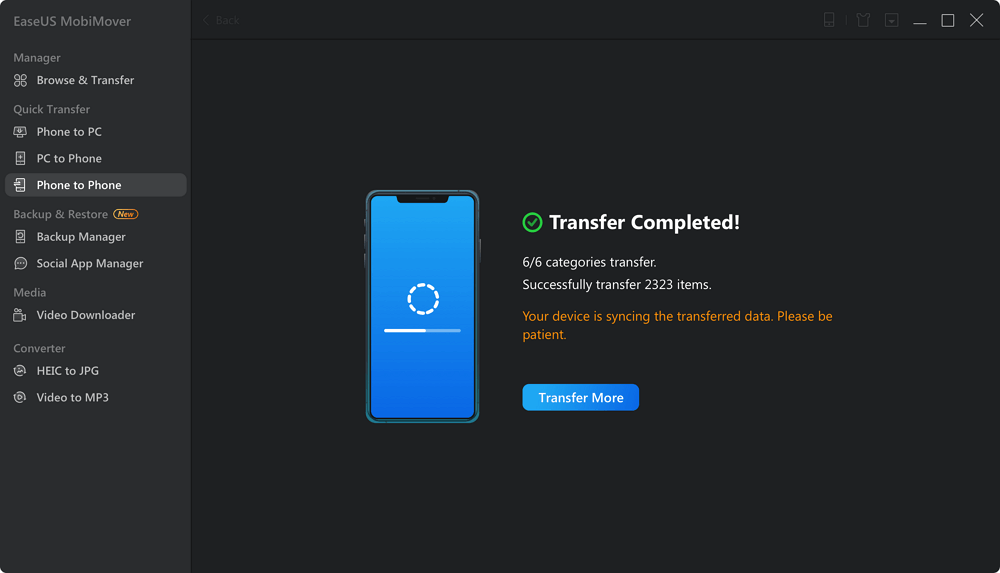
Step 4. Click Transfer to start the data transfer process from Android to iPhone. Keep your devices connected until the whole process ends.
![transfer completed]()
How to Move Media Files to iPhone After Setup Using iTunes
Moving data from an Android device to an iPhone after setup via iTunes can be a bit complicated. But if Move to iOS is not working or stuck on time remaining estimating and you don't want to try a third-party app, then iTunes would be your last option to transfer a variety of data types, especially for media files like photos, music and videos.
As for other content such as contacts and messages, iTunes does not support syncing these types of data from Android. Instead, iCloud or other cloud-based services can be helpful.
To move data from Android to iPhone after the setup with iTunes:
Step 1. Transfer Data to Your Computer
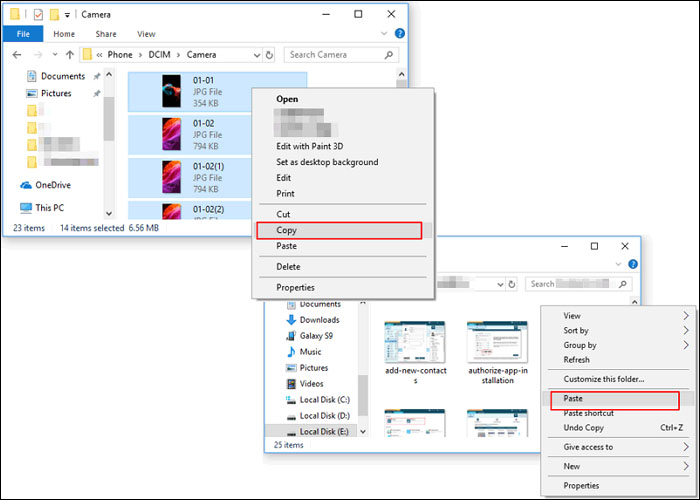
Connect your Android device to your computer using a USB cable. Transfer files (photos, videos, music, etc.) from your Android device to your computer. You can usually do this by dragging and dropping files from Android to a folder on your computer or perform the copy & paste action.
![copy files from Android and paste on computer]()
Step 2. Use iTunes to Sync Data to iPhone
Connect your iPhone to the computer using a USB cable. Open iTunes and select the iPhone icon that appears in the upper-left corner. Then follow the steps:
- Go to the "Music" or "Movies" tab in iTunes.
- Check "Sync Music" or "Sync Movies" and choose the files or folders you imported from your Android device.
- Click "Apply" to start syncing the selected media to your iPhone.
![sync photos from iTunes to iPhone]()
Step 3. Transfer Contacts, Messages, and Other Data
Once you transfer photos, music and videos from Android to iPhone with iTunes, you can import contacts, messages or other content to your iCloud account via the iCloud website, then sync your iPhone with iCloud to get the files.
How to Sync Calendar and Contacts to iPhone After Setup via Gmail
The last but not least, you can also use Email to sync calendar and contacts from Android to iPhone via Gmail account.
To transfer calendar and contacts to iOS after setup using Email:
Step 1. Sync Your Android Device with Gmail
On your Android phone, go to Settings > Accounts > Google and select the Gmail account you use for contacts and calendar. Ensure that Contacts and Calendar sync are turned on.
![sync contacts on Gmail]()
Step 2. Add Your Gmail Account to Your iPhone
On your iPhone, head to Settings > Mail > Accounts or Settings > Contacts > Accounts. Tap "Add Account", then select Google. Enter your Gmail credentials and sign in.
Once signed in, you will be asked which items of your Google account you'd like to sync. Ensure Contacts and Calendars are enabled.
![enable contacts on Gmail]()
FAQ on How to Transfer to iOS After Setup
1. Why didn't all my messages transfer to my new iPhone from Android?
Not all messages may transfer from Android to iPhone due to compatibility issues, data corruption, or interruptions during the transfer process. Ensure both devices have stable Wi-Fi connections and sufficient battery life during the transfer. Check if all messaging data was selected and correctly synced in the "Move to iOS" app settings. If problems persist, consider using third-party apps designed for more comprehensive data transfer or retry the process, ensuring no interruptions occur.
2. How long does Move to iOS take?
The duration of the "Move to iOS" process varies based on several factors, including the amount of data being transferred, the network speed, and the performance of the devices involved. For small amounts of data, the transfer might take just a few minutes.
However, for larger volumes of data, like extensive photo libraries or lengthy message histories, it could take an hour or more. Ensure both devices are connected to a stable Wi-Fi network and plugged into power sources to facilitate a smoother and potentially faster transfer.
3. How to fix Move to iOS not working?
If "Move to iOS" isn't working, try these steps: Ensure both devices are compatible and updated, restart both devices, and check Wi-Fi connections. Disable Smart Network Switch on Android and turn off mobile data. Ensure sufficient storage on the iOS device. If issues persist, reset network settings on the iOS device (Settings > General > Reset > Reset Network Settings), reinstall the "Move to iOS" app on Android, or contact Apple Support for further assistance.
Conclusion
In conclusion, there are 5 easy methods on how to move Android to iPhone after setup. While the "Move to iOS" app is limited to use during the initial device setup or after a factory reset, alternative methods such as using the EaseUS phone to phone transfer app, syncing via iTunes, or leveraging cloud-based services like Gmail, provide flexible and efficient options. Each method offers unique advantages, whether it's transferring media files via iTunes or syncing contacts and calendars through Gmail.

