Also supports videos, music, ringtones, contacts, books, and more.
Many users might want to transfer photos and videos from iPhone to iPad. The purpose of this might be to have a backup of these data, free up some space on your iPhone, or view your photos on a bigger screen. Whatever your purpose, this guide covers five workable ways to achieve this goal, including:
| Tips |
Effectiveness |
Difficulty |
| 1️⃣EaseUS MobiMover |
High - It helps transfer all photos from iPhone to iPad at once or transfer specific files you've selected. |
Super easy |
| 2️⃣iCloud |
High - It allows you to sync photos across your Apple devices automatically. |
Easy |
| 3️⃣AirDrop |
Moderate - It helps transfer Photos from iPhone to iPad wirelessly. |
Easy |
| 4️⃣Email |
Moderate - It enables you to send Photos from iPhone to iPad remotely. |
Easy |
| 5️⃣iTunes |
Moderate - iTunes can sync a large number of photos from iPhone to iPad, but you can only manage photos in iTunes. |
Difficult |
Tip 1. Transfer Photos from iPhone to iPad with EaseUS MobiMover
Applies to transferring all or specific photos and videos
EaseUS MobiMover is our first recommended solution for getting photos from iPhone to iPad because of its ease of use and fast transfer speed, which are two important points that should be taken into consideration when it comes to transferring photos. If you prefer to transfer photos from iPhone to iPad without iCloud, using this tool is advisable. As a versatile iPhone data transfer tool, EaseUS MobiMover can help you easily and quickly transfer certain or all photos, videos, contacts, and other 20 types of data from iPhone to iPad, or vice versa.
To move photos from iPhone to iPad, you'll need to download this program on your computer. Then, follow our step-by-step instructions to start the transferring process.
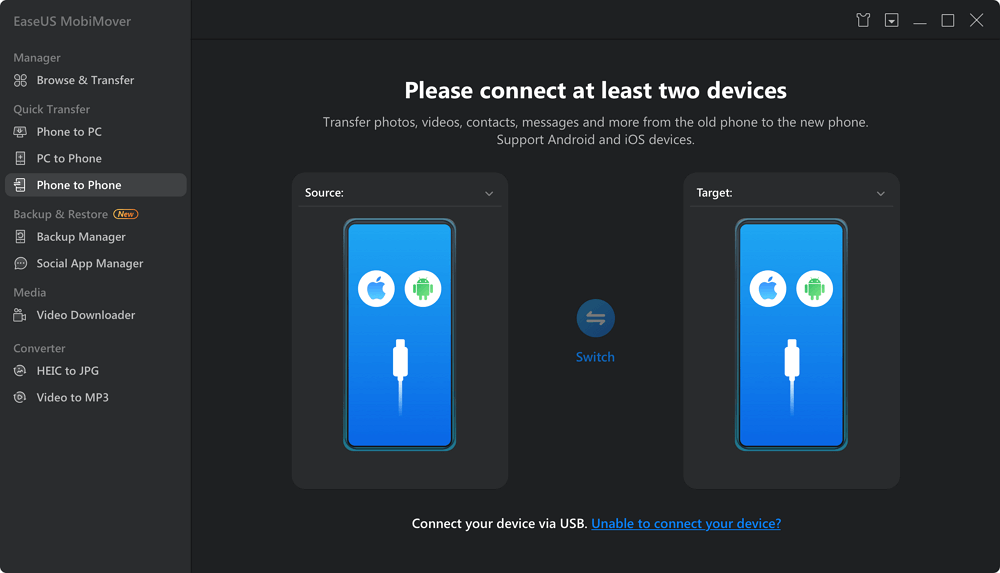
Step 1. Connect both of your iOS devices to your computer (Mac/PC). Launch EaseUS MobiMover, and choose "Phone to Phone" on the screen. Correctly set the source device and target device, and click the "Next" button to continue.
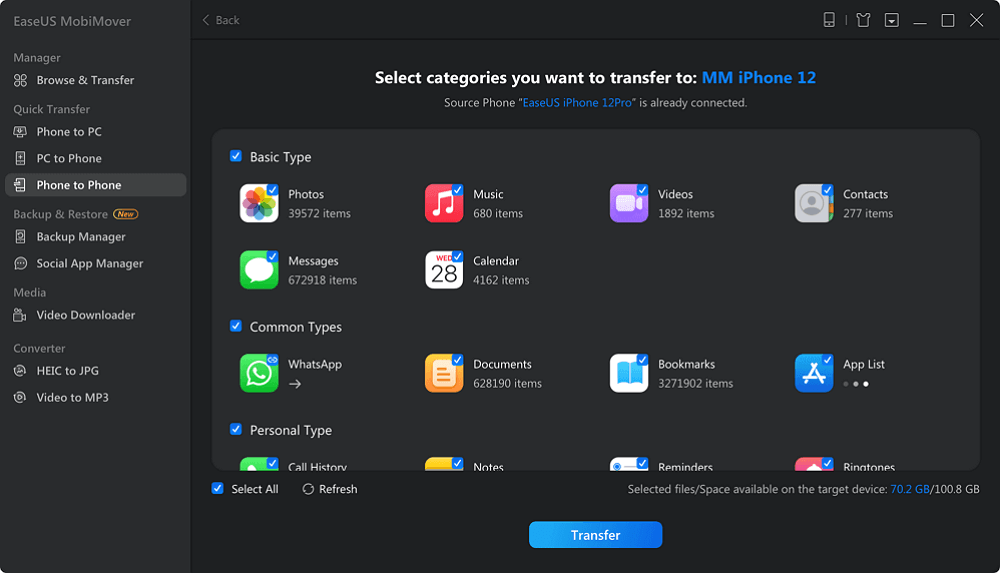
Step 2. Check the category/categories you want to transfer from your iPhone to iPad or from iPad to iPhone. As you can see, in addition to photos, you can also copy videos, audios, contacts, messages, and more between your iPhone and iPad.
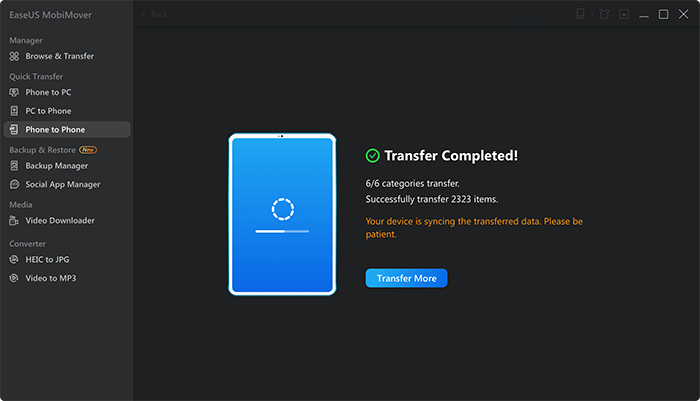
Step 3. After checking the settings, click the "Transfer" button to start transferring photos from your iPhone to iPad or iPad to iPhone. When it has completed, go to the "Photos" app on your target device to check the newly imported items.
If you prefer to transfer data from iPhone to iPad without iCloud, using EaseUS MobiMover is a good choice. With this program installed on your PC, you will be able to manage your iOS content better. Don't hesitate to give it a try.
Tip 2. Transfer Photos from iPhone to iPad Automatically via iCloud
Applies to transferring all photos and videos
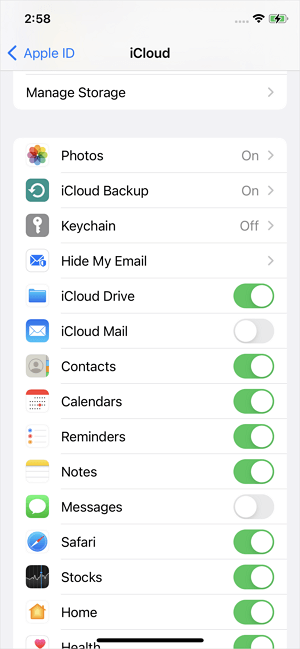
If you want to get all photos from iPhone to iPad, then Apple's recommended data transfer solution - iCloud is the best solution. To do this, you need to make sure your iPhone and iPad are connected to a WiFi. Then, sign in your iPhone and iPad with the same Apple ID and follow the guide below to finish the rest of the steps.
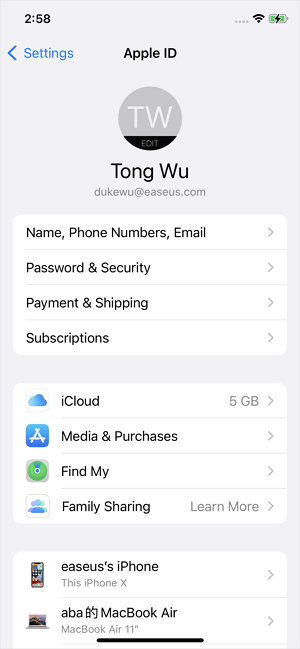
Step 1. Go to the "Settings" app > Tap [your name] > Choose "iCloud."
![Go to iCloud]()
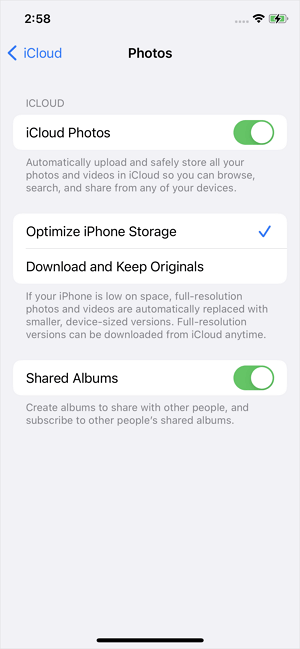
Step 2. Click "Photos" among the iCloud photos.
![Choose iCloud photos]()
Step 3. Toggle on "iCloud Photos" and select "Optimize iPhone Storage" or "Download and Keep Originals."
![Toggle on iCloud photos]()
Step 4. Repeat these steps on the iPad and wait for the iPhone to sync photos to your iPad automatically.
Tip 3. Send Photos from iPhone to iPad Wirelessly with AirDrop
Applies to transferring one or multiple photos from iPhone to iPad
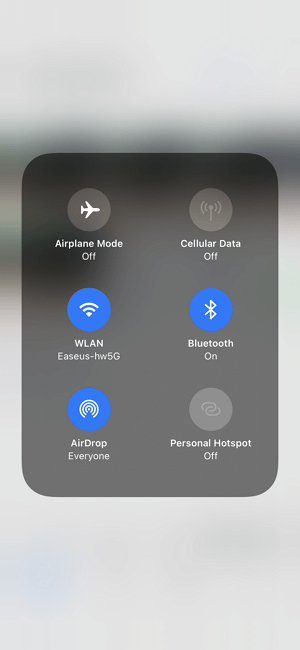
AirDrop is a built-in feature that allows you to quickly and easily share files between Apple devices. These files include photos, videos, contacts, map locations, and more. Since this feature uses Bluetooth to locate nearby compatible iOS devices and helps share data over Wi-Fi, you need to enable both Bluetooth and WiFi on both devices. After that, you can follow the steps below to AirDrop photos and videos from your iPhone to your iPad.
Step 1. Go to the Control Center to enable AirDrop on Bluetooth on both the iPhone and iPad.
![Turn on AirDrop]()
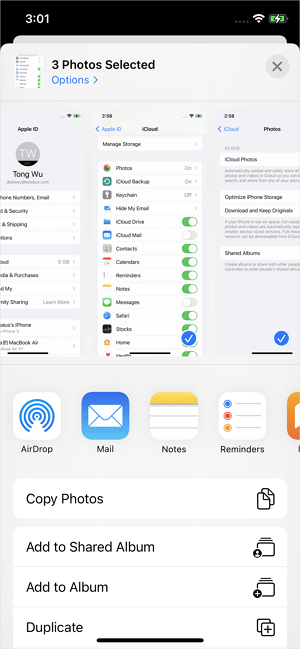
Step 2. Open the "Photos" app on your iPhone and select the photos you want to transfer. Then tap the "Share" icon and choose "AirDrop."
![Select the photos you want to share]()
Step 3. Tap the target iPad to send your iPhone photos to the device. On the iPad, click "Accept" to start receiving these pictures.
![Select the target iPhone]()
The problem "AirDrop not working" may happen sometimes on your iPhone/iPad. If you encounter the same issue, follow the troubleshooting guide to solve the problem.
Tip 4. Transfer Photos from iPhone to iPad with Email
Applies to move one or two photos and videos from iPhone to iPad
Email is a convenient way to transfer one or two photos from an iPhone to an iPad. But it isn't the optimal option since it can't support large files or large photo attachments. But if you stick with Email, here are the steps.
Step 1. Go to the "Photos" app on your iPhone.
Step 2. Select the photos you want to move to the iPad.
Step 3. Tap the "Share" button and choose "Mail".
Step 4. Type in the information needed, then click "Send" to send the email to your own account.
Step 5. Go to the "Mail" app on your iPad. Check the Email from yourself and save the photos on your iPad.
![Transfer photos from iPhone to iPad with Email]()
Tip 5. Sync Photos from iPhone to iPad with iTunes
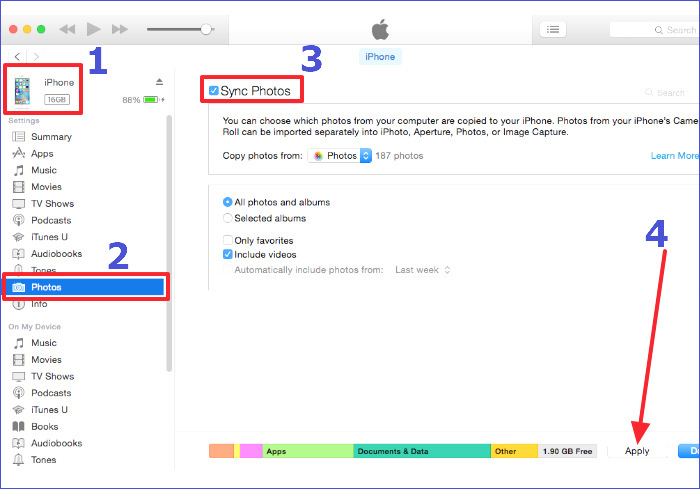
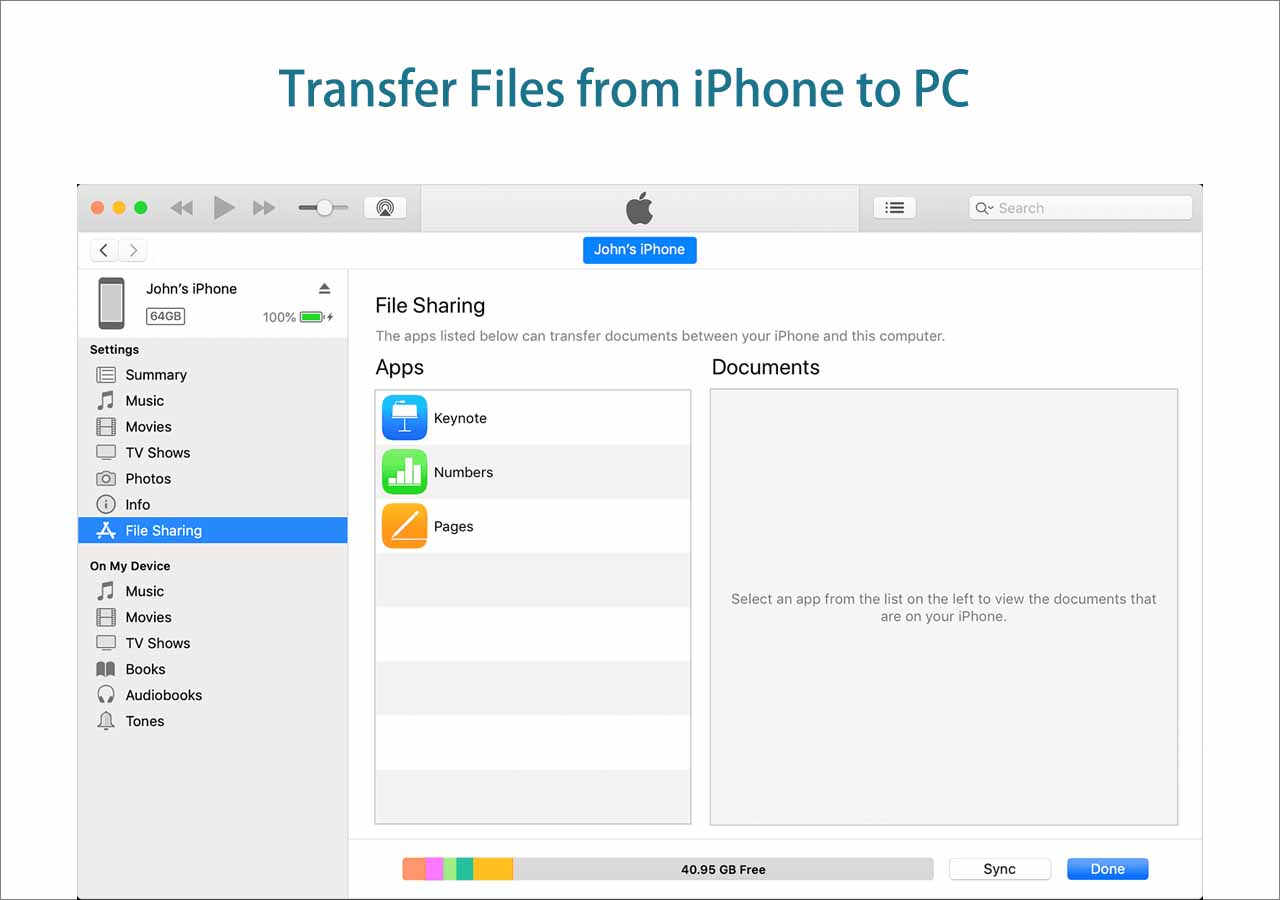
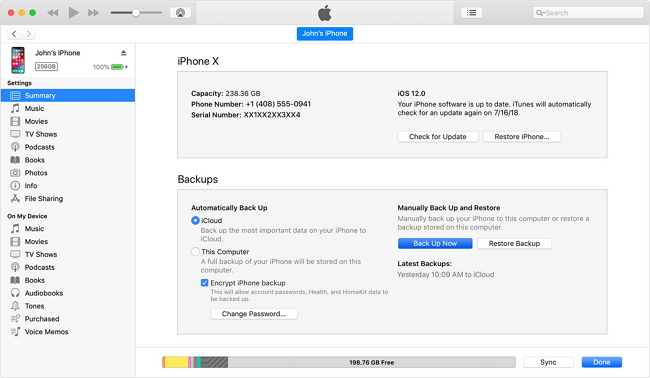
Apart from AirDrop and iCloud, iTunes (or Finder) is also an official way to transfer files and backup data. If you are using Mac and starting with MacOS Catalina, you should use Finder instead of iTunes. However, to use iTunes or Finder, you cannot enable iCloud Photos on your iPhone since shared photos cannot be transferred with iTunes. There is still one more thing to warn you: syncing photos with iTunes will wipe iPhone photos syncing with other libraries and replace them with the iTunes library.
Step 1. Connect your iPhone to your computer and open iTunes. Select your iPhone by clicking on the device icon.
Step 2. Navigate to the "Photos" tab. Check the "Sync Photos" option and choose the folder or source from which you want to sync photos.
Step 3. Click "Apply" to start the syncing process. This will transfer the selected photos from your iPhone to your computer.
![sync-photos-to-itunes.png]()
Step 4. After the sync is complete, disconnect your iPhone and connect your iPad to the computer.
Step 5. Select your iPad in iTunes. Again, go to the "Photos" tab and check the "Sync Photos" option. Choose the same folder that you used for your iPhone photos. Click "Apply" to sync the photos to your iPad.
This method is effective for transferring a large number of photos, but keep in mind that photos synced through iTunes cannot be deleted directly from the iPad; they must be managed through iTunes on your computer.
The Bottom Line
We do hope our guide can help you sync photos from iPhone to iPad. As you can see, among our recommended solutions, EaseUS MobiMover is the most practical and easy to use. It can help you transfer photos, videos, contacts, messages, and many other iPhone data. But if you don't want to install a third-party tool, try other solutions instead.
FAQs on How to Transfer Photos from iPhone to iPad
Here are some frequently asked questions to assist you further:
1. How do I transfer photos from iPhone to iPad without iCloud?
Without iCloud, there are many options for you to choose from. For example, you can use AirDrop or Email to transfer photos. Most importantly, you can use a reliable third-party tool like EaseUS MobiMover to help you transfer photos from iPhone to iPad.
2. Why is iPhone and iPad not syncing?
You need to make sure that you're signed in to iCloud with the same Apple ID on your iPhone and iPad. And check that your device's date and time settings are accurate for your current location.
3. How do I sync my iPhone to my iPad?
The most popular way to sync your iPhone to your iPad is to use iCloud. And if you are looking for an effective iOS transfer tool, EaseUS MobiMover can help you sync your iPhone to your iPad more flexibly.
NEW
HOT
