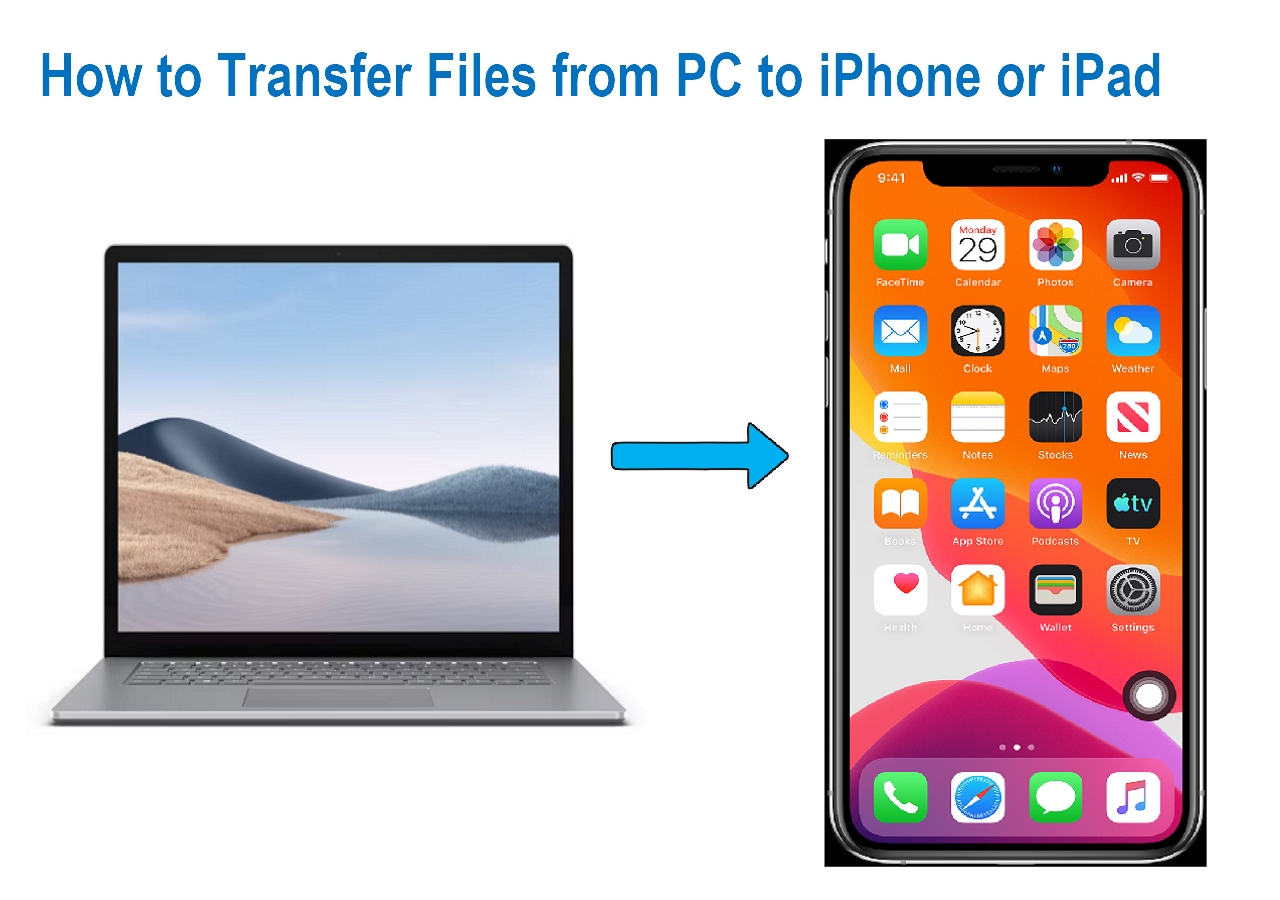
You may always wonder how to transfer files from PC to iPad. Transferring photos from laptop to iPad may take much work before you know the exact solutions. How to transfer photos from laptop to iPad in a practical way? Now, it's time to find the best solutions!
How to Transfer Photos from Laptop to iPad via MobiMover
If you are searching for a solution for how to transfer photos from laptop to iPad, then EaseUS MobiMover could help with the issue. It's a transferring tool specially used to help users transfer photos from PC to iPad without losing quality. Transferring pictures is just one aspect. With MobiMover, you can access video, contacts, and other transferring. To sum up, you can:
- Transfer data and other files without losing quality
- Back up essential files and data
Before using it, remember to check the versions of your devices- iOS 9.0 and above versions for iOS devices and Windows 7/8/10 for PC (you need to update your devices if required).
You can follow these steps to get it downloaded:
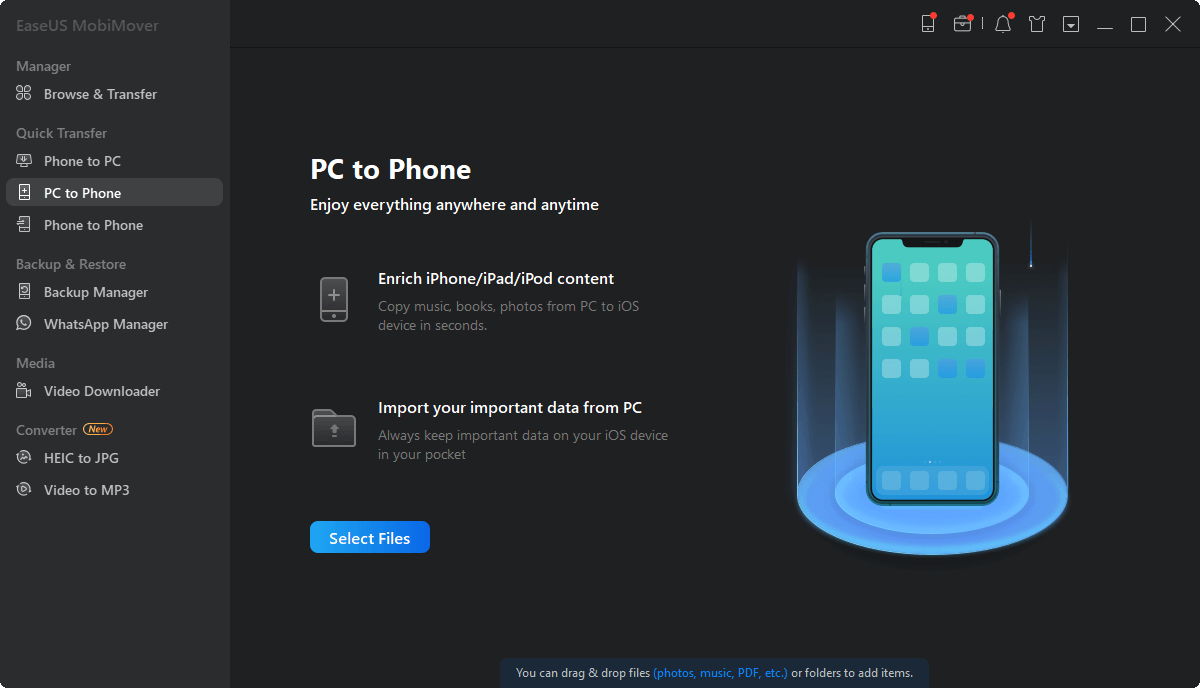
Step 1. Connect your iPad to your PC and click "Trust" in the pop-up on your iPhone. Launch EaseUS MobiMover and choose "PC to Phone".
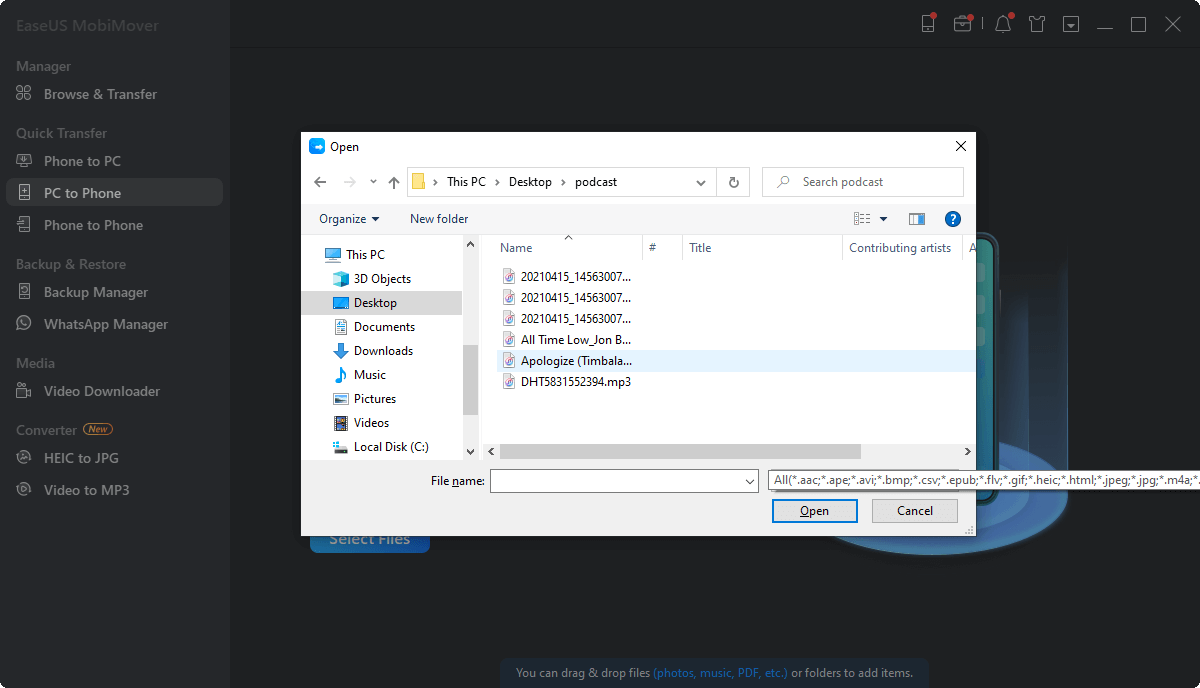
Step 2. Click the "Select Files" button on the above picture. Go to your computer to select and open the folders or files from which you want to copy images.
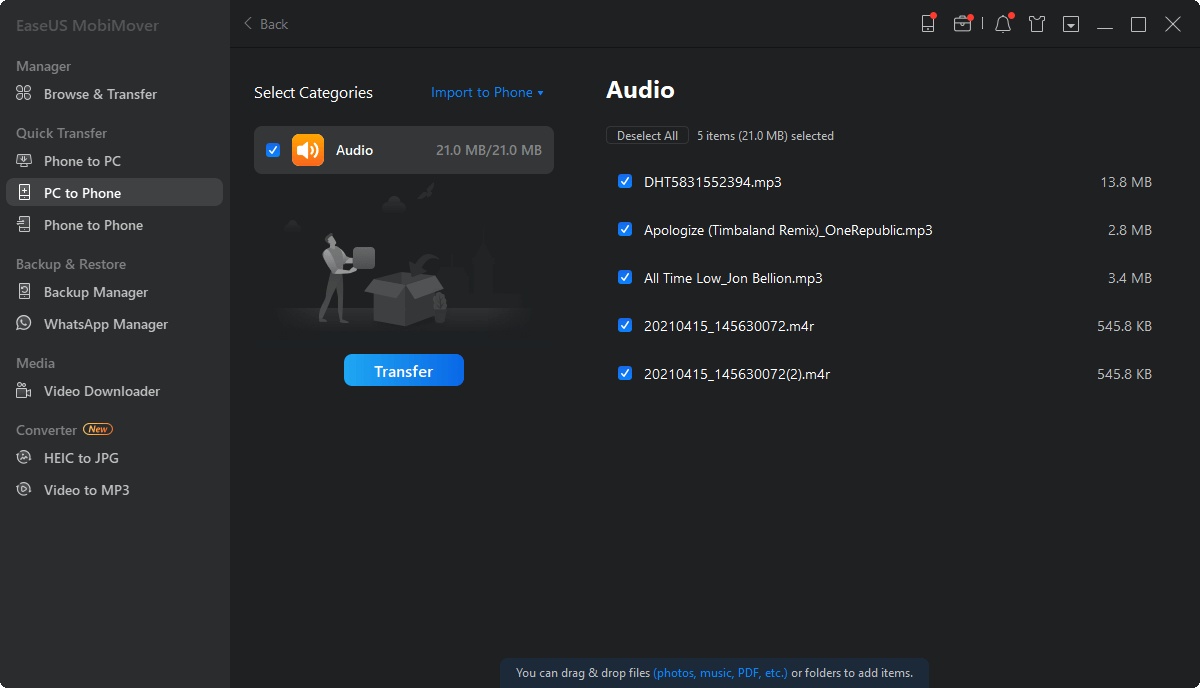
Step 3. MobiMover will display the files you've chosen. If you need to add more photos, you can make it by drag-and-drop or via clicking "Add Contents". If the folders/files you've chosen include other file types, you can transfer them from PC to your iPad together with photos.
These steps also help to add movies to iPad, put music onto iPad, and add contacts to iPad.
Easy transferring, safe backup, and customized management of your iOS contents—— with merely one EaseUS MobiMover, you can reach your goal effectively!
How to Transfer Photos from Laptop to iPad via iCloud
If your iPhone is by your side, you can quickly transfer photos from laptop to iPhone. But what if sometimes you want to move the pictures to iPad to make wallpapers? Hence, how to import photos from laptop to iPad is the issue here. This method needs you to first sign in to your iCloud account. Then, you are accessible to the process of how to transfer files from PC to iPad without iTunes. Let's follow the steps below:
Step 1. Go to Settings > find [your name]
Step 2. Open iCloud > Open Photos to enable iCloud Photos.
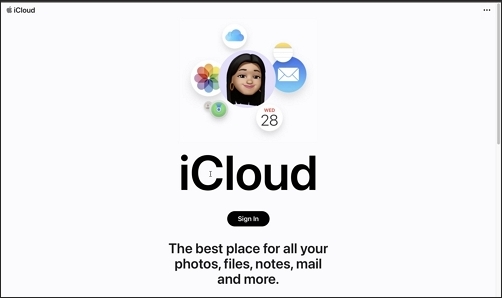
Step 1. Open a browser and go to iCloud.com > Sign in with your Apple credentials
Step 2. Click the Photos option > Click Upload photos to choose the images you want to add to your iPad. (Press Ctrl+A to select all photos)
Step 3. Wait patiently until the photos finish transferring
![go to iCloud in a browser and sign in]()
Here's one tip you should remember: as long as you use iCloud to help you move pictures, you need to connect to the Wi-Fi. Otherwise, the transfer process won't go smoothly.
How to Transfer Photos from Laptop to iPad via iTunes
So, how to transfer photos from laptop to iPad via iTunes as an alternative? In this part, you need first to get your iTunes prepared. If you have no access to iTunes, you can refer to the guide on how to transfer photos from PC to iPad without iTunes. It would be best to remember that iTunes can only share all existing images stored on iPad Photo Library. Now, let's follow the steps below:
Step 1. Download or update the latest version of the iTunes app on your laptop
Step 2. Connect your iPad to your laptop using a USB cable (You can also transfer files from PC to iPad using USB effectively)
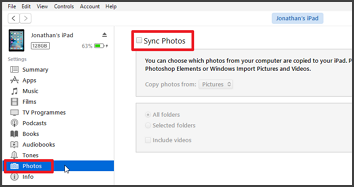
Step 3. Click the "Device" button on the window's top-left, and then tap "Photos."
Step 4. Click "Sync Photos" and select the folder that contains your photos
Step 5. Tap on the "Apply" button in the lower right corner, and the transferring process will start
![tap on Photos and click Sync Photos]()
Another notice is that when using iTunes, remember to turn off iCloud Photos on your iPad if it is on. To sum up, if you want to save time while transferring files to iPad or iPhone, using iTunes may not be the best choice, for the sync is not automatic, which means that you need to relaunch it every time if you need some changes.
How to Transfer Photos from Laptop to iPad via Google Photos
Want to know more about how to import photos from laptop to iPad in the cloud? Google Photos could help a lot! It is a good alternative that provides a free service for storing data online. You can efficiently and effectively sync your photos between multiple devices: computers, tablets, and mobile phones, like transferring photos from Mac to iPad and transferring photos from iPad to computer. Get Google Photos installed first and follow the detailed steps below:
Step 1. Visit Google Photos and sign in with your own Google account
Step 2. Download Google Photos in App Store on your iPad and log in with the same account
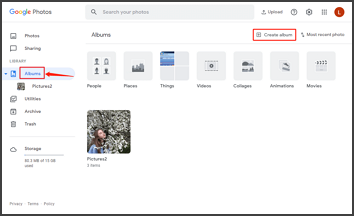
Step 3. Select "Albums" on PC and then tap on the "Create Album" button
Step 4. Open Google Photos on your iPad and tap on the hamburger button (menu) > "Collections."
Step 5. Find and choose the album that contains the pictures you want to import to your iPad. And tap on the ellipsis icon and choose "Select."
Step 6. Tap on the "Share" button after you have checked the photos you want to transfer are selected
Step 7. Choose "Save [number] Images" to download photos to your iPad.
![select Albums and tap on Create Album]()
This solution is more complex than the other solutions mentioned above, but as long as you possess a Google account, you can take this approach. Another note for you is that Google Photos merely offers 15GB of free storage, which is limited, especially for users who want to transfer a large number of photos.
How to Transfer Photos from Laptop to iPad using Google Drive
Google Drive is also available for dealing with the issue of how to transfer photos from laptop to iPad. Similar to Google Photos, Google Drive also offers users 15GB of free storage, which is limited for those who want to transfer photos over 15GB. With a mere Google account, you can have access to it. Sign in to your Google account first, and let's see the exact steps below:
Step 1. Download the Google Drive on your PC as well as your iPad
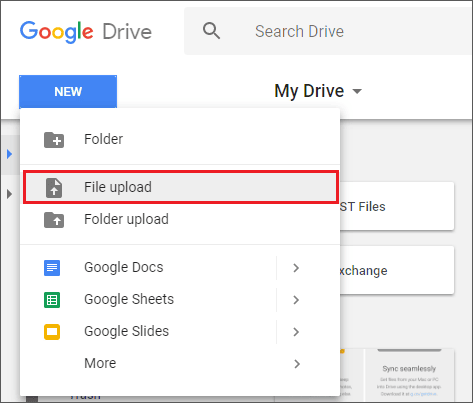
Step 2. Tap on the "New" button on your PC after downloading the Drive, and choose the "File Upload" or "Folder Upload" button.
Step 3. After uploading, you can see the files or photos on your Google Drive at once
Step 4. Open the app on your iPad, and log in with the same Google credentials. And after that, you can see the synced pictures then.
![choose the File Upload or Folder Upload button]()
FAQs on How to Transfer Photos from Laptop to iPad
Here are more related questions below, and you can check them if you have the same question:
1. How do I transfer photos from laptop to iPad wirelessly?
You can apply AirDrop to transfer photos. First, choose an item on your iPad, and then click the button that displays the app's sharing options. Finally, tap on the same sharing option before you select the other device.
2. How do I transfer files from my laptop to my iPad via Bluetooth?
In Device settings, select Send or Receive files via Bluetooth. In Bluetooth File Transfer, select Send files and choose one device that you want to send to. After doing that, select Browse to choose the files and wait patiently until the transferring process finishes.
3. How do I transfer files from PC to iPad without Internet?
You can use an offline file-sharing app, such as AirDrop (Apple iOS) and Google Files (Windows or Android), for they work by turning your device into a Wi-Fi hotspot, just without the Internet.
Conclusion
After reading this guide, you are sure to accumulate several useful ways that help you cope with the problem of how to transfer photos from laptop to iPad effectively. In conclusion, among the methods mentioned above, we highly recommend EaseUS MobiMover to help you with the transferring process, which is safe and less time-consuming for not only photo transfer but also other data transfer. Moreover, there's no need for you to worry about losing data. Instead of any other installations, you can back up all your important data within only one EaseUS MobiMover.
NEW
HOT
