Photo transfer occurs almost every day. It may happen between two iPhones or between an iPhone/iPad/iPad and a computer, for the purpose of photo backup or file sharing. Thus, learning how to transfer photos is necessary.
Given that many of you need to transfer photos from Windows 10 to iPad, here I will show you how to put pictures from PC to iPad in different ways. Read on to check the details and choose the method you like to apply.
Method 1. How to Transfer Photos from Windows 10 to iPad with iPhone Transfer Software
Also supports: Videos, music, ringtones, contacts, books, and more
Whether you want to transfer photos from iPad to PC in Windows 10 or transfer photos from Windows 10 to iPad, the iPhone transfer software - EaseUS MobiMover will help.
As an iOS data transfer tool, it works to transfer files between an iPhone/iPad/iPod and a PC/Mac or between two iDevices. Therefore, it enables you to do things like:
Besides, since it also serves the function of a video downloader, you can use it to get videos from video sites or social networking sites to your computer or iDevice to watch offline. If you are interested in this feature, refer to the guide on how to download YouTube videos to PC for reference.
Let's see how to transfer photos from PC to iPad with a few simple clicks:
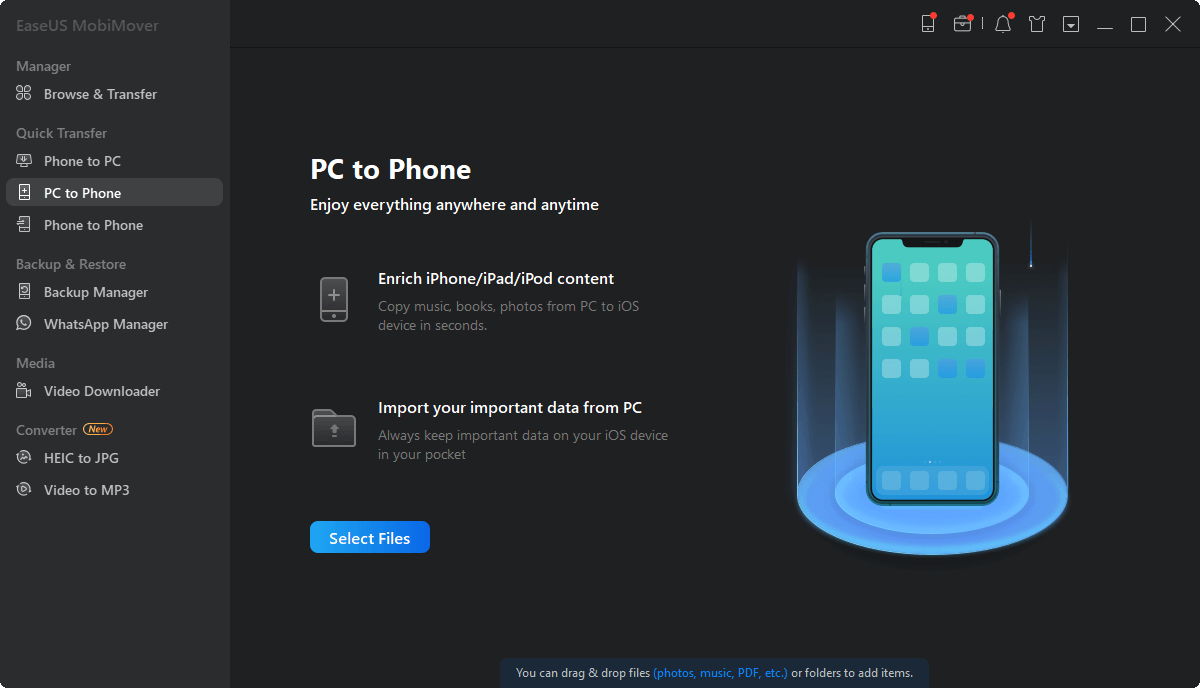
Step 1. Connect your iPad to your PC and click "Trust" in the pop-up on your iPhone. Launch EaseUS MobiMover and choose "PC to Phone".
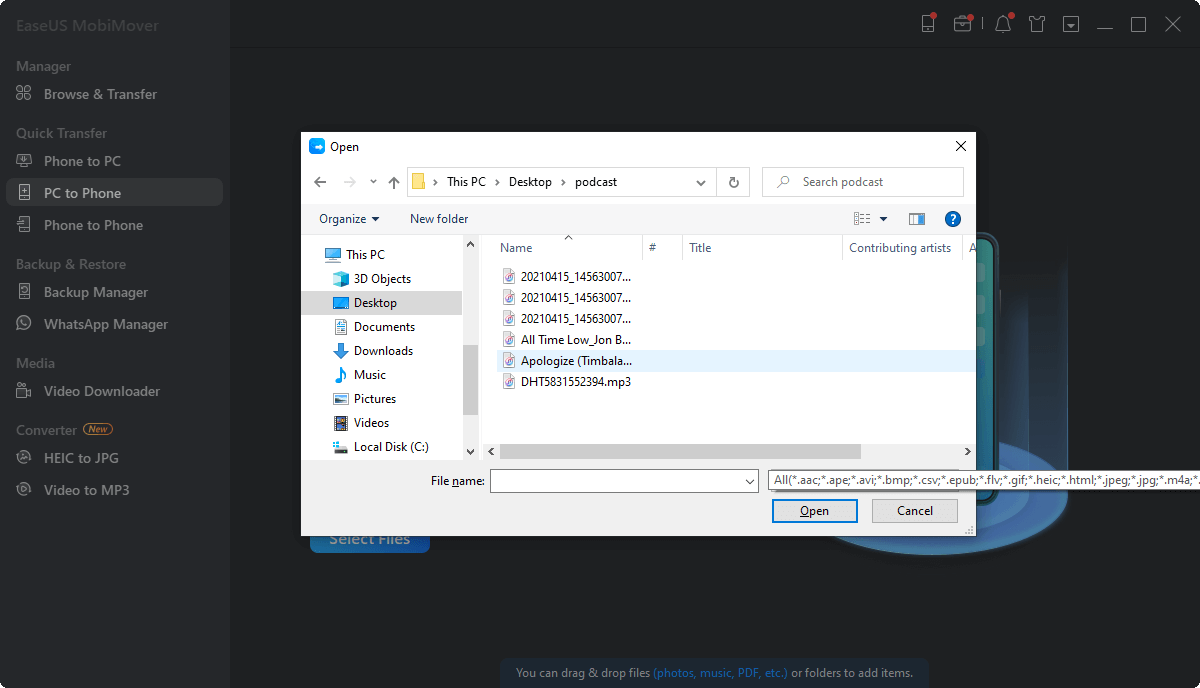
Step 2. Click the "Select Files" button on the above picture. Go to your computer to select and open the folders or files from which you want to copy images.
Step 3. MobiMover will display the files you've chosen. If you need to add more photos, you can make it by drag-and-drop or via clicking "Add Contents". If the folders/files you've chosen include other file types, you can transfer them from PC to your iPad together with photos.
Method 2. How to Transfer Pictures from PC to iPad Using iTunes
As you may know, iTunes will also help when it comes to how to transfer files from PC to iPad, be it a PC running Windows 10, Windows 8, or Windows 7. However, transferring photos from Windows 10 to iPad using iTunes will cause data loss on the iDevice. Because iTunes works by syncing. That means the newly synced items will replace the existing files on your iPad, including music, movies, TV shows, books, and more.
Thus, if there are important media files on your tablet that you don't want to lose, try one of the other ways to transfer photos from Windows 10 to iPad.
To sync photos to iPad:
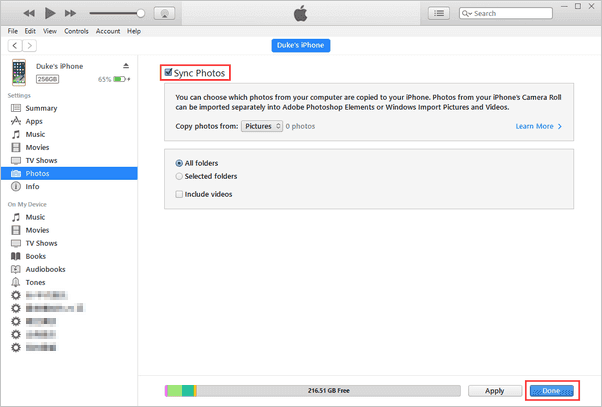
Step 1. Connect your iPad to your PC with a USB cable and wait for iTunes to launch automatically.
Step 2. Click the "Device" button in iTunes and choose "Photos".
Step 3. Select "Sync Photos" and choose the items you are going to copy.
Step 5. Click "Apply" to start syncing photos from PC to your iPad.
![How to transfer photos from Windows 10 to iPad with iTunes]()
Method 3. How to Add Photos to iPad from PC via iCloud
Using iCloud is also workable to put photos on iPad from PC. Unlike iTunes that uses a USB cable, iCloud shares photos using a Wi-Fi connection. That's why you need to make sure there is a stable and reliable network connection on your devices while transferring pictures from Windows 10 to your iPad. What's more, to move photos successfully, enough iCloud storage is also necessary.
To transfer photos (and videos) from Windows 10 to iPad using iCloud:
Step 1. On your Windows 10 PC, open a browser and visit iCloud.com.
Step 2. Sign in with the Apple ID you use on the iPad and choose "Photos".
Step 3. Click the "Upload" button to upload new photos (and videos) from PC to iCloud.
Step 4. On your iPad, go to "Settings" > [your name] > "iCloud" > "Photos" and turn on "iCloud Photos" or "iCloud Photo Library".
Step 5. Wait for the photos to be synced to your iPad. By doing so, you can transfer photos from Windows 10 to your iPad with ease.
![How to transfer photos from PC to iPad using iCloud]()
Method 4. How to Transfer Photos from Laptop to iPad with Cloud Storage Services
Apart from the three ways above, using cloud storage services like Dropbox, OneDrive, Google Photos, and more are also helpful to put pictures from computer to iPad. Similar to using iCloud, you need to make sure you are using the same account on your devices and there is a stable Wi-Fi connection for you to use.
Let's take Google Photos as an example:
Step 1. On your PC, go to Google Photos, sign in with your Google account, and click "Upload" > "Computer" to upload the photos you want to transfer from your computer to Google Photos.
Step 2. On your iPad, download and install the Google Photos app and sign in with the same Google account you use on your PC.
Step 3. Select the photos you want to transfer and download them to your iPad.
![How to transfer photos from Windows 10 to iPad via Google Photos]()
The Bottom Line
All four methods are also applicable to transfer photos from iPad to PC. As you can see, using a tool like EaseUS MobiMover is the easiest solution to add photos to your iPhone, iPad, or iPod. Don't hesitate to get this tool and let it help whenever you need to transfer files to or from your iOS device.