Are you looking for some tips to help you transfer data from iPhone to iPad after setup? If that's the case, you've come to the right page. Firstly, why do you need to transfer the iPhone to the iPad after setup? The following scenarios are included:
- ➤ You get a second-hand iPad and you didn't perform a factory reset on your iPad.
- ➤ You want to transfer data from your iPhone to your old iPad for backup or other purposes.
- ➤ Once you turn on your new iPad and miss the Quick Start screen to transfer data from iPhone to iPad.
No matter why you want to transfer data from iPhone to iPad after setup, this post will get you covered! In this article, we will introduce 5 helpful tools to move data from iPhone to iPad without Quick Start after you set up your iPad. Solutions at a glance:
In the following, we will focus on how to use these five reliable methods to fix how to transfer data from iPhone to iPad after setup. Let's get right to it now!
Transfer Data from iPhone to iPad with EaseUS MobiMover After Setup
Have you ever heard of EaseUS before? EaseUS, founded in 2004, is a software development company that aims to provide professional all-in-one solutions in all directions for iOS or computer users. They have EaseUS MobiMover, which is designed to move specific data or everything from one mobile device to another. For example, you can use this phone data transfer tool to transfer data from iPhone to iPhone, transfer Android to iPhone, or transfer data from old iPad to the new one.
Once you set up your iPad, you can download this reliable and practical application on your Windows PC or Mac to start transferring items from iPhone to iPad without any effort.
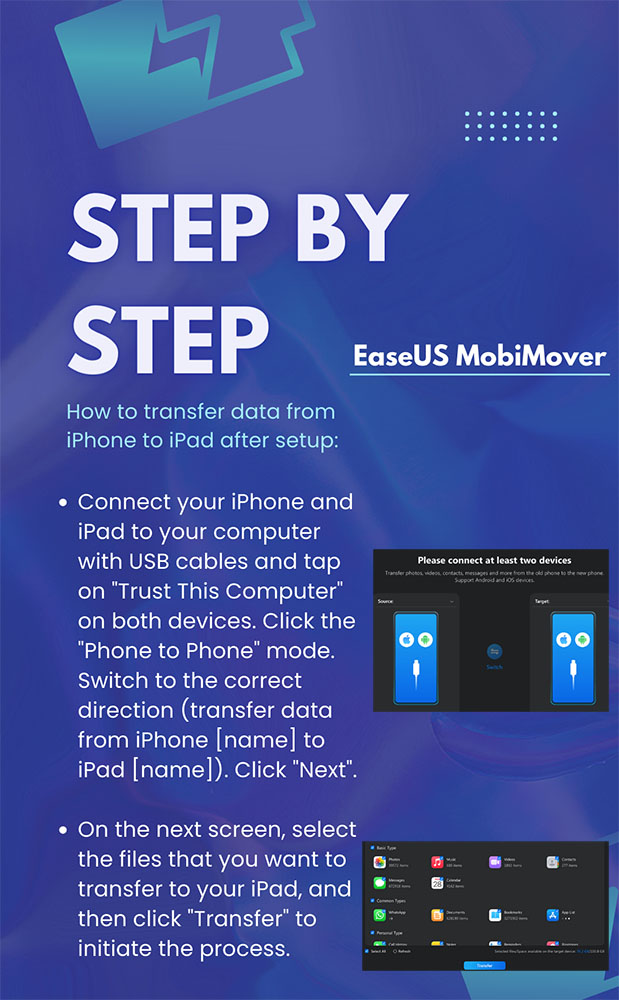
Follow the steps below to transfer data from iPhone to iPad without iCloud using EaseUS MobiMover after setup:
![transfer iPhone to iPad with EaseUS MobiMover]()
If you are also interested in how to transfer data from iPad to iPad, click below for more information:
![related articles]()
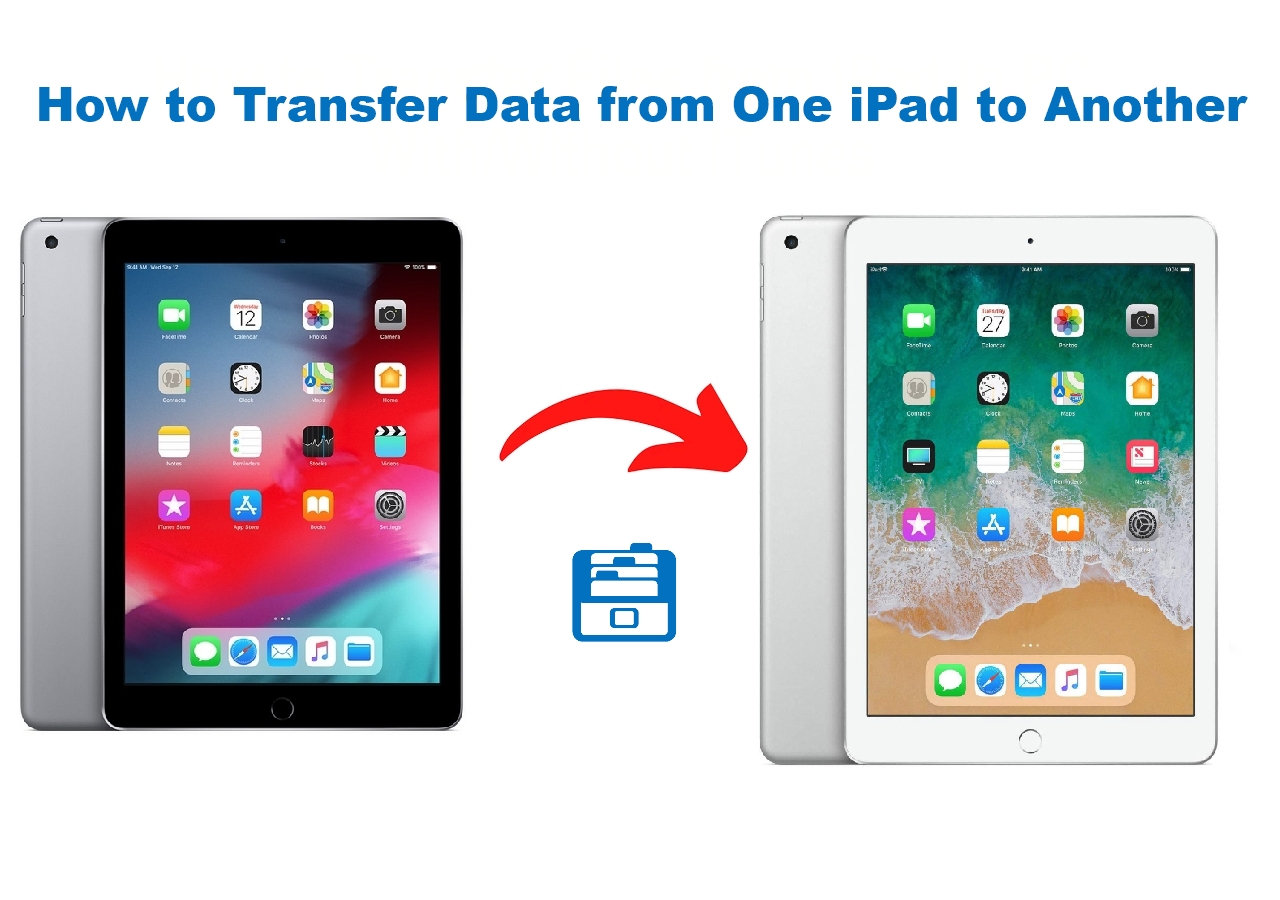
How to Transfer Data from One iPad to Another in 5 Ways
In this article, we will show you some ways to transfer data from one iPad to another. Ranging from Apple's recommended iTunes, iCloud, and AirDrop to a third-party application. Everything you need is included in this post.
Here is a video guide to transfer data from iPhone to iPhone after setup.
How to Restore iPhone Backup to iPad from iTunes After Setup
When it comes to iPhone backup or restoring, I guess iTunes may be the first solution that crosses your mind. Indeed, iTunes is a multi-functional and comprehensive media player running on Windows and MacOS computers. If you are a Mac user using macOS Mojave or earlier or a Windows user, you are suggested to transfer data from iPhone to iPad after setup without iCloud. Then you can restore the backup file from PC to iPad with one click easily.
Here's how to transfer data from iPhone to iPad using iTunes after setup:
Step 1. Open iTunes on your computer or laptop. Connect your iPhone to the computer with USB cable.
Step 2. Click the Device icon on the main interface in iTunes.
Step 3. In the left sidebar menu, click Summary. On the right main screen, select This computer as the target location to accept the iPhone backup files.
Step 4. Then click Back Up Now to start the backup process.
Step 5. When you're done, unplug the iPhone and connect your iPad to the computer instead.
Step 6. Click the Device icon. Select Summary > This computer > Restore Backup. Follow the on-screen instructions to complete the remaining operations.
![back up and restore iPhone via iTunes]()
- Tip
- If your Mac is updated to macOS Catalina or later, you can use the Finder on your Mac to back up data from iPhone to Mac and then restore it from Mac to your iPad instead of iTunes.
How to Restore iPhone Backup to iPad from iCloud After Setup
In terms of iPhone backup and restoration, iCloud can do the same thing as iTunes. Both of them are capable of transferring data across Apple devices widely. One thing to remind: iCloud only offers free storage of 5 GB for each Apple ID account to back up or transfer data to its cloud service. Therefore, check your iPhone data amount and size before proceeding with the iCloud backup process. If it's more than 5 GB, upgrade to iCloud+ and then follow the steps below to transfer data from iPhone to iPad with iCloud backup:
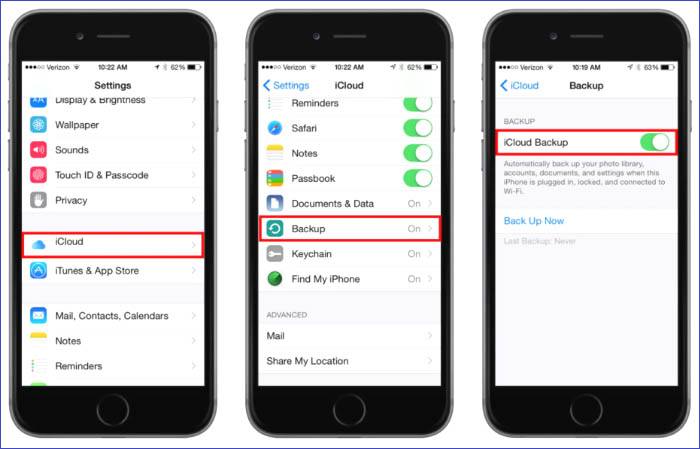
Step 1. On your old iPhone, go to Settings > [your name] > iCloud.
Step 2. Select iCloud Backup > Back Up Now.
![back up iPhone via iCloud]()
Step 3. Once you back up iPhone to iCloud successfully, on your iPad, go to Settings > General > Reset and select Erase All Content and Settings to erase iPhone now.
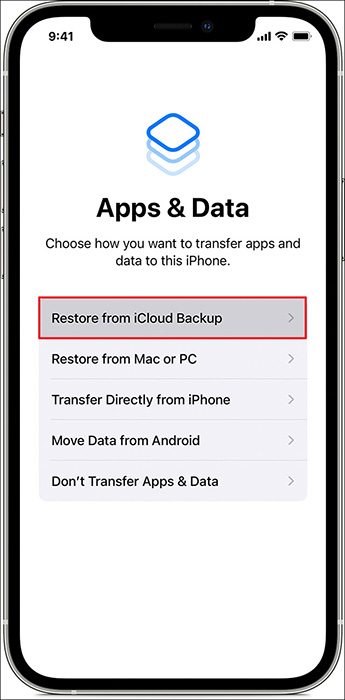
Step 4. Then set up your iPad again. When you come to the App & Data screen, select Restore from iCloud Backup.
![restore from iCloud]()
How to Sync Specific Data from iPhone to iPad via iCloud After Setup
Now that you've learned how to transfer backup files from iPhone to iPad using iCloud or iTunes, it's time for you to learn how to sync specific items or parts of content from iPhone to iPad after setup. If you don't want to transfer everything from iPhone to iPad, you can use iCloud to transfer photos from iPhone to iPad automatically or other files, in addition to EaseUS MobiMover.
This syncing method is definitely easier than iCloud backup described in the last section. Perform the following instructions to learn how to sync specific data from iPhone to iPad with iCloud:
Step 1. On your old iPhone, go to Settings > [your name] > iCloud.
Step 2. Under the Apps Using iCloud tab, select Show All.
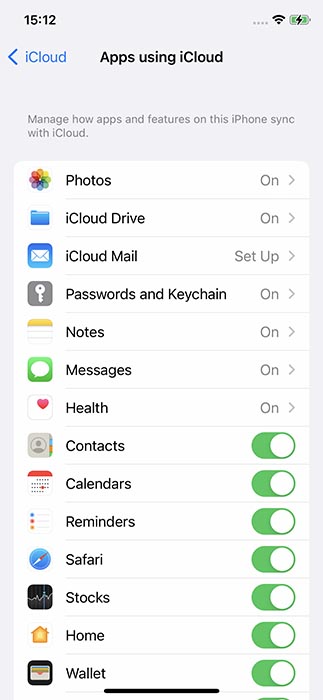
Step 3. Scroll down to enable the app data that you want to sync to your iPad, such as photos, mail, contacts, calendars, and notes shown below.
![iCloud syncing data types]()
Step 4. Turn on your iPad and go to Settings > [your name] > iCloud. Toggle on the slider beside the service that you want to sync to this device.
How to AirDrop Data from iPhone to iPad After Setup
To transfer data from iPhone to iPad after setup selectively, there's another alternative - AirDrop. This is a wireless ad hoc service developed by Apple, intended to share files across Apple devices over Wi-Fi and Bluetooth. With this handy wireless service, you can transfer contacts from iPhone to iPad or other individual items from one Apple device to another. The data sharing between iPhone and Mac is also available.
Here's how to transfer data from iPhone to iPad wirelessly using AirDrop:
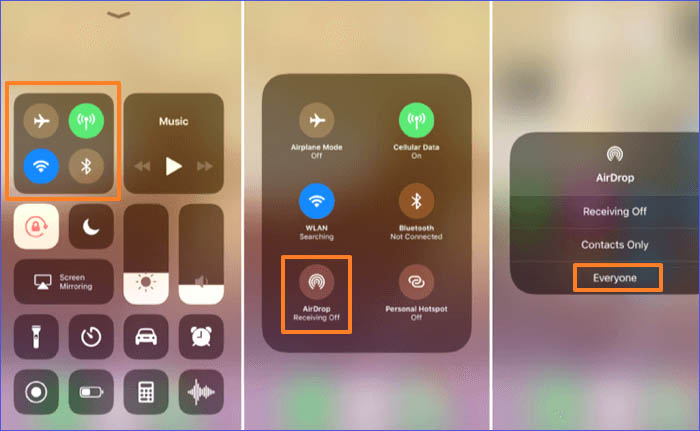
Step 1. On your iPhone, turn on AirDrop and then navigate to the file that you want to share on your iPad.
![turn on AirDrop]()
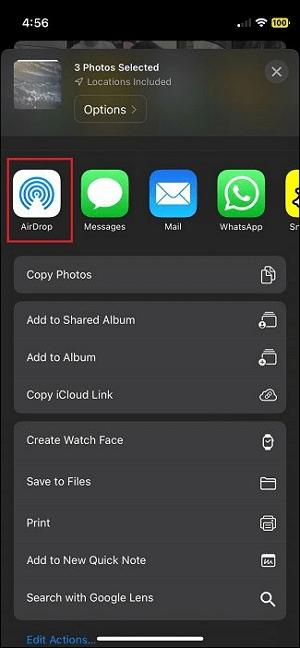
Step 2. Once you select it, tap on the Share button.
Step 3. Select AirDrop in the sharing option box from the bottom of the screen.
![select AirDrop on your iPhone]()
Step 4. Make sure the AirDrop is also enabled on your iPad. Only in this way can you find it in the device list on your iPhone.
Step 5. Then select the iPad to transfer the content.
Bonus: Can You Use Quick Start After Setting Up Your New iPad
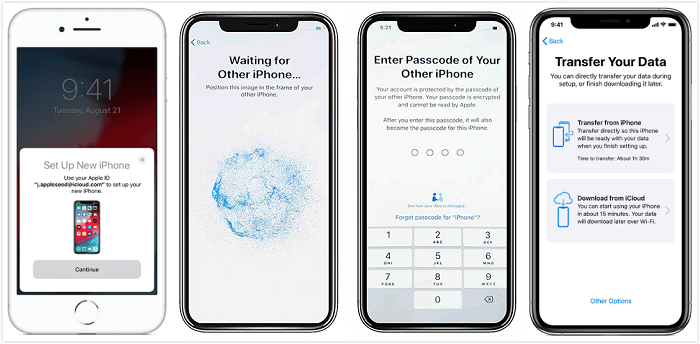
We've shown you 5 common and efficient ways to transfer an iPhone to an iPad after setup above. You might ask: "Can you transfer data from iPhone to iPad after setup using Quick Start?" Generally speaking, the Quick Start feature only appears on the Transfer Your Data screen during the setup. If you don't select the Transfer from iPhone option due to some emergency reasons, you can't use Quick Start to transfer data again unless you factory reset your iPad.
That is to say, if you want to use Quick Start to transfer everything after you set up your new iPad, you need to reset your iPad first by navigating to Settings > General > Reset > Erase All Content and Settings. Then you can set up your new iPad again and then select Transfer from iPhone.
![transfer data to new iPhone with Quick Start]()
Conclusion
In this iOS data transferring guide, we've shared 5 workable ways with you on how to transfer iPhone data to iPad after setup. Among them, EaseUS MobiMover is recommended most. With this iPhone data transfer and management tool, you can back up data from iPhone to PC, transfer files from Android to iPhone, or share items between two iOS devices. It's really worth a try.
FAQs on How to Transfer Data from iPhone to iPad
For more information on today's topic - transferring data from iPhone to iPad, you can check the following frequently asked questions.
1. What is the first thing to do when you get a new iPad?
Turn on and set up your new iPad with an internet connection. If you want to transfer data from an old iPhone/iPad to this new device, you can follow the on-screen instructions to do that using Quick Start. If you want to transfer data from an old Android to a new iPad, EaseUS MobiMover would be a good helper.
2. Do I have to use the same Apple ID with my iPad?
You can create a new Apple ID on this new device. But it is suggested to sign in on your new iPad with the same Apple ID that is already signed in on your other Apple devices.
3. How can I back up my iPad?
You can go to Settings > [Your Name] > iCloud to back up your iPad to iCloud. Or you can also use EaseUS MobiMover to back up your iPad or iPhone to computer.
I sincerely hope this post is useful and helps you out of this dilemma. You are welcome to contact me on Twitter if you have any further questions or concerns about this guide. If you found this guide useful, you can click the button below to share it with your friends.


 NEW
NEW HOT
HOT