Transferring photos from iPhone to PC can sometimes feel like a hassle, especially when you are trying to avoid costly software or complicated processes. Luckily, there are several free and easy-to-use tools available that simplify this task, allowing you to quickly move your precious memories without any technical headaches. In this article, we will explore the free software or apps to transfer photos from iPhone to PC running Windows 10/11.
When it comes to choosing a suitable free software to transfer photos from iPhone to PC, there are three key factors that should be taken into consideration: transfer speed, photo quality, and storage space. A fast transfer speed can significantly reduce waiting time. No format conversion or compression is required, allowing you to transfer iPhone photos without losing quality. Unlimited free storage brings great convenience for transferring multiple photos.
EaseUS MobiMover - Best for Transferring Selected or All Photos from iPhone to PC
Compatibility: Windows 11/10/8.1/8/7, macOS
EaseUS MobiMover is an excellent tool to transfer photos from iPhone to PC, Mac, external hard drive, USB flash drive, etc. Known for its intuitive interface, it makes the transfer process simple even for users who aren't tech-heavy. Beyond just moving Camera Roll from iPhone, it offers features like selective transfer and backup options, giving you greater control over your Photo library. Overall speaking, this photo transfer software is recommended to move photos and videos based on several important advantages:
- Photo Quality: It transfers photos without any loss in quality, preserving the original resolution and format of images, including popular formats like JPG, PNG, HEIC, and more.
- Transfer Speed: Using a USB cable connection, it processes the transfer locally, unaffected by internet conditions, making it efficient for moving large photo libraries quickly.
- Free Use: The free version allows users to transfer up to 20 items per day between iPhone and PC, which is generous enough for typical photo transfer use by many.
- Other Features: It supports selective photo/video transfer, allowing users to pick specific images or entire albums. It also handles other file types, such as music, contacts, and messages.
How to Transfer Photos from iPhone to PC in Three Steps:
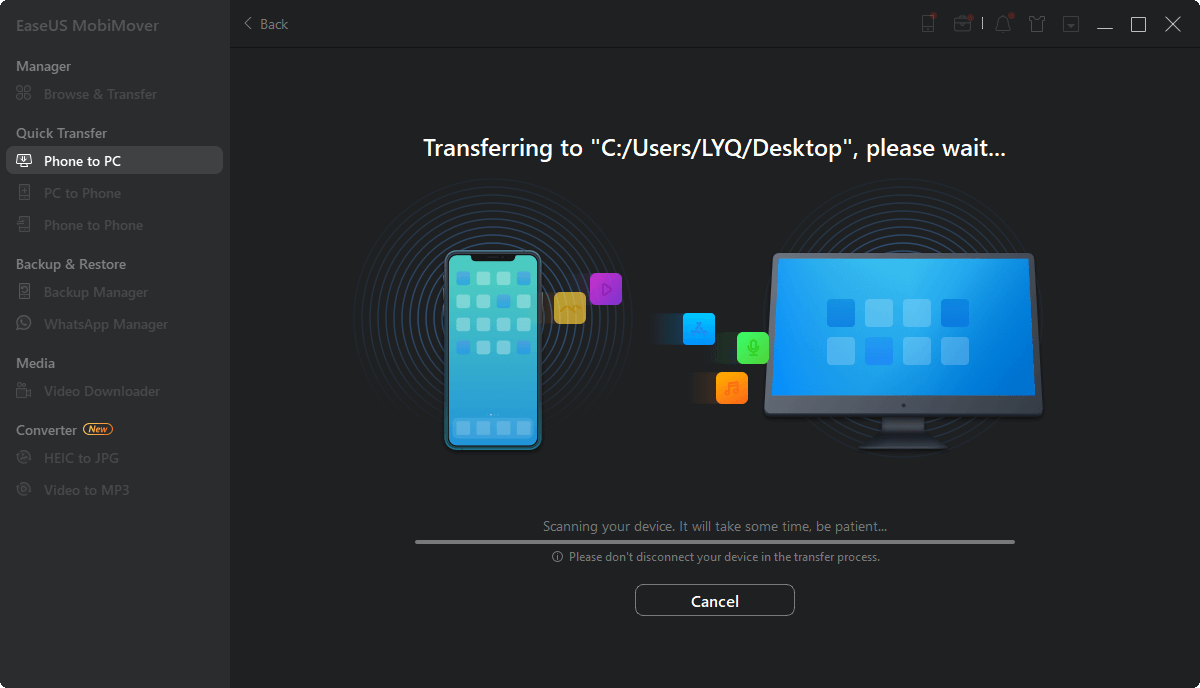
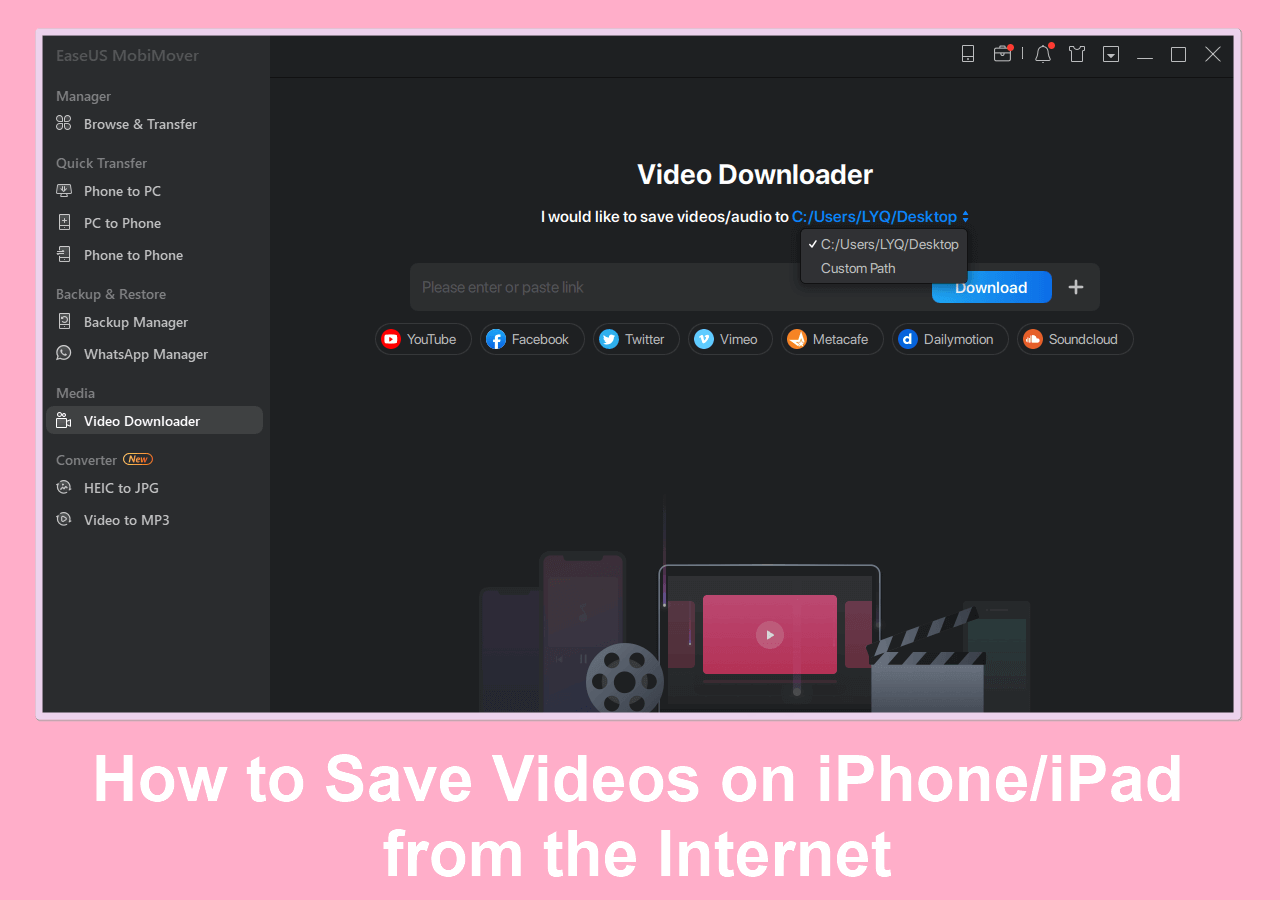
Step 1. Connect your iPhone to PC running Windows 7 or later. Run EaseUS MobiMover, choose "Phone to PC" and click the "Next" button on the screen. This mode allows you to transfer data from iPhone to PC in one click.
Step 2. MobiMover supports transferring audio, videos, pictures, books, contacts, messages, etc. from iPhone to PC. Here, choose "Pictures" only. MobiMover will save the files on your desktop by default. You can customize the path as you need.
Step 3. Now, click the "Transfer" button to start transferring photos from your iPhone to PC. The transfer time depends on the file size. Wait patiently
File Explorer - Free Software to Transfer Photos from iPhone to PC Unlimited
Compatibility: Windows 11/10/8.1/8/7
File Explorer, a file manager application for PCs, also excels at transferring photos and videos between mobile phones and computers. It has no restrictions on the number of photos or the size of the files you can transfer. It requires no additional software installation; users simply connect their iPhone via USB, navigate to the device in File Explorer, open the Internal Storage and DCIM folder, and copy photos directly to their computer. The following are the reasons why File Explorer is recommended:
- No Installation: No additional software needed, making it quick and accessible for all Windows users.
- Direct File Access: It allows users to manually select and copy specific photos or entire folders.
- No Quality Loss: Preserve original photo quality without compression or alteration during transfer.
- Quick Navigation: Organize photos in familiar folder structures, making it easy to find and manage files post-transfer.
How to transfer photos from iPhone to PC via File Explorer:
Step 1. Connect your iPhone to your PC via a USB cable.
Step 2. Open File Explorer on your computer. If you're using Windows 8 or Windows 10, you can open it by pressing Windows key + E.
Step 3. Click on "This PC" in the sidebar. Then, you will see your iPhone under "Devices and drives." If you're using Windows 7, then your iPhone is under "Computer."
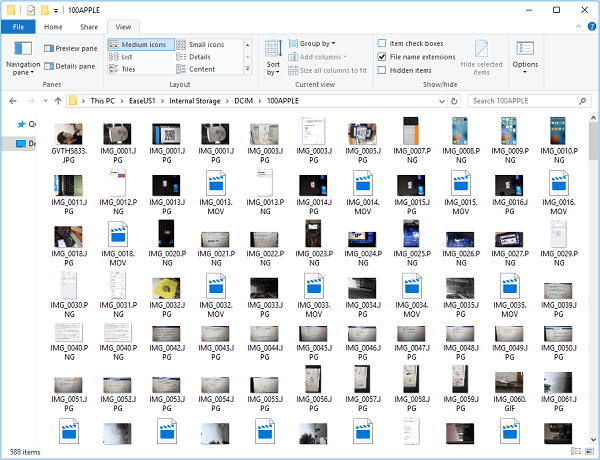
Step 4. Double-click your iPhone's name and then click on "Internal Storage", then DICM.
Step 5. Find the folder that holds the iPhone photos you'd like to import and drag (copy) them to the folder you want to house them.
![Transfer photos with file explorer]()
Windows Photos App - Best for Importing, Organizing, and Editing iPhone Photos on PC
Compatibility: Windows 10 and Windows 11
The Windows Photos app is a free photo transfer app, a photo viewer, and an editor included with Windows 10. With it, you can freely view and manage iPhone photos on your Windows PC or an external device. It not only allows seamless importing of photos but also organizes them into albums and collections by date or folders. The following are the reasons why the Windows Photos app is recommended for photo transfer:
- Easy Photo Management: Automatically organize photos by date or folders, making navigation easy.
- Multiple Import Options: Easily import photos from iPhone directly or via iCloud, offering flexible transfer methods.
- Built-in Editing Tools: Allow quick adjustments such as cropping, rotating, color correction, and AI-powered enhancements.
- Cloud Integration: Sync with OneDrive and iCloud to access photos from various devices in one place.
How to import photos from iPhone to PC with the Windows Photos app:
Step 1. Open Photos on your PC from the Start Menu, desktop, or taskbar. Meanwhile, connect your iPhone to your Windows PC.
Step 2. Click "Import" in the upper-right corner.
Step 3. Click "From a USB device."
Step 4. Then, export photos from iPhone. Choose the photos you'd like to export.
Step 5. Click "Continue" to import photos to your Windows PC.
![Transfer photos with the Photos app]()
iCloud - Best for Wireless Sync and Automatic Backup of iPhone Photos to PC
Compatibility: iCloud for Windows, iCloud.com website
iCloud is Apple's free software to transfer photos from iPhone to PC wirelessly. By enabling iCloud Photos on an iPhone, users can automatically upload their photos to iCloud whenever connected to Wi-Fi. On the PC side, installing iCloud for Windows or accessing iCloud.com allows users to download or view their entire photo library without physically connecting the devices.
- Manage Photos Across Devices: Photos stay backed up and accessible from any device signed into the same Apple ID.
- Photo Quality: It supports original photo quality and preserves file formats, including HEIC and Live Photos.
- Free Storage Space: It offers 5 GB of free storage space, with paid plans available for larger photo libraries.
How to transfer photos from iPhone to PC wirelessly via iCloud:
Step 1. First of all, you'll need to enable iCloud Photo Library on your iPhone to sync photos. Go to your Settings > [your name] > Photos > Enable iCloud Photo Library.
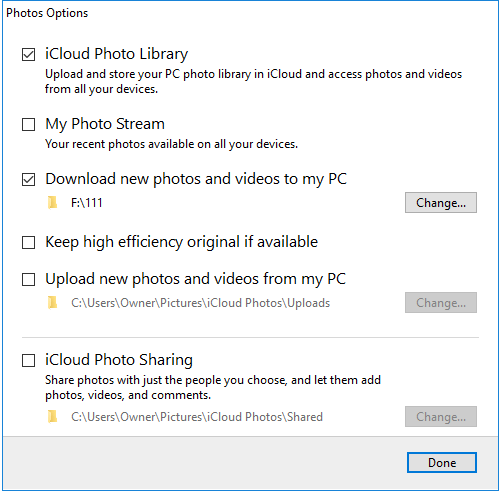
Step 2. After importing photos from iPhone to iCloud, you can download iCloud photos to your PC. Open the iCloud Control Panel on your computer. Click "Options" next to Photos.
Step 3. Tick the box next to "iCloud Photo Library" and "Download new photos and videos to my PC."
Step 4. Go to your computer to check the iCloud photos and videos from your iPhone. Thus, the process to transfer pictures from your iPhone is complete.
![Transfer photos with iCloud]()
If you didn't install iCloud or enable iCloud Control Panel on your computer, you could go to the iCloud website to get the job done as well.
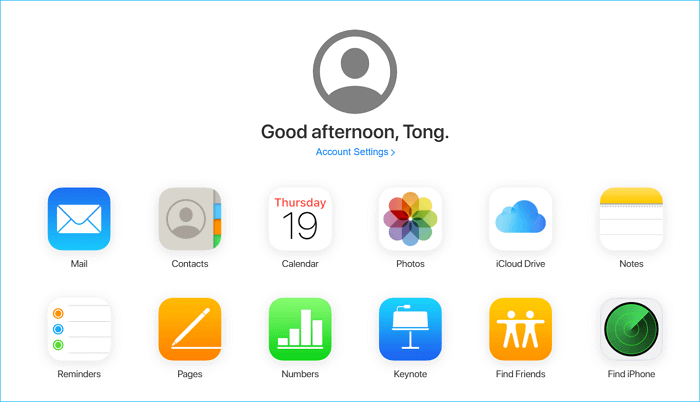
Step 1. Go to iCloud.com on your computer and sign in with your Apple ID and password.
Step 2. Select "Photos" to view all photos stored in your iCloud.
Step 3. Choose and download the items to your PC.
![Transfer files from iPhone to PC via iCloud website]()
- Notice:
- 💡Make sure you installed the iCloud application on your computer
- 💡Make sure both your iPhone and computer are connected to a stable internet
- 💡Make sure you have enough iCloud storage
- 💡Make sure you have signed in with the same Apple ID on both devices.
Google Drive - Best for Wireless Cloud Backup and Cross-Device Photo Access
Compatibility: Windows, macOS, Android, iOS
Google Drive offers a convenient cloud-based solution to transfer photos from an iPhone to a PC without needing cables. By uploading photos to Google Drive from the iPhone, users can then access, view, and download them from any device with internet access. This method not only transfers photos but also keeps them backed up and available across platforms.
- Wireless Transfer: without the need for USB cables or software installation on a PC.
- Automatic Backup: It automatically backs up your photos to the cloud and protects them from loss.
- Free Storage: Generous free storage of 15GB shared across Google Drive, Gmail, and Photos.
How to download photos from iPhone to PC with Google Drive:
Step 1. On your iPhone, open the Google Drive app and sign in with your Google account.
Step 2. Tap the blue "+" button at the bottom right of the screen. Select Upload > Photos and Videos.
![files-google-drive-send.png]()
Step 3. Browse your photo library and select the photos you want to upload. Tap Upload to start the transfer to Google Drive.
Step 4. Once uploaded, open a web browser on your PC and go to photos.google.com or drive.google.com.
Step 5. Sign in with the same Google account. Select and download photos to your PC's local storage as needed.
LocalSend - Free App to Transfer Photos from iPhone to PC
Compatibility: Windows, macOS, Android, iOS, Linux.
LocalSend is a free, open-source file transfer app that enables quick, peer-to-peer sharing of photos and other files between iPhone and PC. Unlike cloud services, it transfers files directly over the local Wi-Fi network without needing external servers, ensuring privacy and speed.
- Free Photo Transfer App: Completely free and open source with no ads, tracking, or hidden fees.
- Easy to Use: Simple and intuitive interface integrates directly with the iOS share menu.
- Large File Transfer: Supports large file transfers such as batches of photos or videos with good transfer speeds.
How to share images from iPhone to PC with LocalSend:
Step 1. Download and install LocalSend on both your iPhone and your PC. Ensure both devices are connected to the same Wi-Fi network.
Step 2. On your iPhone, use the share option in the Photos app to select photos, then choose LocalSend.
Step 3. Select your PC from the list of nearby devices detected by LocalSend.
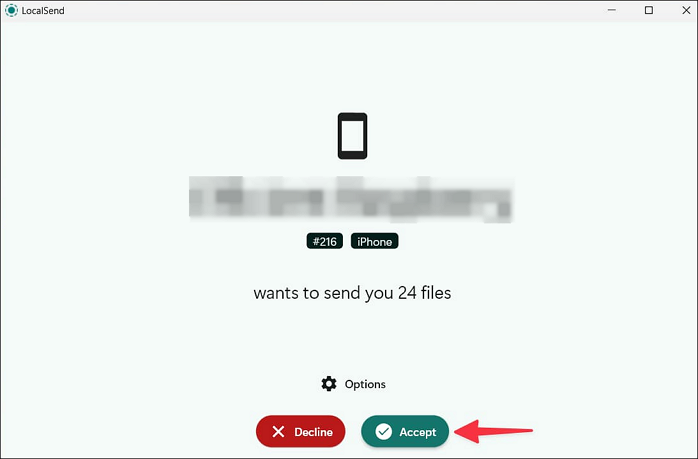
Step 4. Accept the incoming transfer prompt on your PC.
![localsend-receive.png]()
The Bottom Line
In conclusion, transferring photos from an iPhone to a PC can be achieved through various methods, each with its unique strengths and suited to different user needs.
- Built-in options like File Explorer and the Windows Photos app provide quick and straightforward transfers without extra cost or software.
- Cloud solutions such as iCloud and Google Drive offer wireless convenience and cross-device accessibility.
- For those seeking enhanced control, features, or privacy, third-party software like EaseUS MobiMover or open-source apps like LocalSend present powerful alternatives with added functionalities.
FAQ on Free Software to Transfer Photos from iPhone to PC
For more information about free software to transfer photos from iPhone to PC, check the following questions that people also asked.
1. Why can't I transfer photos from iPhone to PC?
You are not allowed to transfer photos from iPhone to PC if you are only storing a smaller preview of your images on the iPhone. Your photos are actually stored on iCloud.
2. What is the fastest way to transfer photos from iPhone to PC?
Connect your iPhone to a PC with a USB cable and then follow the steps below:
- Unlock your phone and turn it on. In the event that the device is locked, your PC cannot locate it.
- On your PC, select the Start button > Photos to open it.
- Select Import > From a USB device, then follow the instructions.
3. How do I transfer large amounts of photos between iPhones?
It is strongly recommended to use an iCloud backup to transfer photos from an old iPhone to a new iPhone.


 NEW
NEW HOT
HOT