How to Transfer Videos from PC to iPad:
-
EaseUS MobiMover: Fast USB transfer, no iTunes needed, ideal for quick, reliable, and batch video copying.
- iTunes Sync: Fast syncing of purchased media, replaces existing synced videos.
- iTunes File Sharing: Transfer directly to specific apps like iMovie, no full library sync.
- VLC Player: Wireless transfer over WiFi, supports many formats, saves videos inside the VLC app or iPad's Photos app.
- iCloud: Cloud syncing across Apple devices, automatic backup, but needs internet and storage.
- Google Drive: Cross-platform cloud upload/download, good for users working on multiple devices..
iPad is a great companion to spend your leisure time with, especially when you want to watch videos on a larger screen. This guide provides reliable and hassle-free methods for transferring videos from your PC to your iPad, whether they are movies, TV shows, or music videos. Follow this guide to add all your favorite video files to your iPad for seamless viewing anywhere, anytime.
How to Transfer Videos from PC to iPad Without iTunes
Supports: Videos in Camera Roll, Movies, TV Shows, and other videos in MP4, MOV, M4V, WMV, RM, MKV, AVI, FLV formats
EaseUS MobiMover is a versatile and user-friendly software designed to transfer videos from PC to iPad efficiently and safely without using iTunes. It supports a wide range of video formats and offers a seamless one-click transfer process, making it an ideal choice for managing mobile data. It works via USB connection, ensuring stable and secure transfers without overwriting or compromising the original video quality.
Why Choose EaseUS for Data Transfer:
- Wide Format Support: Compatible with various video formats such as MP4, MOV, AVI, MKV, etc.
- Easy to Use: Intuitive interface that simplifies video transfer with just a few clicks.
- Fast and Reliable: Quickly moves large video files or multiple videos to iPad without losing quality.
- Additional Features: Convert videos to MP3, download videos from YouTube, transfer photos from PC to iPad, etc.
How to Transfer Videos from PC to iPad Without iTunes:
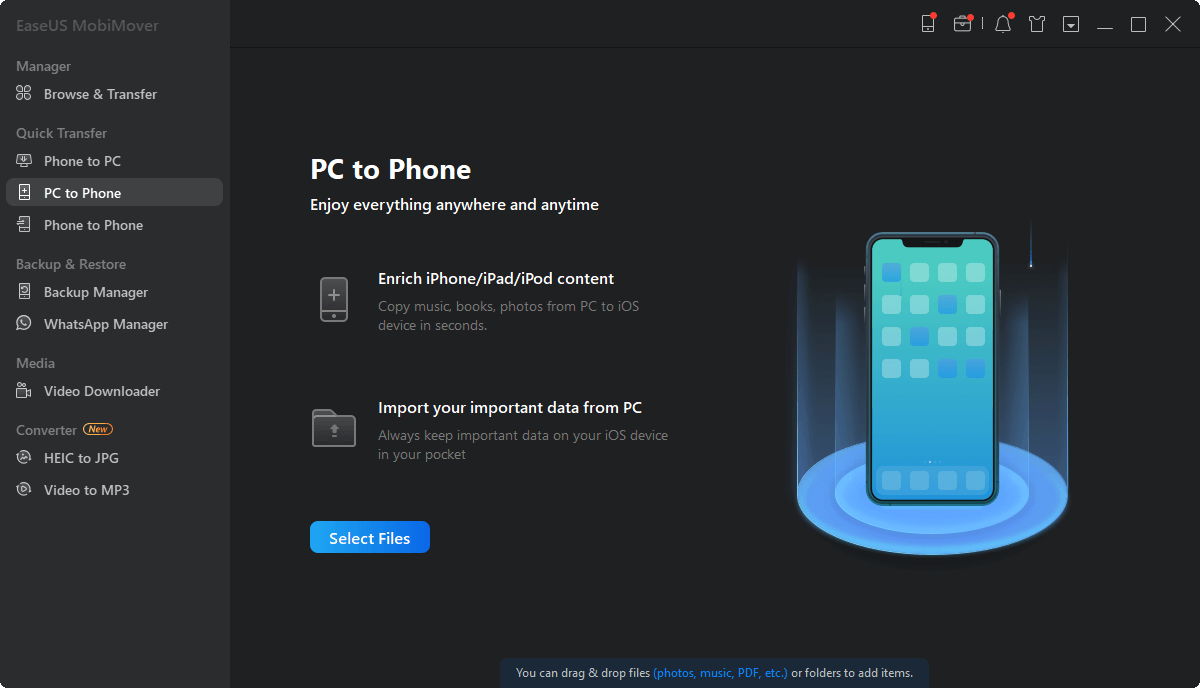
Step 1. Connect your iPad to your PC and start EaseUS MobiMover. Unlock your iOS device and click "Trust" in the prompt asking for you permission. Then go to "PC to Phone" > "Select Files".
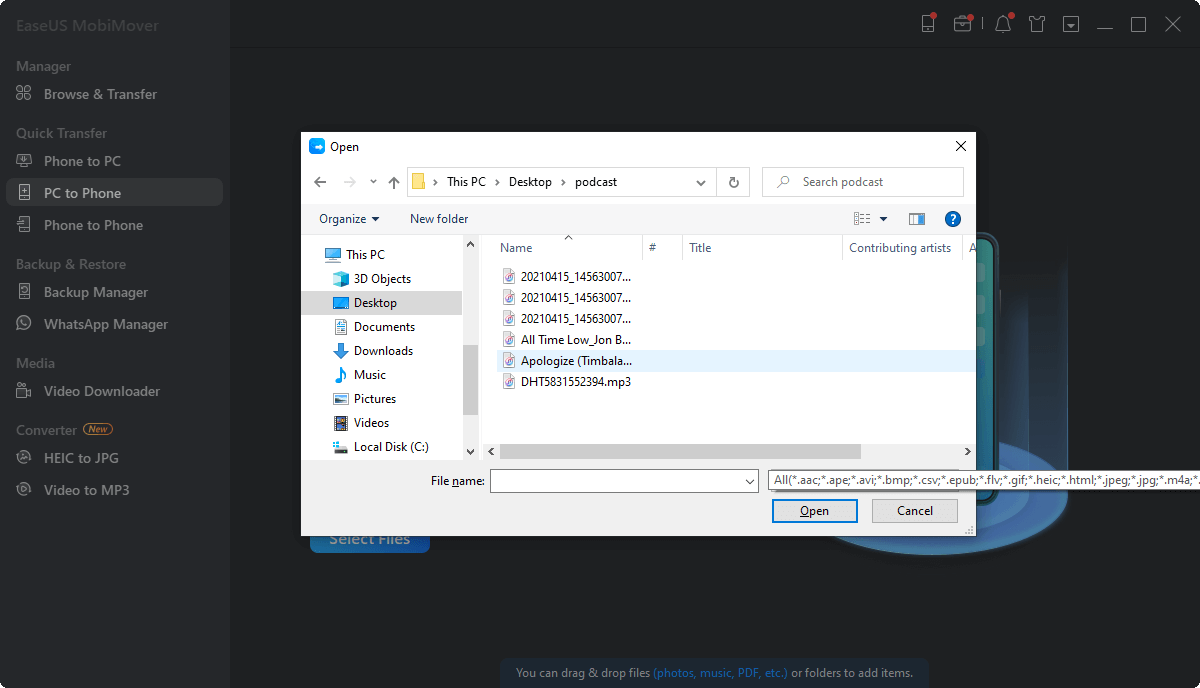
Step 2. Select the videos you want to transfer to your iPad and click "Open".
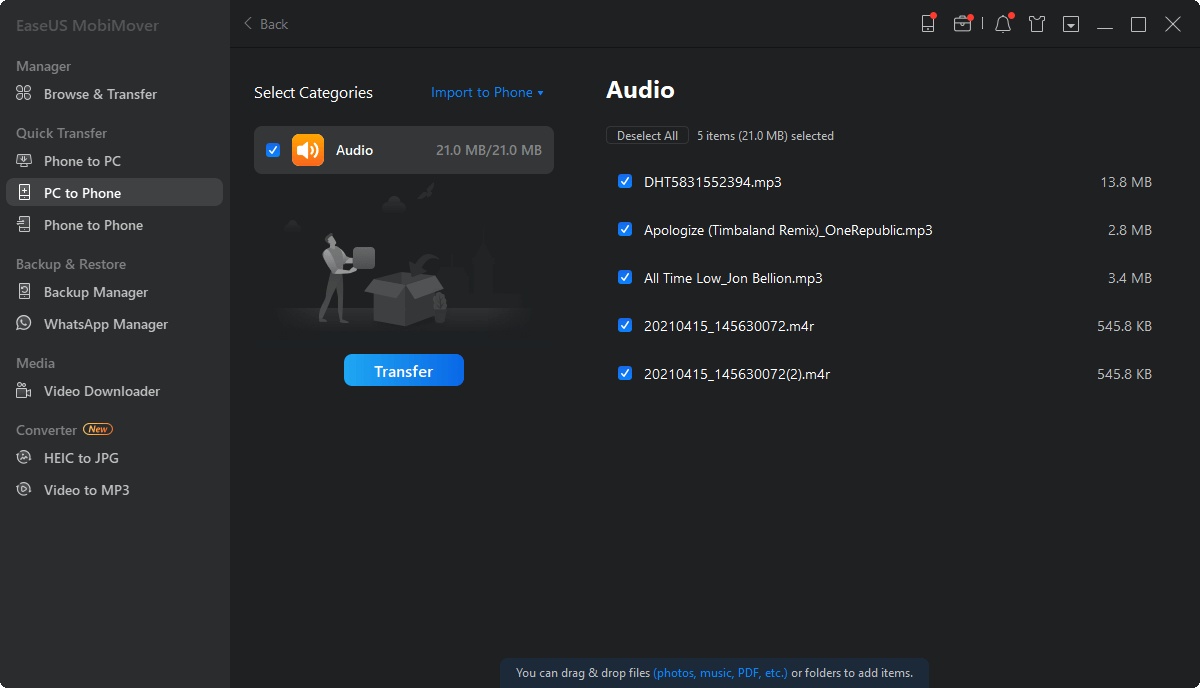
Step 3. Click "Transfer" to start transferring videos you selected from your PC to your iPad. When it has finished, you can go to check the items on your iPad.
This method is perfect for:
- Casual users who want a simple, straightforward way to transfer videos without technical hassle.
- Frequent media users who often add movies, TV shows, or personal videos to their iPad.
- Content creators who need quick syncing of video content for editing or presentation.
- iOS beginners who are seeking a user-friendly alternative to iTunes.
How to Transfer Videos from PC to iPad with iTunes
iTunes will help you in two ways. If you want to put movies or TV shows that are in your iTunes library to your iPad, you should use iTunes syncing. If you intend to transfer videos to iPad without syncing, using iTunes File Sharing instead.
Option 1. Transfer Movies/TV Shows to iPad with iTunes Syncing
Step 1. Connect your iPad to your computer with a USB cable and wait for iTunes to launch automatically.
Step 2. Unlock your iPad and trust the computer. If required, enter your iPad password.
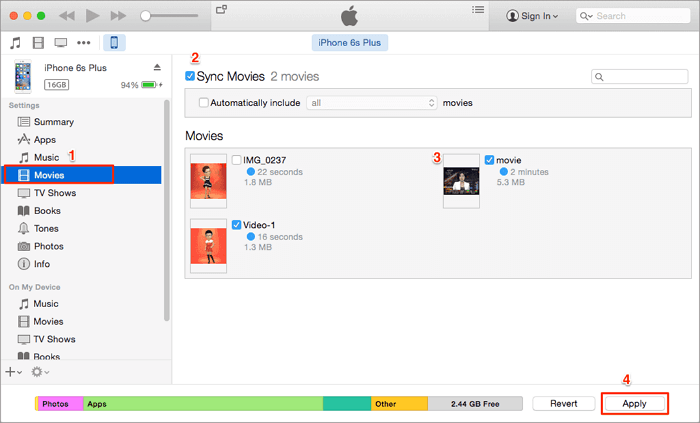
Step 3. Click the device icon. Under "Settings", choose "Movies" or "TV Shows" according to your needs.
Step 4. Click the checkbox next to "Sync Movies" or "Sync TV Shows" and choose the videos you want to transfer.
Step 5. Click "Apply" to start transferring videos from PC or laptop to your iPad.
![How to transfer videos from PC to iPad with iTunes syncing]()
This method is perfect for:
Transferring videos, especially ones purchased from the iTunes Store. Syncing your iTunes library ensures that selected movies or TV shows in your library are copied over to your iPad. However, one shortcoming is that it will replace the existing synced media of the same type. In other words, if your iPad already has movies or TV shows synced from another computer or iTunes library, syncing with a new iTunes library will remove those old synced videos and replace them with the ones from the new library.
Option 2. Copy Videos from PC to iPad with iTunes File Sharing
Step 1. Connect your iPad to your computer with a USB cable and run iTunes if it doesn't open automatically.
Step 2. Unlock your device and trust the computer. If required, enter your device passcode.
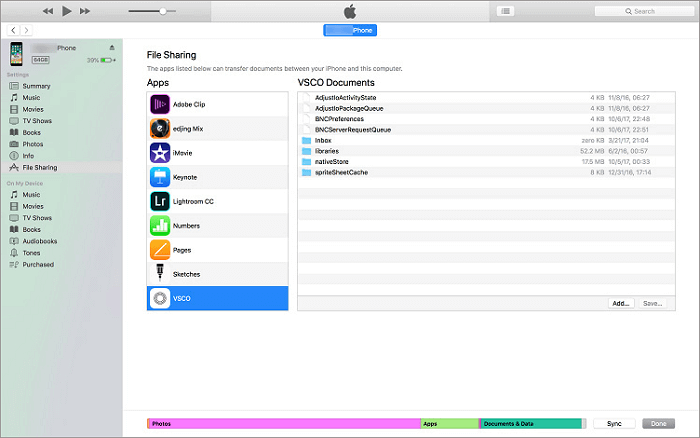
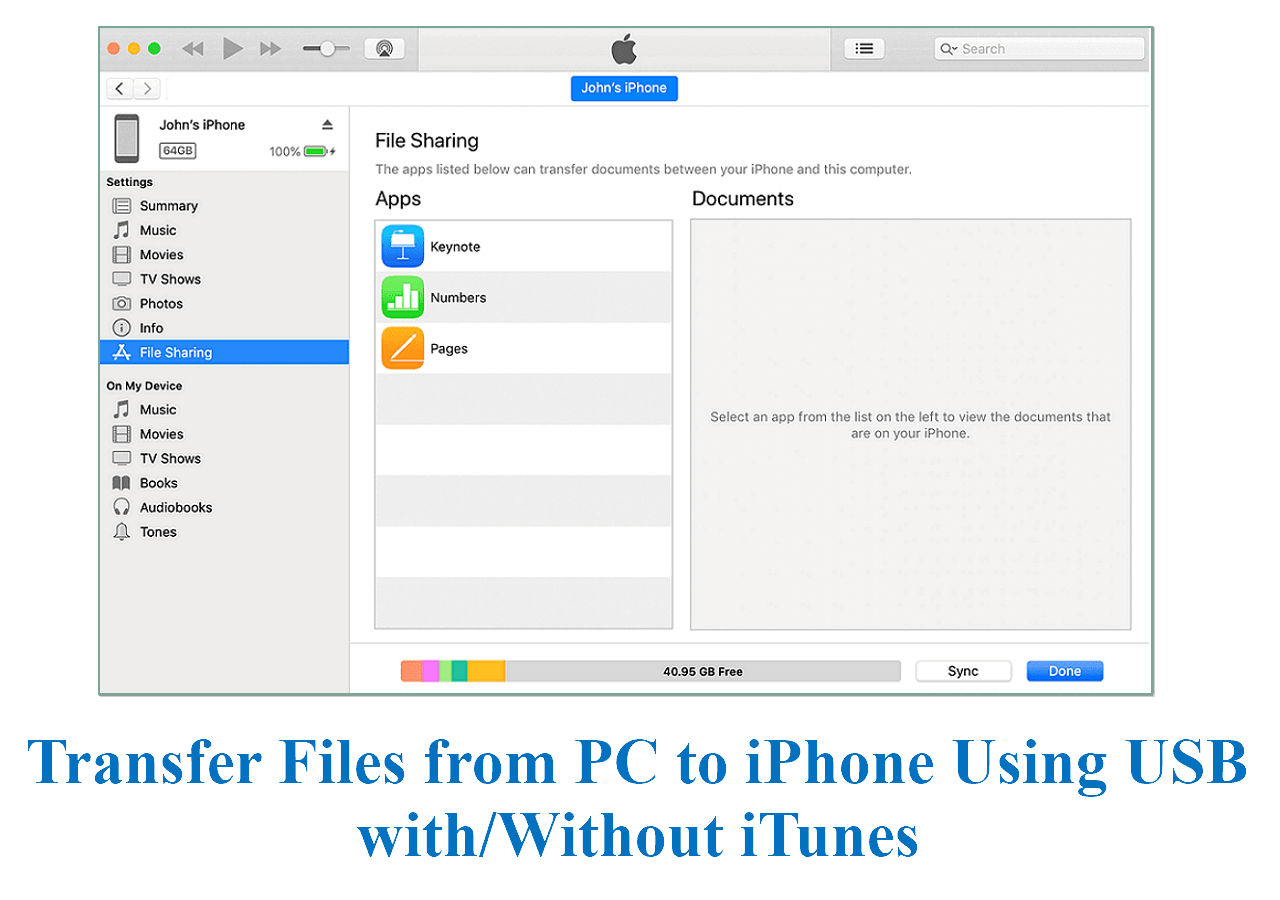
Step 3. Select the device icon and choose "File Sharing". Now you should see a list of the apps that support file sharing, including many video-related apps.
Step 4. Choose the app you want to copy the videos to, e.g. iMovie, and then add the video file to the app. You can either drag the videos you want to transfer to the window on the right side or click "Add File" to add the items to the app. Afterward, the file will be copied to your device automatically.
Step 5. When it has finished, Open "iMovie" and click the download icon.
Step 6. Select "iTunes" > "Import [number] Files". By doing so, you can transfer videos to your iPad from PC successfully.
![How to transfer videos from computer to iPad with iTunes file sharing]()
This method is perfect for:
Copying videos directly to specific apps on your iPad that support file sharing, such as iMovie. It allows transferring video files without full library syncing, giving flexibility to move files to particular apps for editing or playback without affecting existing iTunes media sync settings.
How to Copy Videos from PC to iPad with VLC
VLC is a cross-platform media player that is available on both Windows and iOS. To add videos to iPad via VLC, you need to install the VLC app on your iPad and ensure both devices are on the same Wi-Fi network. It's a convenient way to transfer videos from PC to iPad wirelessly.
How to Transfer Videos from Laptop to iPad:
Step 1. Open the VLC app and click the icon in the top left corner.
Step 2. Enable "Sharing via WiFi," which will show an IP address.
Step 3. On your PC or laptop, open a browser and enter the VLC-provided IP address.
Step 4. To transfer videos from PC to your iPad, you can either add the items by drag-and-drop or click the plus icon. Then you will see the videos being transferred to your iPad wirelessly and automatically.
Step 5. The transferred items will be saved in the VLC app by default. To save videos to the iPad's Camera Roll, select the videos in VLC, share, and choose "Save Videos."
![How to transfer videos from PC to iPad with VLC]()
This method is perfect for:
Wireless video transfer from your PC to your iPad over the same WiFi network. It allows you to upload videos in various formats directly into the VLC app without cables or iTunes. VLC supports almost all video file types, including MKV, AVI, etc., which are not natively supported by the iPad. Thus, you can play unsupported video types and store media within the VLC app. You can also optionally save transferred videos to the iPad's Photos app for broader use.
How to Add Videos from PC to iPad with iCloud
Apart from the VLC app mentioned above, there are other options for you to transfer videos from PC to iPad over a network connection. iCloud is Apple's solution for you to share files across your iPhone, iPad, iPod, Mac, and PC. Before you start, you should know that the videos you want to transfer are at most 5 minutes in length and 720p in resolution, which is quite limited. If your videos don't meet the requirement, switch to other ways available in this guide.
How to Transfer Videos from PC to iPad using iCloud:
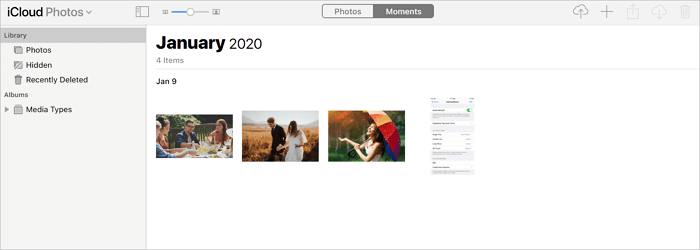
Step 1. On your iPad, go to "Settings" > [your name] > "iCloud" > "Photos" and enable "iCloud Photos".
Step 2. Upload the video files you want to transfer to iCloud.
- If you have installed iCloud for Windows, go to iCloud settings and enable "iCloud Photo Library" and "Upload new photos and videos from my PC", then copy the videos to the folder under the latter option.
- If not, go to iCloud.com and sign in with the Apple ID you use on your iPad. Select iCloud Drive, drag and drop the video files from your desktop to the iCloud Drive window. Then, you can choose to view uploaded content on your iPad or move it to iCloud Photos.
Step 3. When the syncing process has been completed, open the Photos app on your iOS device to check the videos.
![How to copy videos from PC to iPad with iCloud]()
This method is perfect for:
Those with reliable internet connections and sufficient iCloud storage, as syncing videos depends on upload and download speeds and available space. The iCloud method is a great choice for users looking for an integrated Apple ecosystem experience with effortless access, backup, and recovery of their videos and other media.
How to Transfer Videos from PC to iPad with Google Drive
Similar to iCloud, the file storage service Google Drive also enables you to store files in cloud storage and sync files across your devices. Other choices include Dropbox, OneDrive, Tresorit, and more.
To add videos to iPad from PC via Google Drive:
Step 1. Go to drive.google.com and sign in with your Google account.
Step 2. Click the "New" button and choose "File upload" or "Folder upload".
Step 3. Find and select the files or folders you'd like to transfer and click "Upload".
Step 4. Download and install Google Drive for iOS on your iPad from the App Store.
Step 5. Sign in with your Google account and now you could access the items from your computer. Download the videos to your device if necessary.
![How to add videos to iPad from PC with Google Drive]()
This method is perfect for:
Those who often work across multiple devices and prefer cloud-based storage for easy file sharing and management. It works well for users who need to transfer large files or multiple videos without worrying about limited device storage, as Google Drive offers 15 GB of free cloud storage and affordable upgrade options.
The Bottom Line
Which way will you use to get a video file from PC to your iPad? For you to make a better choice:
| Method |
Effectiveness |
| MobiMover |
A versatile iOS data transfer tool to transfer videos, music, photos, files, and other content. |
| VLC |
A media player to share videos between your iPad and computer wirelessly. |
| iCloud |
An official cloud service to back up data, including videos. |
| Google Drive |
A third-party cloud service created by Google. |
| iTunes |
A perfect media service to transfer music and videos. |
- - EaseUS MobiMover not only supports the video transfer between an iPhone/iPad and a computer but also assists you in downloading a video from websites like YouTube, Facebook, Twitter, and more to your computer or iPhone/iPad.
- - iCloud is the only option that saves the photos in your iPad camera roll directly.
- - VLC is a completely free solution for you to transfer videos from PC to iPad wirelessly.
- - Google Drive provides you with more free space compared with iCloud but saves the synced files in its own app.
- - iTunes is a good choice to transfer files that are in the iTunes library.
Use the method best suited to your needs to copy videos to your iPad and then play or edit the videos on your device as you like.
Frequently Asked Questions About Transferring Files from PC to iPad
The following are some answers to questions that are frequently asked by users. If you want to know the answers, check the following instructions now.
1. How can I transfer videos from my iPhone to my PC?
Many solutions can be used to transfer videos from your iPhone to your PC. If you want to transfer iPhone photos and videos, then the Photos app, iCloud, and File Explorer, can help you do it with ease. Or if you want a quicker way, you can consider using EaseUS MobiMover, which excels at transferring large videos from your iPhone to PC without quality loss. Besides, it has no limit to the number of videos you can transfer.
2. How do you copy your home videos from a computer onto your iPhone/iPad?
You can transfer home videos from a computer onto your iPhone or iPad with some iPhone data transfer tools like EaseUS MobiMover, which provides you with a fast, safe, and reliable way to transfer data. Other than that, there is no feasible way to transfer home videos only from a computer to an iPhone or iPad.
3. How do I transfer voice memos from iPhone/iPad to a computer?
Two options are available for transferring voice memos from your iPhone/iPad to a computer - using Share Sheet or iCloud. The Share Sheet way is more available for transferring specific voice memos and the iCloud can sync all voice memos to your computer. Which to use depending on your choice.
To transfer voice memos using the Share Sheet:
- Open the Voice Memos app on your iPhone and select the item you wish to transfer.
- Click "More" > "Share." Choose the way you wish to share your voice memos. You can choose Email, AirDrop, Google Drive, etc.
- Then, you can head to your computer and sign into your Email account, Google Drive, or other accounts to download the voice memos. Note that AirDrop is only available on Apple devices, so you need to click "Accept" on another iOS device.
To transfer voice memos using iCloud:
- Go to "Settings" > [your name] > "iCloud" and toggle on "Voice Memos".
- On your PC, open a browser and go to iCloud.com, sign in with your Apple ID and password. Choose "Voice Memos" and download the voice memo to your PC.
NEW
HOT
