Four ways for you to import photos from iPad to PC running Windows 10.
As you need to transfer photos from iPhone to PC in Windows 10 sometimes, you may also need to transfer photos from iPad to Windows 10 PC to make a backup, edit the photos more conveniently from a computer, or create a video from the photos.
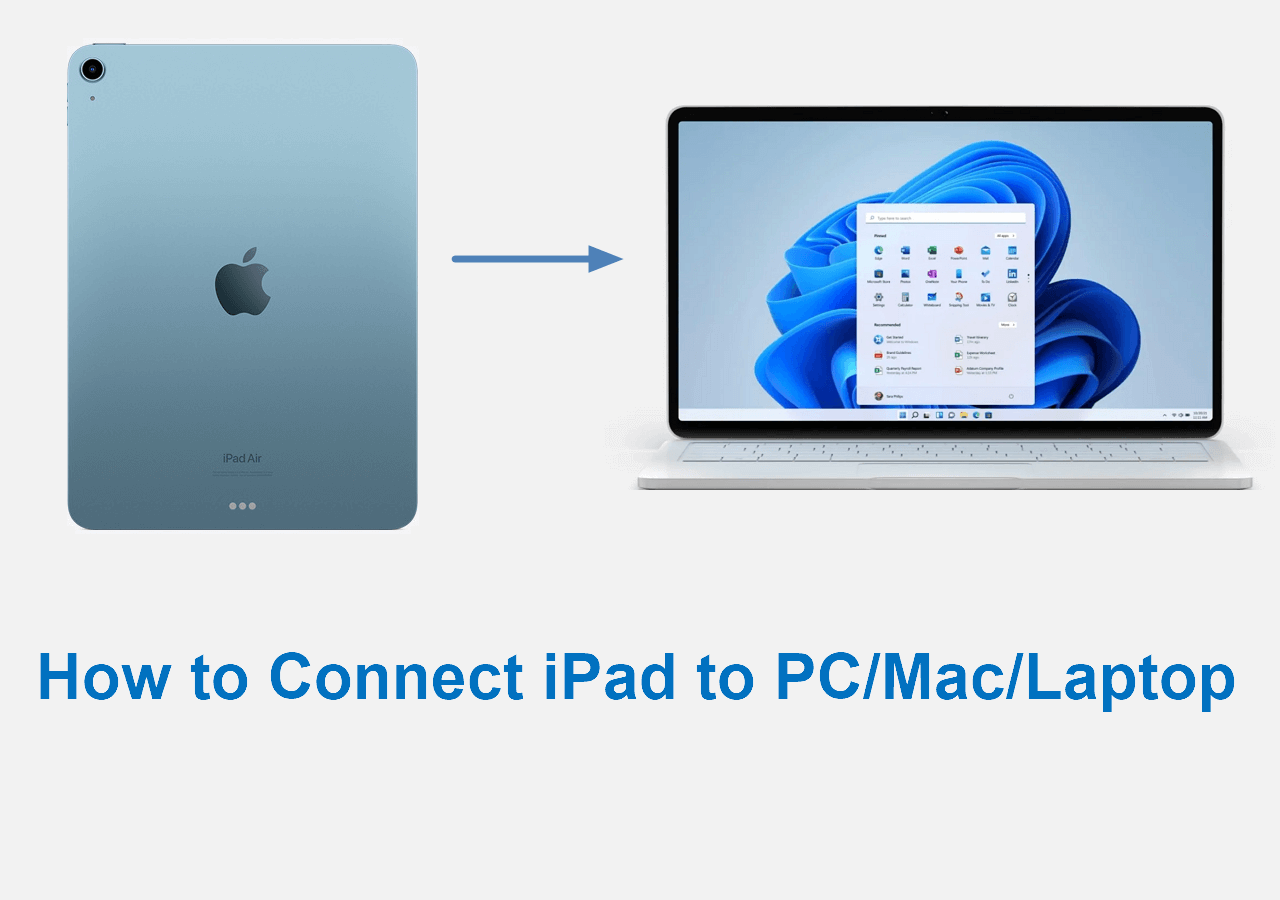
Given that, here we will show you how to download photos from iPad to PC in Windows.
Method 1. How to Transfer Photos from iPad to Windows 10 PC Without iTunes
Without installing iTunes, you can download photos from iPhone/iPad to PC in Windows 10, Windows 8, or even Windows 7 with the help of EaseUS MobiMover Pro. It's a reliable iOS data transfer software tool as well as a free video downloader and will do a great help when you want to:
- Transfer files between an iPhone/iPad/iPod and a computer (Mac or PC)
- Copy files from one iOS or iPadOS device to another.
- Download online videos from Facebook, Twitter, YouTube, and other sites to a computer or iPhone/iPad for offline watching
Except for photos, other types of content, like videos, music, ringtones, contacts, messages, and books, are also transferrable using this tool.
To transfer photos from iPad to PC in Windows 10:
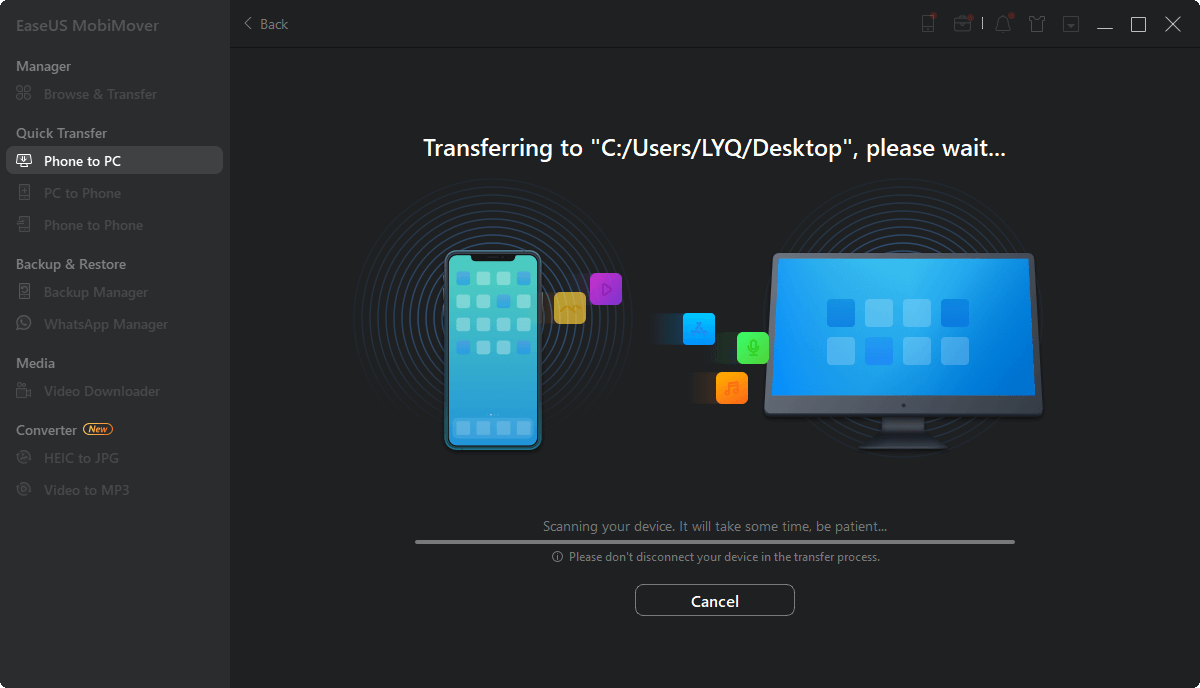
Step 1. Connect your iPad to PC with a USB cable and run EaseUS MobiMover. Choose "Phone to PC" under "Data Transfer" to transfer photos from iPad to PC. Then, click the "Next" button to move on.
Step 2. To transfer photos from your iPad to PC, make sure that the "Pictures" is selected. As you can see, you can choose to move all the supported files from your iPad to the computer at once. Besides, MobiMover enables you to customize the storage path for the exported data as you need.
Step 3. Click the "Transfer" button to start transferring photos from your iPad to PC. Except for exporting files from iPad to PC, you can also use MobiMover to import data from PC to iPad with "PC to Phone" mode.
Since it also allows the data transfer from a computer to an iDevice, you can transfer photos from Windows 10 to iPad if you need to.
Method 2. How to Import Photos from iPad to Windows 10 via Photos
Apple released the Photos app first in Windows 8. And it's still available in Windows 10. The Photos app is a built-in utility that enables you to manage photos on the computer and import pictures from another device, including your iPhone, iPad, and iPod Touch. Therefore, you will be able to transfer photos from iPad to PC in Windows 10 with the help of the Windows 10 Photos app.
For your information, there is also an app on Mac called Photos which allows you to transfer photos from iPhone to Mac.
To download photos from iPad to PC in Windows 10:
Step 1. Connect your iPad to the PC with a USB cable.
Step 2. Unlock the device and trust the computer. If required, enter your iPad passcode and continue.
Step 3. Go to the "Start" menu and launch "Photos".
Step 4. In the Windows 10 Photos app, click "Import" and choose "From a USB device".
Step 5. Check the items you want to transfer and click "Continue" to start transferring your iPad photos to Windows.
![How to transfer photos from iPad to PC in Windows 10]()
One drawback of using Photos is that you can't transfer photos to Windows by folder. That means all the photos and albums will be stored in the same location regardless of its folder.
If the Photos app is not working in Windows or you can't import photos from iPhone/iPad to PC, don't worry and follow the guide we provided to solve the issue.
Method 3. How to Download Photos from iPad to Windows 10 PC via Windows Explorer
As long as the PC can recognize your iPhone, iPad, or iPod, you can directly move photos from the device to computer via the Windows Explorer (called File Explorer in Windows 10). Similar to the Photos app, using Windows Explorer can't help to transfer photos to Windows by folder. If you want your iPad pictures to be well-organized on your PC, using EaseUS MobiMover introduced in method 1 is advisable.
To transfer photos from iPad to PC in Windows 10:
Step 1. Connect your iPad to your computer with a USB cable.
Step 2. Unlock your device and click "Trust" or "Allow" in the prompt to continue.
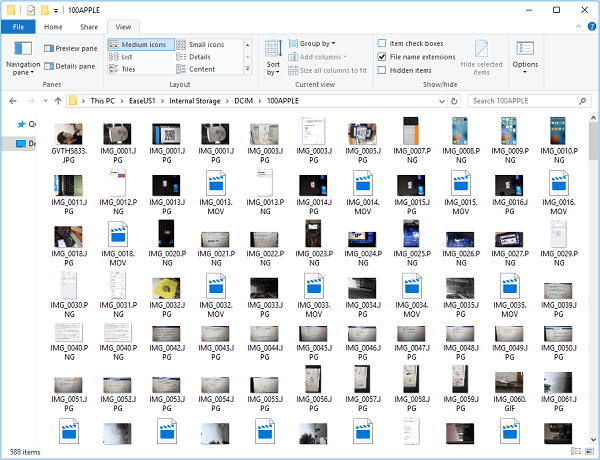
Step 3. If your computer recognizes the iDevice successfully, go to "This PC" > [your iPad's name] > "Internal Storage" > "DCIM" > "Apple100" to copy the photos from your iPad to PC.
![How to download photos from iPad to PC in Windows 10]()
Method 4. How to Transfer Photos from iPad to PC in Windows Using iCloud
Being different from the three tips above, using iCloud to sync photos from your iPad to PC requires no USB cable. Instead, it needs a network connection to work properly. Apart from a network connection, you also need to make sure you are using the same Apple ID on your devices and there is enough space in iCloud for you to store the photos you want to transfer. That means you should use iCloud to share data between your own devices.
iCloud will help you to transfer iPhone or iPad photos in two ways, depending on whether you have installed iCloud for Windows or not.
If you have installed iCloud on your PC:
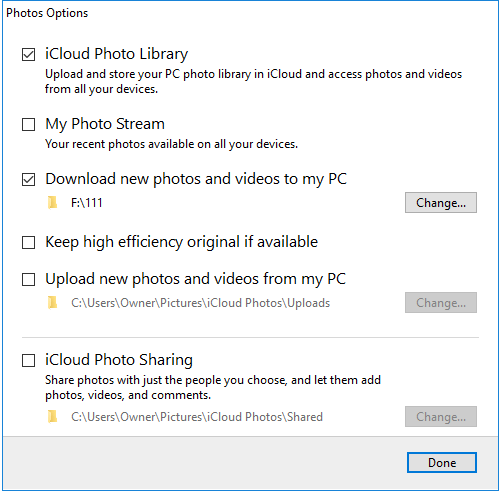
Step 1. On the computer, open iCloud settings and check the "Photos" option.
Step 2. In the pop-up window, enable "iCloud Photo Library" and "Download new photos and videos to my PC". Under the latter option, you can change the storage path for the photos to be imported.
Step 3. On your iPad, go to "Settings" > "your name" > "iCloud" > "Photos" and turn on "iCloud Photos". Then your iPad photos will be uploaded to iCloud and downloaded to your PC automatically over the network.
Step 5. Go to the folder shown under the option ''Download new photos and videos to my PC" to check the items.
![How to transfer photos from iPad to PC using iCloud]()
If you don't want to install iCloud:
Step 1. Turn on "iCloud Photos" on your iPad via "Settings".
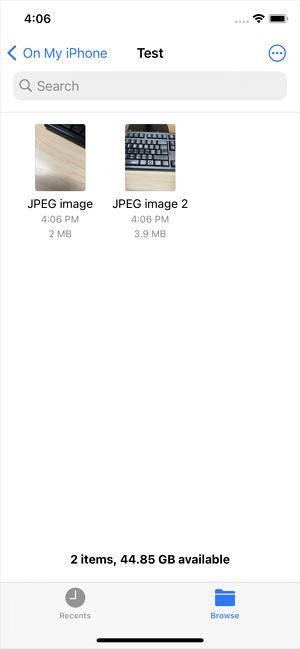
Step 2. On Windows 10, go to visit iCloud.com and sign in.
Step 3. Choose "Photos" among the options and you will see the photos from your mobile device.
Step 4. Select the photos you want to transfer and download these items to your Windows PC to achieve your goal of transferring photos from iPad to PC. For a detailed guide, refer to the guide on how to download iCloud photos to PC.
![How to import photos from iPad to PC in Windows 10 via iCloud.com]()
If you also need to get files (Word/Excel/PPT) from iPad to PC or vice versa, using iCloud Drive provided by the iCloud service is a good choice.
The Bottom Line
Now you know how to import photos from an iOS device to a Windows PC. Other than using the Photos app, all the other ways also allow you to import photos from Windows to iPad.
Apply the one that fits your needs most to download iPad photos to PC within minutes.