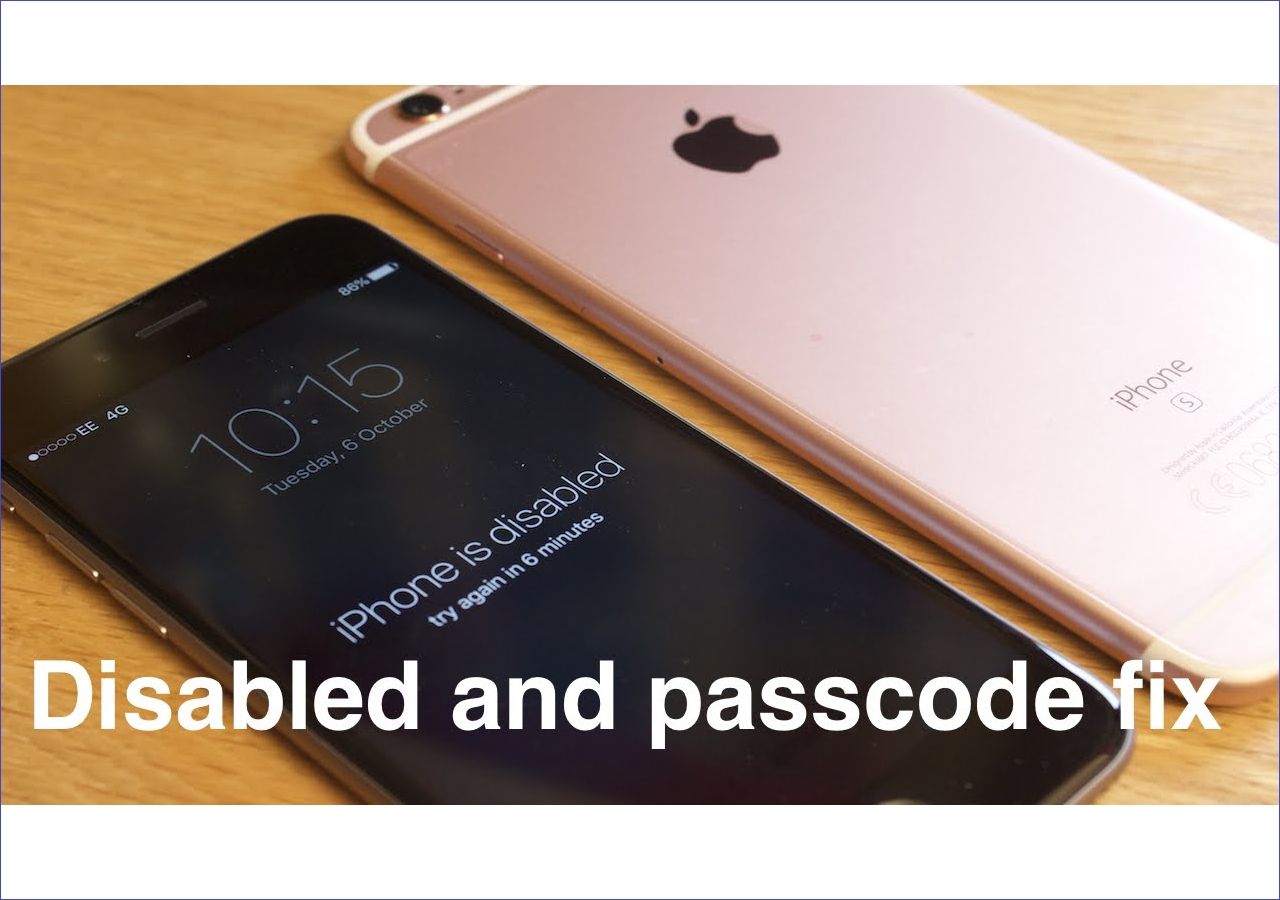
Forgetting the iPhone passcode can be annoying and frustrating because you have to spend a lot of time and energy finding solutions to unlock iPhone. But you don't have to be too anxious about this problem if you're using an old version of the iPhone since you can unlock iPhone without computer using an emergency call screen. As for some latest iPhones, you can also find your unlock solutions in this detailed guide.
| Fixes |
Efficiency |
Difficulty |
| 1️⃣Emergency Call |
Less effective: Unlock iPhone using emergency call by hacking directly. |
Complex |
| 2️⃣iPhone Unlocker Tool |
Highly effective: unlock iPhone with computer. |
User-friendly |
| 3️⃣Siri |
Less effective: unlock iPhone without passcode by hacking Siri. |
Complex |
| 4️⃣iTunes |
Effective: Restore iPhone by iTunes to unlock it. |
Moderate |
| 5️⃣Find My |
Effective: Erase the device using the Find My feature. |
Moderate |
Part 1. How to Bypass iPhone Lock Screen Using Emergency Call [Only for iOS 6.1]
Can you really unlock iPhone by calling it?Before you proceed, it's worth mentioning that this solution only works for iPhones running iOS 6.1. And it doesn't allow you to access all data on your iPhone. Instead, you can only access the contacts, phone dialer, and photos after unlocking iPhone without passcode. If you want to access the rest data of your phone or if you want to unlock an iPhone running iOS 6.1 or later, you should try other solutions instead.
Now follow the steps on how to unlock iPhone passcode without computer using emergency call and enter the emergency code to unlock iPhone:
Step 1. Slide to unlock your iPhone and type in any passcode. Tap "Cancel" on the iPhone passcode screen.
Step 2. Slide to unlock your iPhone again, and then tap "Emergency Call."
Step 3. Hold the Power button until the "Slide to power off" icon appears. Tap "Cancel."
Step 4. Dial 112 or 119, click the emergency call button and immediately click the "Cancel" button. Press the power button to turn off your screen.
Step 5. Press either the Home or Power button to turn on the screen. Slide to unlock your iPhone.
Step 6. Hold the power button for about 3 seconds and click the "Emergency Call" before the "Slide to turn power off" appears on the screen. Then, your iPhone will be unlocked.
Further reading about iPhone unlocking issue:
Part 2. How to Unlock Any iPhone with an iPhone Unlocker
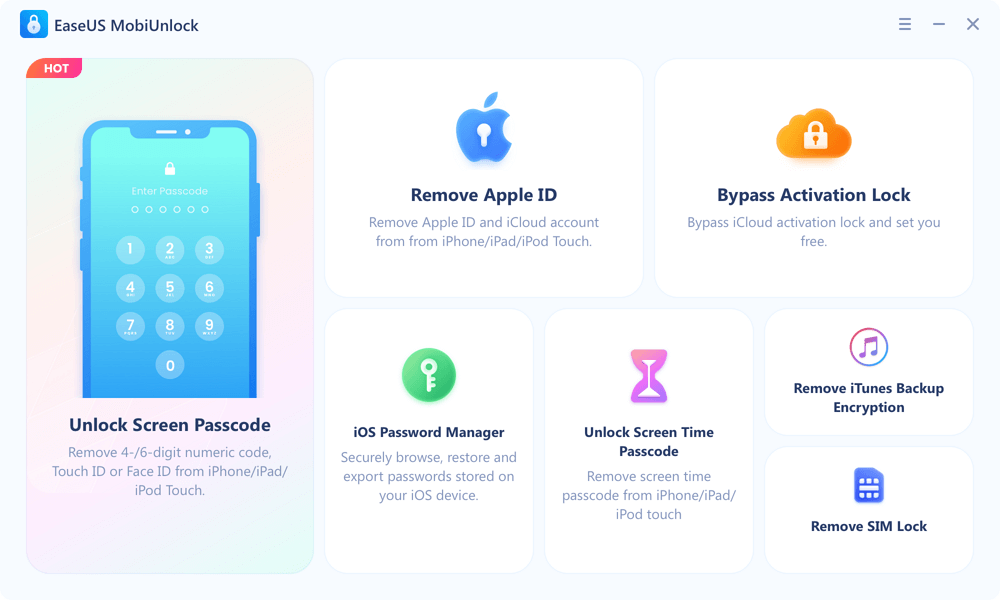
If you prefer a more accessible and more convenient way to unlock your iPhone, you shouldn't miss this professional and reliable iPhone unlock software - EaseUS MobiUnlock. With it, you can remove a 4-digit code, 6-digit code, Touch ID, or Face ID from your device. Not just that, it is also useful for a variety of scenarios, such as:
To unlock an iPhone with EaseUS MobiUnlock:
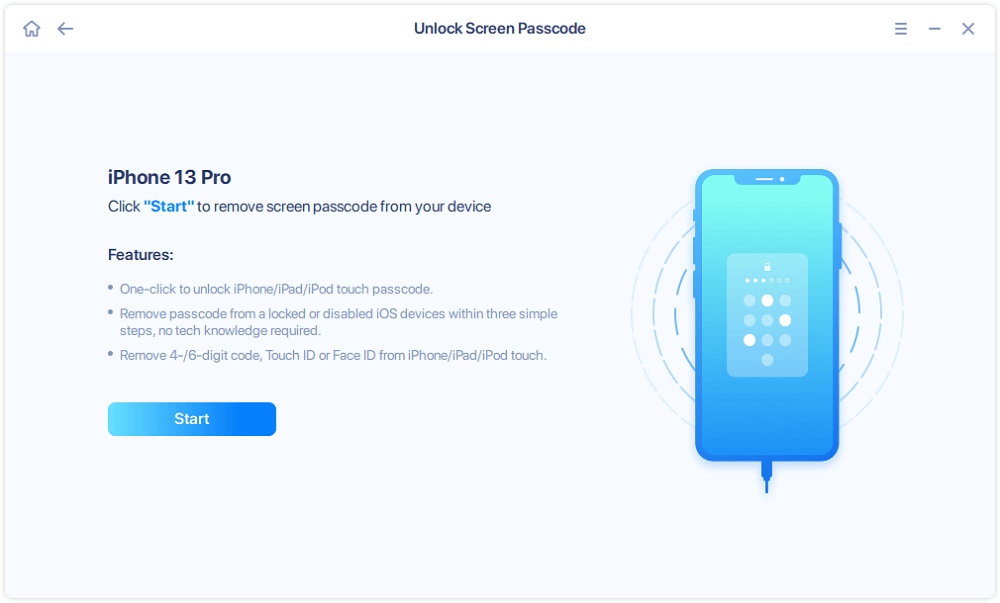
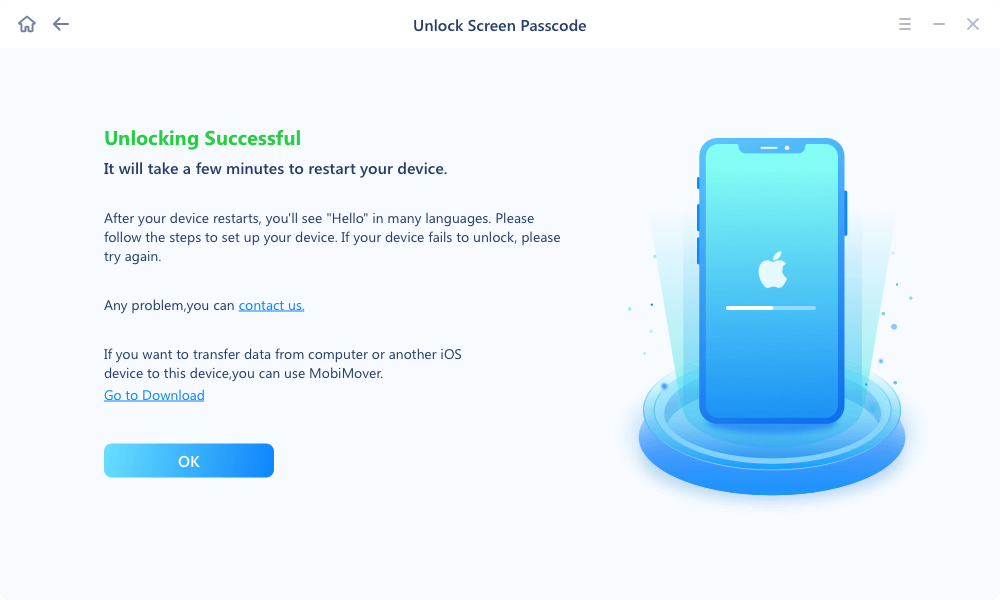
Step 1. Download and open EaseUS MobiUnlock, and then select "Unlock Screen Passcode."
Step 2. Connect the iPhone to the computer and click "Start" to go on.
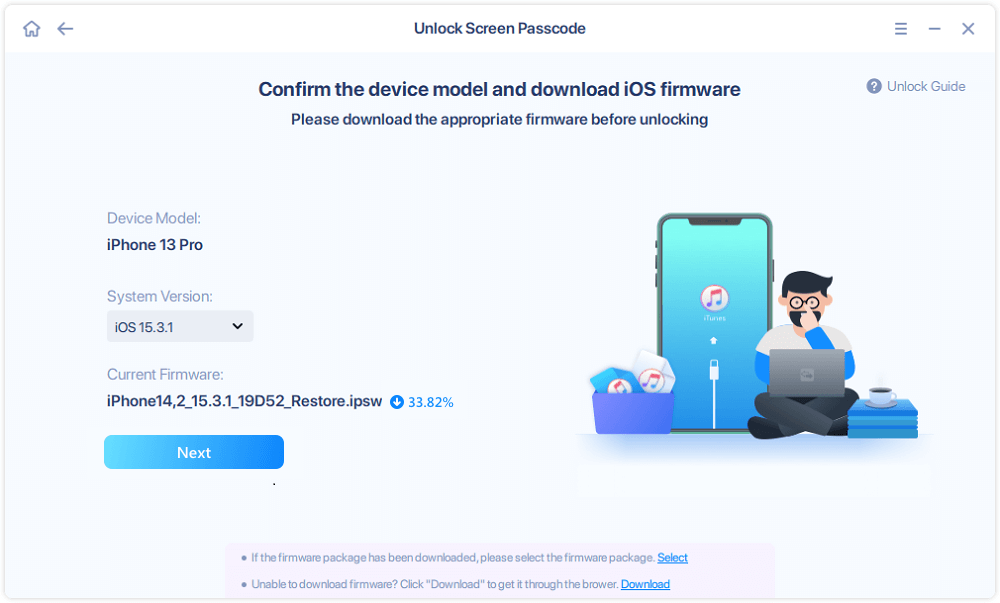
Step 3. Check your device model and click "Next" to download the latest version of firmware for your device. If the firmware has been downloaded already, select the package manually.
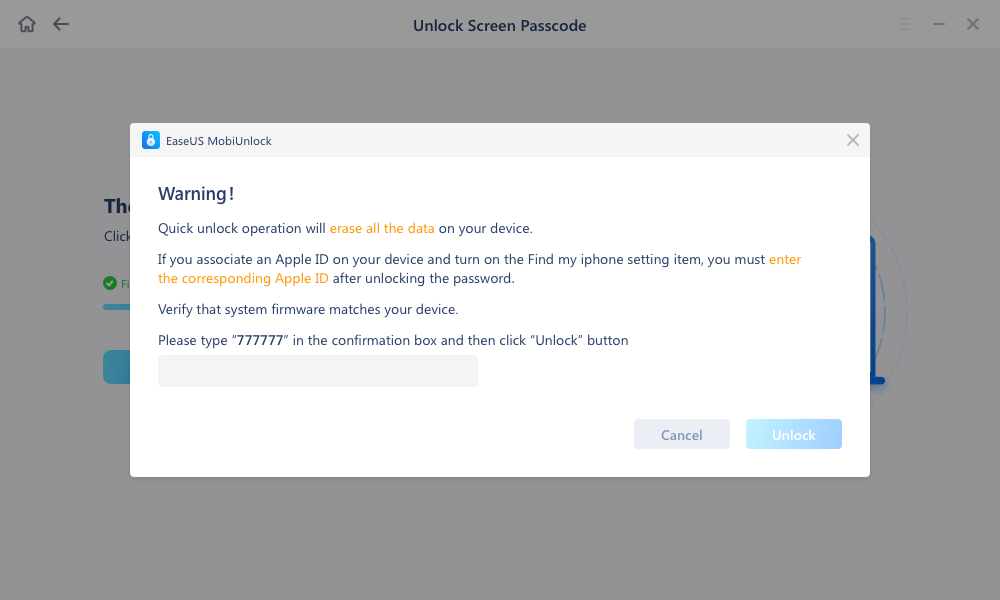
Step 4. After you download or select the firmware, click "Unlock Now." Then, a now window will pop up to let you enter the information, just do as it requires and click "Unlock" again to remove your iPhone password.
Step 5. Wait for the process to finish. Afterward, you iPhone will be reset and the password will be removed.
Part 3. How to Bypass iPhone Passcode with Siri [Only for iOS 10]
If your iPhone is running iOS 10 and has active internet, you can use Siri to unlock your device.
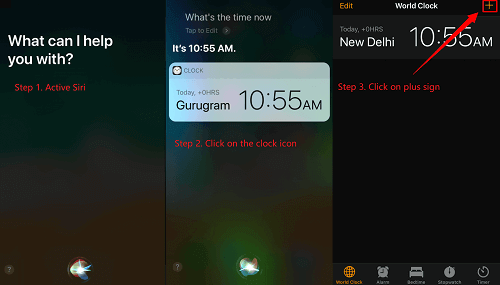
Step 1. Long press your home button to activate Siri > Ask for the "What's the time now?"
Step 2. Then, Siri will display the local time. Once the clock icon appeared, click it.
Step 3. Then, you will see a World Clock with some small icons, as the following picture shows. Just click on the plus sign in the upper right corner.
![Unlock iPhone with Siri]()
Step 4. You will see a search box, type any characters in it and "Select All' these characters.
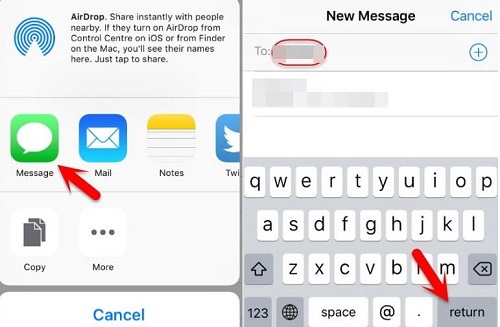
Step 5. Next, you will see several options. Tap on "Share" to continue. Select the Message.
Step 6. From the message page, tap any character in the "To" field and tap "return" from your keyboard.
Step 7. Wait for a while and press the Home button, and then your iPhone will be unlocked.
![Unlock iPhone with Siri]()
Part 4. How to Unlock iPhone or iPad with iTunes
If you've previously synced your iPhone with iTunes on a particular computer, you can restore it from that computer. This will erase all the content and settings (including your passcode) from your device. But it doesn't matter if you've made a backup before. The steps on how to unlock iPhone with iTunes are detailed below.
Step 1. Put your iPhone or iPad in recovery mode.
iPhone with FaceID, iPhone SE (2nd Generation), iPhone 8/8 Plus: Press and then quickly release the Volume Up button > Press and then quickly release the Volume Down Button > Press and hold the Side button until you see the Apple Logo.
iPhone 7 and iPhone 7 Plus: Simultaneously press and hold the Volume Down and the Sleep/Wake button > Release both buttons when the Apple Logo appears on the screen.
iPhone 6s, iPhone 6s Plus, or iPhone SE (1st Generation): Simultaneously press and hold the Home button and the Sleep/Wake button > Release the buttons when you see the Apple Logo.
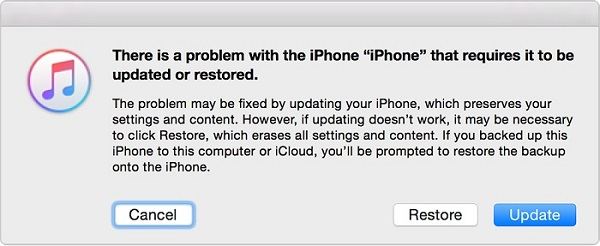
Step 2. Restore your iPhone or iPad.
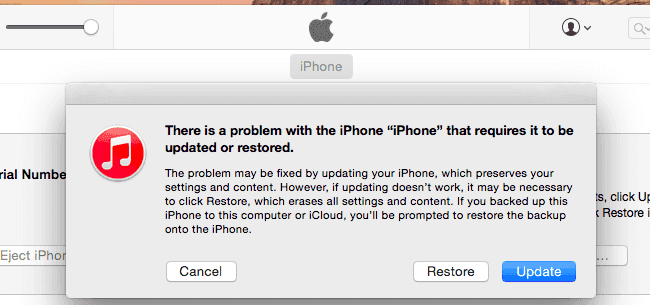
- Launch the latest version of iTunes on your computer.
- Connect your iPhone to the computer, and then you'll see a window saying, "There is a problem with the iPhone that requires it to be updated or restored."
- In that window, select "Restore" to erase your iPhone.
Step 3. Set up your iPhone as new.
![Restore iPhone from iTunes]()
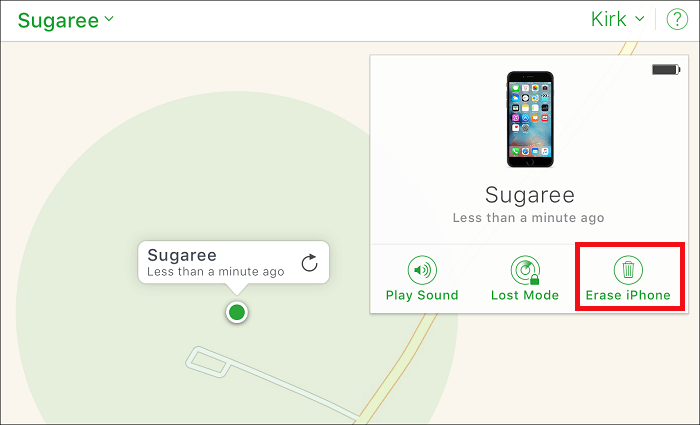
Part 5. Remotely Unlock iPhone with Find My Feature
The final solution to unlock an iPhone is via the Find My feature, which can help you remove everything, include your passcode, from your iPhone or iPad. But you need to make sure you've previously enabled Find My feature on your iPhone, and there is an active internet connection on your device.
Step 1. Open iCloud.com on your computer > Log in with your Apple ID and password.
Step 2. Choose "Find My" > Click on the "All Devices" option to view all the devices linked to your Apple ID.
Step 3. Select your locked iPhone or iPad.
Step 4. Choose "Erase iPhone."
Step 5. Click on the "Erase iPhone" button to erase the iPhone.
![Unlock iPhone remotely with Find My feature]()
Conclusion
That's all about how to unlock iPhone with an emergency call screen. As you can see, using an emergency call screen to unlock an iPhone only works for iPhones running iOS 6.1. And for other iPhones or iPads, you have to turn to the other four solutions for help.
FAQs on How to Unlock iPhone Using Emergency Call
If you have any questions about how to bypass iPhone lock screen using Emergency call, you may want to check the commonly asked questions below.
1. How to unlock iPhone passcode without computer?
You can use Siri or emergency call to hack the device and unlock it from passcode. But make sure your iPhone device meets the model requirements.
2. How do I unlock a disabled iPhone?
If you forget the lock screen passcode and enter the wrong passcode many times, your iPhone may be disabled for a hour or more. You can also refer to the methods mentioned in this post to unlock your iPhone.
3. Can you unlock an iPhone without passcode or Face ID?
It is recommended to try EaseUS MobiUnlock dirtectly to unlock iPhone without any effort.


 NEW
NEW HOT
HOT