Supports: Photos, videos, contacts, music, ringtones, books, documents, and more
Transferring files from Mac to iPhone or iPad can be done easily with third-party iPhone transfer software, Finder, AirDrop, or iCloud. If you prefer to transfer files from Mac to iPhone/iPad using USB, there are mainly three solutions for you.
🎯Transfer Files from Mac to iPhone/iPad with iOS Data Transfer Tool
Applies to: Photos, videos, music, ringtones, contacts, books...
If you are looking to transfer files listed above, using the iPhone transfer software - EaseUS MobiMover is advisable. With such a tool installed on your Mac, you will be able to transfer files between Mac and iPhone/iPad without data loss. What's more, you can also apply it to share data between iDevices including iPhone, iPad, and iPod touch.
Other than being an iOS data transfer tool, EaseUS MobiMover is also a video downloader that helps to download YouTube videos to Mac or save videos from Facebook to iPhone. If you like to download online videos for offline watching, you are highly recommended to try EaseUS MobiMover.
To transfer files from Mac to iPhone or iPad via USB:
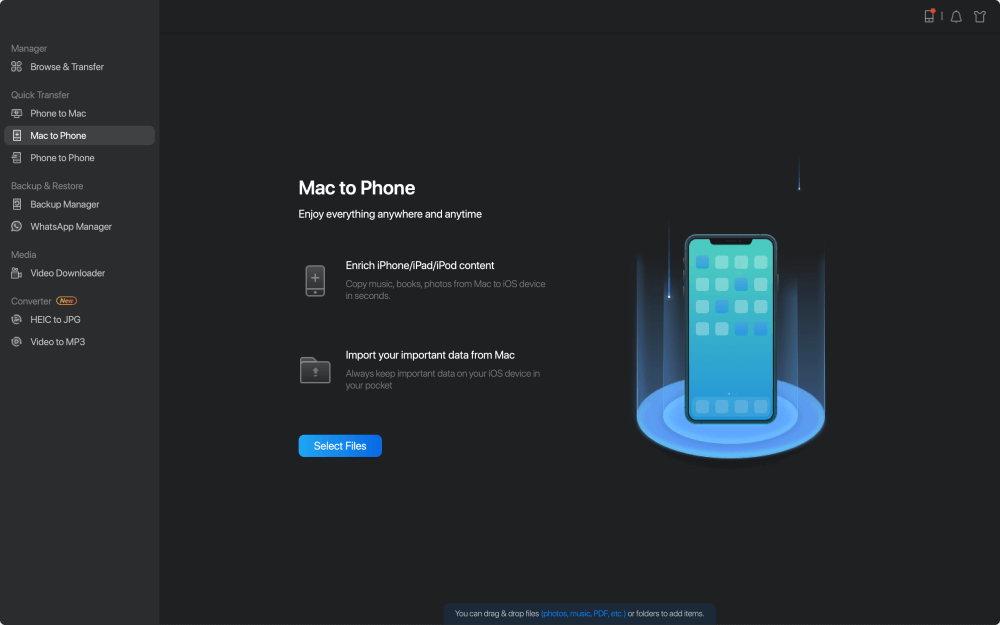
Step 1. Connect your new iPhone to your Mac via a USB cable and tap "Trust This Computer" on your device if a pop-up appears. Launch EaseUS MobiMover and navigate to "Mac to Phone" on the main interface like the sample image below. Click "Select Files" to start the process of transferring files from Mac to iDevice.
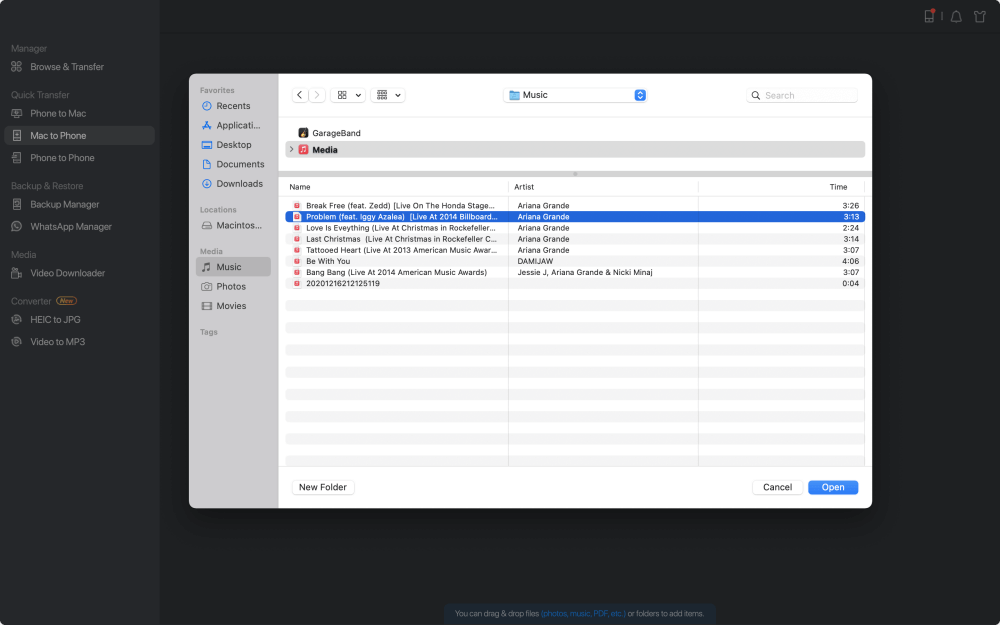
Step 2. You can browse files on your Mac and choose the items you want to transfer. After that, click "Open."
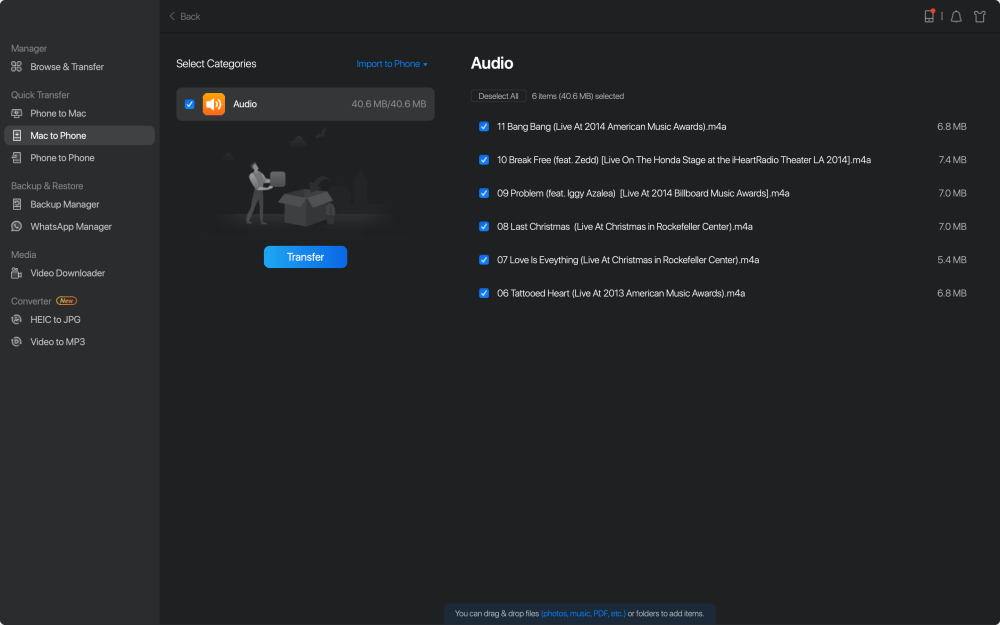
Step 3. You can preview the selected files on the right panel. If you want to add new items to transfer at this step, click "Add File" or directly drag files and drop to the appointed area. Finally, click "Transfer" to start transferring data from your Mac to iPhone at once. Don't disconnect your iPhone while transferring. When the process finished, go to the corresponding location on your iPhone and open the right application to check the synced data.
💻Sync Files from Mac to iPhone/iPad via Finder
Applies to: Music, movies, TV shows, books, photos, and documents
If you are using a Mac running macOS Mojave and later, Finder is here to help. As you may know, Finder has replaced iTunes in device backup and data syncing. When you want to transfer files from Mac to iPhone or iPad, Finder could fulfill your needs.
To transfer files from Mac to iPhone/iPad via Finder:
Step 1. Connect the iPhone or iPad to the Mac with a USB cable.
Step 2. In Finder, click your device from the sidebar.
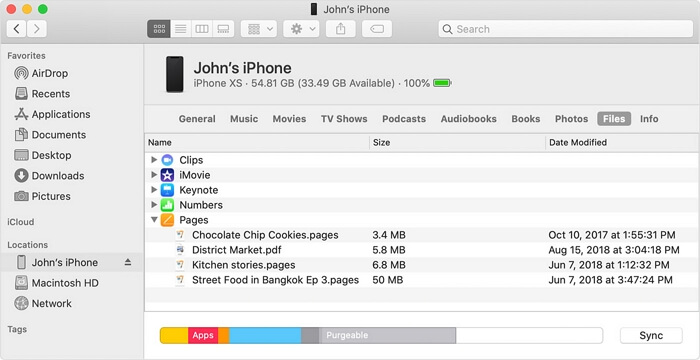
Step 3. Go to the "Files" tab and you will see a list of apps on your iPhone/iPad that supports file sharing.
Step 4. Drag files from Finder to the app with which you want to use these files.
Step 5. After syncing, go to the corresponding app on the mobile device to check these files.
![How to transfer files from Mac to iPhone using USB]()
Apart from transferring files from Mac to iPhone/iPad using USB, Finder also allows you to sync content between your Mac and iDevice over Wi-Fi.
📲Transfer Photos from Mac to iPhone/iPad Using USB
Applies to: Photos and videos
If you have a USB flash drive for iPhone and are looking to transfer photos and videos from Mac to your iPhone or iPad, you can do it directly without a USB cable. You will need to download and install a data transfer app on the iOS or iPadOS device to import files from the USB to your iPhone. The app you need depending on the brand of the flash drive.
To transfer photos from Mac to iPhone or iPad using USB:
Step 1. Connect the USB to your Mac.
Step 2. Copy and paste photos and videos from the Mac to the USB.
Step 3. Download and install the data transfer app on your iPhone or iPad.
Step 4. Connect the USB to your iDevice via the Type C hub.
Step 5. When you see the data transfer options, choose to copy files from the USB.
Step 6. Select items you want to transfer and follow the onscreen instruction to finish the process.
![How to transfer photos from Mac to iPhone using USB]()
🏷️The Bottom Line
Except for using USB, there are other wireless solutions for you to transfer files from Mac to iPhone or iPad, like using iCloud or AirDrop. If you are interested in these tips, go to the guide on how to transfer files between iPhone and Mac for more details.
🏷️FAQs on How to Transfer Files from Mac to iPhone/iPad Using USB
Here is a list of frequently asked questions to assist you further:
1. Can I AirDrop a folder from Mac to iPad?
Choose Share and Send from the Share menu at the top of the screen if the document is open, then select AirDrop. On your PC, you may also Control-click a document file, then select Share and AirDrop.
2. How do I share files between Apple devices?
There are many ways for you to share files between Apple devices. You can use AirDrop, iCloud, iTunes and more to transfer files you want to share.
3. How do I transfer files to my iPad without Internet?
If your device can not be connected to the Internet, then you can choose to use a USB Cable or SD Card to transfer files.