With the advancements in camera technology and the increase in storage capacity, iPhone owners routinely retain hundreds or even thousands of photos on their devices. These photos quickly fill up the available storage on an iPhone. Thus, it is imperative to migrate them to a Mac computer for backup to free up iPhone's space. This prompts the question - is there a way to transfer all photos using AirDrop?
| 🔍Difficulty |
Moderate ●●○○○ |
| ⏱️Time Duration |
It depends on the network connection and file size. |
| 📱Things You Need |
At least two Apple devices. |
This article will answer your question by explaining how to transfer all photos using AirDrop. Later, this article also tells you how to move every photo from one Apple device to another without using AirDrop.
Can I AirDrop All Photos at Once
Technically speaking, there is no limit on how many photos you can AirDrop from one Apple device to another at the same time. In other words, you can send all of your photos, be they 1,000 or 10,000, using AirDrop at one time.
However, you are very likely to run into some practical constraints that prevent the successful AirDrop transfer of all photos, such as:
- The Wi-Fi connection speed. When your iPhone's Internet is slow, the photo transfer might fail.
- The available storage space on the device to which you send the photos.
- The time you are willing to wait for the transfer.
You should not transfer bulk content using AirDrop to avoid potential issues. For example, you may encounter the problem that AirDrop transfer failed not to have enough space. Instead, AirDrop all photos in smaller chunks. If you insist on finding a way to transfer all images using AirDrop at once, follow the guide below.
How to Transfer All Photos Using AirDrop on iPhone/iPad/Mac
Is there a way to transfer all photos using AirDrop? The answer is yes. You can AirDrop all images on an iPhone, iPad, or Mac computer.
- How to Adjust AirDrop Settings on Apple Devices
- How to Transfer All Photos Using AirDrop on iPhone/iPad
- How to transfer all photos using AirDrop on Mac
How to Adjust AirDrop Settings on Apple Devices
First, use the following process to ensure AirDrop is correctly configured on both devices.
Step 1. Place two devices within the Bluetooth and Wi-Fi range, which is usually 30 feet.
Step 2. Ensure both devices have Bluetooth and Wi-Fi turned on in the Settings app.
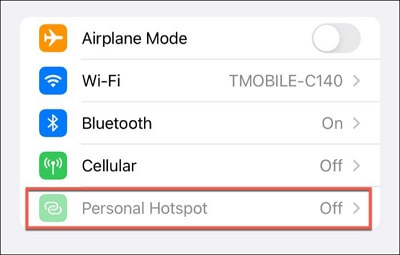
Step 3. If you are AirDropping photos from iPhone to iPhone, turn off the personal hotspot on both iPhones in the Settings app.
![How to Turn Off Personal Hotspot on iPhone]()
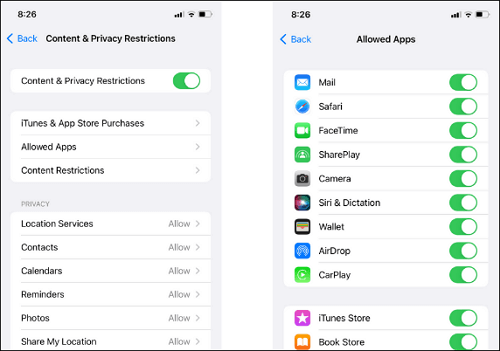
Step 4. Verify if AirDrop is allowed in the Content & Privacy Restrictions. To do so on the two iPhones or iPads, go to "Settings" > "Screen Time" > "Content & Privacy Restrictions" > "Allowed Apps" and turn on AirDrop on iPhone and Mac.
![Allow AirDrop in Content and Privacy Restrictions]()
Step 5. Check if the person you are sending to has their AirDrop set to receive from everyone. You can adjust the AirDrop setting on iPhone/iPad by navigating to "Settings" > "General" > "AirDrop." You can change the AirDrop setting on Mac by navigating to "Finder" > "AirDrop."
How to Transfer All Photos Using AirDrop on iPhone/iPad
To AirDrop photos on iPhone or iPad are similar, you can follow the steps below:
Step 1. Open the Photos app on your iPhone or iPad and go to the "Library."
Step 2. Tap the "Select" button at the upper right corner of the screen to enter the selection mode.
Step 3. Swipe your finger from left to right to select multiple photos, faster than manually tapping on each photo until all photos are selected.
Step 4. Tap on the Share icon (a box with an upward arrow) at the lower left corner of the screen and choose the AirDrop icon.
![How to Share All Photos Using AirDrop on iPhone]()
Step 5. Tap on the person's profile image you are sending to.
Step 6. On the receiving device, be it an iPhone, iPad, or Mac, unlock it and choose "Accept" when a prompt appears.
How to transfer all photos using AirDrop on Mac
After you turn on AirDrop on Mac, you can go through the following steps for how to transfer photos from Mac to iPhone using AirDrop:
Step 1. Open the Photos application on your Mac and click the "Library" at the sidebar.
Step 2. Press the Command + A keys on your keyboard to select all photos quickly.
Step 3. Click the Share icon in the tool menu and choose "AirDrop."
![How to Share All Photos Using AirDrop on Mac]()
Step 4. Click on the person or device you want to AirDrop to.
Step 5. On the recipient's device, be it an iPhone, iPad, or Mac, unlock it and choose Accept when a prompt appears.
How to Transfer All Photos Between Apple Devices Without AirDrop
As AirDrop uses Wi-Fi technology to establish a wireless connection between the two devices, its transfer speed is significantly impacted by the Wi-Fi network's performance. Transferring lots of photos at a time using AirDrop would fail due to an unreliable Wi-Fi connection.
Instead, you can use a wired solution to transfer all photos between Apple products with a success guarantee. Among all the options, employing a file transfer program like EaseUS MobiMover Pro is the most straightforward and efficient.
Advantages of EaseUS MobiMover:
- Fast and secure data transfer without being affected by the internet connection.
- Transfer 14 types of files, including photos, videos, messages, calendar events, and more, some of which are not even supported by AirDrop.
- Share files between iPhone and Mac, or transfer files between Apple products - iPhone, iPad, iPod, and Mac.
- Retain the quality of high-resolution images and live photos on iPhones.
- Support transferring data between iOS and Android devices.
How to Transfer All Photos From iPhone to Mac Using EaseUS MobiMover
EaseUS MobiMover will start sharing all images on your iPhone automatically. The time it takes depends on how many images you have.
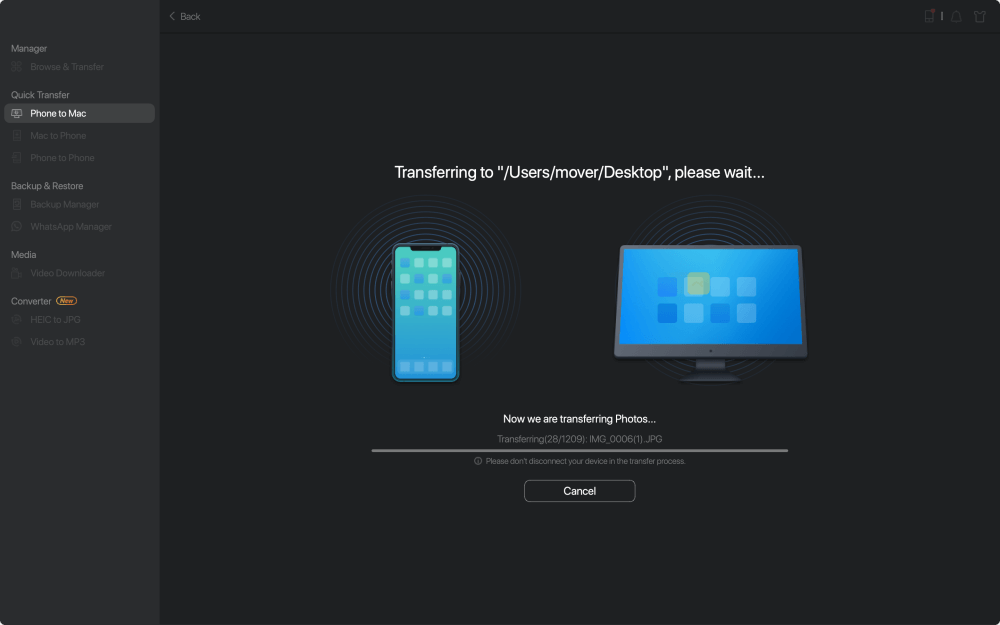
Step 1. Connect your iPhone to Mac with a USB cable. Run EaseUS MobiMover, choose "Phone to Mac" and click the "Next" button to continue.
Step 2. Check the category/categories you want to copy from your iPhone to Mac. As you can see, you can copy other supported files together with photos from your iPhone to Mac all at once. After that, don't forget to customize the storage path for the exported photos unless you want to save them on your desktop.
Step 3. Now, click the "Transfer" button to start transferring photos or other files from your iPhone to Mac without iTunes. Exporting files from iPhone to Mac with MobiMover is the right way for backup to avoid unexpected data loss.
The Bottom Line
This article answers your question, "Is there a way to transfer all photos using AirDrop?" You can transfer all photos using AirDrop on iPhone, iPad, or Mac. However, individually selecting photos on iPhone or iPad is time-consuming. Therefore, it is recommended to consider using an alternative way to transfer all photos between Apple devices.
EaseUS MobiMover is a comprehensive data transfer tool for Apple users. You can transfer all photos from iPhone to iPhone, iPhone to iPad, iPhone to Mac, iPhone to iPad, and vice versa with a few clicks.
FAQs on How to Transfer All Photos Using Airdrop
If you want to know more regarding "Is there a way to transfer all photos using AirDrop," read below.
1. Can I AirDrop all my photos to my new iPhone?
Yes, you can AirDrop all photos from an old iPhone to a new iPhone. However, if you have a vast number of images to send, AirDrop may not be the most efficient way. Instead, you should use the Move to iOS app or a professional data transfer like EaseUS MobiMover.
2. How do I AirDrop all photos from my iPhone to my Mac?
First, ensure your Mac has the Wi-Fi and Bluetooth turned on and set to receive data from everyone. Next, you can open the Photos app and select all photos. Then, tap on the share icon to choose AirDrop. Next, tap on the name of your Mac device. Finally, on the Mac, click Accept to receive the photos.
3. How do I share my entire photo library on my iPhone?
You can go to Settings, locate Photos, and click Shared Library. Then, choose the desired photos or videos, and move them into the Shared Library. You can invite 5 people at most to view your shared files.
NEW
HOT
