Part 1. Introduction
Limited storage on iPad? Want to know how to transfer photos from iPad to SD Card? That's one solution. But have you ever wondered how to transfer photos from iPad to flash drive?
As for the process of how to transfer photos from iPad to flash drive, for Windows users, you should get one of the following things ready:
- your computer with Photos App installed
- properly-working File Explorer
For Mac users, you need to also prepare one of the following things:
- your Mac with Photos App installed
- iPhoto (only for macOS X) or Image Capture downloaded on your Mac
Then, let's dive into the exact steps.
Part 2. How to Transfer photos from iPad to flash drive via EaseUS MobiMover
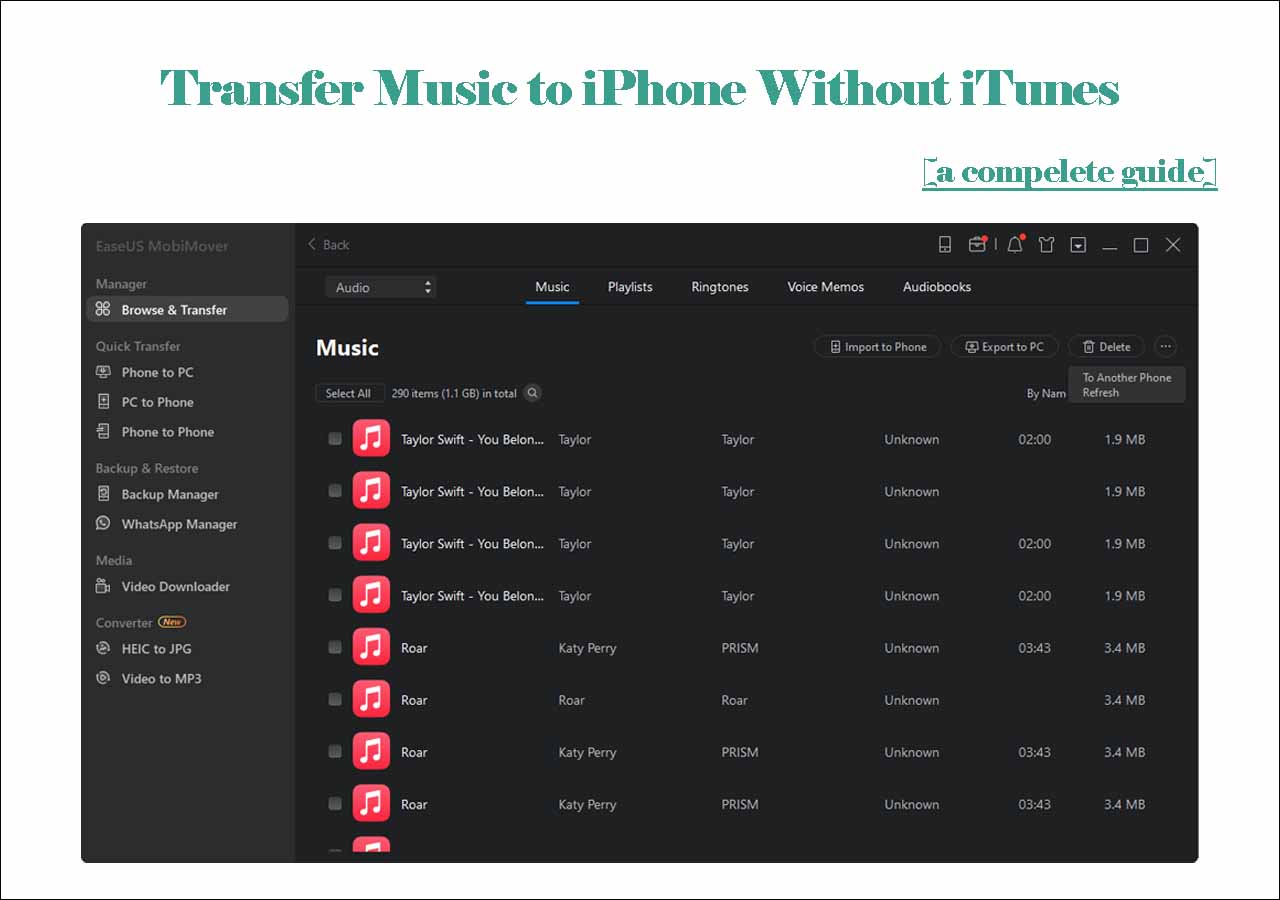
If you want to transfer your data, like photos, videos and contacts etc. quickly and safely, here you can choose EaseUS MobiMover. It supports the iOS devices of iOS 9.0 and above versions (remember to upgrade if needed), and Windows 7/8/10. With only a few clicks, you can choose 3 modes of transferring to meet your individual demands:
- from Phone to PC
- from PC to Phone
- from Phone to Phone
With the help of EaseUS MobiMover, you are able to:
- Transfer data and other files without losing quality
- Back up important files and data
You can follow these steps to get it downloaded. Since you want to transfer photos from iPad to flash drive, you will surely need this tool to help you reach your goal.
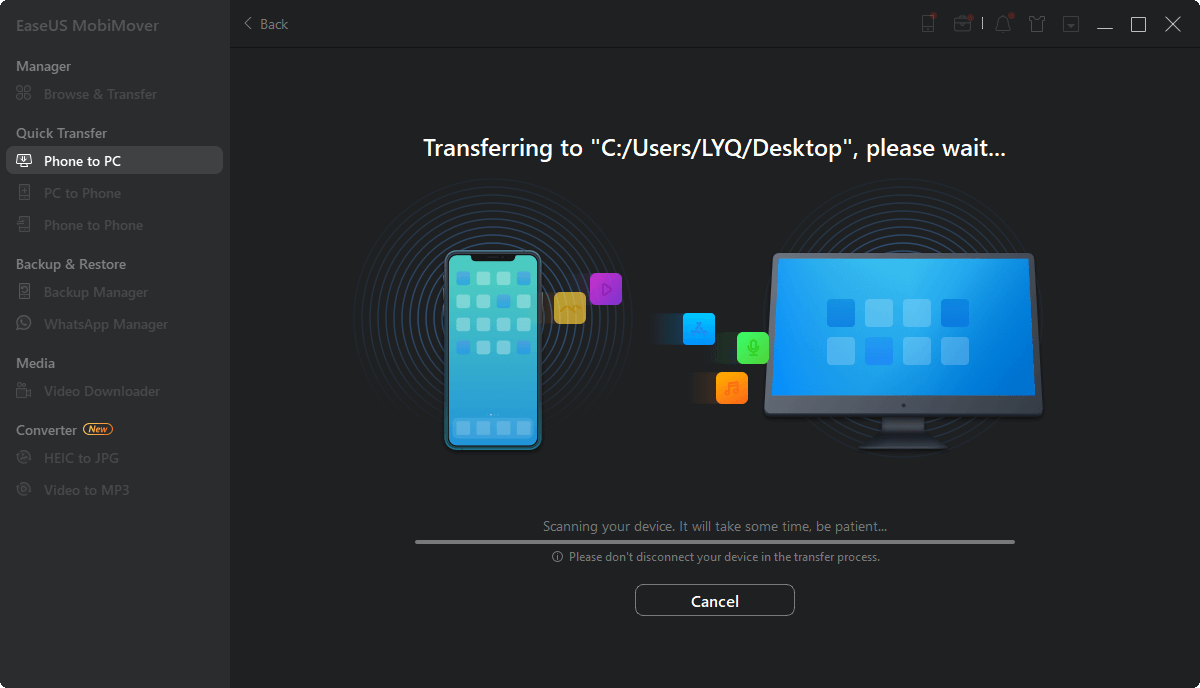
Step 1. Connect your flash drive and iPhone to your computer at the beginning. Start EaseUS MobiMover and choose "Phone to PC" at the left side panel. Then, click the "Next" button to the following step.
Step 2. Keep the genres you'd like to transfer. Except for photos, you can also copy videos, audio, books, podcasts, and more from iPhone to the flash drive as a backup. And, click "Custom Path" to set your flash drive as the destination.
Step 3. Click the "Transfer" button to start transferring photos from your iPhone to your flash drive. When it has completed, you can go to your flash drive to check the items.
Easy transferring, safe backup, customized management to your iOS contents—— with only one EaseUS MobiMover, you can do all the mentioned things above to save your time effectively.
Part 3. How to Copy photos from iPad to flash drive via File Explorer
What about transferring photos from iPad to flash drive on Windows? File Explorer can give you a hand! (known as Windows Explorer in versions earlier than Windows 10)
Without any other operations, all you need to do is to connect your devices to the computer first to transfer photos from iPad to flash drive. So, as long as your computer is of Windows system, you can take advantage of the File Explorer. Here are suggested steps that you can follow:
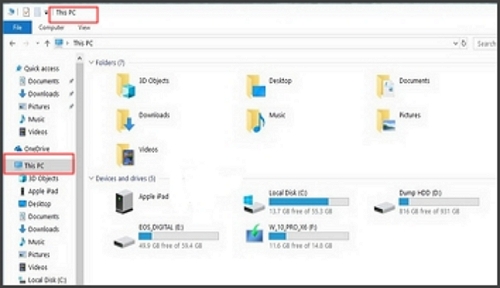
Step 1. Connect your iPad device and your USB flash drive to the computer
Step 2. Go to 'This PC' or 'Computer'> then Double-click your iPad
Step 3. Go to 'Internal Storage'> DCIM folder, and it will show you all the photos stored in Camera Roll.
Step 4. Copy and paste the photos to your USB flash drive. After that, you will find all the photos appearing in your USB flash drive.
![go to 'This PC' using File Explorer]()
For PC users, you can refer to the instructions on how to transfer photos from iPhone to flash drive on Windows.
For other users who want to transfer files to iPad or iPhone, you can also find solutions in this passage: transfer files from USB to iPad/iPhone.
Part 4. How to Get photos from iPad to flash drive via Photos App
Photos app offers an alternative for both Windows and Mac users to transfer photos from iPad to flash drive. It is much faster, easier and less time-consuming, but it's only available for photos in Cameral Roll. To access the Photos app on your Mac using your iPhone, you simply need to connect your device to the computer's USB port and then launch the app. You can follow the steps below:
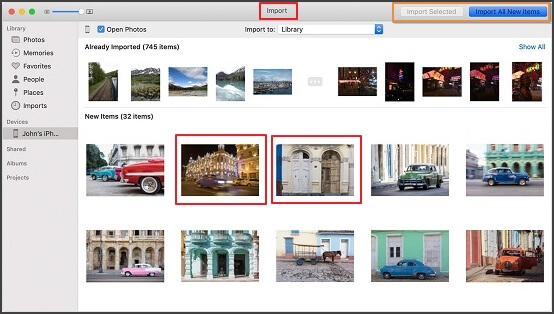
Step 1. Connect your iPad to your Mac with a USB cable
Step 2. Open the Photos app on your computer
Step 3. Select the photos you want to transfer from iPad to flash drive.
Step 4. Tap on the "Import" button of the screen to start the process
![open the Photos App and tap on 'Import' button]()
Still easy right? Especially for those who are reluctant to install any other apps on their Mac/PC, it's a surely suitable alternative! Or you may also want to know the phone to PC connection software if your flash drive is not by your side.
Part 5. How to Import photos from iPad to flash drive via iPhoto
You can first get to know the steps to transfer photos from iPhone to flash drive on Mac. It's known that iPhoto is only available for macOS X users before 2015, which means the users of other versions of macOS or Windows have no access to it now—— this is the most limited element. It could move photos and other media files from an iOS device to Mac and then to a storage device, such as a flash drive. Here, it's also a fix for users who want to import pictures from iPad to flash drive. Let's dive into the steps to help you with the transferring process:
Step 1. Connect your iPad to a Mac with a USB cable. (After the operation, if the iPhoto doesn't open, you need to first change the setting)
Step 2. Find the "Album" on your screen and select the photos you want to import
Step 3. Select "Import All" to back the photos up. (Individual photos also support)
Step 4. Wait patiently until the process completed.
![open iPhoto and select 'Import' button]()
Since the limited usage for only iOS users, users of other equipment could just skip this step and choose the mentioned ones that are suitable for your practical need.
Part 6. How to Copy photos from iPad to flash drive via Image Capture
What if the macOS users have not downloaded iPhoto yet? Then, Image Capture could be a good alternative for you to copy photos from iPad to flash drive. It is similar to iPhoto in terms of the limited users, that is, only available to macOS users. But there is difference actually! With Image Capture, you can collate pictures from different sources without any device drivers. As for the transferring process, just follow the steps below:
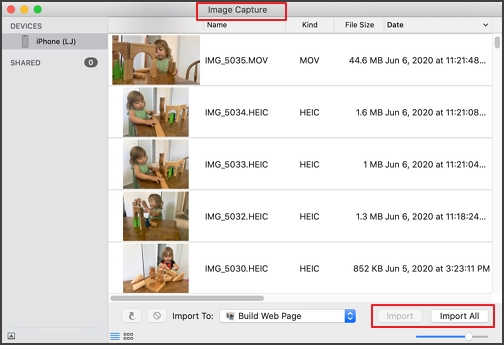
Step 1. Connect your iPad to Mac using a USB cable
Step 2. Open Image Capture and find your device from the pop-up screen, then click it.
Step 3. After the photos appearing, you can choose the photos you want to transfer and then tap on the "Import" button or click the "Import All" button to transfer all the images.
![open Image Capture and click on 'Import' button]()
Don't want to lose your images and keep the original quality? Then, this method is suitable for sure!
Part 7. How to Move photos from iPad to flash drive via Email
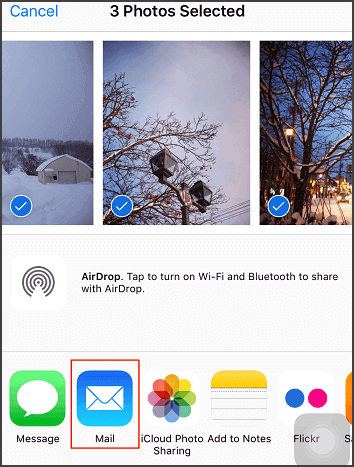
Every one of you is sure to have your own Email account, actually, Email is a good way to help you transfer photos from iPad to flash drive. However, you can only transfer 5 photos each time. If you have less photos to transfer, this would be a nice choice for you. Otherwise, for the users who want to transfer a large amount of photos, it could be too slow to wait. Let's see the instructions below:
Step 1. Run the Photos app on your iPad first, and choose the photos you want to import.
Step 2. Tap on the "Share" button and choose "Email"
Step 3. Click the "Send" button.
Step 4. Find your mailbox and check whether the photos are on your computer
Step 5. Plug your flash drive to this computer, and send the existed photos to your flash drive.
![tap on the 'Share' button and choose Email]()
Part 8. Conclusion
After reading this passage, you may have already known all the possible ways to help you transfer photos from iPad to flash drive. Here, we highly recommend EaseUS MobiMover, for which is available especially for iOS users who want to move data or files between their iOS devices and computers, moreover, it could not only transfer photos but also other data that you want to import someday (videos, contacts etc.) without losing quality. With EaseUS MobiMover, you can also back up the important files and data at the same time.
Part 9. FAQs on "How to Transfer Photos from iPad to Flash Drive?"
This part offers more questions about "How to Transfer Photos from iPad to Flash Drive", you can check them below if you have any other related questions.
1. Can I connect a flash drive to an iPad?
If your iPad model is iPad Pro 12.9-inch (5th generation) or iPad Pro 11-inch (3rd generation), you can connect the flash drive to your iPad.
2. Why can't I transfer files from phone to USB?
Check your USB connections and try another USB cable, because not all USB cables can transfer files. You can either connect your phone to a different computer or connect other optional devices to your computer to see whether it works.
3. Can you transfer photos directly from iPhone to flash drive?
If your flash drive is for iPhone, which means it is compatible with USB Type-C devices, you can transfer photos from iPhone to flash drive directly by connecting the flash drive to your iOS device via the charging port.


 NEW
NEW HOT
HOT