Highlights:
- To back up photos from iPhone to Mac in one click, use EaseUS MobiMover for fast backup, even for large photo libraries.
- For wireless backup between iPhone and Mac, iCloud photos may be enabled.
- To transfer photos via Finder, connect your iPhone to your Mac with a USB cable and sync specific or all albums.
- To use the Photos app for a seamless wireless backup, enable iCloud Photos and access your synced library directly on your Mac.
Backing up photos from your iPhone to a Mac is a good idea because it can save storage on your device and make it secure. In case of limited memory or the desire to secure photos from accidental deletion, it is advisable to get an appropriate method.
This guide explains the most common issues and solutions when backing up photos from iPhone to Mac, so you should be able to quickly find the one that is appropriate for you.
Method 1. Backup Photos from iPhone to Mac in One Click
AirDrop is facile and allows easy transfer of files between an iPhone and a Mac. However, it does have some downsides. Nowadays, transferring files can take forever, especially if the file is too huge; at other times, it may be cut short, and you will have to start everything one more time.
For a more efficient and hassle-free method, EaseUS MobiMover is an excellent alternative. It offers a seamless way to back up your photos quickly and securely without dealing with AirDrop's limitations. MobiMover can help you back up iPhone data to Mac in one click.
Key Features of EaseUS MobiMover:
- One-Click Backup: There is no need to go through certain folders separately and locate the files you need. Simply upload everything you have on your Mac in a few seconds.
- Batch Transfer: It helps transfer data from iPhone to Mac/PC/iPhone/iPad in batch.
- Selective Backup: Choose specific photos or albums for backup, giving you full control over what you transfer.
- HEIC to JPG Conversion: You can do it manually or use automatic settings to change photos into the more popular format during transfer, making it less of a hassle.
- Cross-Device Compatibility: File transfer through any device becomes simple as it is made for the iPhone, iPad, and Mac.
- Manage iCloud Data: MobiMover can view and sort through photos saved on your iCloud account right from the program.
EaseUS MobiMover is great for people who are frustrated by slow and interrupted transfers since it allows you to back up your photos effortlessly. Here, we provide a stepwise method to begin using EaseUS MobiMover.
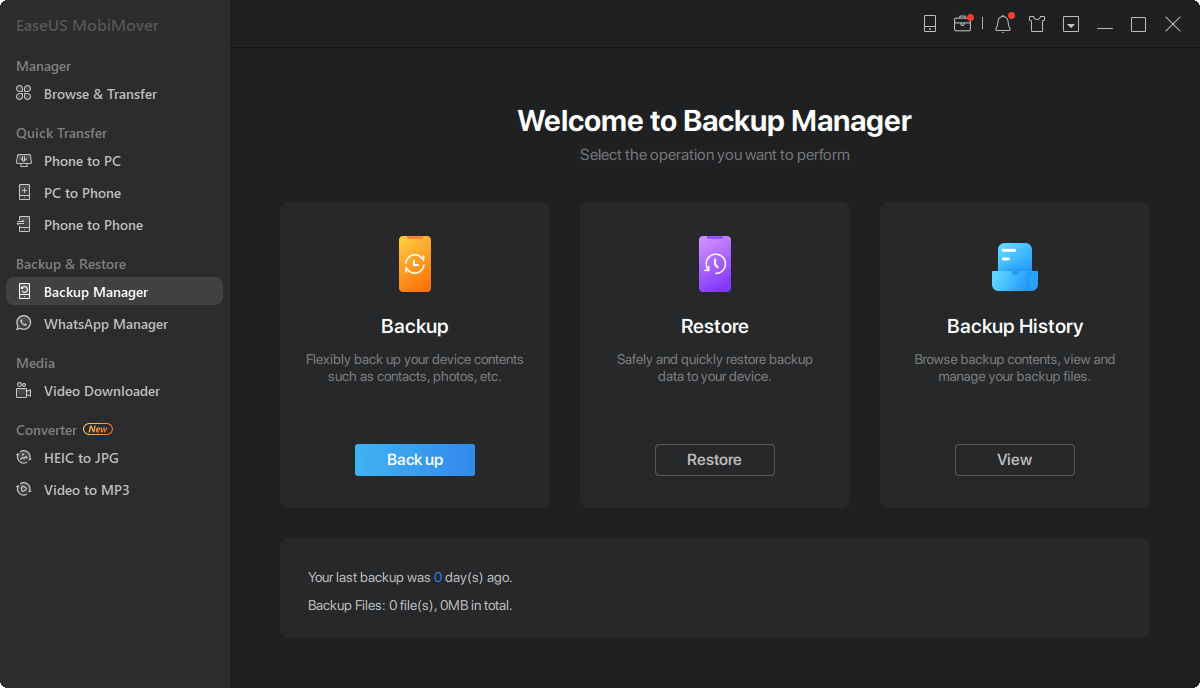
Step 1. Run EaseUS MobiMover and connect your device to the computer. Select the "Backup Manager" pattern in the main interface. Then, select "Backup" to continue.
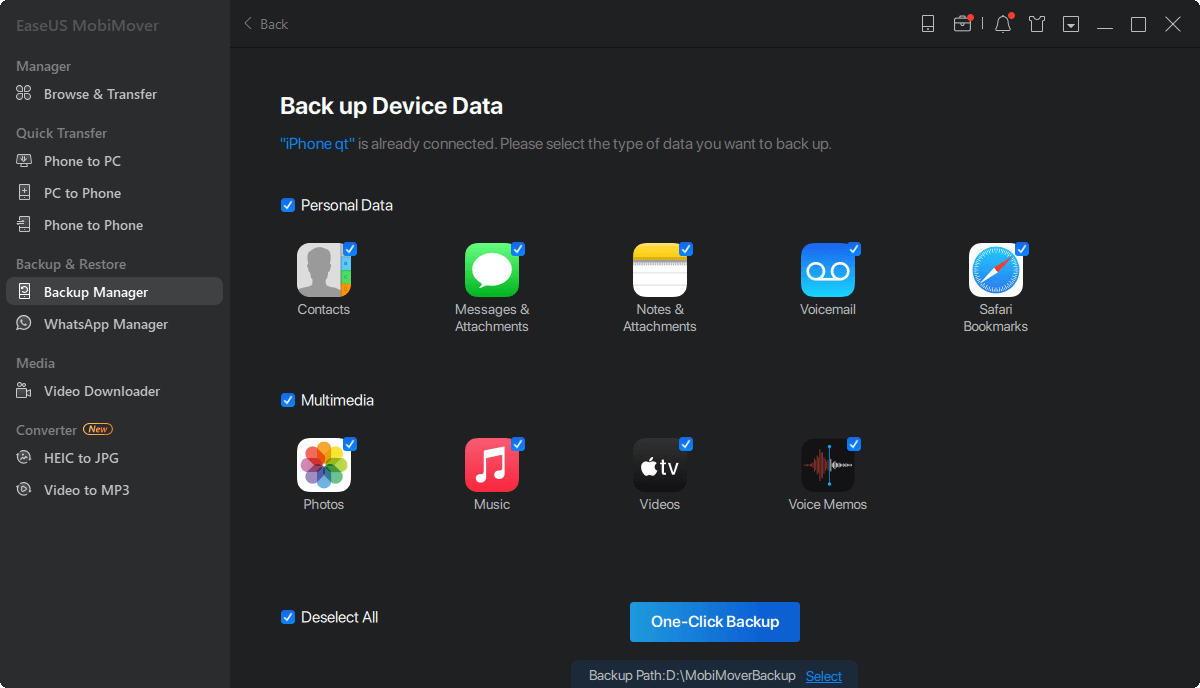
Step 2. EaseUS MobiMover will display all the iPhone files that are available for backing up. Just select all files by ticking the box next to the "Select All," and then click on "One-Click Backup" to proceed.
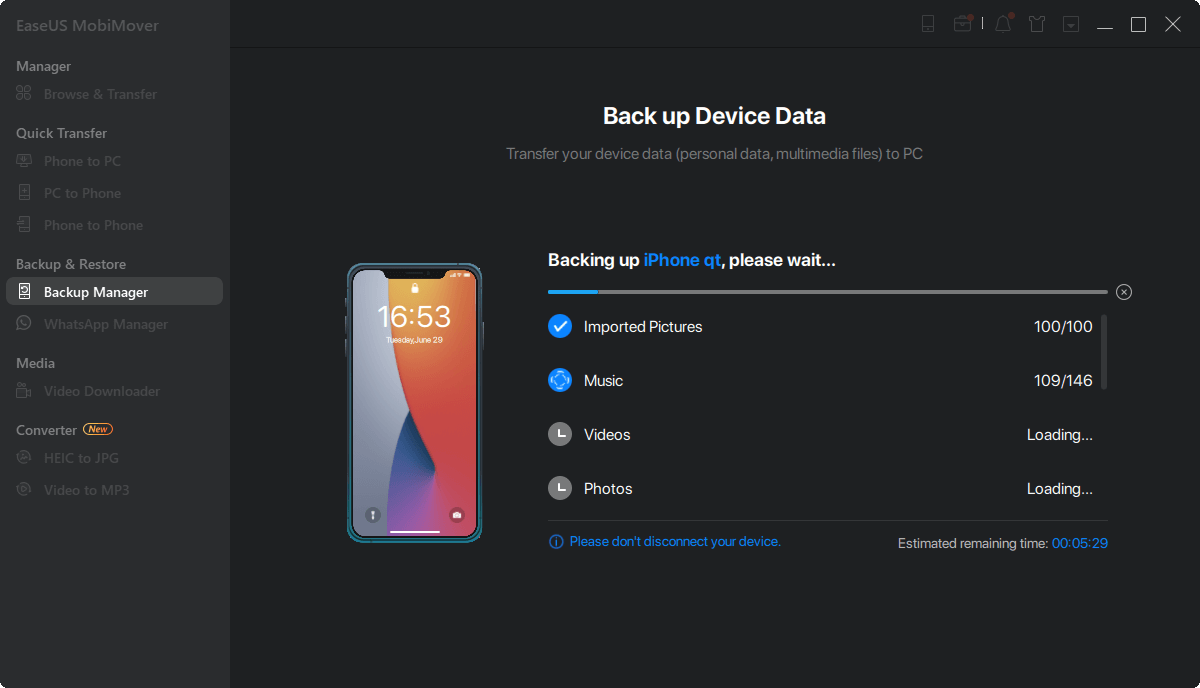
Step 3. EaseUS MobiMover will start to back up iPhone files to your computer immediately. Don't suspend the USB connection while backing up.
Once you've made a backup, you can restore this backup to your device when you need it. But note that this will erase your device and get everything replaced by what's in the backup. If you do mind this, just try to use "Phone to PC" feature to back up your device instead.
Method 2. Backup Photos from iPhone to Mac with iCloud
iCloud's wireless feature is a quick and easy way of backing up photos from an iPhone to a Mac. With iCloud, anytime you receive a photo on your Apple device, it gets instantaneously synced up with the rest of your devices.
But all is not good as this relies on your internet connection, stability, and bandwidth. Additionally, available iCloud storage is also a hampering factor if your photo library is sizeable.
Steps to Back Up Photos from iPhone to Mac with iCloud:
Step 1. Start by pressing the Settings app on the iPhone. Tap [Your Name] > iCloud > Photos.
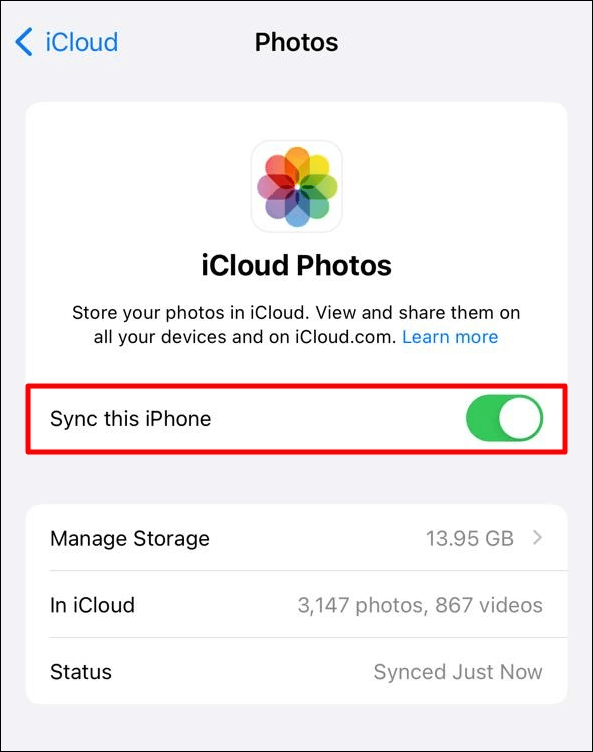
Step 2. Next, enable the Sync this iPhone toggle to start syncing your photos to iCloud.
![disable sync this iphone option]()
Step 3. On your Mac, sign in with your iCloud, wait for a while for the photos to sync, and access the backed-up photos using the Photos app.
Method 3. Backup iPhone Photos to Mac via Finder
Apple replaced iTunes with Finder to manage iPhone data. Using Finder, you can back up your iPhone photos to your Mac easily via a USB connection. While this method provides a stable and reliable transfer option, it does require a cable and lacks the flexibility to select photos, which makes it less convenient.
Steps to Back Up iPhone Photos to Mac via Finder:
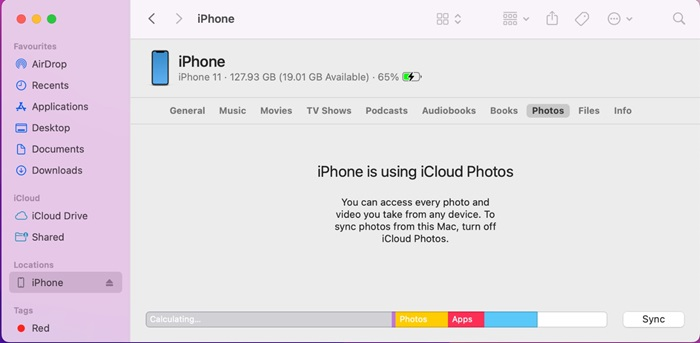
Step 1. Start by connecting your iPhone to your Mac using a USB cable. Make sure your iPhone is unlocked, and tap Trust This Computer if prompted.
Step 2. Next, open Finder on your Mac. You'll find your iPhone listed under Locations in the left sidebar. Click on your iPhone's name to access its settings.
Step 3. Now, navigate to the Photos section within Finder and click the Sync button to back up iPhone photos to Mac.
![click on sync finder]()
Method 4. Backup iPhone Photos to Mac Using Photos App
The Photos app on iPhone lets you easily back up your photos to your Mac using its iCloud Photos feature. This wireless approach ensures your photos are synced seamlessly across your Apple devices. However, this method depends on internet speed and available iCloud storage, which can be limiting for larger photo libraries.
Steps to Back Up iPhone Photos to Mac Using Photos App:
Step 1. Start by opening Settings on your iPhone and tapping [Your Name] at the top. Next, select iCloud, then go to Photos, and enable Sync this iPhone.
![disable sync this iphone option]()
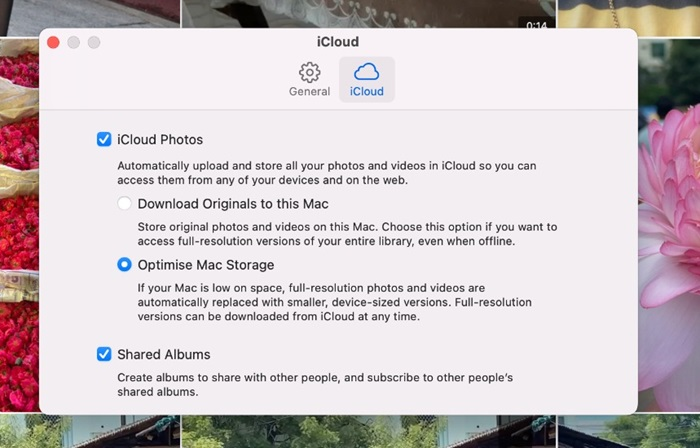
Step 2. On your Mac, open the Photos app and click Photos in the top menu bar. Then, select Preferences and go to the iCloud tab. Now, enable the iCloud Photos checkbox to sync the photos stored in iCloud to your Mac.
![enable icloud photos on mac]()
Step 3. Wait for the syncing process to complete. Once done, you'll find your iPhone photos organized and accessible in the Photos app on your Mac.
Conclusion
Using the iCloud, Finder, and AirDrop applications, you can transfer and back up your iPhone photos on the Mac while you are logged in to your Apple account and vice versa. While each method works well, each comes with certain limitations that could affect the backup process.
For a more easy and flexible solution, EaseUS MobiMover is the best choice. Unlike traditional methods, it allows for quick transfer with the ability to back up selectively as well as HEIC to JPG change. There is no doubt that using EaseUS MobiMover to back up photos will be a pleasant experience since the process is quick and pain-free.
FAQs on How to Backup Photos from iPhone to Mac
1. Can I back up photos to Mac wirelessly?
Yes, you can back up photos wirelessly using iCloud or AirDrop. If you connect to Wi-Fi, iCloud will backup your photos automatically, while AirDrop allows cable-free transfer of selected photos.
2. What if I don't see my iPhone in Finder?
Your iPhone must be unlocked, and you will have to press Trust This Computer if it appears. Also, check for the functionality of the USB connection and the updates for macOS.
3. How can I access my backed-up photos on my Mac?
If your photos are backed up using the Finder or Photos app, those photos will be available in the Photos library on the Mac. If you transfer photos using AirDrop, they are located in the Downloads folder. Once syncing is completed, the photos saved using iCloud services can also be found within the Photos app.
Share this post with your friends if you find it helpful!

