Highlights
- Stolen Device Protection is a new feature in iOS 17.3 to further protect your iPhone data.
- To turn on Stolen Device Protection in iOS 17, go to Settings > Face ID & Passcode > Passcode > Turn On Protection.
- Apply EaseUS MobiUnlock to turn on Stolen Device Protection without Face ID, Touch ID, or Apple ID.
The new iOS 17.3 brings about powerful new features, in addition to fixing bugs on your devices. The debut of iOS 17.3 means that iOS has taken its security performance to a higher level. One of the eye-catching features is the Stolen Device Protection.
The Stolen Device Protection is to offer further security protection to your iPhone. Do you want to explore the new feature of the new iOS 17.3? In this post, we will explain how to turn on Stolen Device Protection on iPhone iOS 17.3 step by step. This is also a full guide about Stolen Device Protection.
Part 1. What is Stolen Device Protection and How Does it Work?
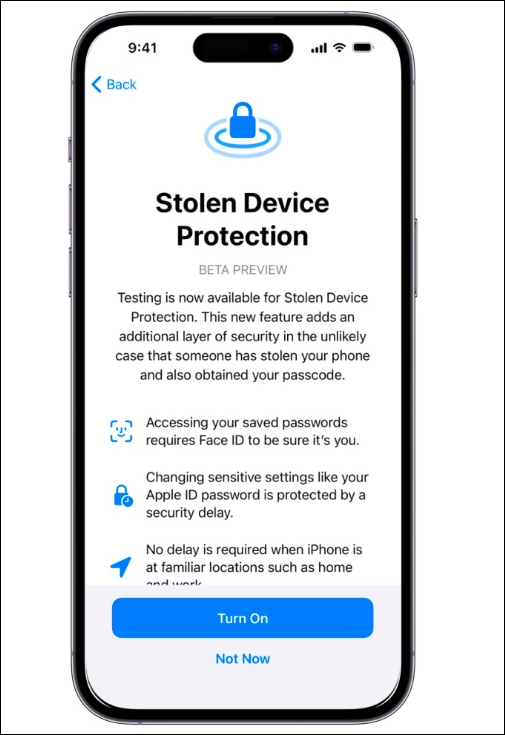
Stolen Device Protection is a new feature introduced by iOS 17.3. It adds a new security limitation to your iOS device. The purpose of this feature is to protect your account and personal information if your iPhone is stolen. When your iPhone is turned on and not in a familiar place, such as your home or office, it requires extra security steps to access some features. These familiar locations are set by you and require you to always turn on Location services.
🎈How Does Stolen Device Protection Work?
The most important core of Stolen Device Protection is biometric identification. If your iPhone is not in a familiar location, you need biometric verification (Touch ID or Face ID) to take some actions:
- Turn off Lost Mode
- Create a new Apple Card
- View your Apple Card's virtual card number
- Erase all content and settings (Factory reset iPhone in Settings)
- Browse and use saved passwords in Keychain
- Take some actions in Wallet (Apple Cash or Savings transfers)
- Use some payment methods saved for "autofill" in Safari
- Use Quick Start to Set up a new device
![Stolen Device Protection]()
Part 2. How to Turn on Stolen Device Protection [Step by Step]
Now you know the powerful feature of Stolen Device Protection. In this part, we will discuss how to turn on Stolen Device Protection on iPhone or iPad step by step. First, you need to make sure your device is running iOS 17.3 or newer. If it is not, you can update your iPhone to the latest iOS 17.
📱To check your iOS version:
- Go to Settings > General > Software Update.
Here are the steps to turn on Stolen Device Protection.
Step 1. Open your iPhone or iPad, and head to the Settings app.
Step 2. Scroll down to tap the "Face ID & Passcode" option.
Step 3. Enter your passcode to access this service.
Step 4. Scroll down the screen to find "Stolen Device Protection."
Step 5. Tap on "Turn On Protection."
Step 6. The "Stolen Device Protection" page will show up.
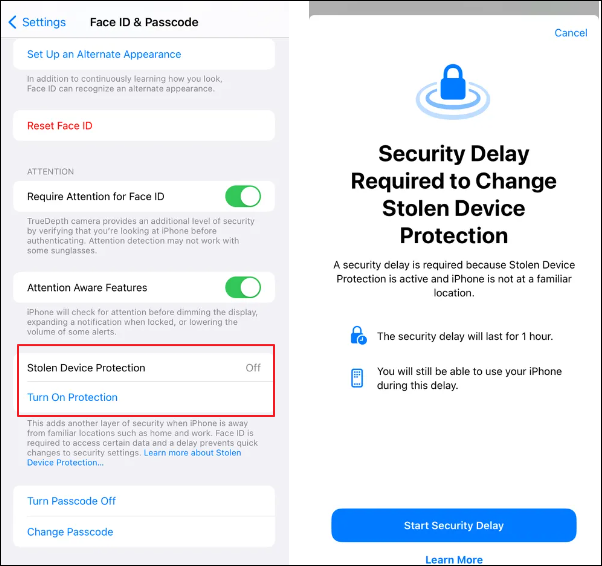
Step 7. Start to set up Security Delay by following its on-screen instructions.
![Stolen Device Protection set up]()
How to set up the familiar locations on your iPhone.
Step 1. Open your iOS device and go to the Maps app.
Step 2. Click the Home icon.
Step 3. Tap "Open My Contact Card" on the new Contact Card page.
Step 4. Tap "add address" to add your home or office locations.
If you want to know more about how to use Stolen Device Protection, you can refer to an Apple guide on Stolen Device Protection.
Part 3. How to Disable Stolen Device Protection
Even though this feature provides an extra layer of protection for iOS devices, you sometimes need to turn off this service. Or you feel that this service bothers you, especially when you are in an unfamiliar place and it will be troublesome to change your Apple ID password. At this point, you can choose to disable Stolen Device Protection. If you need, follow the steps below.
Step 1. Head to the Settings app.
Step 2. Tap "Face ID & Passcode".
Step 3. Enter your screen passcode to sign in.
![Face ID and Passcode in Settings]()
Step 4. Scroll down to find Stolen Device Protection.
Step 5. Tap to turn off Stolen Device Protection.
Step 6. Later, Stolen Device Protection will be disabled on your device.
📝Note: When you attempt to disable Stolen Device Protection outside of a familiar area, a security delay will occur before the feature may be disabled.
Part 4. How to Disable Stolen Device Protection Without Apple ID
You may not be able to disable Stolen Device Protection due to some reasons. For example, when you want to use biometric verification, the Face ID and Touch ID are not available. You can't change your Apple ID password because of some glitch in the Security Delay. Or you just don't remember your Apple ID passcode. No matter what the reason is, EaseUS MobiUnlock can help you bypass Stolen Device Protection. EaseUS MobiUnlock is a professional iPhone unlocker to help you fix iPhone issues like iPhone Unavailable, iPhone Disabled, and Security Lockout.
If you can't disable Stolen Device Protection, EaseUS MobiUnlock can help you remove Apple ID without a passcode. Later, you can sign in your Apple ID again or create a new one.
Reminder: Before you start, make sure that you've enabled Two-factor authentication for your Apple ID. If you've ever set a screen lock for your device, make sure you can remember the passcode becasue we need you to trust this computer on your device.
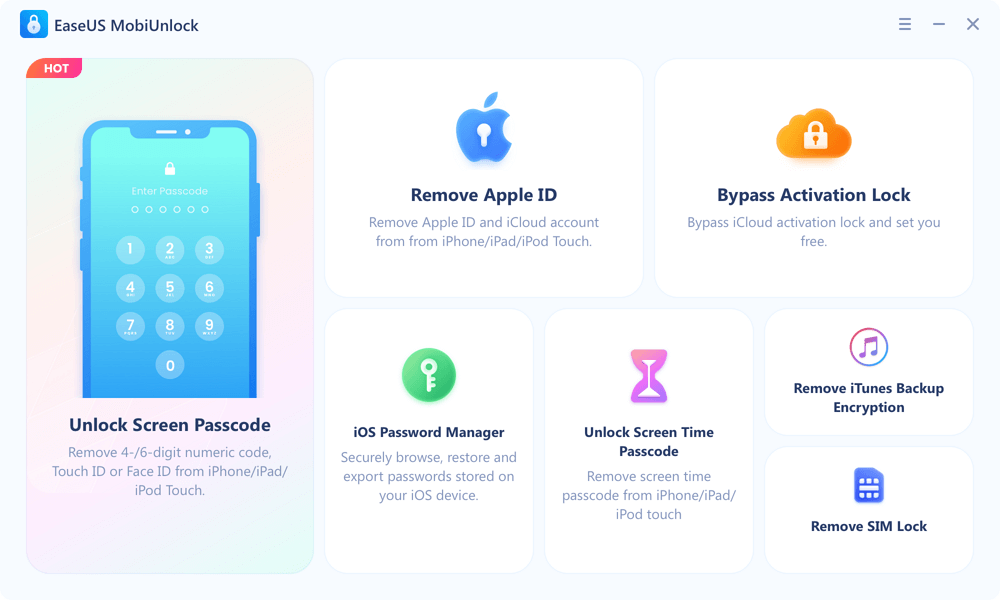
Step 1. Launch EaseUS MobiUnlock on your computer and connect your iPhone or iPad. Select "Remove Apple ID" from the home page of this program.
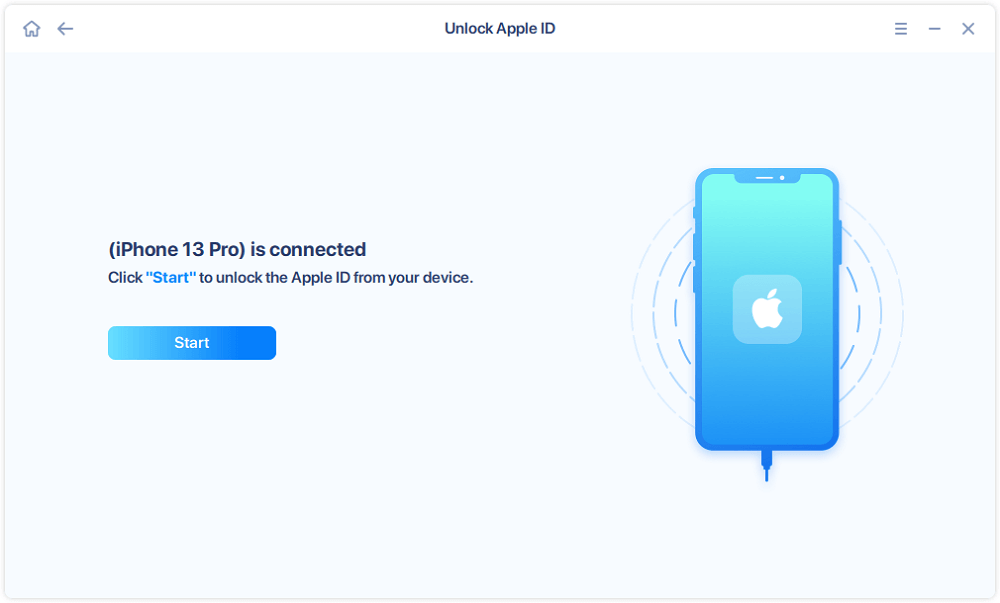
Step 2. Then, our program will start recognizing your device. Once your device is detected, click "Start" to proceed. Following that you'll need to download a firmware. Once the firmware is ready, click "Unlock Now."
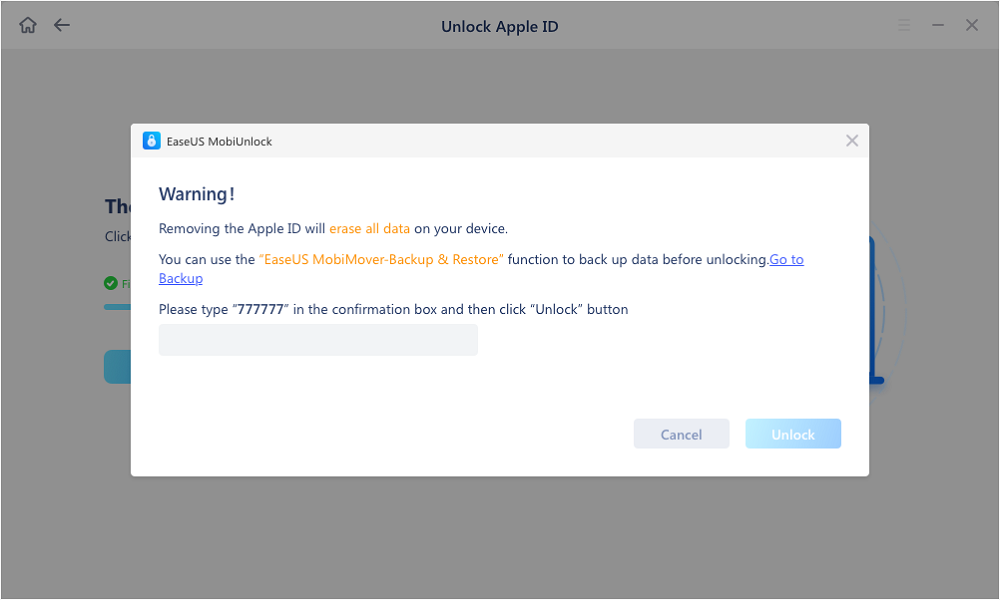
Step 3. A warning screen will pop up to ask you to enter the needed information. Proceed by enterring what it needs and then click the "Unlock" button.
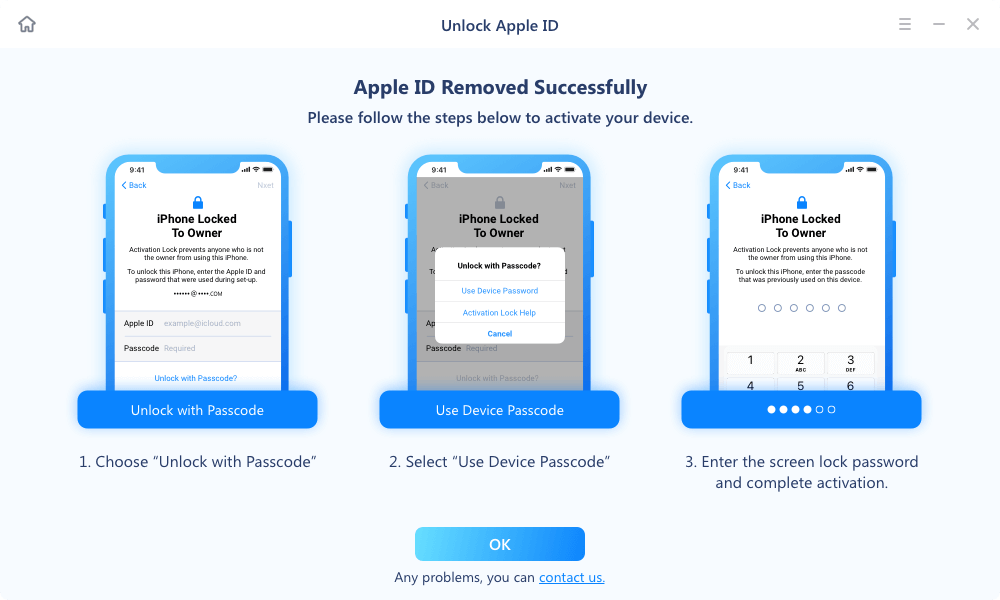
Step 4. Wait for your Apple ID to be removed. Then, you can regain access to your device with a new Apple ID.
Update Your iPhone and Turn on Stolen Device Protection Now!
The new Stolen Device Protection feature on iOS 17.3 offers a higher layer of security protection. This article provides a full guide about Stolen Device Protection. You now know how it works and how to turn on Stolen Device Protection on your iPhone. To sum up, you can follow the simple steps to turn on Stolen Device Protection:
- Settings > Face ID & Passcode > Passcode > Turn On Protection
If you need to turn off Stolen Device Protection, you can follow a similar path to disable it. If you encounter issues with your Face ID or Touch ID, it is recommended to use EaseUS MobiUnlock to remove your Apple ID account from your iPhone.
Share this post with your friends if you find it helpful!