Key Points:
1️⃣You cannot transfer photos from iPhone to iPhone with Bluetooth alone. Instead, you can use AirDrop to share pictures between Apple products, which requires Bluetooth to discover nearby devices.
2️⃣If you want to know more about photo transfer between iPhones, you can use EaseUS MobiMover, iTunes, iCloud, and message apps.
Whether you're switching from one device to another or you simply want to transfer photos to friends, learning how to transfer photos from iPhone to iPhone using Bluetooth is the knowledge that will always come in handy. This guide is about to help you with that.
In this guide, you're going to learn how to transfer photos from iPhone to iPhone using Bluetooth, as well as other alternative methods to transfer photos from iPhone to iPhone. Depending on the size of the file you want to transfer or which is most convenient for you, you can easily make these transfers without breaking a sweat.
Can You Transfer Photos from iPhone to iPhone Using Bluetooth?
No, you cannot transfer photos directly from iPhone to iPhone using Bluetooth alone. While iPhones have Bluetooth capability, Apple does not allow file transfer, such as photos, over Bluetooth like Android does. However, Apple uses AirDrop, a feature that combines Bluetooth and Wi-Fi to quickly and securely transfer photos and other files between iPhones, iPads, and Macs. AirDrop uses Bluetooth to discover nearby devices and Wi-Fi to transfer data at high speed.
How to Transfer Photos from iPhone to iPhone Using AirDrop
Step 1. Enable Wi-Fi and Bluetooth on both iPhones.
Step 2. Open the Control Center and tap it to turn on AirDrop. Set it to Contacts Only or Everyone on both iPhones.
Step 3. Select the photos you want to share. Click the Share icon, and select AirDrop as the transfer method from the list of options.
![select airdrop]()
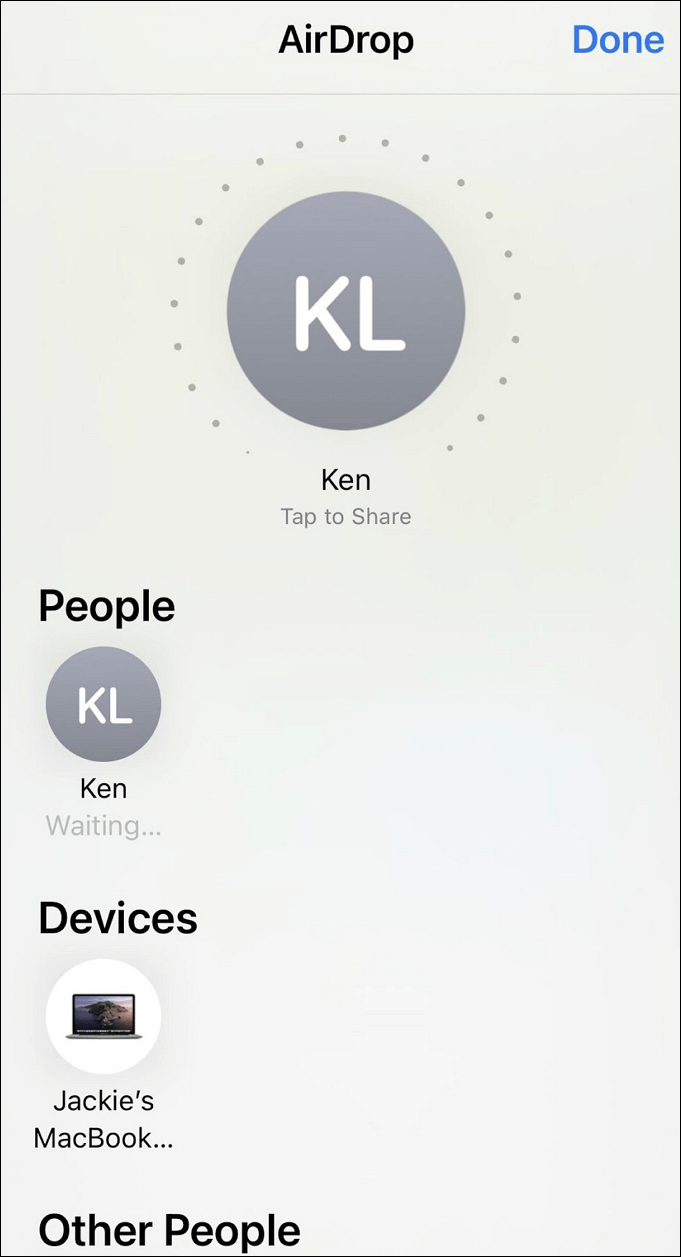
Step 4. Select the iPhone you want to transfer photos to and accept them on the recipient iPhone when prompted to.
![select the iPhone you want to transfer photos to]()
Step 5. Wait for the transfer to complete without interrupting. You'll be notified on both iPhones when the transfer is complete. Check the recipient's phone to ensure all photos were sent.
Alternatives to Transfer Photos from iPhone to iPhone Using Bluetooth
While learning how to transfer photos from iPhone to iPhone using Bluetooth and AirDrop is easy and efficient, there are alternative methods you can easily use when transferring data from iPhone to iPhone. These are all efficient methods you can easily use, and with these step-by-step guides, you get to view your options as well as steps to go about each of them. Let's dive right into the next section, where we discuss it all!
| Tool |
Difficulty |
Effectiveness |
| EaseUS MobiMover |
Easiest
⭐
|
It efficiently gets the job done and can be easily used. |
| iTunes |
Moderate
⭐⭐⭐
|
It needs an extra device as your system. |
| iCloud |
Easy
⭐⭐
|
You can access the iCloud files on different devices with the same account. |
| iMessage/SMS |
Easy
⭐⭐
|
It is a quick and easy way to share photos. |
How to Transfer Photos from iPhone to iPhone Using EaseUS MobiMover
EaseUS MobiMover is a useful alternative tool for transferring photos between iPhones, but it does not use Bluetooth for this process. Instead, MobiMover works as a desktop application that facilitates data transfer by connecting both iPhones to a computer via USB cables. You can then transfer photos from one iPhone to another through the computer interface, bypassing the need for wireless transfer methods like AirDrop or Bluetooth.
Key Points about iPhone-to-iPhone Photo Transfer:
- You can selectively transfer pictures or the entire album between devices.
- It does not rely on network speed or Bluetooth, so it avoids risks of data loss during wireless syncing.
- It does not compress files during the process, maintaining the original quality of the videos and photos.
This efficient app gets the job done and can be easily used with the following steps.
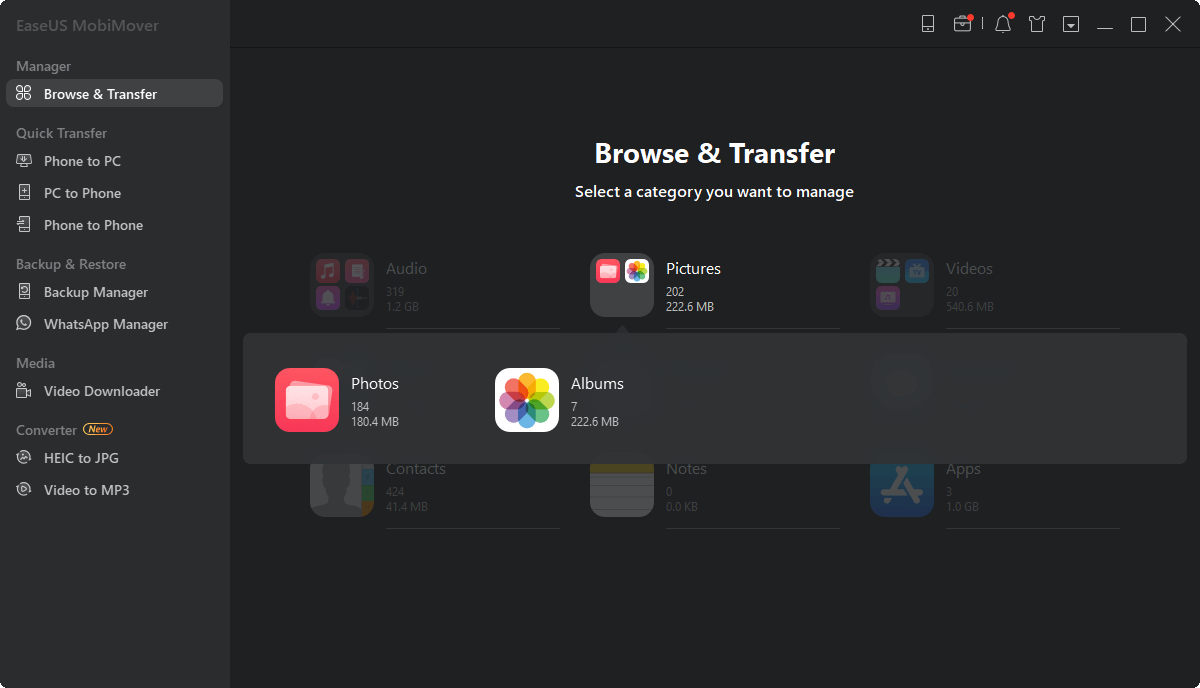
Step 1. Connect your iPhones to your computer. Open EaseUS MobiMover, then go to > Pictures > Photos. You can also use the data transfer feature to download all the photos from iPhone to iPhone at a time.
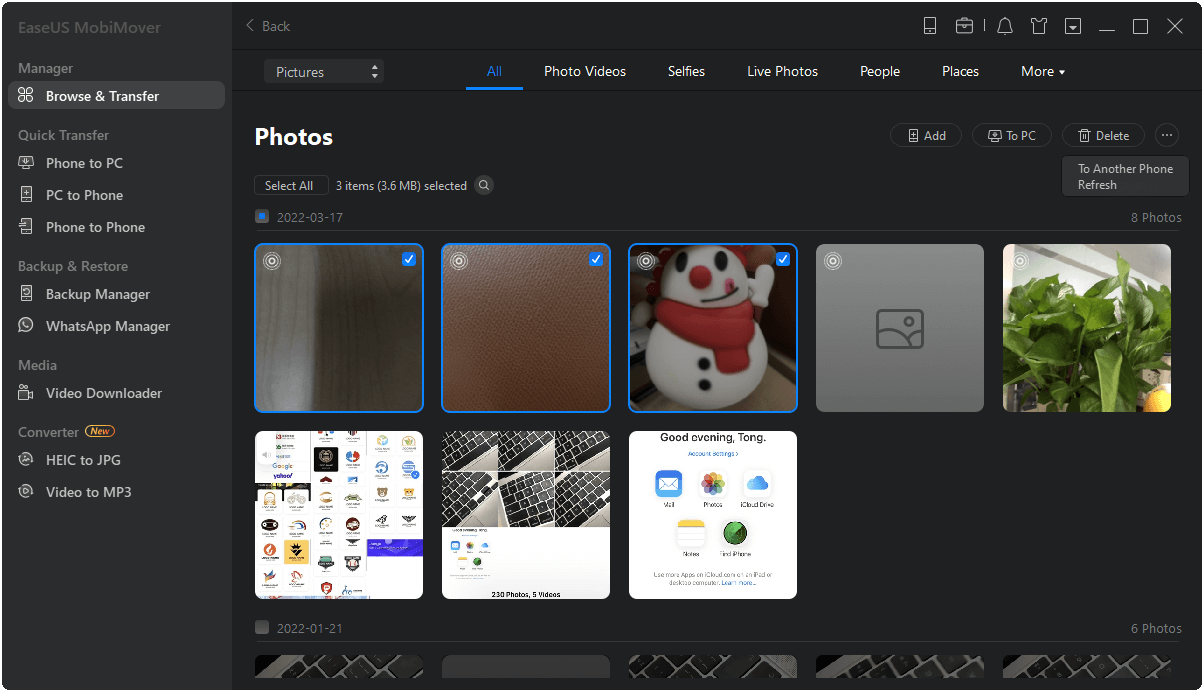
Step 2. Choose the photos or albums you want to move from one iPhone to another (set the source and target iPhones correctly by clicking the phone icon on the top toolbar). You can choose to transfer all the photos at once or specific images selectively.
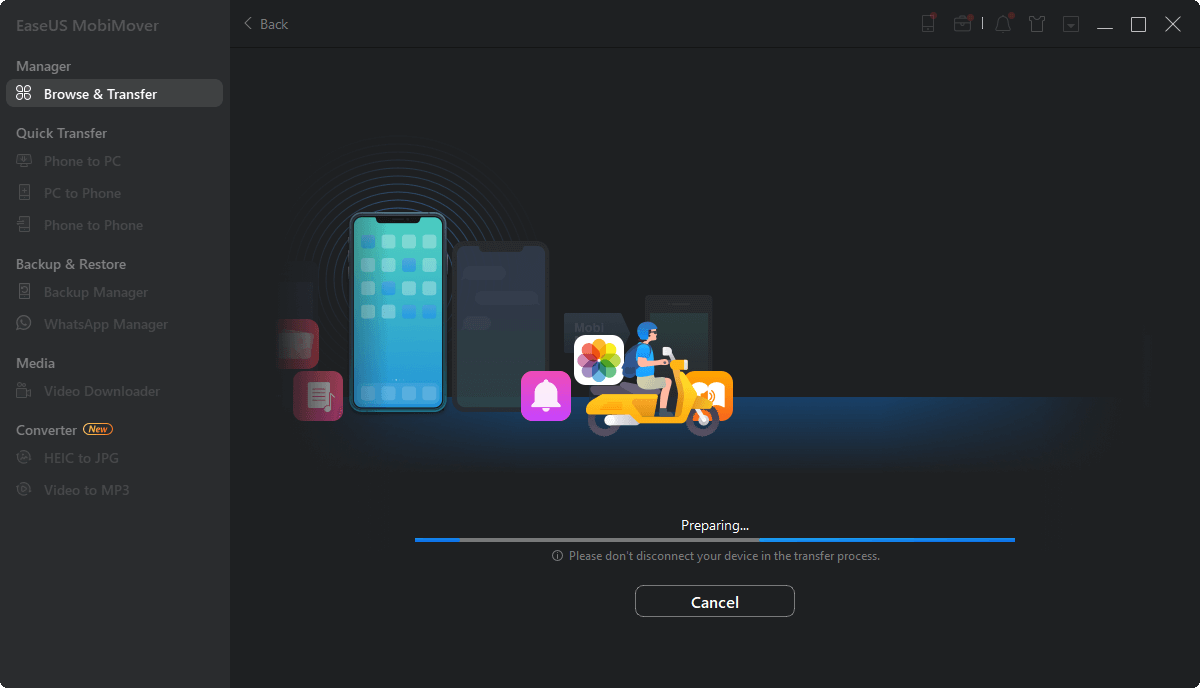
Step 3. Click "To Another Phone" to start transferring photos from iPhone to another. When it has done, go to your target device to check the items in the "Photos" app.
Transfer Photos from iPhone to iPhone Using iTunes
You can always use iTunes to transfer photos from one iPhone to another or transfer files from iPhone to PC with iTunes, with the only extra device you need as your system. Follow the steps to complete the process:
Step 1. Download and install iTunes on your system and connect the phone to the computer using a USB cord.
Step 2. Launch iTunes on your computer, select the source iPhone from the iTunes screen, and click on the "Photos" tab on the menu bar.
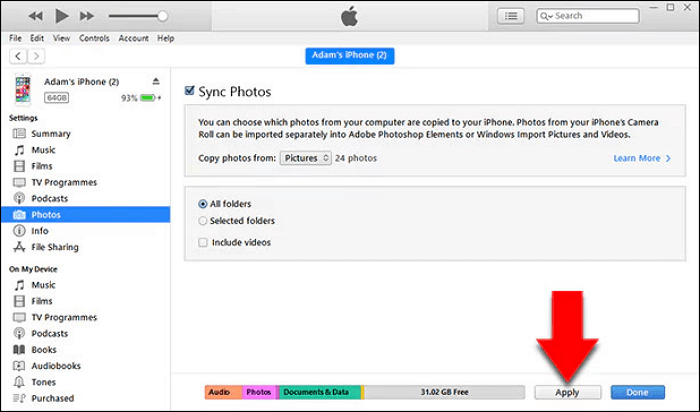
Step 3. On the "Photos" tab, select the "Sync Photos" box, then proceed to select where to sync the photos on your system. Preferably, a folder with a name you can easily remember.
![select sync photos]()
Step 4. Select the photos you wish to transfer to the selected folder and click "Apply" from the iTunes window.
![select photos, click apply]()
Step 5. Once the sync is done, disconnect the first iPhone and connect the second iPhone to your computer.
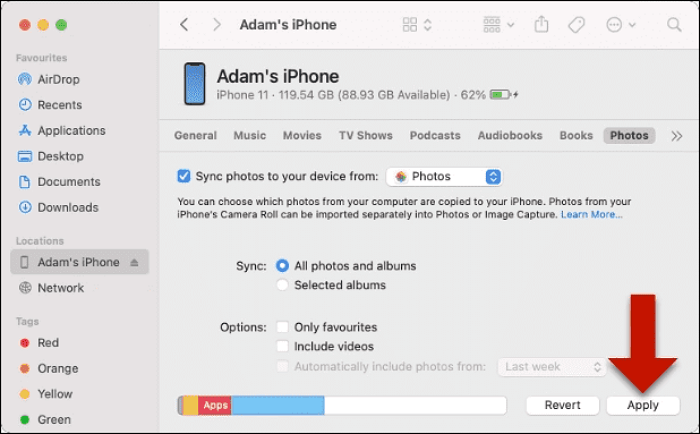
Step 6. Select the second iPhone in iTunes as done previously, and click on "Photos" > "Sync Photos."
Step 7. Select the folder with the synced photos from the previous iPhone, and click on the "Apply" button.
![Select the folder with the synced photos from the previous iPhone]()
Step 8. Wait for the sync to complete and disconnect the iPhone. You can now check your Photos app to ensure the transfer was successful.
Transfer Photos from iPhone to iPhone by Creating a Shared Album
Using a shared album is another way you can easily transfer files from one iPhone to another with the iCloud Photos service. To do this, use the following easy steps.
Step 1. Begin by ensuring both iPhones are signed in with the same Apple ID so they can access the same iCloud.
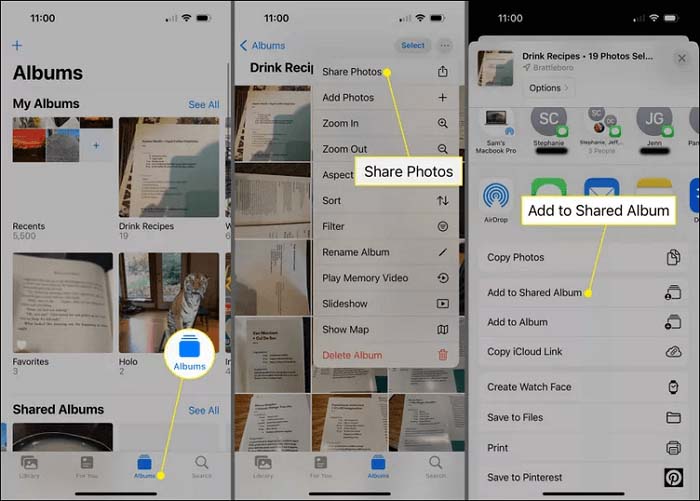
Step 2. Open the Photos app on the iPhone with the photos you want to share, and click the "share" icon. This is located in the bottom left corner of the screen.
Step 3. Select the "Add to Shared Album" on the sharing menu, or create a new shared album if you don't already have one by clicking "New Shared Album."
Step 4. Invite the target iPhone to the shared album by entering their phone number or Apple ID, and accept the invitation on the other iPhone.
Step 5. Open the shared album on the receiving phone,
Step 6. Check the shared album on the recipient's iPhone; the photos will be downloaded automatically. Proceed to save the photos by clicking on the "Save Image" option on each photo.
![Check the shared album on the recipient's iPhone]()
Transfer Photos from iPhone to iPhone Using iMessage or SMS
Another way to transfer photos from one iPhone to another is by using iMessage or SMS. It is a quick and easy way to share photos with the following easy steps. They include:
Step 1. Open the Photos app on the source iPhone, and select the photos you want to transfer.
Step 2. Tap on the "Share" icon at the screen's bottom left corner and select "Messages" as the sharing method.
![Tap on the Share icon at the bottom left corner of the screen]()
Step 3. Type in the recipient's phone number or Apple ID when prompted. You can also add a message if you want.
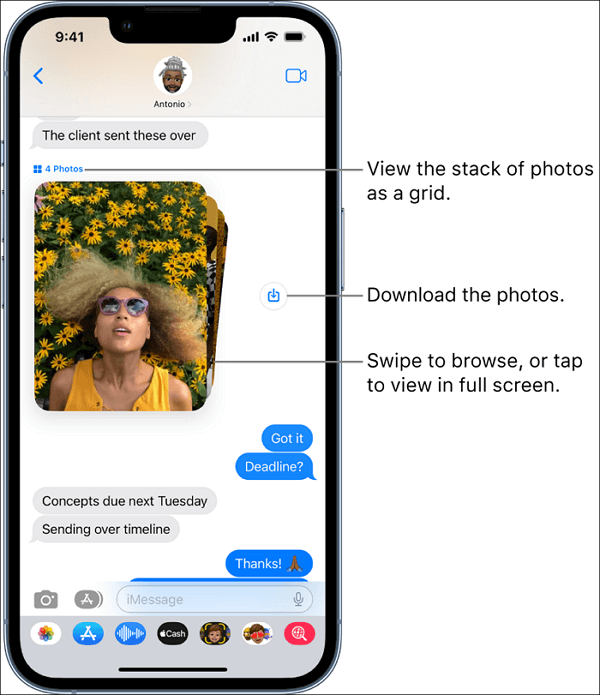
Step 4. Tap the send button, and open the message on the recipient's phone. You can now save the message on the recipient's iPhone to have it in storage.
![Tap the send button, and on the recipient's phone, open the message]()
Conclusion
You don't always need tech support for everything with your device, and this guide on how to transfer photos from iPhone to iPhone using Bluetooth shows you that.
With the alternative methods listed, you can also carry out these transfers by choosing which options you deem fit, and you're guaranteed to be successful.
There you have it! With this guide, you can easily and swiftly transfer from iPhone to iPhone easily and swiftly from the comfort of your home.
FAQs on Transfer Photos from iPhone to iPhone
Have more questions you're not certain about? Well, here is a list of questions and answers we're sure will help.
1. Can I share data from iPhone to iPhone using Bluetooth?
No. Direct photo transfer using Bluetooth alone is not supported on iPhones. Instead, you can use AirDrop, which leverages Bluetooth for device discovery and Wi-Fi for fast file transfer.
2. How to transfer photos between two iPhones using a USB cable?
To make a transfer of photos between two iPhones using a USB cable, begin by connecting the two devices using a Lightning to USB cable. After unlocking both iPhones, the iPhone with the photos you want to send, go to Settings, then to Photos to enable iCloud Photos. Select the Photos app on the receiver iPhone, and click Import. Choose the photos you want to transfer from the source iPhone, and they're set to download.


 NEW
NEW HOT
HOT