With Live Photos, you can not only edit, adjust, and share them like normal photos, but they also show a brief moment of movement and sound when activated. Basically, it's a way to bring your photos to life by capturing a few seconds of video.
You've already known how to transfer photos from iPhone to computer based on your previous knowledge. And we know how frustrating it can be when you can't get your live photos off your phone and onto your computer. In this guide, we'll show you a few good methods on how to transfer live photos from iPhone to PC. And with our help, you'll be able to transfer your live photos easily. Now, let's get started!
How to Transfer Live Photos from iPhone to PC Using iCloud
Using iCloud is probably the easiest and least time-consuming way to transfer Live Photos from iPhone to PC. With this method, there's no need to connect your iPhone to your PC, and the transfer also gets done pretty fast. Before you start, you should check whether the storage space in iCloud is full. If it is full, you can check the guide on how to manage iCloud storage. Here are the steps you can follow:
Step 1. Upload Live Photos to iCloud
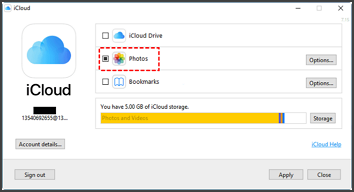
The first step in this process is to upload your Live Photos from your iPhone to your iCloud Photo Library. It's quite a simple thing to do. Just head on to the Settings app on your iPhone and scroll down to Photos in the Apple apps section. Once there, tap on Photos, and you'll see a setting called iCloud Photos with a toggle switch next to it. If iCloud Photos is not toggled on, you'll need to enable it. Once that is done, your photos (including Live Photos) will be uploaded to your iCloud account.
Step 2. Log In to iCloud on PC
Now, on your PC, either launch the iCloud app or launch your browser and go to iCloud.com Once you sign into iCloud with your Apple ID, you'll need to locate the Photos app and click on it.
Step 3. Download Live Photos to PC
After you locate the Live Photos you want to transfer, you can download them on your PC. You'll get two files when you download a Live Photo: a JPG file and a MOV file. So, keep that in mind.
![sign in and locate the Photos app]()
How to Transfer Photos and Videos from iPhone to PC Using EaseUS MobiMover
EaseUS MobiMover Pro, as one of software to transfer photos from iPhone to computer, you can easily get your photos moved to PC using it. The best part of this tool is that it has no restrictions on the number of photos you can transfer and has no internet requirement, which surely makes the transfer process incredibly easy and convenient. Apart from photos, you can also transfer videos and contacts etc. via EaseUS MobiMover.
You can follow the exact steps below to help you complete the transfer process:
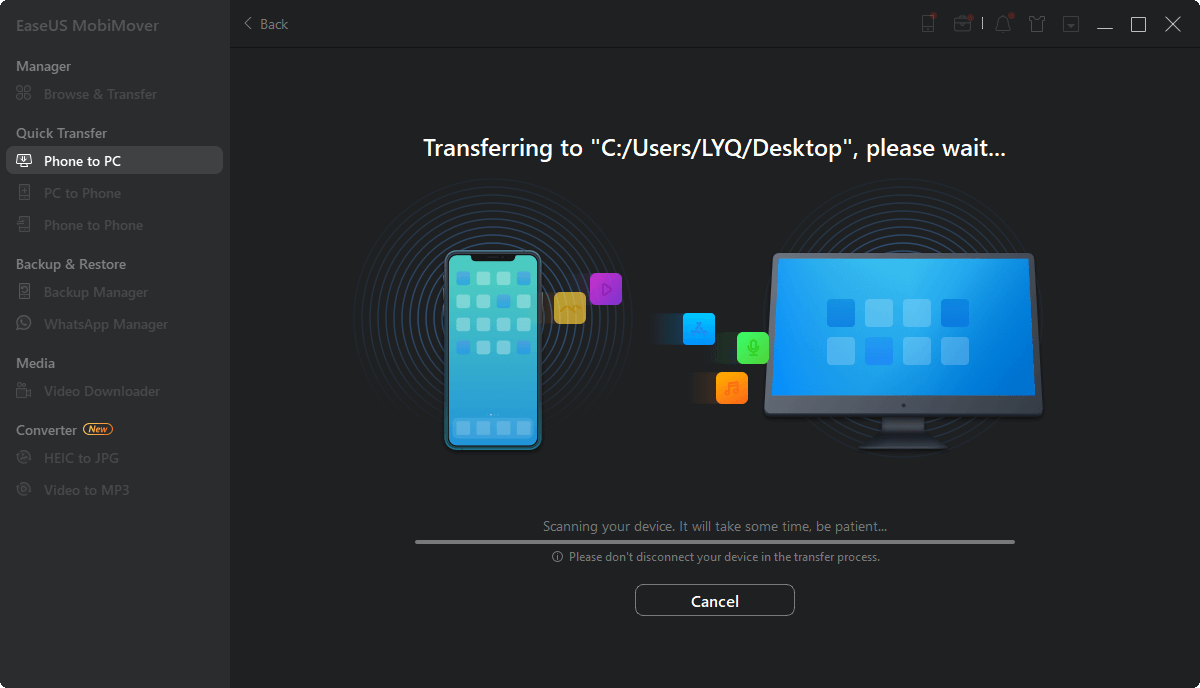
Step 1. Connect your iPhone to your computer (Mac or PC). Launch EaseUS MobiMover, then choose "Phone to PC" and click the "Next" button to continue. If you prefer to transfer photos from your iPhone to computer selectively, go to "Content Management" > "Pictures" > "Photos" instead.
Step 2. Choose "Pictures" from the displayed data categories. You can also transfer other files together to free up iPhone space or for backup. And, you are free to save the exported iPhone files on your local computer or USB flash drive.
Step 3. Then click the "Transfer" button to start transferring photos from iPhone to computer. Wait patiently for the process to finish and then go to check the exported items.
Besides, it is also a good option if you're struggling to copy photos from iPhone to iPhone, it could help you back up the essential data at the same time if needed.
How to Save Live Photos from iPhone on PC Using File Explorer
The next method we're going to look at for saving Live Photos from iPhone to PC is File Explorer, which is known as Windows Explorer in versions earlier than Windows 10.
Step 1. Connect Your iPhone to the PC
To save Live Photos from your iPhone to your PC, start by connecting the iPhone to your PC using a USB cable. You'll get some prompts on both your iPhone and the PC for permission to access the files when you connect your iPhone to the PC. Make sure to hit "Allow" to proceed with the next step.
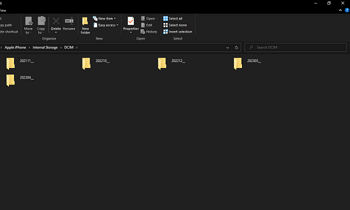
Step 2. Launch File Explorer
The second step is to launch the File Explorer. After File Explorer is launched, go to Devices and Drives and click on the icon of your iPhone. In the storage of your iPhone (that shows up in the File Explorer titled "DCIM"), navigate to your Photos folder.
Step 3. Select the Live Photos to be Transferred
In the Photos folder, locate the Live Photos that you want to save on your computer. You'll probably find all your Live Photos in a separate folder, so that might help a lot when you're looking for your pictures.
Step 4. Copy and Paste the Live Photos
Once you've located and selected the Live Photos you want to transfer, simply copy them. Then, navigate to the folder where you want to place them and paste the photos there. It might take a couple of minutes for the transfer to complete, so hang tight.
![launch File Explorer and select the live photos]()
How to Move Live Photos from iPhone to PC Using a USB Cable with iTunes
Don't forget that iTunes is also a good assistant to help you with the transfer process. If you want to know more about how to transfer photos from iPhone to PC using iTunes, continue reading. One thing to note is that you need to connect your PC with USB first and check the Wi-Fi around you works well and smoothly in case there will be a problem with the transfer process. Let's dive into the detailed steps:
Step 1. Connect iPhone to Your PC
The first thing to do to move Live Photos from iPhone to PC is to connect your iPhone to the PC via a USB cable.
Step 2. Launch iTunes
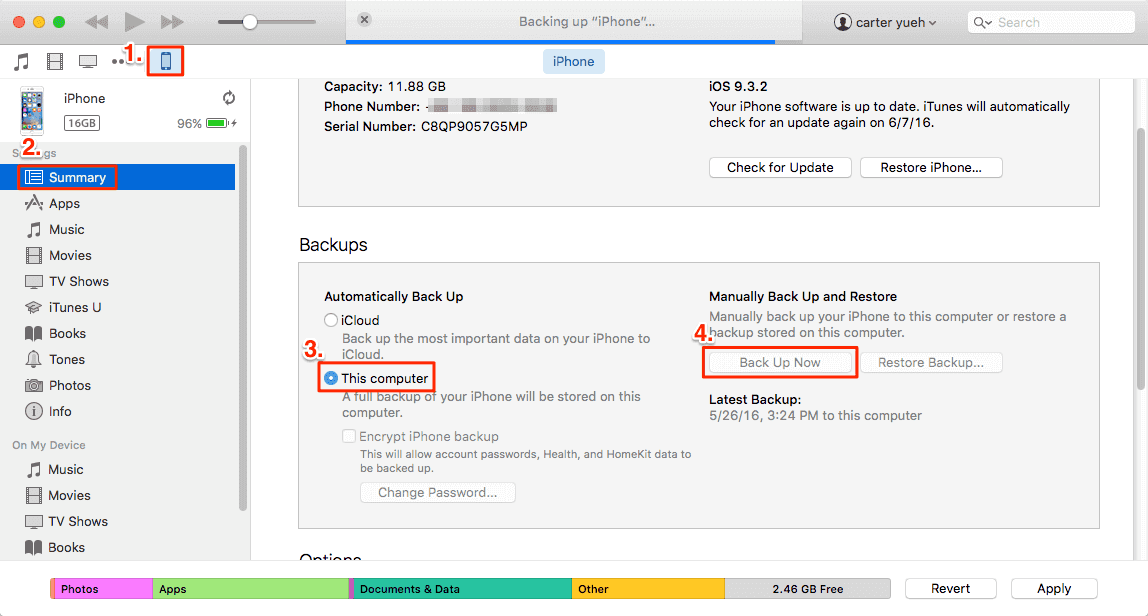
Launch iTunes on your PC and select the iPhone from the left panel.
Step 3. Locate Your Live Photos
Now, go to the Photos tab, and navigate to the Live Photos section. You'll see an option there saying "Sync Photos," which you'll need to mark in the checkbox. Then, choose "Selected Folders" and select the photos that you want to move to your computer.
Step 4. Sync the Selected Live Photos
Once you've selected all the Live Photos you want to move to your PC, you just need to click the "Apply" button to start the transfer process. Depending on how many Live Photos you're moving to your computer, this step might take some time to complete, but bear with it. Once the transfer is complete, you can see your Live Photos on your computer.
![sync the selected live photos and choose Sync Photos option]()
Conclusion
In this post, we've shared with you some of the best and easiest methods on How to Transfer Live Photos from iPhone to PC. We've discussed how to transfer your photos using iCloud, iTunes, Windows File Explorer, and EaseUS MobiMover in the sections above. All of these methods work really well, but depending on your situation, you might prefer some of these methods over others. If you have any queries related to this post or these methods, feel free to drop us a comment, and we'll get back to you as soon as possible.
FAQs on How to Transfer Live Photos from iPhone to PC
People ask a lot of questions about how to transfer Live Photos from iPhone to PC, and here are some of them.
1. How Do I Export Live Photos from iPhone to a Computer?
You can export Live Photos from iPhone to a computer using a lot of methods. You could use iCloud, iTunes, Windows File Explorer, or a third-party tool like EaseUS MobiMover.
2. How to Transfer Live Photos from iPhone to PC Windows 10?
If you're using Windows 10 on your PC, there's no need to worry. You can still transfer Live Photos from iPhone to PC using iTunes, iCloud, Windows File Explorer, or third-party tools (EaseUS MobiMover, for example).
3. How to Transfer Live Photos from iPhone to Mac?
If you're a Mac user, it's very simple to transfer Live Photos from iPhone to Mac. You can simply download them from your iCloud, or you could use iTunes for this purpose. Certain third-party apps that transfer data are also available on Mac, for example, EaseUS MobiMover, so you can use them to transfer your Live Photos too.


 NEW
NEW HOT
HOT