Applies to iPhone 12/12 Pro/12 Pro Max, iPhone 11/11 Pro Max, iPhone XR, iPhone X, iPhone 8/8 Plus, iPhone 7/7 Plus, iPhone 6/6s.
There are many benefits of deleting data, such as freeing up more space for your iPhone, improving your device's performance, or removing duplicate files. Anyway, it is a good habit to reorganize your device by removing some unnecessary data regularly. Among your iOS data, photos and videos take a huge chunk of the space on your device, so it's a good idea to get these files deleted.
Usually, you can delete photos and videos from your Album on your device, but this is very time-consuming. Given that, we collect some easy ways for you to do the same thing. Now, let's follow the following paragraphs to remove photos from an iPhone.
Part 1. How to Delete Photos from iPhone from a Computer with EaseUS MobiMover
EaseUS MobiMover, a popular iPhone data transfer tool, works best to delete various data from your device. These data include videos, music, ringtones, voice memos, audiobooks, contacts, messages, books, and more. Apart from deleting files, you can also apply it to add iPhone ringtones, transfer files between two iOS devices, or download videos from websites to your device, etc. Before deleting, you can use its Backup & Restore tool to back up your photos and videos. Thus, you don't have to worry about deleting important photos accidentally.
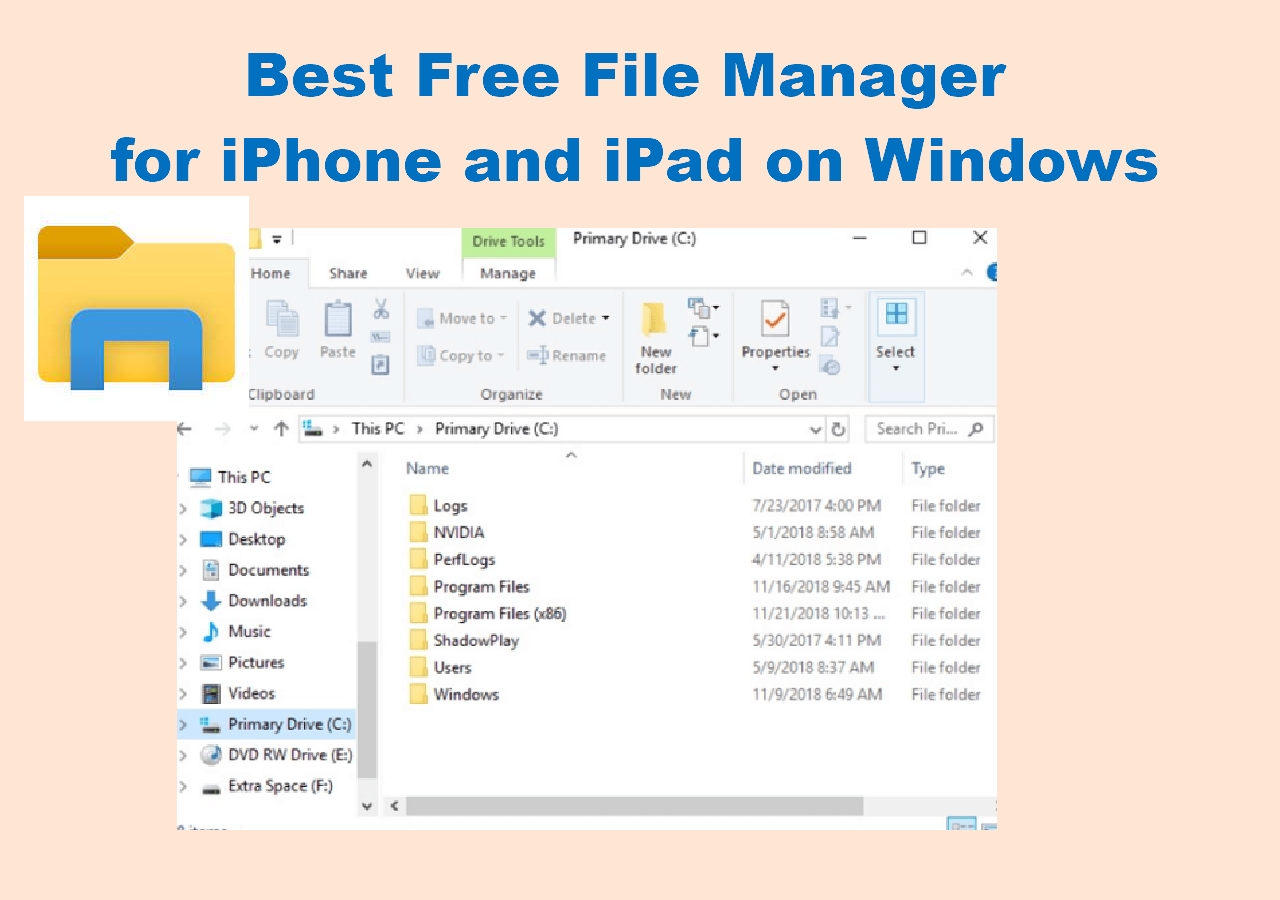
Now, let's download EaseUS MobiMover on your computer and delete iPhone photos from your PC.
The following steps show you how to delete iPhone photos from PC. You can apply similar steps to delete iPhone photos from Mac.
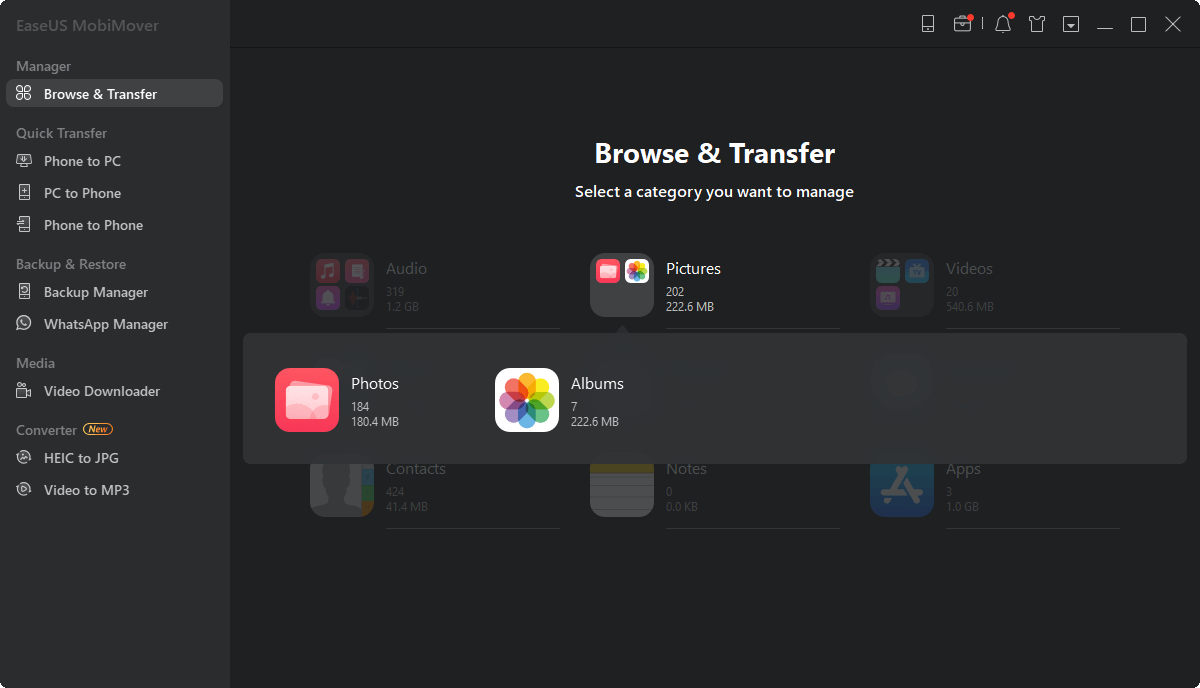
Step 1. Connect your iPhone to your computer with a USB cable, run EaseUS MobiMover, then go to "Content Management > Pictures > Photos". (If you prefer to remove photos from your iPhone by album, choose "Albums" instead.)
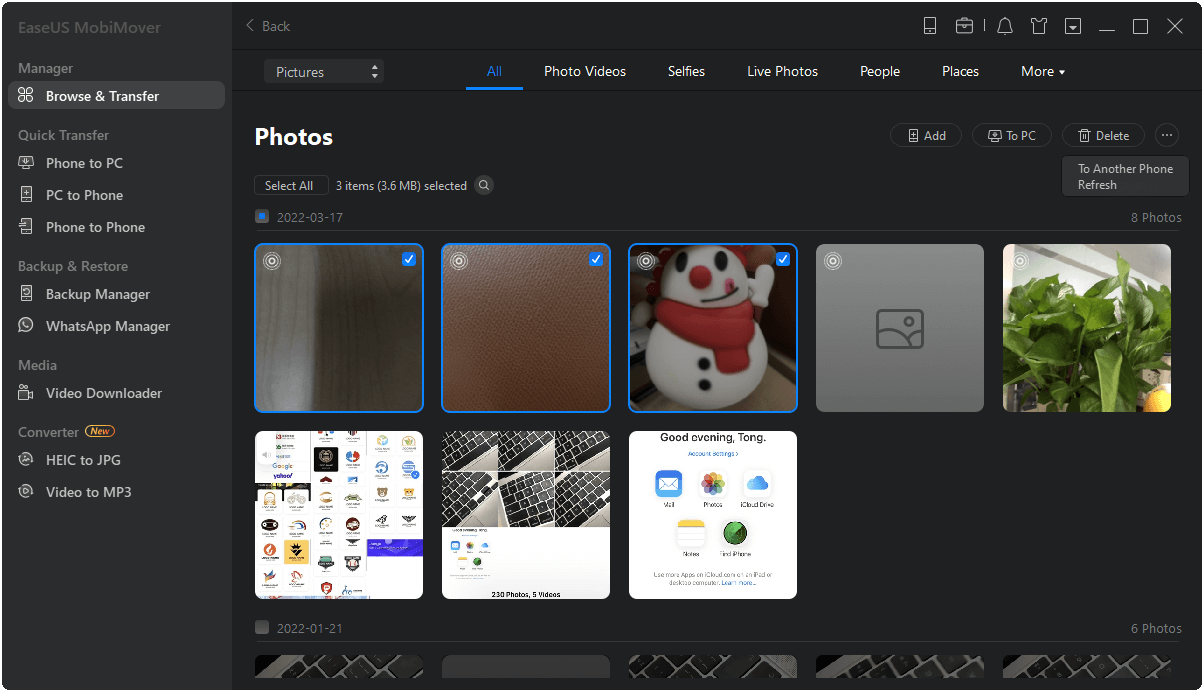
Step 2. If you want to delete all your iPhone photos at once, click "Select All" and tap the trash icon. If you intend to remove some specific items, select the photos you want to delete and then click "Delete".
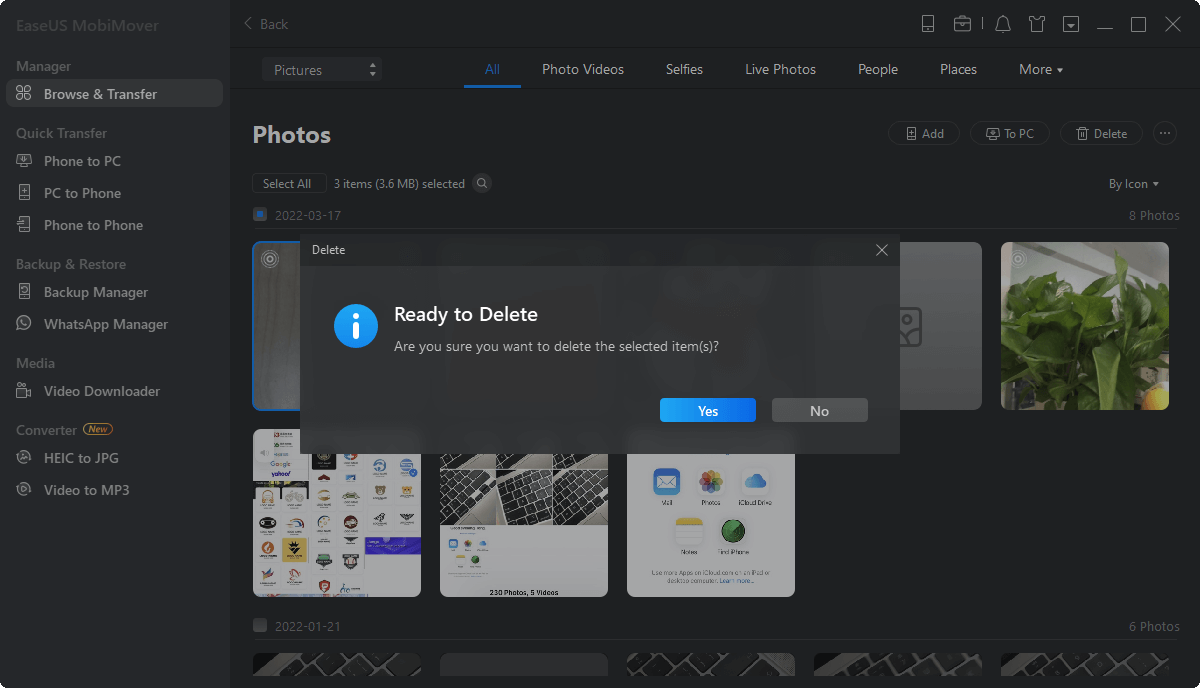
Step 3. After tapping the "Delete" button, a new window will pop up asking for confirmation. Click "Yes" in the window to delete photos on your iPhone from the computer.
Part 2. How to Delete Photos from iPhone with iTunes
Another indirect way to delete photos and videos is to use iTunes. By syncing your iPhone with iTunes, you can get all your current photos and videos replaced by what you choose in your iTunes backup. If you intend to remove some specific items from your iPhone, you can go back to use the method introduced in Part 1. Otherwise, you can follow these steps to delete all photos via iTunes.
Step 1. Download and install the latest version of iTunes on your PC or Mac.
Step 2. Connect your iPhone to your computer and run iTunes if it doesn't open automatically.
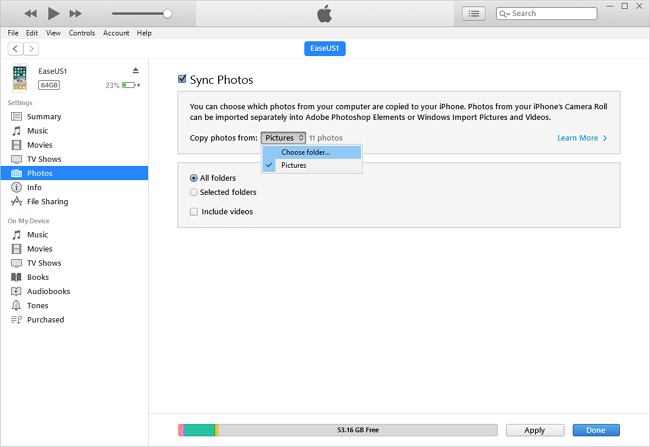
Step 3. Click the device button and choose "Photos."
Step 4. Check the box next to "Sync Photos."
Step 5. From the box next to "Copy photos from," choose "Choose folder..." You can choose an empty folder.
Step 6. Click "Apply."
![How to delete photos from iPhone from computer using iTunes]()
Part 3. How to Delete Photos from Windows PC via Explorer
Additionally, you can also remove photos from your iPhone via Windows Explorer. To do this, make sure you've installed iTunes, which is used to help the PC to recognize your device. Then, you can follow these steps to delete iPhone photos from the computer.
Step 1. Connect your iPhone to the computer and "Trust/Allow" the PC to access your iPhone.
Step 2. Click on "This PC" from your desktop.
Step 3. Choose "Apple iPhone," then navigate to your iPhone's DCIM photo folder from the left pane.
Step 4. Select specific photos you wish to delete or select all by pressing Ctrl+A.
Step 5. Press Shift+Delete to delete these photos from your iPhone.
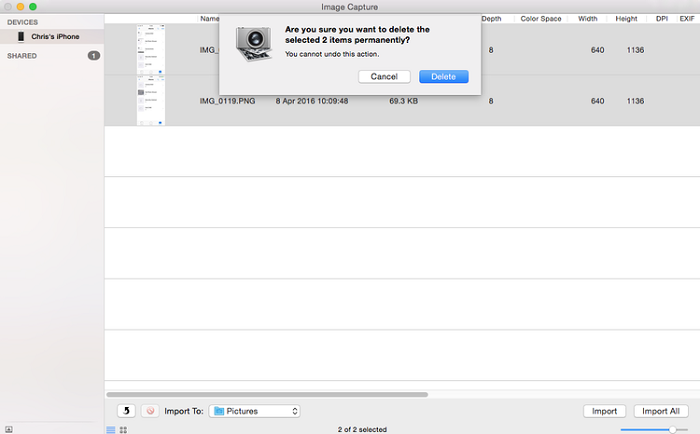
Part 4. How to Remove Photos from Mac with Image Capture
You can also use the Photos app on the Mac to delete all pictures. Before adopting this method, make sure you've turned the iCloud Photo Library off, or you can't remove photos in this way.
Step 1. Connect your iPhone to the Mac using the USB cable.
Step 2. Open the Image Capture on your Mac.
Step 3. Trust your Mac on your iPhone if asked.
Step 4. Then, the Image Capture will display all photos it detects.
Step 5. You can select specific items to delete or press Cmd+A to select all to delete.
Step 6. Confirm the deletion.
![Delete photos from Mac via Image Capture]()
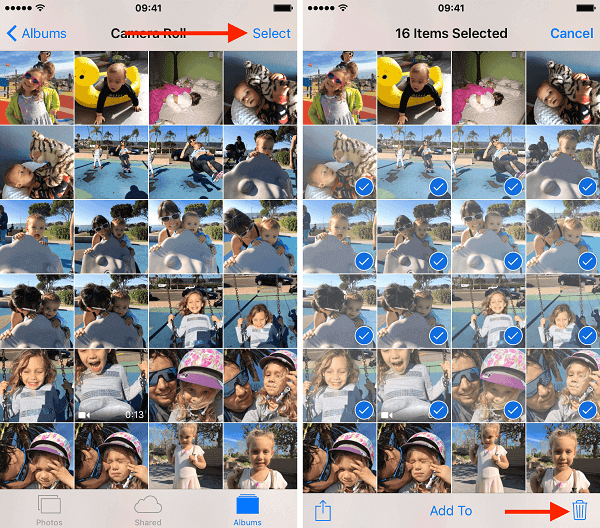
Part 5. How to Delete Photos from iPhone via the Photos App
You can also delete one or multiple photos from your iPhone via the Photos app. It is easy to operate. Whether to delete a single photo, massive photos, or a whole album, you can find your way in this part.
To delete photos one by one:
Step 1. Open the Photos app on your iPhone.
Step 2. Find the picture you wish to delete and tap on it.
Step 3. Then, tap the "Trash" icon on the bottom right and choose "Delete Photos."
To delete multiple photos:
Step 1. On your iPhone, open the Photos app.
Step 2. Choose an album that houses the photos you wish to delete.
Step 3. Tap on the "Select" option at the upper right corner.
Step 4. Now, you can mass select photos you wish to delete.
Step 5. Once you've done, tap on the "Trash" icon on the bottom right.
![How to delete photos from iPhone]()
To delete an album:
Step 1. On your iPhone, open the Photos app.
Step 2. Choose the album that store the photos. You can only delete particular image types like screenshots, bursts, selfies, Live Photos, etc.
Step 3. Tap on "Select" in the upper right corner.
Step 4. Tap on "Select All" on the left.
Step 5. Press the "Trash" icon to remove all photos.
To delete multiple albums:
Step 1. Open your Photos app on your iPhone.
Step 2. At the bottom of your screen, choose "Album."
Step 3. Tap on "Select All" next to "My Albums."
Step 4. Tap "Edit" in the upper right corner.
Step 5. Tap the red badge on the album you wish to delete.
Step 6. Confirm your choice by tapping "Delete Album."
![Delete Album from iPhone]()
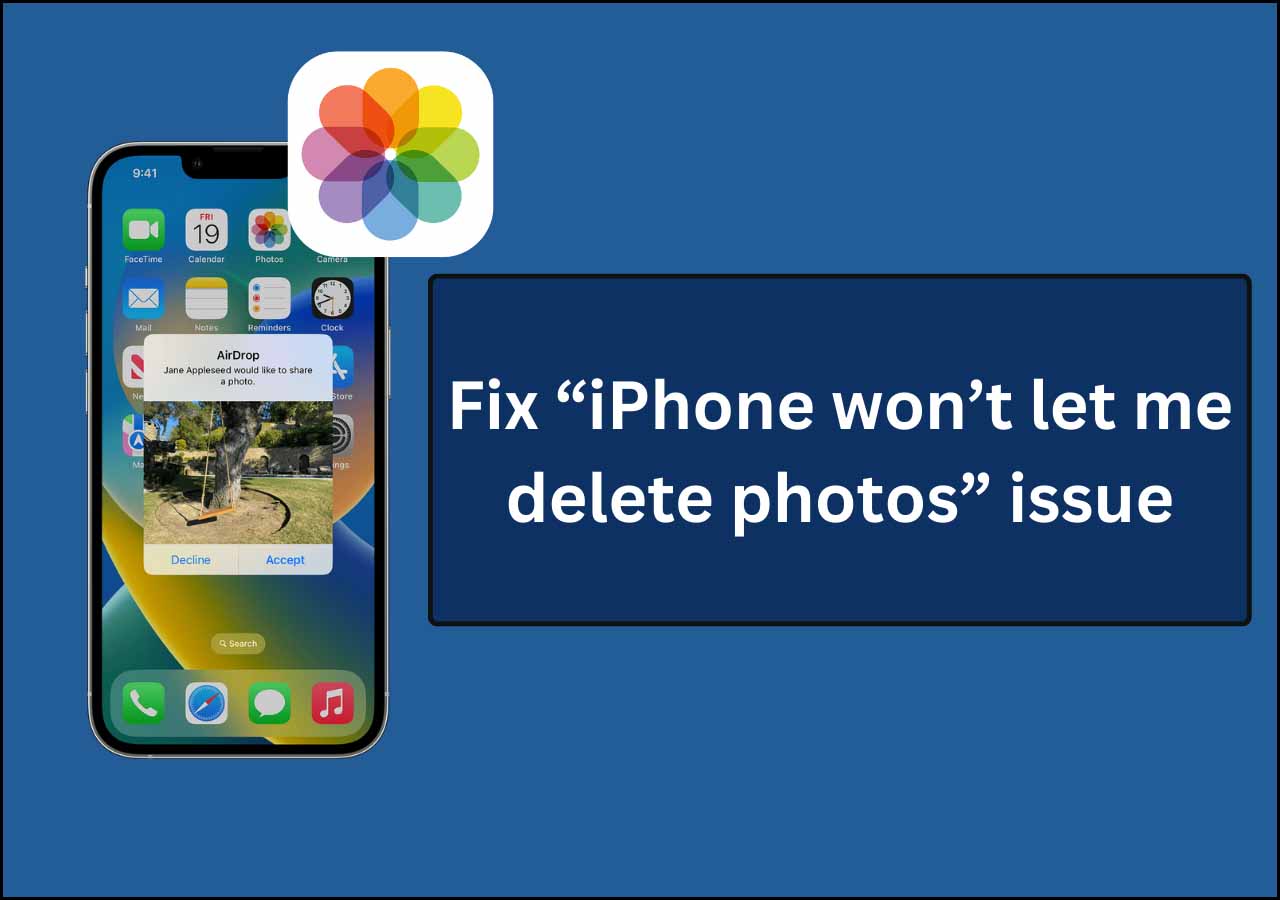
Tips: All the photos you delete will be placed in the Recently Deleted album for 30 days, then they're gone forever. So if you find you delete something important by accident, you can recover them from the Recently Deleted album. While if you wish to delete photos permanently, you can go to the Recently Delete album > Tap on "Select" > Tap "Delete All" > Tap "Delete Photos."
The Bottom Line
Whether you want to delete photos to free up more space or reorganize your iPhone data, you can use the methods mentioned in this guide to delete unwanted photos from a computer or via your Photos app. That's all about our guide, and we hope it can help you solve your problems.


 NEW
NEW HOT
HOT