Sometimes, you may need to import Outlook contacts to your iPhone or iPad for convenient use or export Outlook contacts to iCloud and sync across different devices. Regardless of your motivations, here are several ways to transfer Outlook contacts to iPhone.
| 🔍Fix |
💻Effectiveness |
🧿Difficulty |
| 1️⃣Direct transfer |
🔹Simply copy contacts from Outlook to iPhone directly on your device. |
Easy |
| 2️⃣The Outlook App |
🔹Sync Outlook contacts with iPhone and other iOS devices easily. |
Medium |
| 3️⃣EaseUS MobiMover |
🔹An iOS data transfer tool to import VCF/CSV files to the iPhone. |
Easy |
| 4️⃣iCloud |
🔹Sync everything, including calendar events, email messages, etc., to your iPhone. |
Medium |
| 5️⃣Add Outlook Account |
🔹Used only when your iPhone is connected to an internal corporate network. |
Complicated |
Method 1. Copy Contacts from Outlook to iPhone Directly
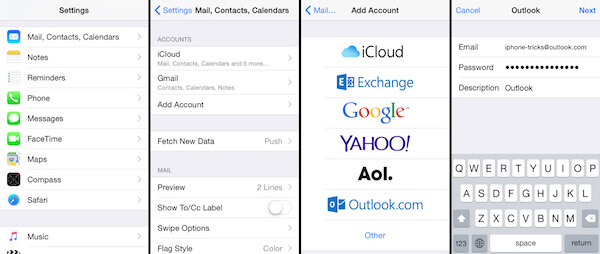
You can copy contacts from Outlook to your iPhone directly on your device. Here are the steps.
Step 1. Open the Settings app, scroll down to find, and select "Contacts" > "Accounts" > "Add Contacts." (If your device is running iOS 8 or earlier, replace "Contacts" with "Mail, Contacts, Calendars."
Step 2. Select and sign in to your Outlook account, toggle the "Contacts" toggle, and select "Keep on My iPhone." Then, tap "Save" to save your changes.
Step 3. Then, all Outlook contacts will be synced to your iPhone.
![Sync Outlook contacts on iPhone]()
Method 2. Save Outlook Contacts to iPhone via the Outlook App
If you're using the Outlook for iOS app on your iPhone, you can directly export Outlook contacts to the native iOS Contacts app. All you need is to sign in with your Outlook account.
If you want to sync your Outlook contacts across all your iOS devices, you can go to the Settings app, tap "Contacts," then set the Default Account to "iCloud."
Here's how to save Outlook contacts to your iPhone:
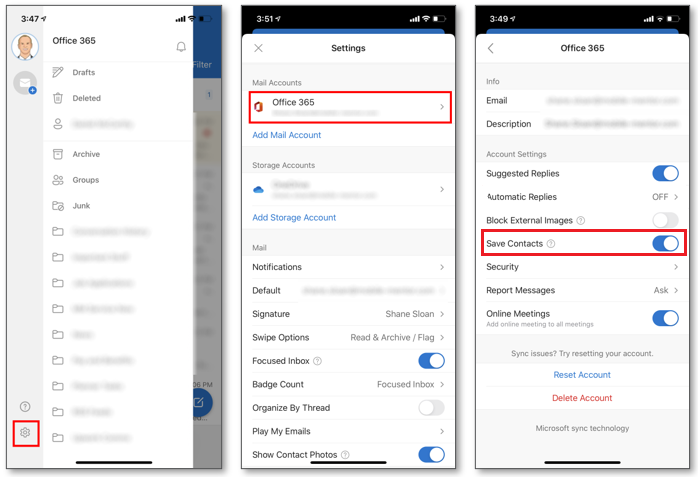
Step 1. Open Outlook for iOS on your iPhone.
Step 2. Tap your profile icon in the top-left corner of your screen. Then, tap Settings (a gear icon).
Step 3. Select your account and toggle on the "Save Contacts" toggle.
Step 4. A message will appear to ask if you'd like to save the Outlook contacts to your iPhone, make sure there is sufficient power on your device, and then tap "Save to my iPhone."
Step 5. Once the process is complete, you can see your Outlook contacts in the Contacts app on your iPhone.
![Export Outlook contacts to iPhone]()
Method 3. Transfer Outlook Contacts to iPhone in a Simple Way
Whether you use iTunes or iCloud, you'll have to sync everything to your device. Most people would likely mind this. If you're one of these groups, just try another indirect solution - export contacts from Outlook in CSV format, and then import these contacts to your iPhone with this iOS data transfer tool - EaseUS MobiMover. As a versatile iPhone data transfer tool, it allows you to import VCF/CSV files to the iPhone.
First of all, you'll need to export contacts from Outlook in CSV format:
- Sign in to your Outlook account on the computer.
- Click the people icon in the bottom left corner.
- Click on "Management" in the top right-hand corner, click "Export Contacts," then click "Export."
- Then, the selected contacts will be saved on your computer in CSV format.
Then, you can use EaseUS MobiMover to transfer Outlook contacts to your iPhone directly. EaseUS MobiMover can also export iPhone contacts to Excel format if you like.
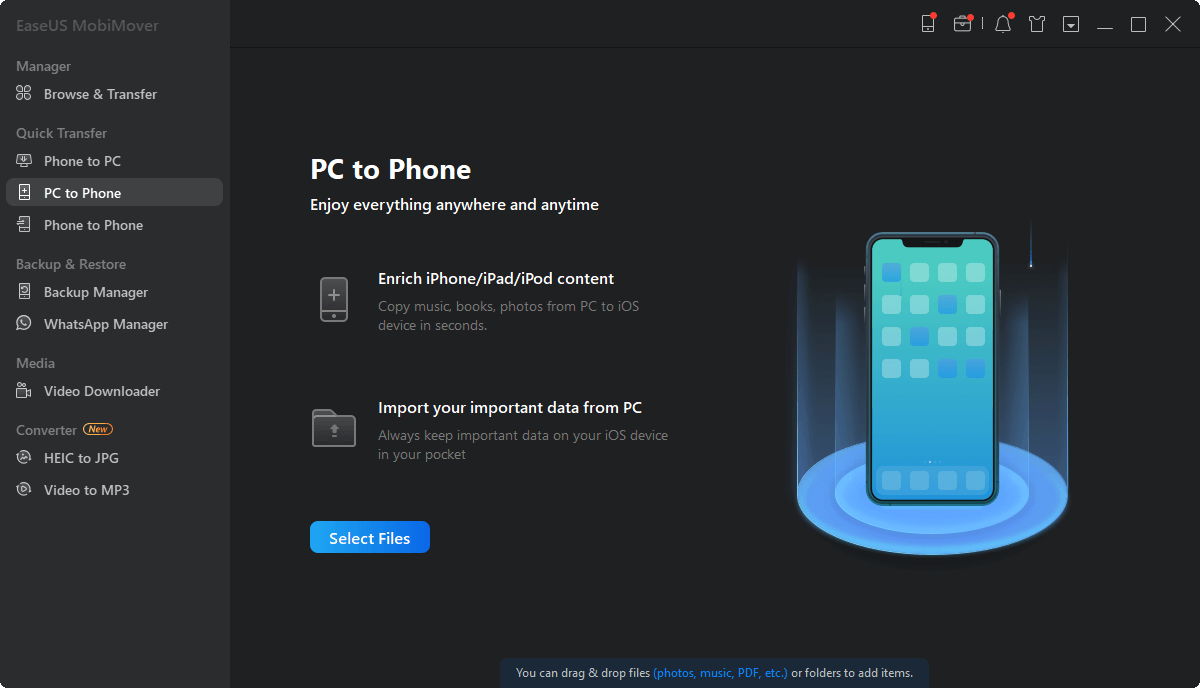
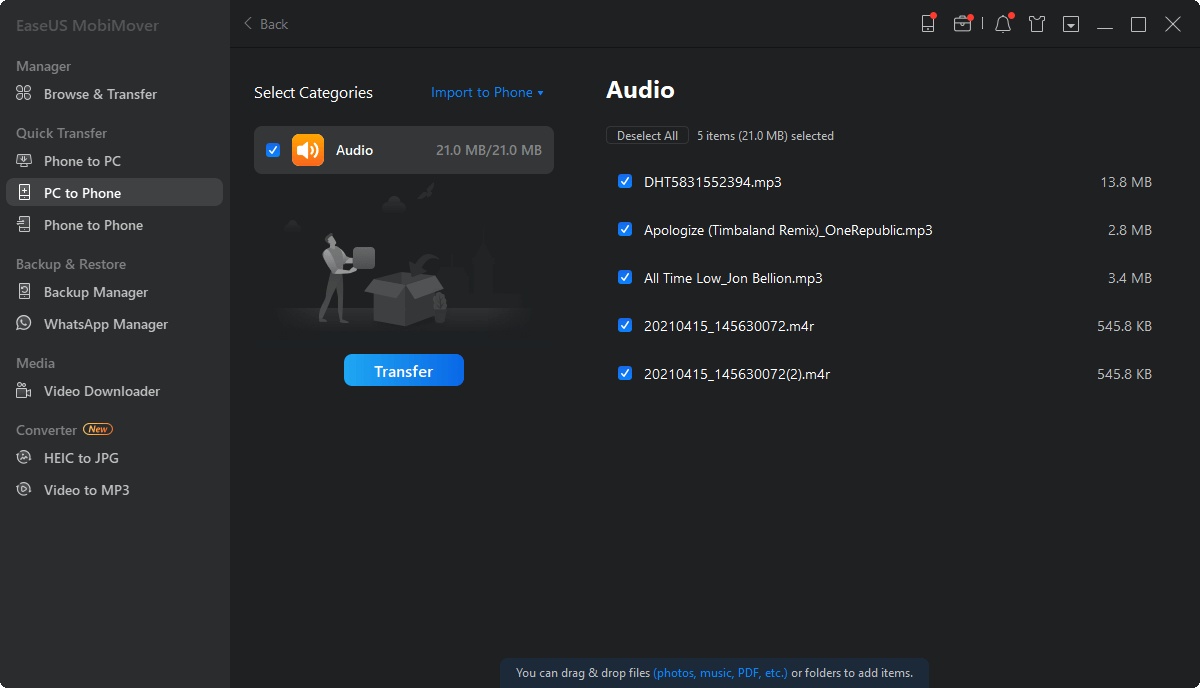
Step 1. Connect your iPhone to your PC with a USB cable and start EaseUS MobiMover. Unlock your iOS device and click "Trust". Then go to "PC to Phone" > "Select Files".
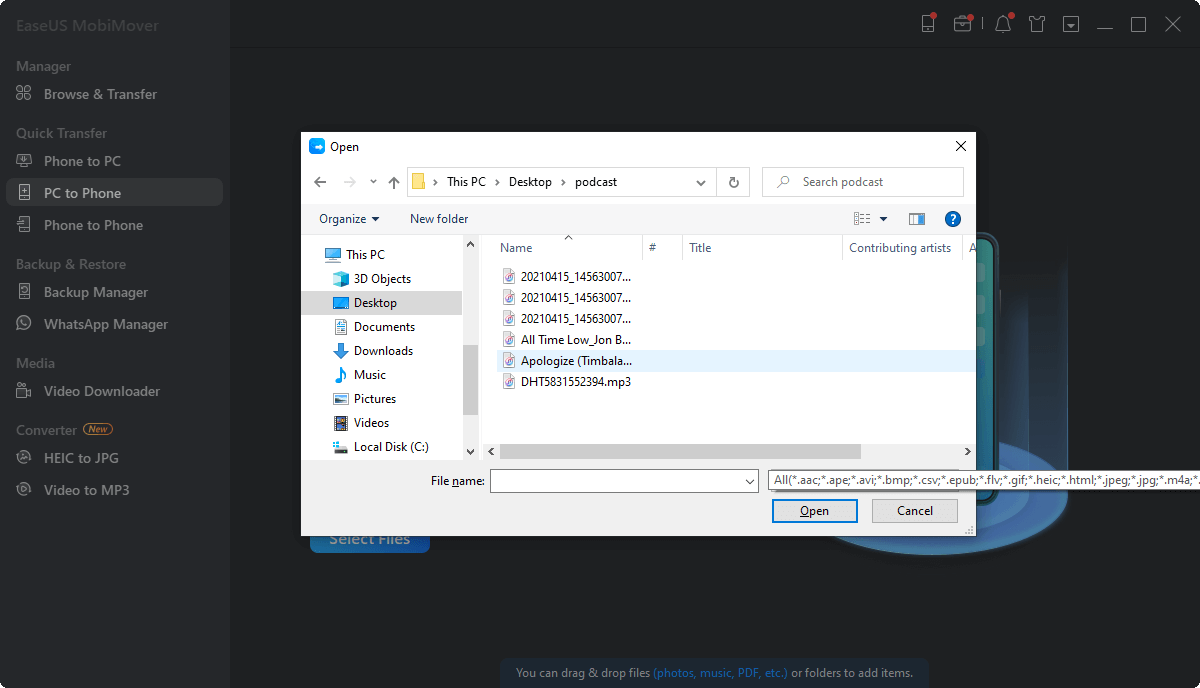
Step 2. Select the contacts (.vcf, .csv, or .html) you want to transfer and click "Open".
Step 3. Click "Transfer" to start transferring contacts from your PC to your iPhone.
Method 4. Sync Outlook Contacts with iPhone Using iCloud
Likewise, this approach will sync everything, including calendar events, email messages, etc., to your iPhone. If you don't mind that, the following steps are about how to sync Outlook contacts with iPhone:
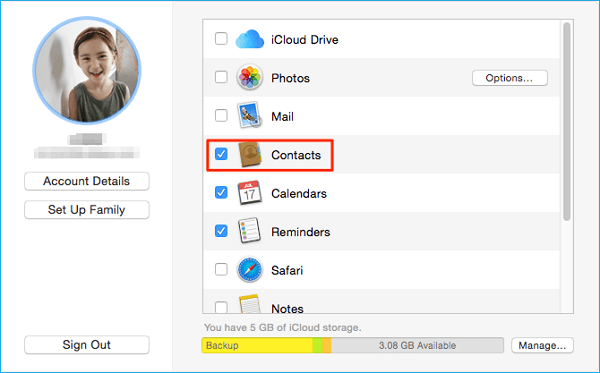
Step 1. Download and install the iCloud Control Panel on your computer.
Step 2. Run it and log in with your Apple ID and password.
Step 3. Tick the box next to the "Mail, Contacts, Calendar, and Tasks."
Step 4. Then, all of the information stored in your mail account, including Outlook, will be synced to your iPhone.
![import outlook contacts to iPhone via iCloud application]()
If you need, you can also import Google contacts to the iPhone similarly.
Method 5. Add Outlook Contacts to iPhone through Exchange
This method can be used only when your iPhone is connected to an internal corporate network. Follow the steps to learn how to add Outlook contacts to iPhone:
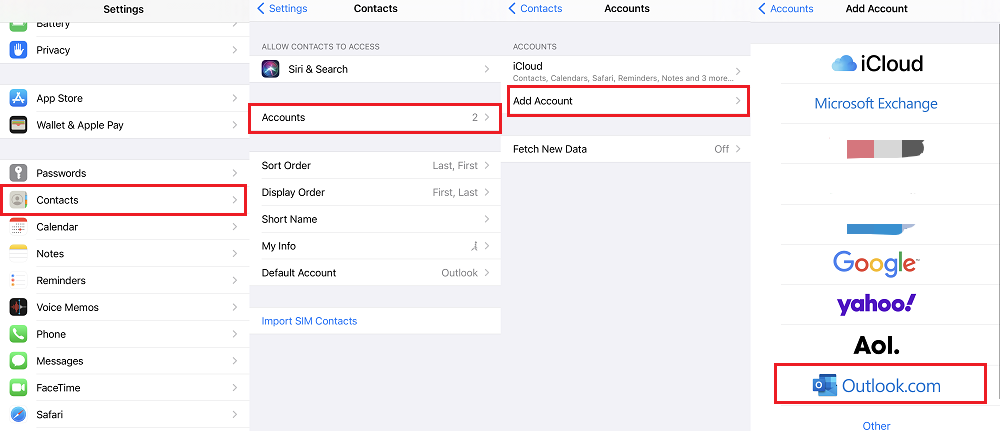
Step 1. Open the Settings app on your iPhone or iPad.
Step 2. Tap "Contacts," and then tap "Accounts."
Step 3. Tap "Add Account." From where, choose "Outlook.com." If you have an Outlook account here, tap it and enable "Contacts."
Step 4. Log in with your Outlook account name and password.
Step 5. Wipe over the Contents to the "On" position. Tap the "Save" icon.
You can also go to the Settings app > Account & Password > Add Account > Outlook.com > Sign in > Toggle the "Contacts" to ON > Save.
![Import Outlook Contacts to iPhone]()
The Bottom Line: Import Outlook Contacts to iPhone Now
That's all about our guide on how to sync Outlook contacts to iPhone or iPad. As you can see, there are many different ways for you to import Outlook contacts to your iPhone. Besides, we also give you a bonus tip to transfer other files between iPhones or iPads or between an iOS device and a computer. If you're interested in data management, don't miss EaseUS MobiMover.
More Frequently Asked Questions About iPhone Contacts
Do you want to dive deeper into iPhone contacts? If you do, these questions and answers might be helpful.
1. Why won't my Outlook contacts sync with my iPhone?
Many factors can be responsible for the problem that Outlook contacts can't sync with your iPhone. To solve this problem, you can try these solutions.
- Restart your iPhone. A simple restart can fix most small issues with your iPhone.
- Enable contacts sync of Outlook by going to Settings > Account & Password > Add Account > Outlook.com (Exchange). Enter your email address or phone number and tap "Next." Then, enter your password and tap "Sign in." Tap "Yes" to allow iPhone to access your Outlook data. Finally, go to turn on "Contacts" sync and tap "Save" to save your change.
- Set Outlook as your default account by going to Settings > Contacts > Default Account > Outlook.
- Reset your account. Open the Outlook app on your iPhone and go to Settings. Select the account that is not syncing and tap "Reset Account."
2. How do I import email contacts to my iPhone?
You can sync contacts from Google, Outlook, Exchange, Yahoo, and Outlook. Their steps are similar. Here, we will take Google Gmail, for example, and show you how to import contacts from Gmail to your iPhone.
Step 1. On your iPhone, go to Settings > Account & Password > Add Account > Google.
Step 2. Enter your email address or phone number and tap "Next."
Step 3. Enter your Google password and tap "Next."
Step 4. Ensure the contacts are enabled and tap "Save."
If you have already added an account, you can enable contacts for the existing Gmail account by going to Settings > Account & Password. Select an account and tap the white "Contacts" switch.
3. How do I stop Outlook from syncing with my iPhone?
It is easy to stop Outlook from syncing with your iPhone. You need to go to Settings, select the email account, and switch the "Save Contacts" slider to the off position. You can also delete your Outlook contacts by navigating to the contact card and selecting "Delete Contact."
NEW
HOT
