The goal of transferring photos from an iPod to a computer can be achieved in many different ways depending on your computer model. If you're using a Windows PC, you can use EaseUS MobiMover, Windows Explorer, the Photos app, iCloud, or Email to get the job done. If you're using a Mac computer, you can use AirDrop, iCloud, the Photos app, or Image Capture to handle this task.
Here we will mainly focus on how to transfer photos from iPod to PC since the ways to transfer photos from iPhone or iPod to Mac have been discussed previously.
Now, let's dive in!
Method 1. Transfer All/Multiple Photos from iPod to PC By Categories
Applies To: PC and laptop running Windows 7 and later; Mac running OS X 10.7 and late
If you want to transfer one or multiple photos from your iPod to your PC easily and quickly, you can use this free iPhone transfer software - EaseUS MobiMover to get the job done. With this tool, you can view and access all photos on your iPod from the computer by categories like live photos, selfies, portraits, and more and transfer only wanted photos to your computer. Before transferring, you can customize the export format as the original HEIC format or convert it to JPG format. Once it's set, you can apply the settings to the further transfer.
In addition to photos, you can also transfer other files like contacts, videos, messages, notes, and more.
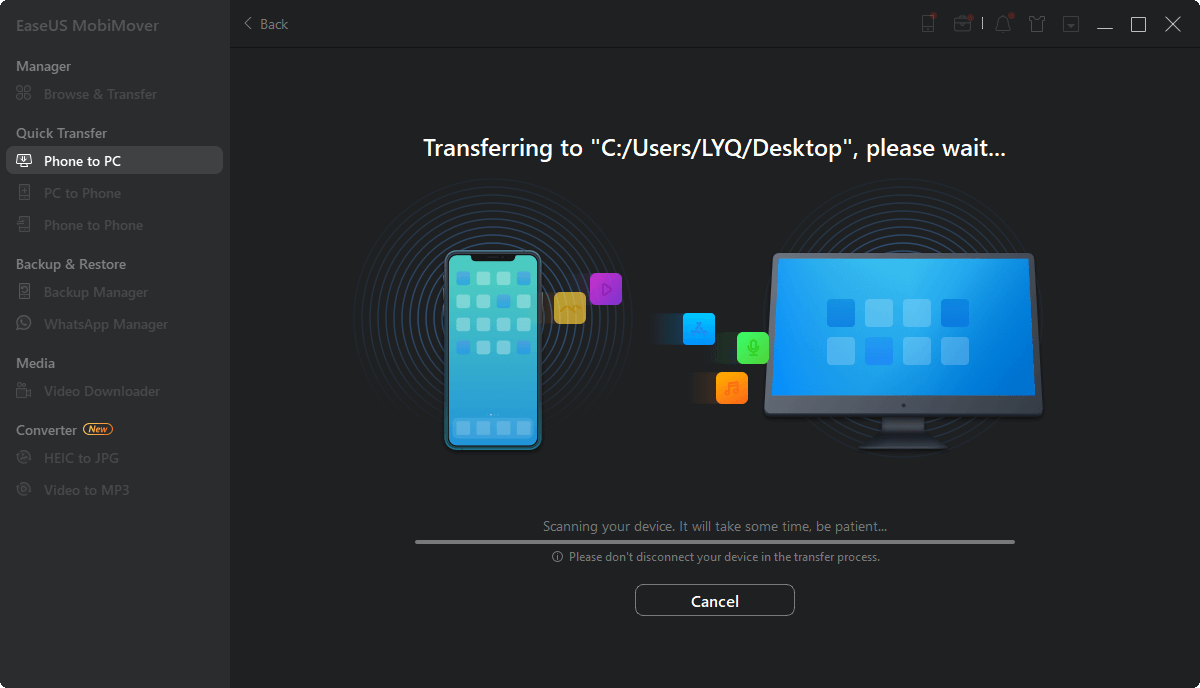
Step 1. Connect your iPod to your computer (Mac, PC, or laptop). Launch EaseUS MobiMover, then choose "Phone to PC" and click "Next" on the screen. If you prefer to transfer photos from iPod to computer selectively, go to "Content Management" > "Pictures" > "Photos".
Step 2. Select "Pictures" to move photos from the iPod to the computer. You can also choose other supported data categories at the same time. MobiMover will export the images to your desktop by default. And you can customize the storage path as you wish.
Step 3. Now, click the "Transfer" button to start transferring photos from iPod to computer at a fast speed. You can back up your iPod through this way regularly.
Other than photos, EaseUS MobiMover also supports other categories, including videos, audio files, contacts, messages, books, and more. And this versatile tool can also enable you to:
Method 2. Get Photos Off iPod onto Computer with Windows Explorer
Applies To: PC or Laptop running Windows 7 and later
You can import the photos from your iPod Camera Roll to your computer via Windows Explorer. No third party is required. But according to users from Reddit, you might only be allowed to transfer photos in the "Save Photos" album on your iPod. Those photos that are saved in other albums are invisible. This also happens to the Windows 10 Photos app and iTunes. If you don't mind, go for this method. While if you want to transfer all photos, you'd better go back to use EaseUS MobiMover.
Step 1. Unlock your iPod and connect it to your PC/laptop. Hit "Trust" on your device when a prompt pops up on your iDevice asking you whether to trust this computer.
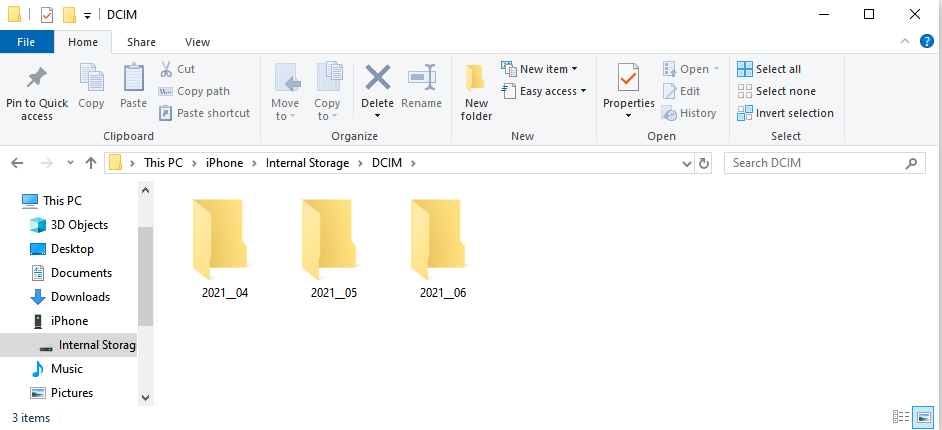
Step 2. Open "This PC" on your computer, go to [your device name] > "Internal Storage" > "DCIM." Your photos will be sorted into different folders by month.
Step 3. Select the folder or specific photos you wish to transfer from your iPod to your computer.
![transfer-photos-via-windows-explorer]()
Method 3. Import Photos from iPod to PC via the Photos App
Applies To: Computer running Windows 10
On computers running Windows 10, there is the Photos app that helps to transfer photos from iOS device to computer. Learn how to do it from the steps below. (You can also use the Photos app on Mac to get photos off your iPod onto Mac. Read the post about how to transfer photos from iPhone to Mac for reference.)
Step 1. Unlock your iPod and connect it to your computer.
Step 2. If a prompt appears on your iPhone asking you whether to trust this computer, click "Trust."
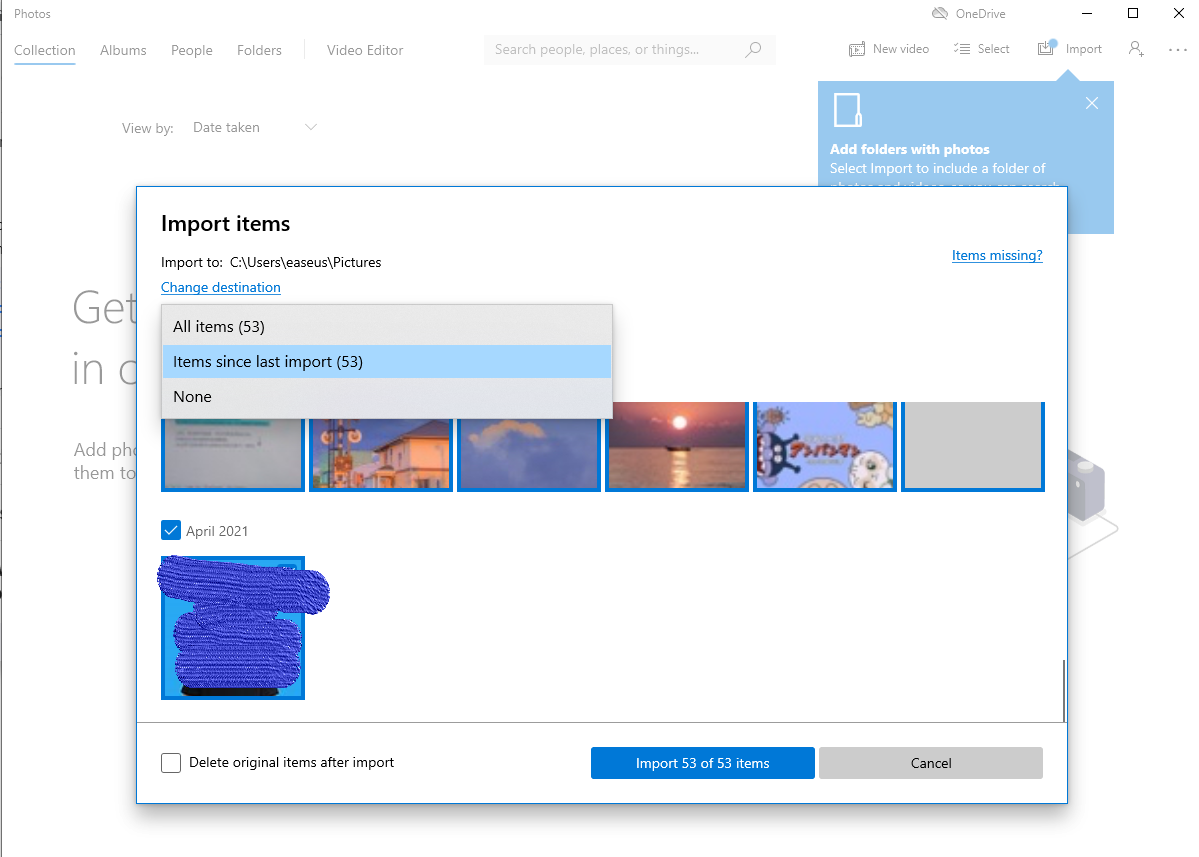
Step 3. Open Photos on your Windows 10 computer, click the "Import" button, and choose "From a connected device."
Step 4. Then Photos will load all the photos and videos on your iDevice. When it has finished, you can choose to transfer all photos or just copy some pictures from your iPod to the computer.
![/transfer-photos-with-windows-photos]()
Method 4. Copy Photos from iPod to Computer via iCloud
Applies To: Mac, PC, laptop
With the help of iCloud, you can sync photos from your iPod to other devices on which iCloud is available, whether you have installed iCloud on your computer or not. (This method is applied on PC with the iCloud control panel. If you haven't installed it yet, go to the post about how to download iCloud photos to PC to learn how to copy photos from your iPod to the computer via iCloud.com.)
Step 1. On your iPod, go to "Settings" > [your name] > "iCloud" > "Photos" and turn on "iCloud Photo Library."
Step 2. On your computer, open the iCloud control panel.
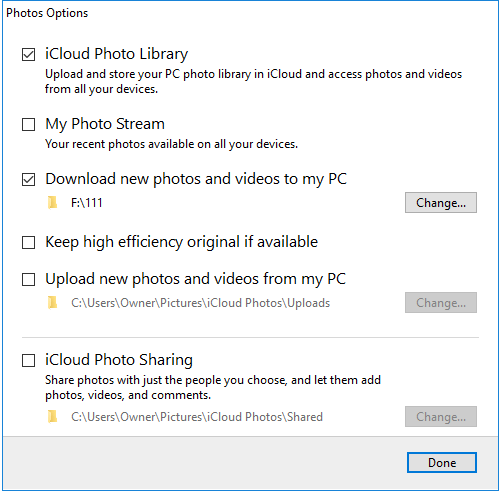
Step 3. Click Options next to "Photos" and check "iCloud Photo Library."
Step 4. Turn on "Download new photos and videos to my PC."
![transfer-iphone-photos-to-pc-icloud]()
By doing so, your iPod photos will be synced to your computer automatically while connected to Wi-Fi. This method can meet your need if transferring all photos from iPod to your computer is what you want.
Method 5. Share Photos from iPod to Computer via Email
Applies To: Mac, PC, laptop
The last method recommended here is to email the photos to yourself. If you want to share a few photos from your iPod to your computer, you can apply this method.
Here's how:
Step 1. Go to the "Photos" app on your iPhone.
Step 2. Select the photos you'd like to transfer to your computer and then tap on the "Share" button.
Step 3. Choose "Mail" and send an email to yourself.
Step 4. Open the email on your computer and save the photos to it.
![transfer-ipod-photos-through-mail]()
The Final words
As you can see, other than iTunes, there are also many other methods you can choose from to transfer photos from your iPod to your computer. You don't need to suffer the laborious operations of iTunes anymore. Just pick the methods that suit your needs to transfer any photos from your iPod to your computer. These methods are also applied to import photos from iPhone or iPad to the computer.