Applies To: iPad, iPad Pro, iPad Air, and iPad mini; MacBook, MacBook Air, MacBook Pro, iMac, and iMac Pro
Key Takeaways: To transfer files from your Mac to your iPad, you can use methods including: free third-party tool, AirDrop and Finder.
- EaseUS MobiMover:
- Connect iPad to your Mac with USB cable.
- Follow the screen to click "Transfer" to move items from Mac to iPad.
- AirDrop:
- Turn on AirDrop on both your Mac and iPad. Select the files on your Mac, right-click, and choose Share > AirDrop.
- Select your iPad from the AirDrop list to transfer the files.
-
iTunes:
- Connect your iPad to your Mac using a USB cable.
- In iTunes on your Mac, select your iPad in iTunes and go to the "File Sharing" section.
- Drag and drop files from your Mac to the File Sharing section to transfer them to your iPad.
As a Mac user, you have more options to transfer files from Mac to iPad or iPhone because Apple provides massive services to get the job done. Ranging from the cloud-based service (iCloud) to the local transfer solution (iTunes), there's always one that can satisfy your needs.
In addition to Apple's official transfer ways, today's guide will introduce a complete smooth and user-friendly data transfer solution for you to transfer data from Macbook to iPad. Which way to choose depends on your specific requirements for data transfer, such as transfer speed, the types of data you wish to transfer, data size, etc.
Part 1. How to Transfer Files from Mac to iPad with USB Cable for Free
Applies to Photos, Videos, Audio, Notes, Contacts, Messages, Voice Mails, Books, Safari Bookmarks, and more
If you're looking for an easy solution to transfer files from Computer to iPad, such as videos, photos, contacts, and messages between a PC/Mac and an iPad/iPhone, then this iPhone data transfer tool - EaseUS MobiMover is one of the best options. With it, you can easily and quickly transfer videos, photos, audio, or other data from your Macbook to your iPad. Whether you want to add movies to iPad or put music on iPad, you can get it done easily using this tool.
Here're some of its key features.
- Easy to use. You can use it without training.
- Highly intuitive user interface. You can easily find access to transfer data.
- Fast transfer speed. Quick to transfer a large number of files without the internet.
- Multiple device compatibility. It supports almost all Windows, macOS, and iOS devices.
- Preview before transferring. You can preview all files before transferring them to your iPad.
Once you download this tool, you can download 10 files per day for free. Here's how to transfer data from Macbook to iPad with USB cable:
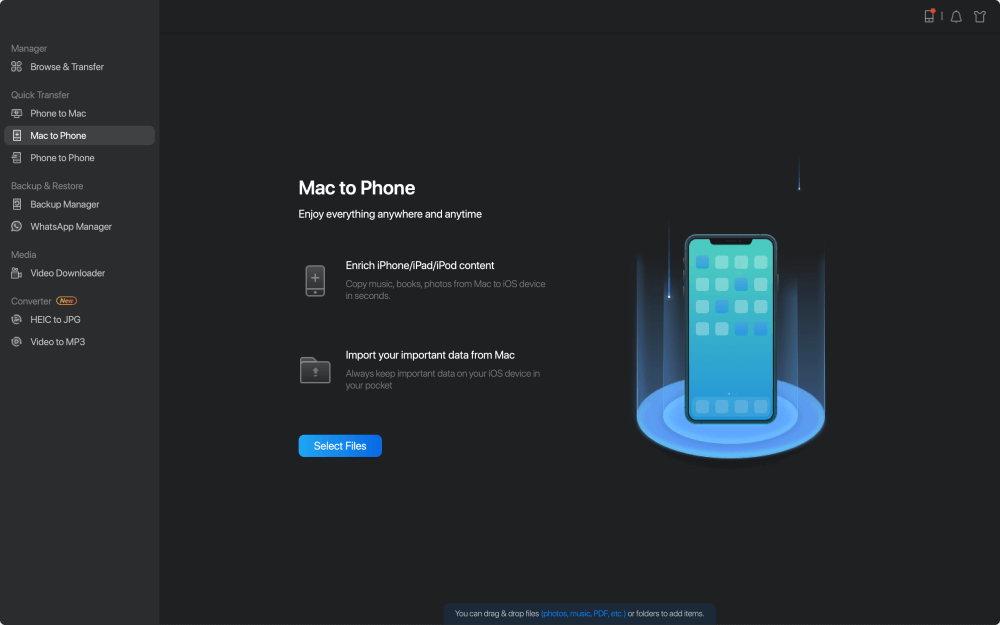
Step 1. Connect your iPad to your Mac, and click "Trust" when a prompt appears on your iPad asking you whether to trust this computer > Run EaseUS MobiMover > Choose "Mac to Phone" from the left pane > Click on the "Select Files" to move on.
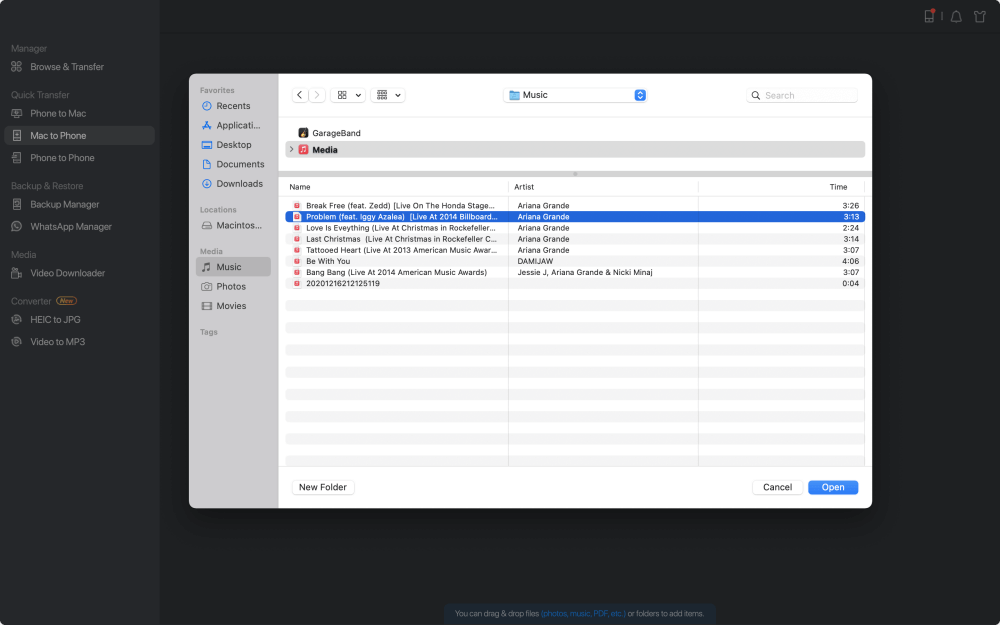
Step 2. Go to browse the files you want to transfer. After choosing the desired files, click "Open".
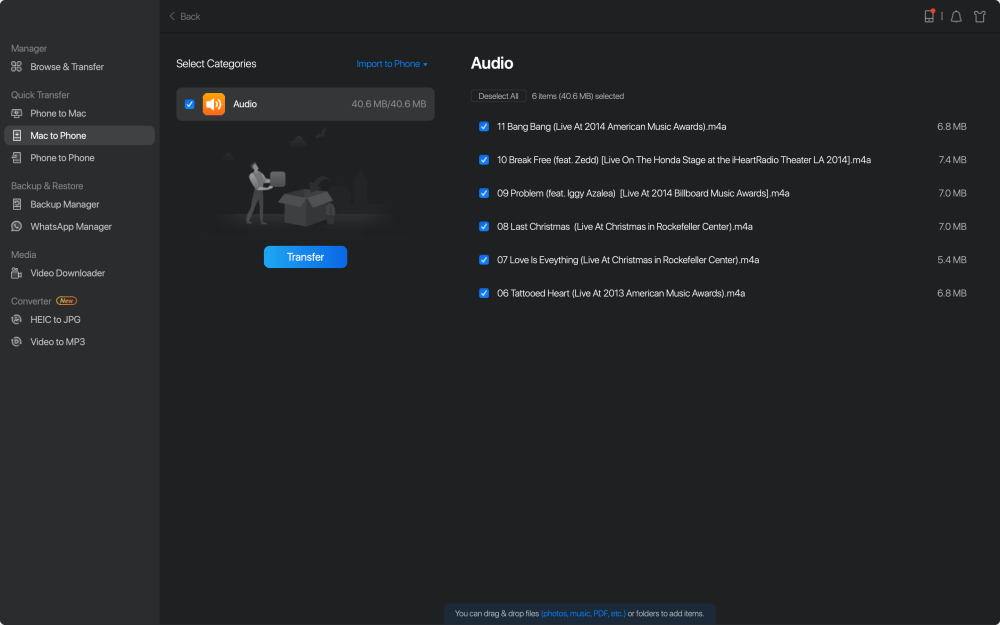
Step 3. Preview the selected files on the right pane, with their detailed file names and file sizes. To add more items to transfer, you can click "Add Contents" or directly drag files or folders from your Mac to the appointed area. Finally, click "Transfer" to start transferring.
Asides from these great features, you can also expect some advanced functionalities, such as:
Part 2. How to Transfer Files from Mac to iPad Wirelessly
Applies to documents, photos, map locations, web pages, and more
Another convenient option is to use AirDrop, the iOS and macOS feature that allows users to wirelessly share files with WiFi and Bluetooth. However, it was reported that using AirDrop may expose your phone number and email address to attackers. So, you'd better be careful to use this feature.
Moreover, not all files are available for transfer via AirDrop. Currently, some supported files include documents, photos, map locations, web pages, etc.
To send or transfer files from Mac to iPad wirelessly via AirDrop:
Step 1. Switch on AirDrop on your Mac.
- Click on the Control Center icon in the top menu bar.
- Click on AirDrop. Make sure the toggle is set to on.
- Specify your AirDrop settings to "Contacts Only" or "Everyone."
Step 2. Turn on AirDrop on your iPad. (Don't forget to switch on Bluetooth and WiFi at the same time.)
- Swipe down from the top right-hand corner of your screen to open Control Centre.
- Press and hold on the box that contains the Airplane Mode, Wi-Fi, and Bluetooth buttons.
- From the pop-up window, tap on the AirDrop button.
- Select "Contacts Only" or "Everyone."
Step 3. Transfer files from Mac to iPad.
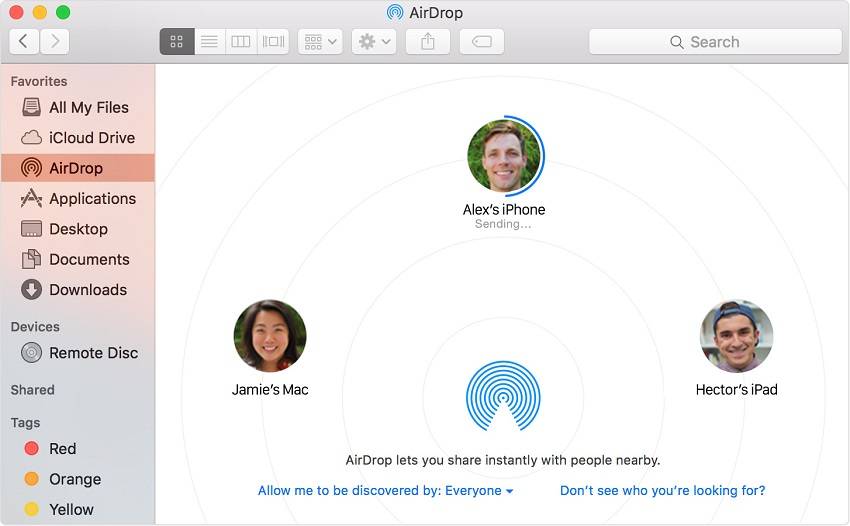
Drag the items you want to send from Mac to iPad to the image of the recipient and click Send.
Or you can click the Share button in an App, choose AirDrop, choose the recipient and then click Done.
![How to transfer files from Mac to iPad without iTunes]()
Pro tips: With AirDrop, you can also transfer files from iPhone to Mac wirelessly without iTunes or share content between two iOS devices freely.
Part 3. How to Transfer Data from Macbook to iPad with Finder
Starting with macOS Catalina, the Finder replaces iTunes as the way to let you access and browse content on your computer. If there is a Finder on your Mac, follow these steps to transfer files from your Mac to your iPad.
Step 1. Plug your iPad into your Mac using a cable and launch Finder.
Step 2. If this is the first time you connect your device to your Mac, click "Trust" in the Finder.
Step 3. Likewise, tap "Trust" on your device if asked, then enter your passcode to proceed.
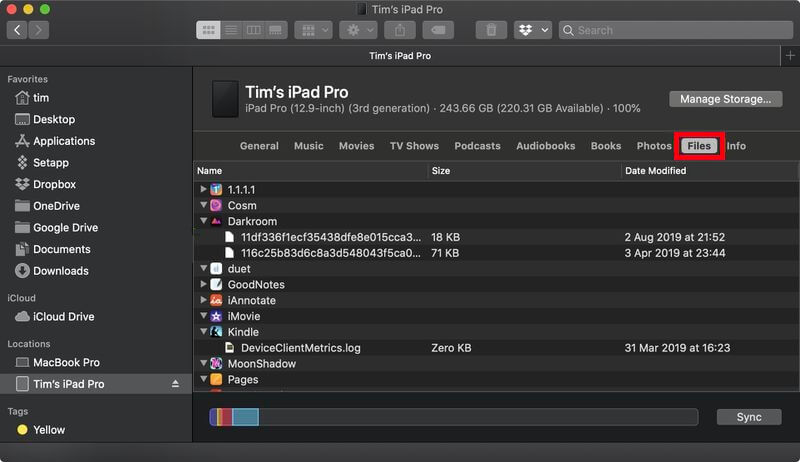
Step 4. Click the "Files" tab. Then you'll see a list of apps that supports sharing files.
Step 5. Press Command + N to open another Finder window and select the files you want to transfer to your iPad. You can only select files that work with apps on your iPad.
![Transfer files from Mac to iPad]()
The Final Words
All three methods above can be used to transfer files from Mac to iPad. It's hard to say which tip is the best for you because each way supports different file types. If you prefer to transfer photos, videos, and audio from your Mac to your iPad, using EaseUS MobiMover in Part 1 could be a better option. While if you intend to copy documents to your iPad, using AirDrop in Part 2 or Finder in Part 3 is recommended.
FAQs on How to Transfer Data from Macbook to iPad
1. How do I transfer files directly to my iPad?
You can use iTunes to transfer files directly from PC to iPad.
- Launch iTunes on your computer and connect your iPad to the Windows or Mac.
- Select your iPhone device. From the File Sharing section, choose Apps.
- Drag and drop files from a folder to your iPad.
2. How do I transfer files from iPad to Mac via USB?
You can use EaseUS MobiMover to transfer files from iPad to Mac via a USB cable. With this professional software, you can easily transfer your files without data loss. Also, it only needs three steps to transfer data to Mac:
- Connect iPad to Mac and launch EaseUS MobiMover.
- Choose Phone to PC mode, and select the categories you want to transfer.
- Click Transfer to start the process, and keep your iPad connected until the data transfer finishes.


 NEW
NEW HOT
HOT