As we all know that, HEIC is a new photo format developed by Apple to help iOS users take and store pictures in a smaller size but of a higher quality. But sadly, this photo format hasn't been widely used on all platforms, so if you want to view, open, or print this kind of photo, you'll need more steps to convert them into more common photo formats. Here we will show you how to convert and print HEIC photos. (If you want to know more about HEIC, check what is HEIC here.)
How to Print HEIC Photos on PC or Mac
As we mentioned earlier, you'll need to convert the HEIC image to a more common photo format like JPG first, and then use your printer to print them out on your PC or Mac. So your very first step is to convert HEIC photos to JPG either with an online conversion service or a desktop-based converter.
But considering that online services require a seperate transfer process to get your pictures from iPhone to the computer, we don't recommend this way. Hence here we'll mainly tell you how to use this easy and powerful desktop-based converter - EaseUS MobiMover to do a quick conversion without losing quality.
Convert HEIC Photos to JPG on PC/Mac Without Losing Quality
EaseUS MobiMover is an iPhone data transfer tool that can be used to transfer HEIC images to your Mac or PC with original quality in JPG format. This process will convert iPhone photo to JPG. The conversion will automatically happen during the transfer process. Once the transfer completes, you can view or print these photos on your computer. In addition to the conversion function, EaseUS MobiMover can also be used to do many things, such as:
- Transfer data from an iPhone to a PC, or vice versa
- Transfer data between two iOS devices
- Back up your iPhone or iPad
- Download videos from popular video-sharing sites
- Convert any local video to MP3
To convert HEIC pictures to JPG format:
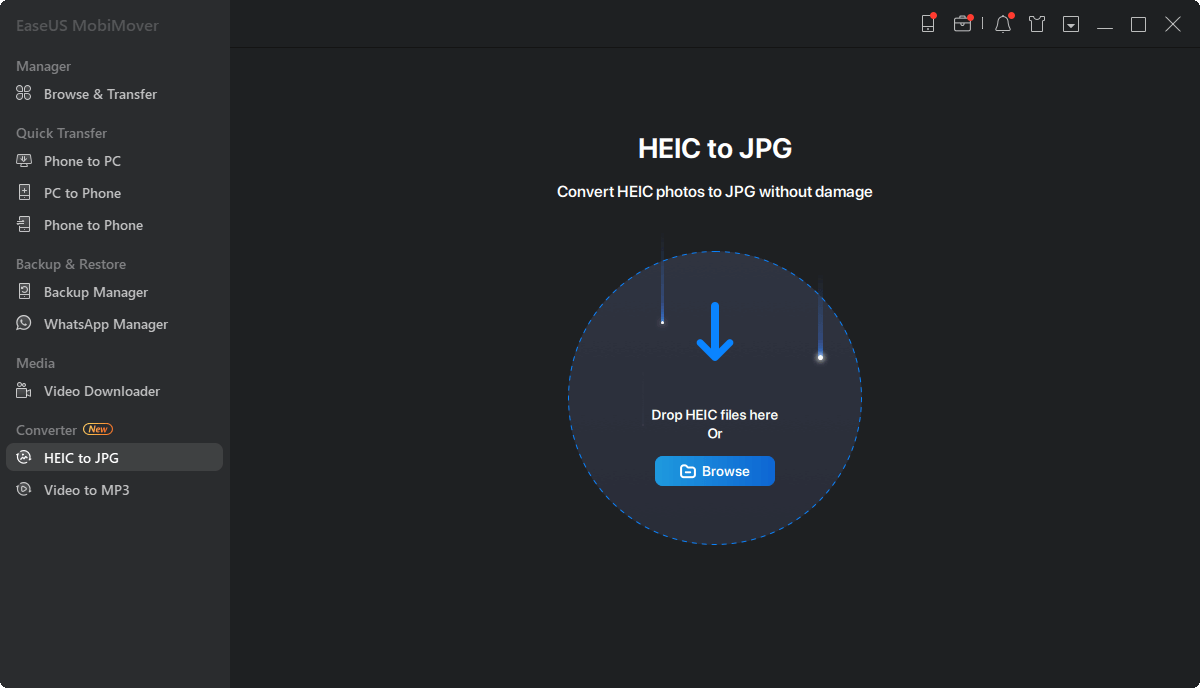
Step 1. Launch EaseUS MobiMover on your PC and click "HEIC to JPG" on the navigation panel.
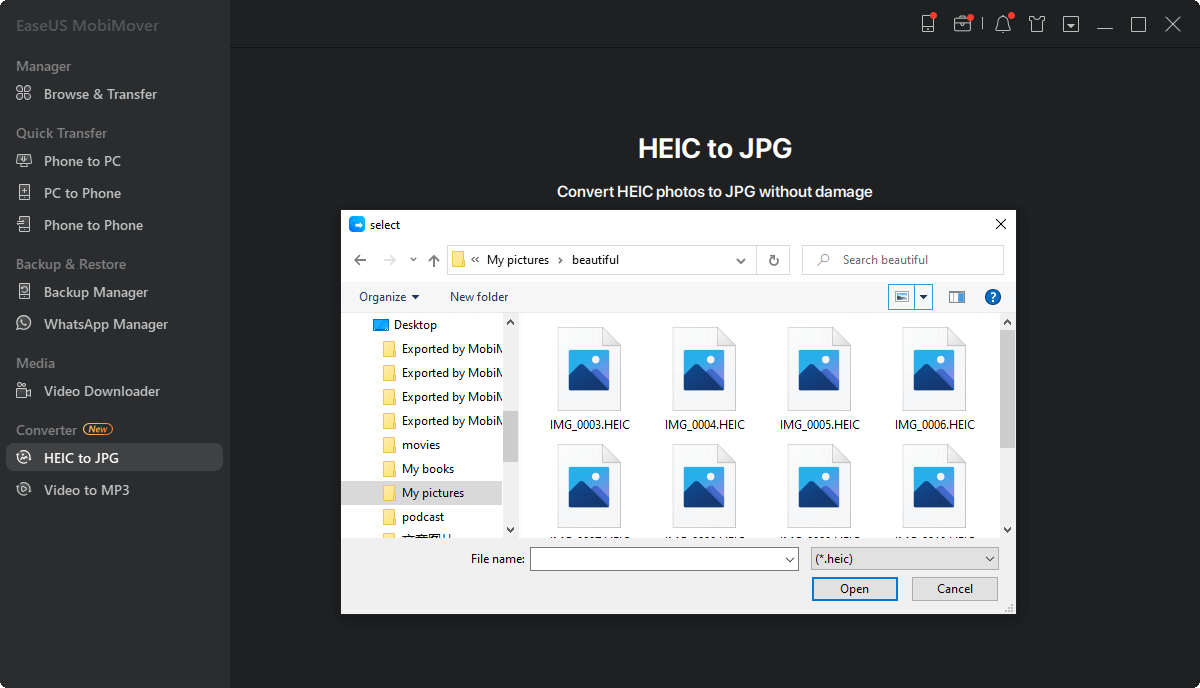
Step 2. Click "Browse" to select and add one or multiple HEIC photos from your PC. You can also drag and drop to import HEIC photos to EaseUS MobiMover here.
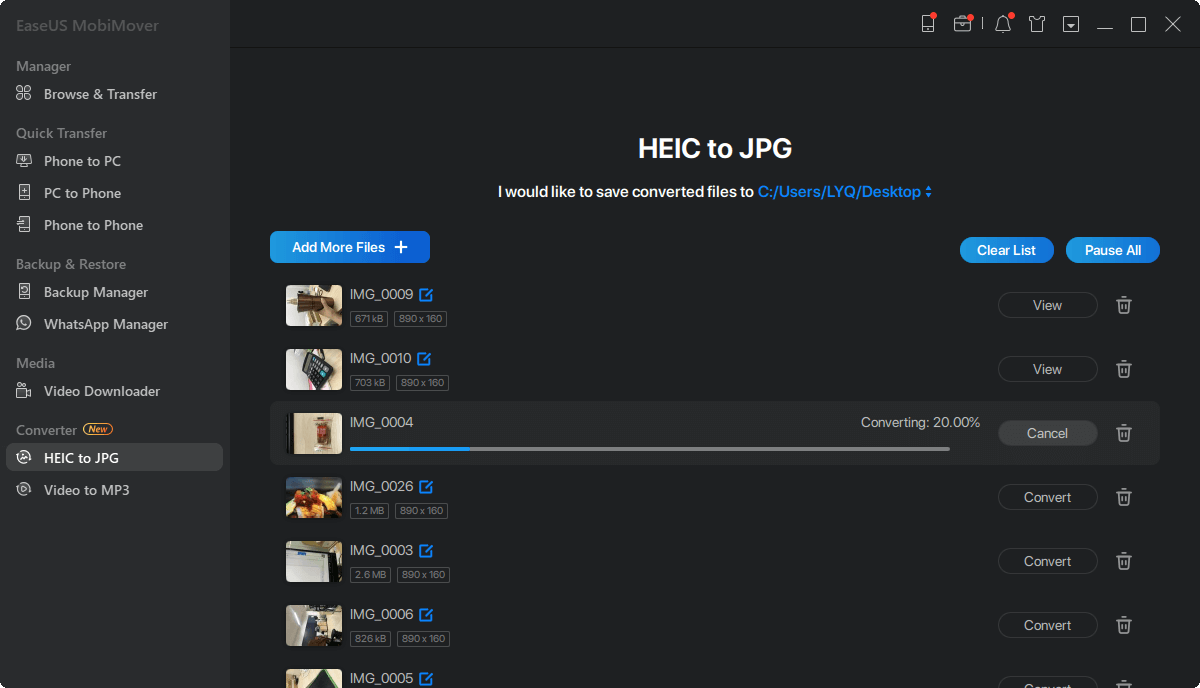
Step 3. Click "Convert" or "Start All" to convert HEIC photos to JPG. After the HEIC to JPG conversion completes, you can click "View" button to check the converted JPG photo on your PC.
You have more choices to change HEIC to JPG on Mac. If you prefer, you can go to the guide on how to convert multiple HEIC to JPG on Mac for more workable tips.
How to Print HEIC Pictures on Windows or Mac
Once your photos are converted and imported, you can follow these steps to print them out. These steps are different depending on your system models.
If you're using a Mac, you can:
Step 1. Find and select the images you wish to convert.
Step 2. Click "File" and then "Print" in the menu bar at the top of the screen. Or you can also hit "Command+P."
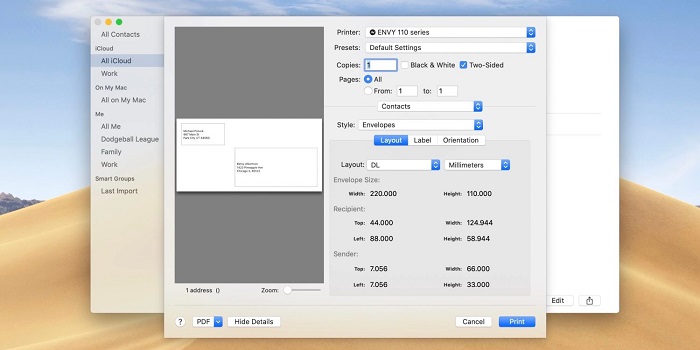
Step 3. Then, a print dialog will appear. From here, you can select the printer you'd like to use and choose the paper size.
Step 4. After that, click "Print" at the Window's bottom corner.
![Print HEIC pictures on Mac]()
If you're using a PC, you can:
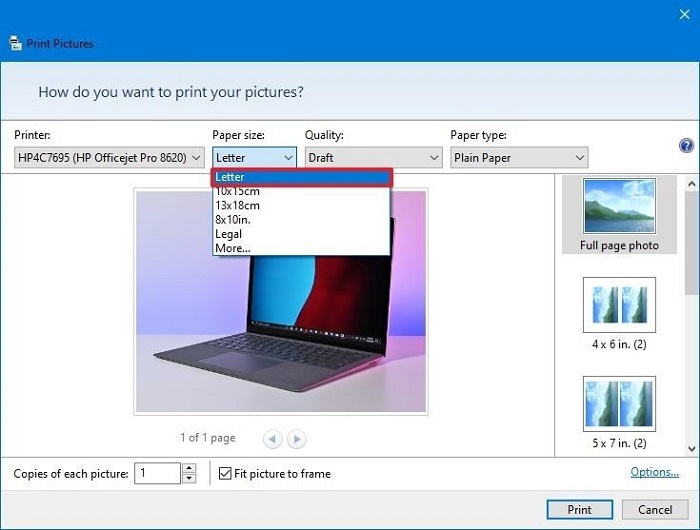
Step 1. Locate and select the picture you wish to print, right-click it and select "Print" from the pop-up menu.
Step 2. A new window will pop up to let you select the printer, paper size, quality of the picture, paper type, and so on. Select the correct option based on your needs.
Step 3. Click on the "Print" button to start the printing process.
![Print pictures on PC]()
The Bottom Line
This is all of our ways to print HEIC photos. As you can see, printing HEIC photos is pretty straightforward. All you need is to batch convert HEIC to JPG or other common photo formats. In this article, we recommend using EaseUS MobiMover to handle the conversion task because it supports batch conversion without compromising the quality of the photos. If you have a better conversion method, welcome to share it with us.

