| Key Takeaways of How to Convert HEIC to JPG on iPad |
|
🔍What format are iPad Photos:
After upgrading to iOS 11 and later, iPads use HEIC for photos and HEVC for videos.
|
|
🔍Convert Camera Photos to JPG on iPad:
Go to Settings > Camera > Formats > Most Compatible. Then, all new photos taken with camera will use JPEG format.
|
|
🔍How to Convert Photos to JPG on iPad:
Connect your iPad to your computer, launch EaseUS MobiMover, and select HEIC to JPG. Click Browse > This PC > iPad > Internal Storage > DCIM. Choose all the HEIC photos on the iPad and click Open > Start All.
|
As you may know, starting with iOS 11, all iPhones and iPads have embraced a new photo format called HEIC (High-Efficiency Image Container). This format takes less storage on your device while keeping high image quality. You can easily open and share such photos between different iOS devices. (Check what is HEIC file here if you want to.)
However, if you're planning on opening them outside the Apple ecosystem, things become problematic - because such a format hasn't been widely adopted yet. Thus, if you want to share pictures on different platforms, your first step is changing HEIC to JPG. Read on to learn these proven methods to change HEIC to JPG on iPad.
The Popular Video Guide on How to Change HEIC to JPG
Method 1. How to Convert iPad Photos to JPG with EaseUS MobiMover
If you have a lot of HEIC pictures to convert, it's best to let some image converters help you batch convert. There are a lot of such converters in the market, and this iPhone data transfer tool and image converter - EaseUS MobiMover, is one of the most straightforward image converters, which is why we pick it.
This image converter boasts a faster speed, better service, better data safety, and more flexible conversion ways. You can convert iPad photos to JPG in two ways - by transferring pictures to your computer or converting images directly with its conversion feature. You can also convert iPhone photo to JPG with EaseUS MobiMover.
Which ways to choose depends on where your HEIC pictures are stored. If your HEIC photos are stored on your iPad, you can use the transfer feature. While transferring, your HEIC pictures will be automatically converted to JPG. If your pictures are stored on your computer, you can use its conversion feature to convert them directly.
Sounds easy, right? Let's download EaseUS MobiMover on your computer and give it a try!
Here's how to batch convert HEIC to JPG using EaseUS MobiMover:
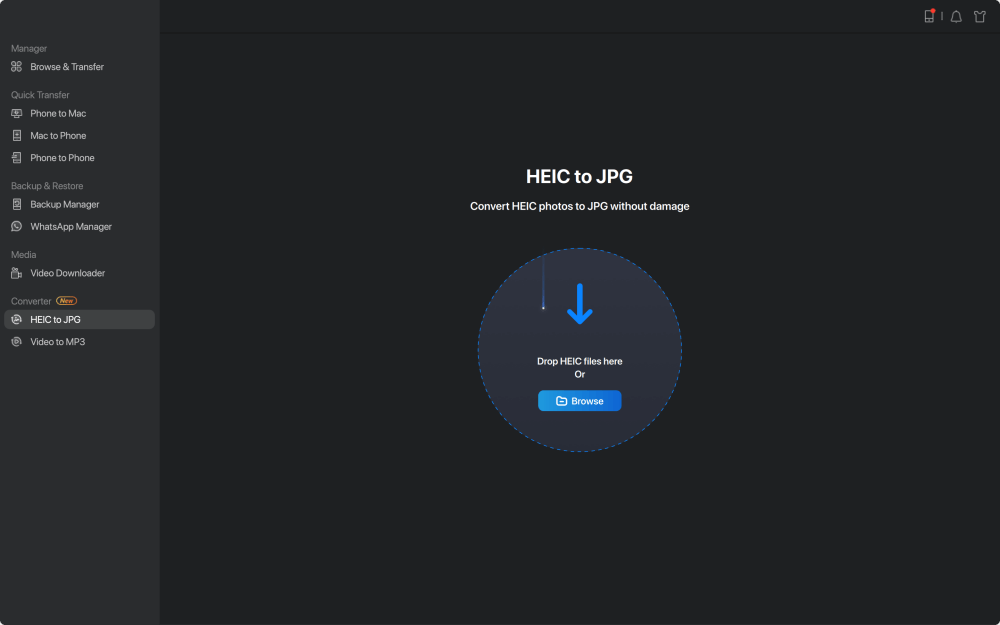
Step 1. Launch EaseUS MobiMover on your PC or Mac, select "HEIC to JPG," and then click "Browse."
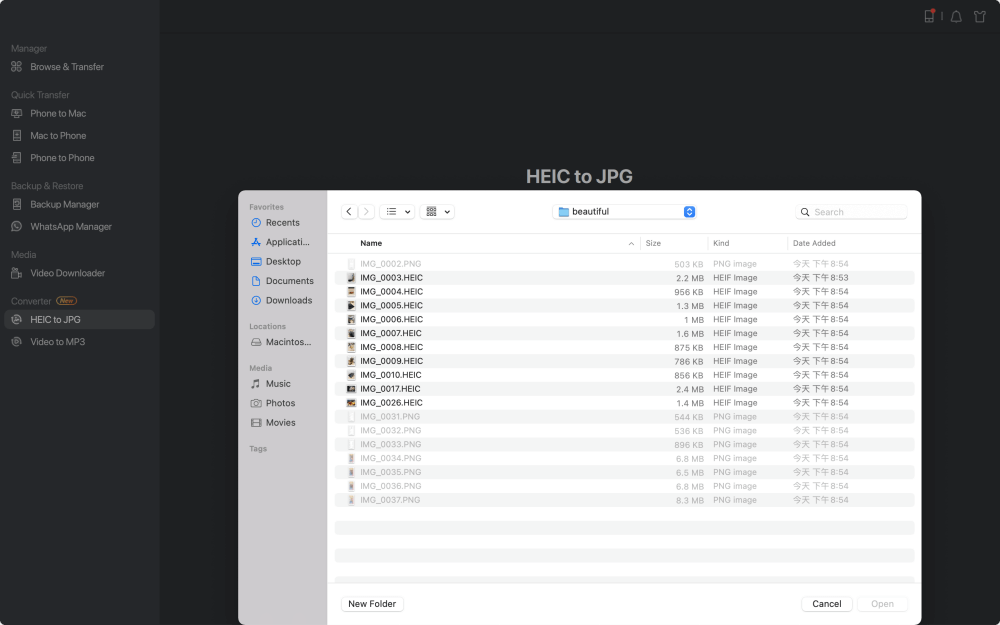
Step 2. Select the HEIC files you want to convert and click "Open."
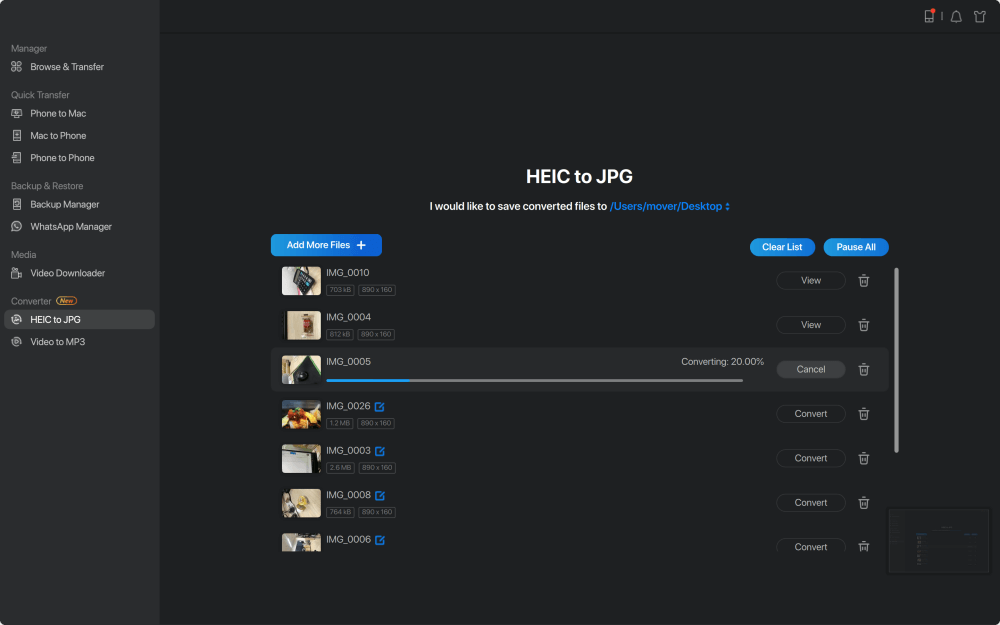
Step 3. Click "Convert" or "Start All" to start converting HEIC to JPG. Once the conversion completes, you can click the "View" button to check the converted JPG photos on your computer.
If you use a Mac, you can also convert multiple HEIC to JPG on Mac to change HEIC photos to JPG.
Method 2. How to Change HEIC to JPG on iPad via the File App
Another way to convert iPad photos to JPG should be the File app. The process of using this app is straightforward. All you need is to copy the pictures you want to convert from the Photos app, paste them in the File app, and then your images will be automatically converted to JPG format. After that, you can either share these pictures with others or download them on your iPad.
Here's how to convert iPad pictures to JPG using the File app:
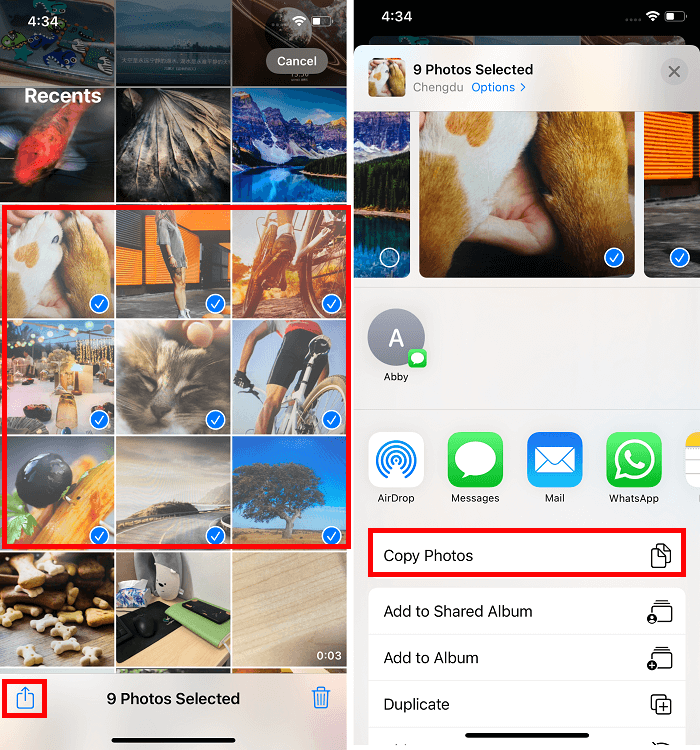
Step 1. First of all, you'll need to copy the images you wish to convert from the Photos app.
- Open the Photos app on your iPad.
- Tap the "Select" option in the upper right corner.
- Select your desired photos and tap the Share icon in the bottom left corner.
- On the "Share" page, select the "Copy Photo" option.
![Copy photos from the Photos app]()
Step 2. Next, you'll need to paste the pictures into the File app.
- Open the File app on your iPad.
- Select "On My iPad." (iCloud photos on the iPad is another available location for storing converted files, but it keeps files in the cloud instead of iPhone)
- Long-press, hold any blank area, and select "New Folder." Give this new folder a name and click "Done."
- Open the newly created folder, tap and hold the empty place, and then select "Paste."
- Then, your HEIC pictures will be converted to JPG format. You can share them with others or download these photos on your device.
![Convert HEIC to JPG via the File app]()
Method 3. How to Make a HEIC Photo to JPG via an Online Image Converter
The last but less recommended way to convert iPad photos to JPG is using some online image converters. Such tools require you to upload your HEIC pictures to a computer in a separate process.
The conversion speed depends on the usual speed of the internet connection you're used to and the size of the pictures you wish to convert. If you have a poor internet connection, the conversion process may take forever to complete, and even worse, the process might be interrupted midway. Also, the more pictures you convert, the longer the process should take.
If you prefer this way, you can try some excellent image converters like HEICtoJPEG, cloud convert, FreeConvert, etc. Since using online image converters is easy, we won't detail the steps here.
The Bottom Line
Those are all methods available for converting iPad photos to JPG. Which way works best for you depends on your specific requirements. If you want to batch convert HEIC pictures to JPG, EaseUS MobiMover is your best option. If you don't want to use any third-party program, just use the File app or online image converters instead.
FAQs
If you have any questions about how to convert iPad photos to JPG, you may want to check the commonly asked questions below.
1. Can I transfer photos from iPhone directly to a Windows PC?
You can transfer photos from your iPhone to your computer using a USB cable. But the photos stored on the iPhone are in HEIC format which is not supported by Windows. It is recommended to use EaseUS MobiMover to transfer photos from iPhone to PC. This iPhone data transfer tool is also able to convert HEIC to JPG.
2. How to transfer photos from Mac to iPhone?
There are numerous methods for transferring photos from a Mac computer to an iPhone. If you have iTunes, you can easily figure out how to transfer files from iTunes to iPhone. You may access your data on your iPhone by uploading it to iTunes.
3. Can I transfer photos from iPhone directly to PC?
Yes. Connect your iPhone to your PC with a USB cable, and you will get access to photos on your iPhone. But except for photos, you are not allowed to access other files seamlessly.


 NEW
NEW HOT
HOT