Backing up your files and settings on your iPhone to either your Mac or iCloud is the best way to protect your important information against data loss or damage. It's useful to backup iPhone to Mac if you get a new iPhone and want to transfer your previous files and settings to it.
The procedure of backing up your iPhone on macOS 13 Ventura differs from that on older versions since many settings and buttons have been updated. This article provides a detailed, illustrated walkthrough for how to back up an iPhone on macOS Ventura.
| Tool |
Effectiveness |
Difficulty |
| Finder |
It is a feature that comes with the Apple system, so you don't have to download and install any software to backup iPhone to Mac. |
Moderate
●●○○○
|
| EaseUS MobiMover |
It enables you to backup iPhone on Mac or PC easily and create a full backup of your iPhone on the computer. |
Easy
●○○○○
|
How to Back Up iPhone on macOS Ventura with Finder
For most Mac users, iTunes is the first thing that springs to mind when backing up an iPhone to a Mac. However, on macOS Catalina and later versions of macOS, Apple has integrated the Finder software with iTunes' iPhone/iPad backup function. In other words, you should use the Finder program rather than iTunes to backup iPhone to Mac Ventura.
How to Back Up iPhone on macOS 13 Ventura
Step 1. Connect your iPhone to your laptop or computer using a USB or USB-C cable.
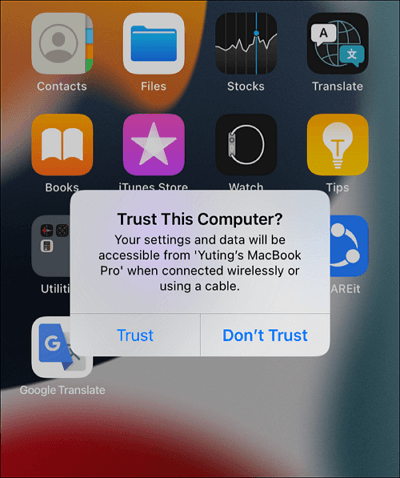
Step 2. On the iPhone, tap "Trust" when a "Trust This Computer" pop-up shows up, telling you that the Mac computer will access the settings and data on the iPhone.
![Trust This Computer on iPhone]()
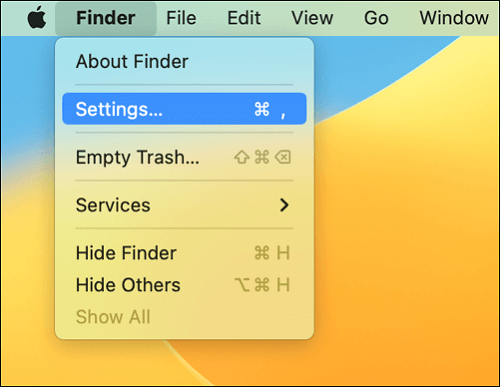
Step 3. Open the Finder app on your Mac, click the "Finder" on the top menu bar, and choose "Settings."
![Finder Settings on macOS Ventura]()
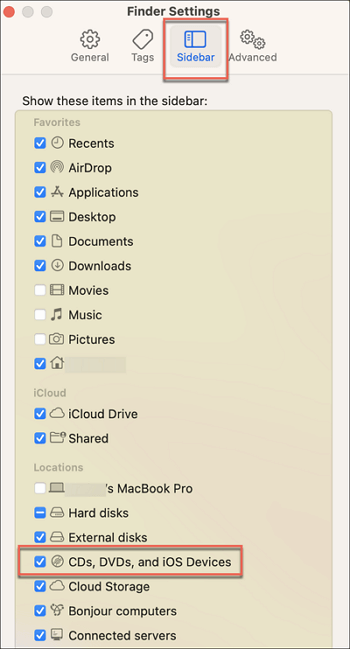
Step 4. Go to the "Sidebar tab" > "Locations," and make sure the CDs, DVDs, and iOS Devices option is selected.
![Show iOS Devices on macOS Ventura]()
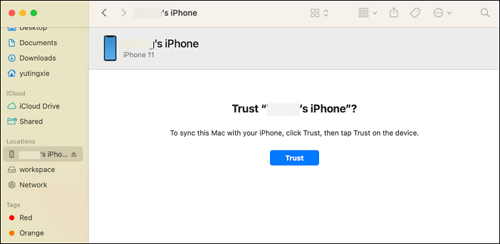
Step 5. Select your iPhone in the left sidebar under the "Locations" tab.
Step 6. Click "Trust" on your Mac to sync this Mac with your iPhone, and soon the Mac will load the information of the iPhone.
![Trust iPhone on macOS Ventura]()
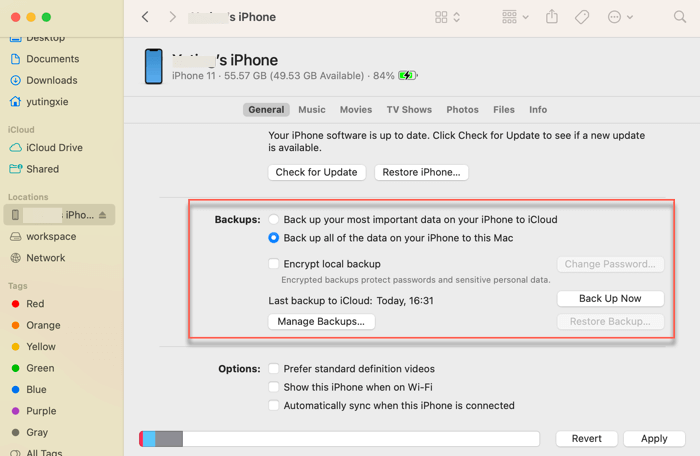
Step 7. Click "General" in the button bar and select one of the backup options:
![Back up iPhone on macOS Ventura]()
- Back up the most important data on your iPhone to iCloud: This option will back up your iPhone to iCloud and store backup data to iCloud instead of on your Mac.
- Back up all of the data on your iPhone to this Mac: This option stores backup data on your Mac. It is recommended to use this option.
- Encrypt local backup: This option stores backup data on your Mac and encrypts it for protection with a password.
Step 8. Click "Back Up Now" to immediately start a backup of your iPhone to the Mac.
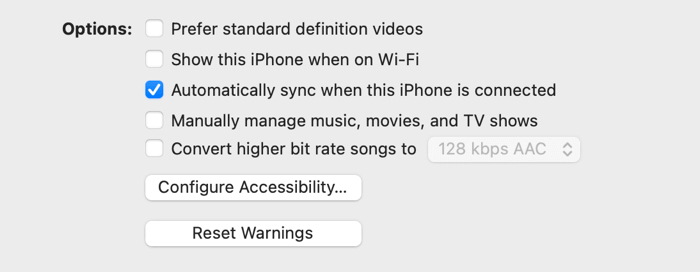
Step 9. To set up an automatic backup of your iPhone on Mac Ventura, navigate to the "Options" section, select the "Automatically sync when this iPhone is connected" checkbox, and click "Apply."
![Automatically Back up iPhone on macOS Ventura]()
How to Back Up iPhone on macOS Ventura with EaseUS MobiMover
It may take you quite a while to back up iPhone on Mac using Finder for the first time. Try a third-party iPhone backup program like EaseUS MobiMover if you want to backup iPhone to MacOS Ventura quickly.
EaseUS MobiMover Pro is a versatile iPhone backup and restoration solution. It enables you to create a full backup of your iPhone data and settings to a Mac computer and restore individual or all data from a Mac to iPhone at any time. It is also a comprehensive data transfer software that enables you to transfer data from iPhone to PC, Android, iOS, and macOS devices.
This iPhone backup tool can copy your content from iPhone to a Mac with a few clicks.
How to Back Up iPhone on macOS Ventura With EaseUS MobiMover
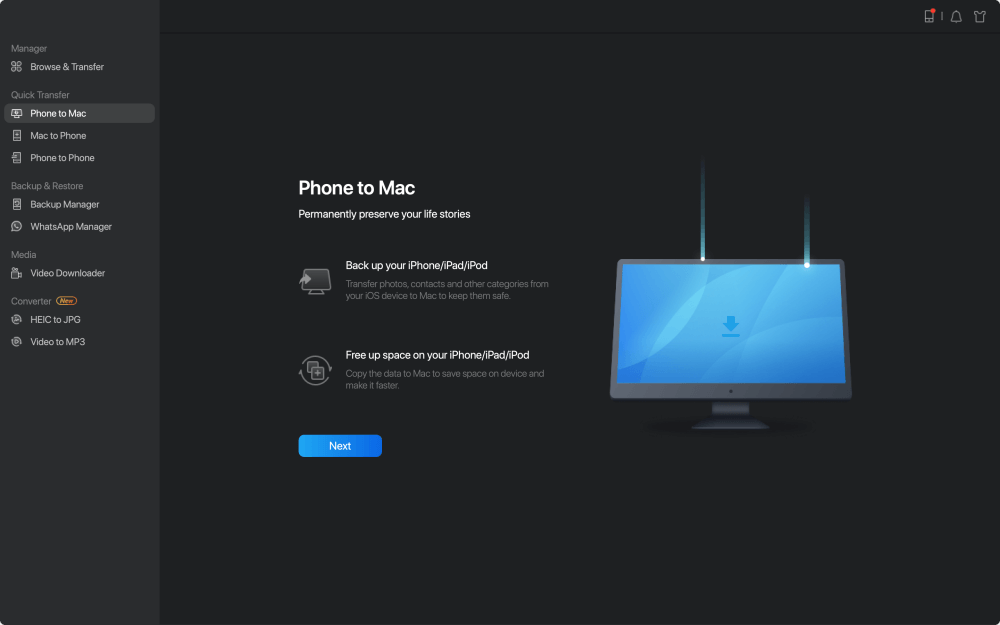
Step 1. Connect your iPad to your Mac with a USB cable and tap "Trust This Computer" on your iPad if you are asked > Run EaseUS MobiMover for Mac and choose the "Phone to Mac" on the main screen > Click the "Next" to continue.
![how to transfer data from iPhone to Mac - step 1]()
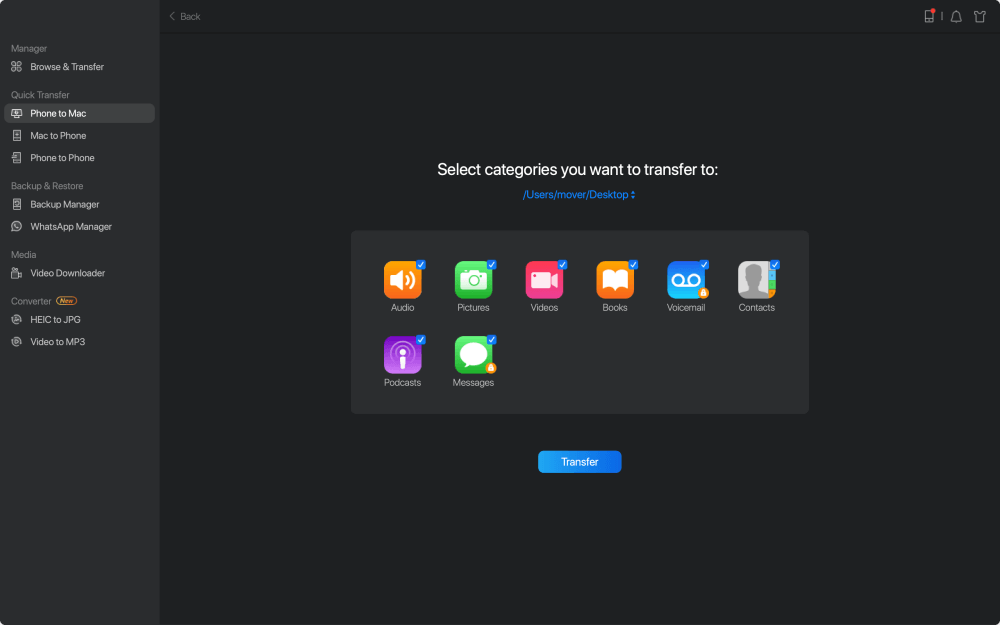
Step 2. Then, MobiMover automatically reads and loads all the supported data on your iPad as the screenshot shows below. You are free to send them all or selectively export one data type at a time. Besides, you can set the destination for saving exported iPad files on your Mac. If you don't customize it by yourself, MobiMover will send them to a desktop folder named by Exported by MobiMover.
![how to transfer data from iPhone to Mac - step 2]()
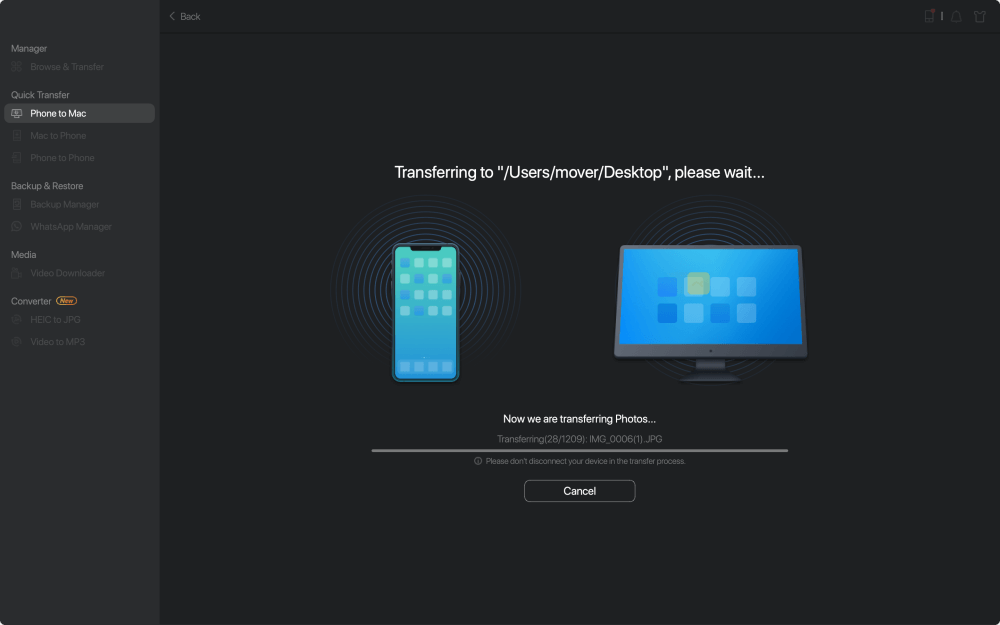
Step 3. Click the "Transfer" to import data from iPhone or iPad to Mac. When the process has completed, you can view, edit, or delete them as you want on your Mac.
![how to transfer data from iPhone to Mac - step 3]()
Bonus Tip: How to Restore iPhone from a Backup on macOS Ventura
After you back up iPhone on Mac, you can use the backup to restore data to your iPhone whenever needed. For example, if your iPhone device has issues that you can't fix, you can restore your iPhone to a recent backup to see if that fixes the problem.
How to Restore iPhone From a Backup on macOS Ventura With Finder
Step 1. Connect your iPhone to a Mac through a USB connection.
Step 2. Open Finder on the Mac, and select the connected iPhone in the Finder sidebar.
Step 3. Go to the "General" tab and click "Restore Backup."
![Restore Backup to iPhone on macOS Ventura]()
Step 4. Choose a backup version you want to restore to the iPhone and click "Restore."
How to Restore iPhone From a Backup on macOS Ventura With EaseUS MobiMover
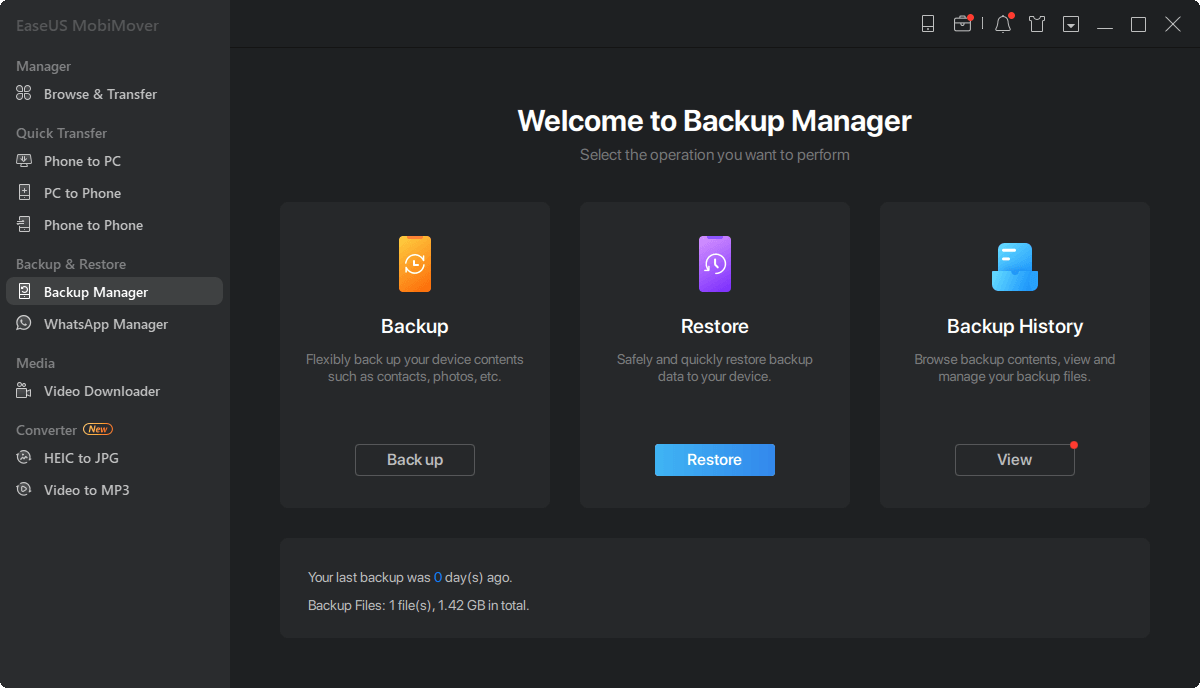
Step 1. Launch EaseUS MobiMover on your PC and connect iPhone to the PC. Click "Backup & Restore" in the left panel.
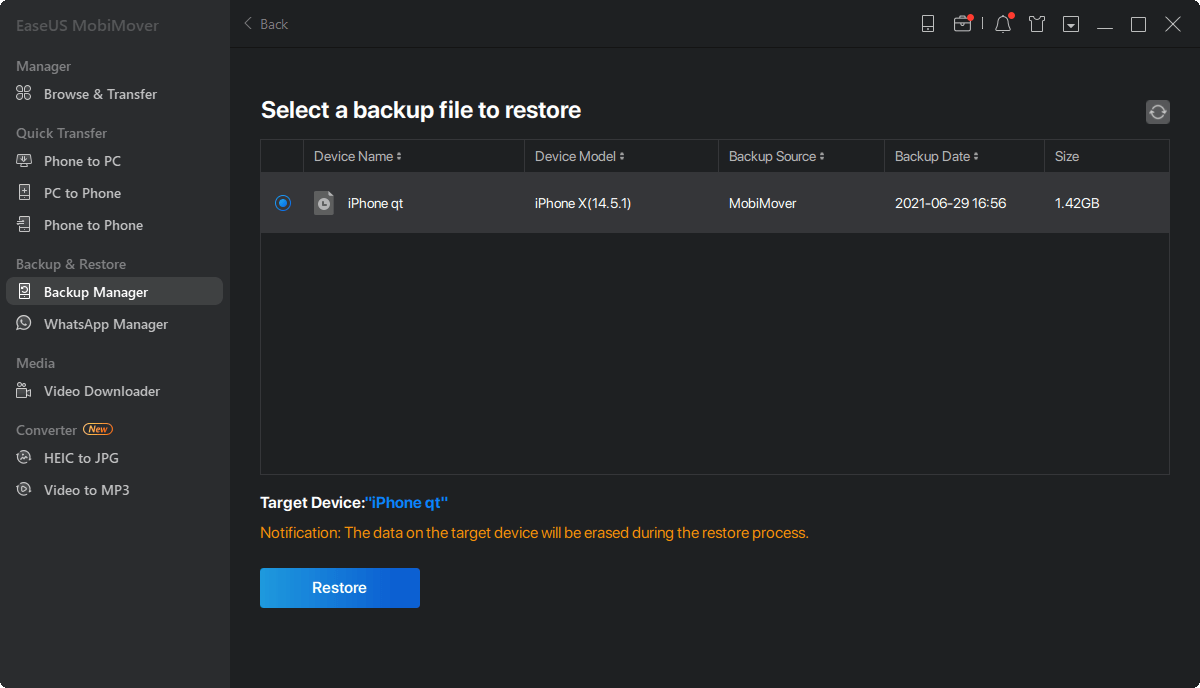
Step 2. Click restore and choose a backup file. It can be a one-click backup or a selective backup file. Then click "Restore."
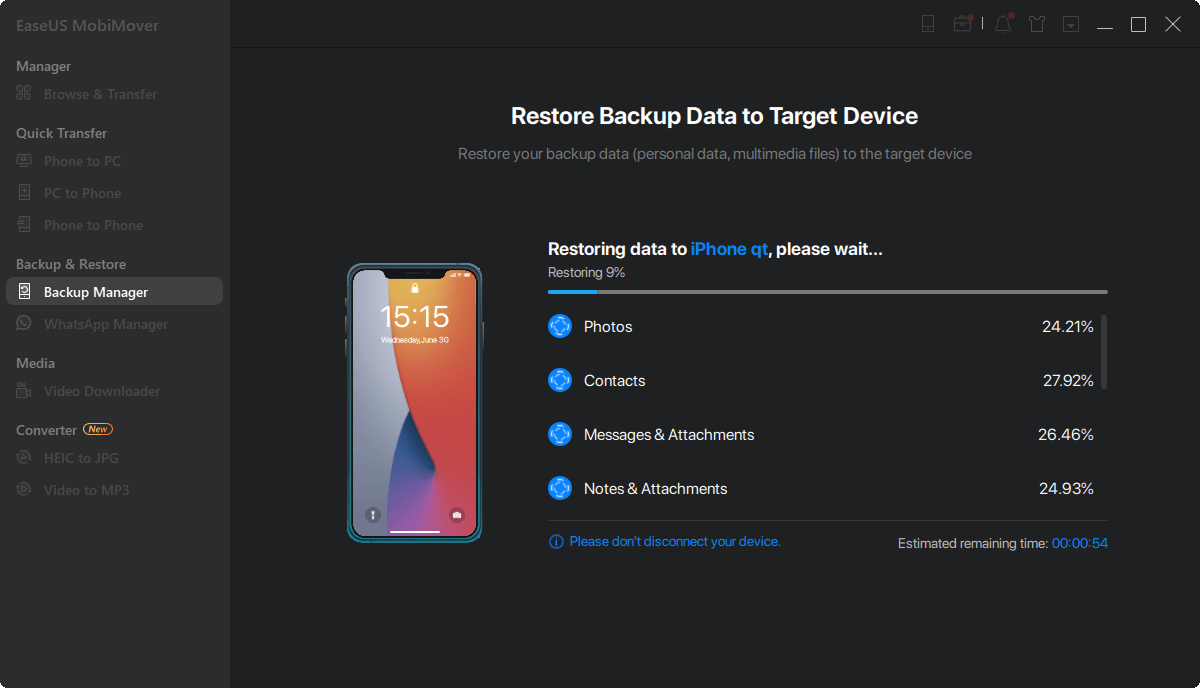
Step 3. Wait fro the process to complete. Then you can find the files are restored to your iPhone.
The Bottom Line
You can use the comprehensive instructions in this article to back up your iPhone on macOS Ventura. To sync the content on your iPhone with a Mac computer, you may either use Finder or EaseUS MobiMover. Later, you can restore your iPhone from a backup on Mac to prevent data loss or fix iPhone errors.
FAQs on Backing up iPhone on macOS Ventura
1. Can I back up my iPhone wirelessly on macOS Ventura?
Yes, macOS Ventura allows you to sync your iPhone and Mac when they're connected over the same Wi-Fi network. Connect your iPhone to your Mac by a USB cable to set up the wireless syncing first. Then open Finder, select the iPhone, select the "Show this iPhone when on Wi-Fi" checkbox, and click Apply.
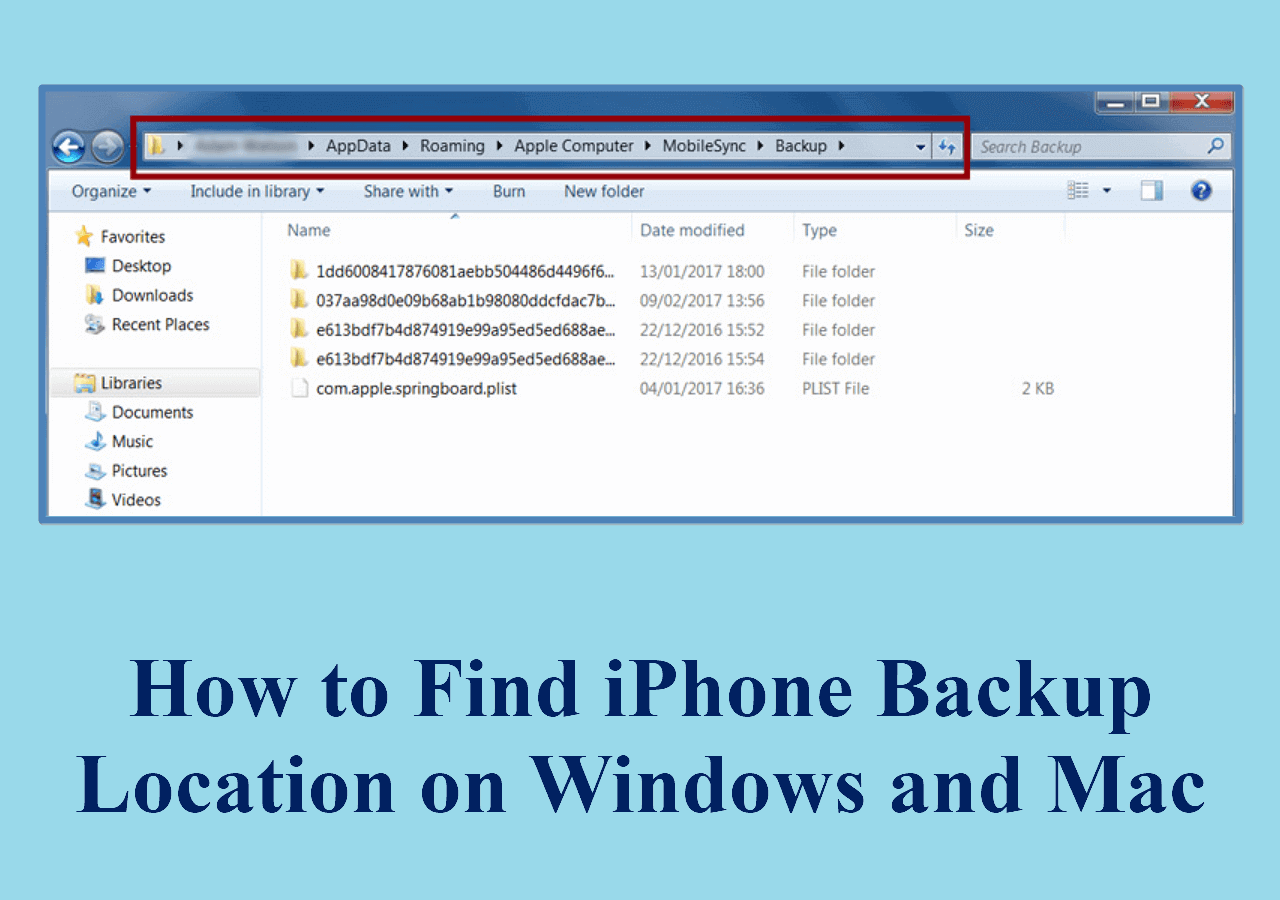
2. Where are iPhone backups stored on macOS Ventura?
You can find the default backup location on macOS Ventura by opening Finder, pressing Shift + Command + G keys together, and pasting ~/Library/Application Support/MobileSync/Backup/ in the Go to Folder window.
3. Can I back up my iPhone without iCloud?
Yes, you can back up your iPhone without iCloud in several ways. In this article, we have already introduced two methods to back up your iPhone - back up iPhone with Finder and with EaseUS MobiMover. Alternatively, another method available is to back up your iPhone with iTunes.
- Connect your iPhone device to the PC through a reliable cable.
- On your computer, launch iTunes and click the iPhone icon.
- Tap the Summary and click the Back Up Now button.