What is AirDrop? AirDrop is a built-in feature in Mac, iPhone, iPad, and iPod Touch, making the data transfer between two AirDrop-supported devices possible. If you want to share the contacts on your iPhone, you can AirDrop contacts from iPhone to iPhone. Or if you want to sync photos from your iPhone to your iPad, you can use AirDrop to make it. In case you don’t know how to operate, the detailed steps are listed below. Just read on to get the method.
Part 1. How to AirDrop Photos from iPhone to iPad
AirDrop lets you transfer photos between two iOS devices easily. Before using AirDrop, some preparations need to be done.
How to Prepare to Use AirDrop
First of all, update your system to iOS 14. Then, you need to have both Bluetooth and Wi-Fi enabled and within the range. Also, remember to turn off your personal hotspot.
Finally, you need to turn on your AirDrop.
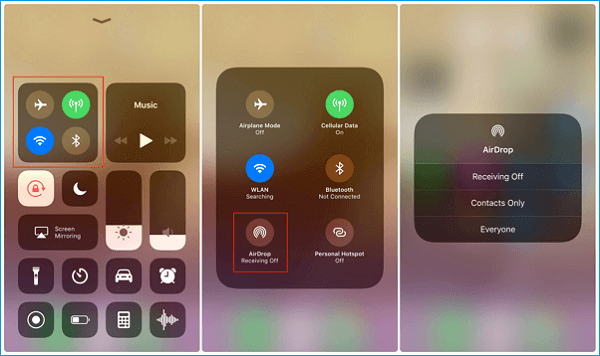
Step 1. Launch Control Center by swiping up/down on your iPhone or iPad > Long press on the Wi-Fi button.
Step 2. Tap “AirDrop” > Select “Contacts Only” or “Everyone.” AirDrop should be in blue indicating it’s enabled.
![turn on AirDrop on Iphone]()
AirDrop Photos from iPhone to iPad
How to use AirDrop when everything is ready? Follow the steps below to learn how to airdrop photos from iPhone to iPad or from iPad to iPhone within minutes.
Step 1. Go to the Photos app on your iPhone and select the photos you’d like to send to your iPad.
Step 2. Tap on the “Share” button, click “AirDrop” and choose your iPad.
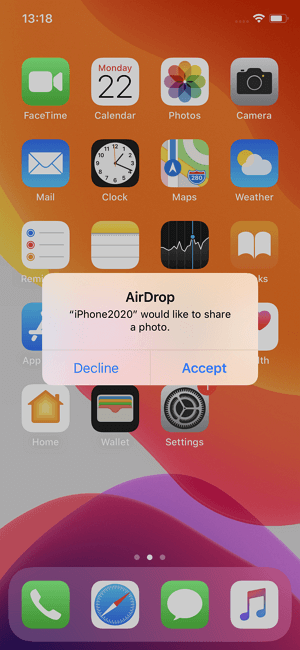
Step 3. On your iPad, click “Accept” when a prompt asking you whether to accept the photos from your iPhone.
The steps above can also be applied to how to AirDrop photos from iPad to iPhone.
![choose photos to AirDrop]()
Using AirDrop is recommended if you want to transfer photos from iPhone to iPad without iCloud.
What if Airdrop Not Working
There are a lot of factors that may result in the “AirDrop not working” issue. Whatever the factors, we will show you some troubleshooting tips to fix the problem you may encounter while using AirDrop.
Tip 1. Update your operating system
Plug your iPhone or iPad into power and connect to the Internet with WiFi. Go to “Settings” > “General” > “Software Update.”
Tip 2. Restart both devices
Press and hold either volume button and the side button until the power off slider appears > Drag the slider, then wait 30 seconds for your device to turn off > Press and hold the side button until you see the Apple logo.
Tip 3. Turn off AirDrop restrictions
Go to “Settings” > “Screen Time” > “Content & Privacy Restrictions” > Make sure AirDrop is turned on.
Tip 4. Re-start Wi-Fi and Bluetooth on both devices
Open Control Center > Tap the Wi-Fi and Bluetooth icons to turn them off and on.
If AirDrop still doesn’t work, you can move to Part 2 to use an alternative transfer tool - EaseUS MobiMover to transfer photos instead.
Part 2. How to Transfer Photos from iPhone to iPad Without AirDrop
In addition to using AirDrop to transfer photos from one iDevice to another, you can also use free iPhone transfer software - EaseUS MobiMover to sync photos. What's more, you can transfer all contacts from iPhone to iPhone at once, back up iPhone messages to computer, and transfer other files between computer and iOS device or between two iOS devices. All of these can be done in a few simple steps.
Sounds great? Now, click the button below to safely download and install EaseUS MobiMover Free on your Mac or PC, then follow the steps to learn how to transfer photos from iPhone to iPad quickly.
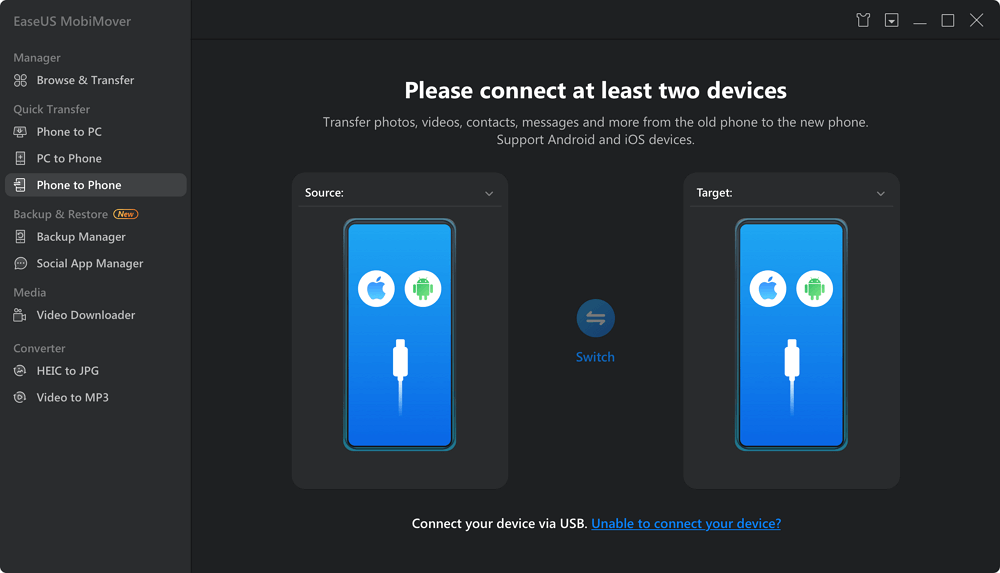
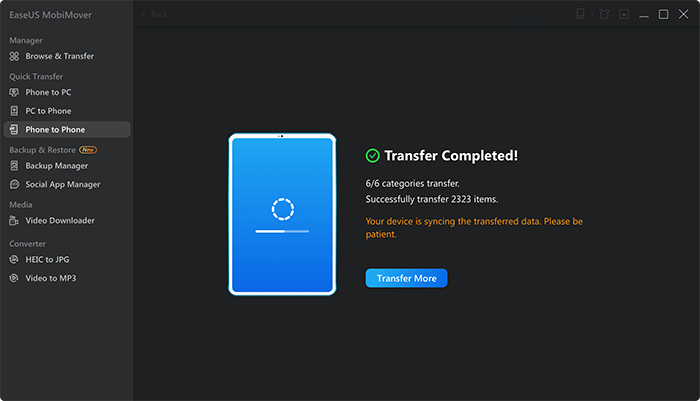
Step 1. Connect both of your iOS devices to your computer (Mac/PC). Launch EaseUS MobiMover, and choose "Phone to Phone" on the screen. Correctly set the source device and target device, and click the "Next" button to continue.
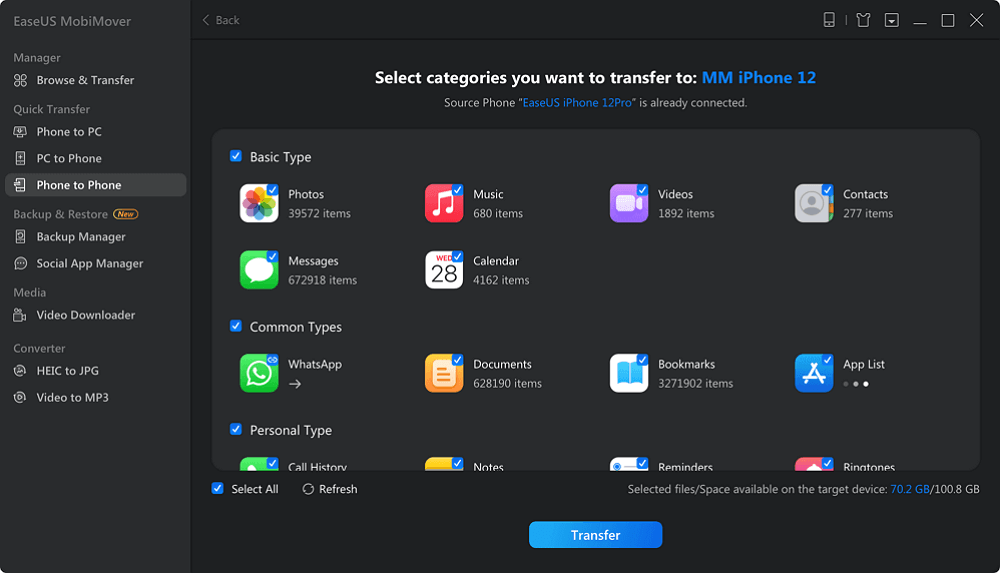
Step 2. Check the category/categories you want to transfer from your iPhone to iPad or from iPad to iPhone. As you can see, in addition to photos, you can also copy videos, audios, contacts, messages, and more between your iPhone and iPad.
Step 3. After checking the settings, click the "Transfer" button to start transferring photos from your iPhone to iPad or iPad to iPhone. When it has completed, go to the "Photos" app on your target device to check the newly imported items.
In Conclusion
AirDrop makes it easy to share photos between two iOS devices. But sometimes it doesn’t work. When you encounter this issue and cannot handle it, you can use EaseUS MobiMover as an alternative method. Moreover, if you want to transfer a large number of photos, EaseUS MobiMover may be faster than Airdrop. We hope the two methods mentioned above can help you airdrop photos from iPhone to iPad without a hitch.
 NEW
NEW HOT
HOT