Two situations in which your iPhone might be locked to the owner
- You brought a second-hand iPhone and found it locked to the previous owner.
- You're trying to find the forgotten passcode by following Apple's directions but receive an "iPhone locked to owner" screen after too many incorrect passcode attempts.
After that, you'll receive the "iPhone Locked To Owner" screen, meaning that you can't access your device unless you enter the Apple ID password used during set-up. What to do if you don't know the iCloud password?
Whether you remember it or not, here are some feasible solutions to bypass the activation lock without iCloud information. (If you are also interested in unlocking iPad without passcode, see How to Unlock an iPad I Found for details.)
| Methods |
Effectiveness |
Difficulty |
| 1️⃣EaseUS MobiUnlock |
High - It helps bypass iCloud Activation Lock easily and quickly. |
Super easy |
| 2️⃣Find the Previous Owner |
High - It lets you ask the previous owner to provide the password to unlock the device. |
Easy |
| 3️⃣Configure DNS |
Moderate - This is to connect your device to some third-party domain name servers. |
Easy |
| 4️⃣Apple Support |
Moderate - It lets you submit a removal request to Apple along with the original purchase. |
Easy |
Solution 1. How to Bypass iPhone Locked to Owner via an iPhone Unlocker
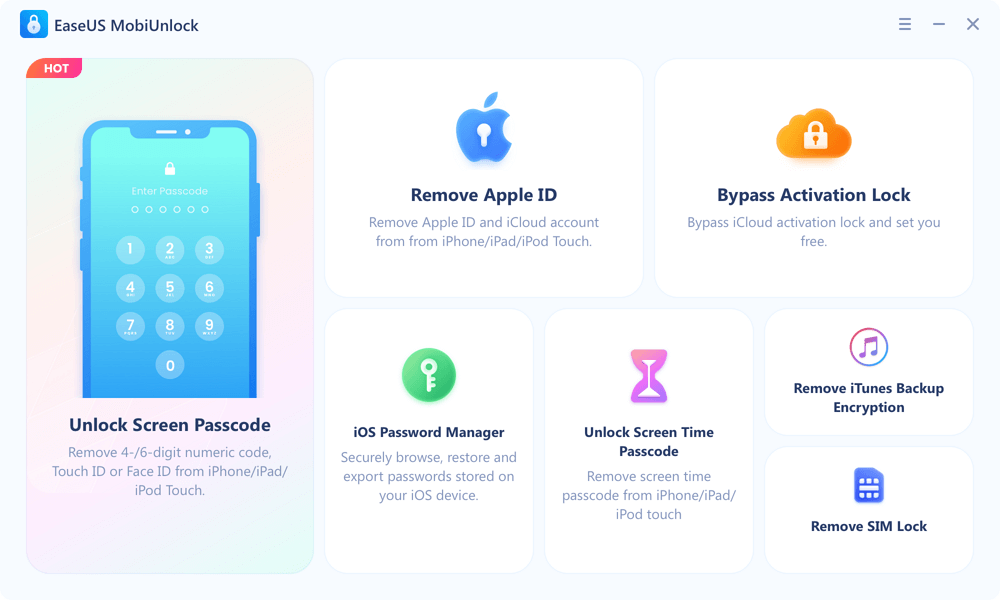
If you can't reach out to the previous owner, you'll have to use some iPhone unlocking programs to solve this problem. Here we mainly want to introduce this professional iPhone unlocker - EaseUS MobiUnlock, a fast iOS unlocking tool that can help users remove various locks of passcodes like screen passcode, Apple ID, iCloud ID, and more.
Here are some features and services you can expect from this program.
- Unlock various iPhone screen locks, including 4-/6- digital
- Get into a locked iPhone or iPad without a password
- Decrypt encrypted iTunes backup
- View all passwords saved on your device
To unlock an iCloud-locked iPhone and bypass iPhone locked to owner with EaseUS MobiUnlock:
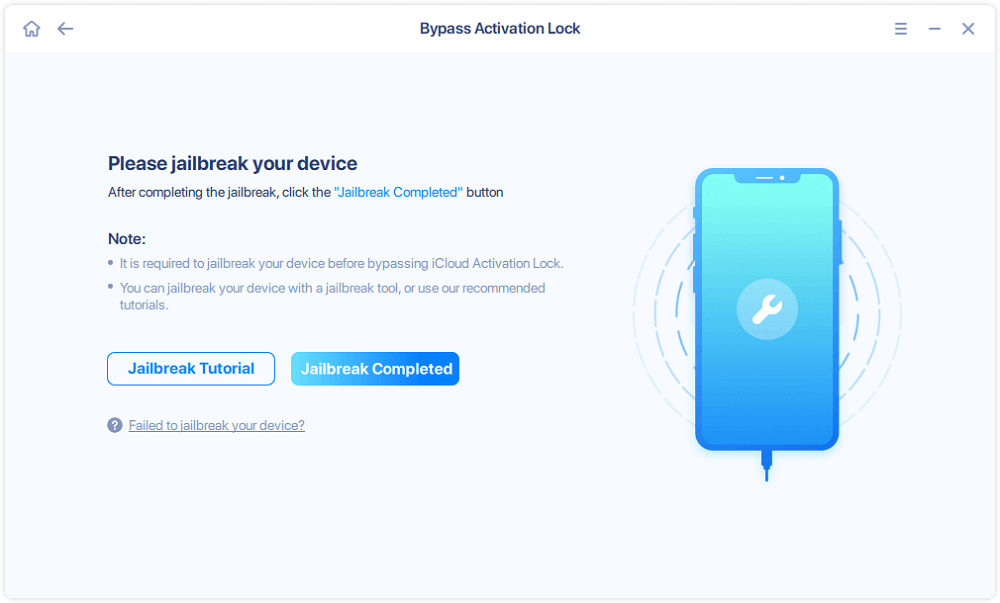
Step 1. Launch EaseUS MobiUnlock on your computer and connect your iPhone or iPad to the PC. Click "Bypass Activation Lock." Check out the "Term of Use" and click "I Agree" to proceed if you agree with all content.
Step 2. Click "Start" to move to the next step - jailbreack your iPhone or iPad. Click "Jailbreak Tutorial" to see how to jailbreak your Apple device. (Note that if your iPhone is running iOS 15 - iOS 16.4, the EaseUS tool will jailbreak the device automatically.) If you already jailbroke your device, click "Jailbreak Completed" to proceed.
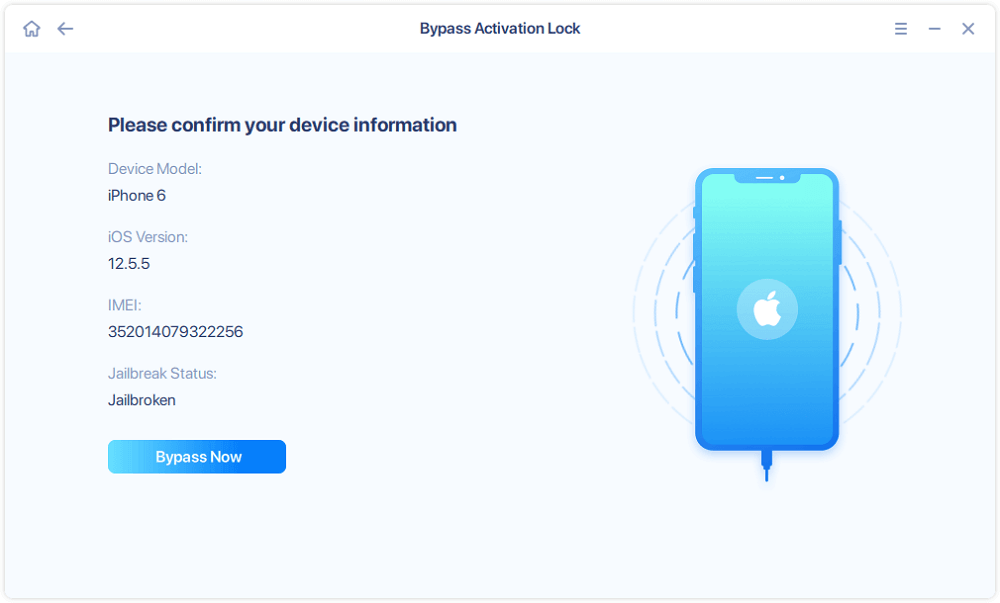
Step 3. Click "Bypass Now," and EaseUS MobiUnlock will start removing Activation Lock from your iPhone or iPad.
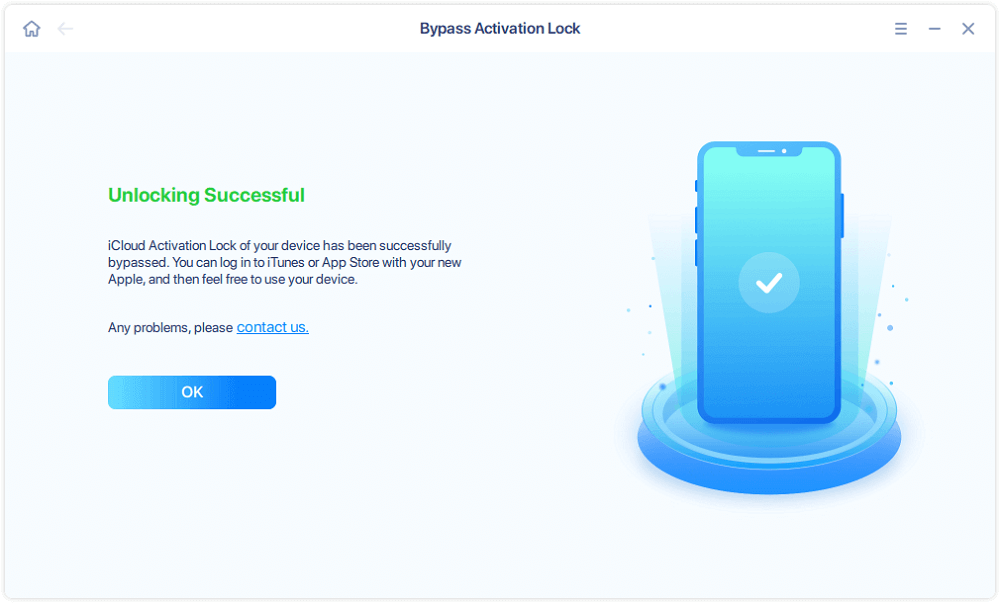
Step 4. Wait for the process to complete. After the process, click "OK" to confirm, and you can set up your iPhone or iPad without obstacles.
You can use this feature to unlock iPad without Apple ID as well.
Solution 2. How to Find the Previous Owner of iCloud Locked iPhone to Perform iPhone Locked to Owner Bypass
How to remove Activation Lock without previous owner? If this is not your iPhone, you can contact the previous owner of your iCloud-locked iPhone and ask him to provide the password to unlock the device. If you don't know how to contact or find the previous owner of your device, here are some suggestions.
- Contact the people who sold the iPhone to you and ask them to contact the previous owner.
- Try to contact the previous owner via social media.
- Take your device to the nearest Police station and ask the police to help you.
It would be best if you could find the previous owner, while if you can't find him/her, you have to use some iPhone unlocking services or tools to bypass your activation lock, as those introduced in this guide.
Solution 3. Other Solutions to Bypass iCloud Activation Lock
Apart from a third-party solution, you can also bypass activation lock iPad & iPhone by configuring DNS. That is to connect your device to some third-party domain name servers rather than an Apple server and unlock your device.
This method only works on some old iOS versions like iOS 10 and earlier. Moreover, there is no guarantee that this method will 100% work. If you want to give such a solution a try, navigate our previous guide on how to bypass Activation Lock. In this guide, we have not only introduced the DNS way but also another way - using IMEI to unlock your iPhone. Which way to choose depends on your specific situation.
![confirm dns]()
Solution 4. Ask for the Help of Apple Support to Bypass iPhone Locked to Owner
If none of these solutions introduced above can't help you out. In that case, you can submit a removal request to Apple along with the original purchase documentation and prepare some request support for unlocking your device.
Did You Get All the Solutions on How to Bypass iPhone Locked to Owner
That's our guide on bypassing "iPhone locked to the owner." We hope you've successfully gotten into your iCloud-locked device with the solutions introduced in this guide. The most recommended way is to use EaseUS MobiUnlock to bypass iPhone locked to owner. You can also contact the previous owner or ask the help of Apple to solve this problem. If you have any questions about our guide, don't hesitate to contact us.


 NEW
NEW HOT
HOT