If you're an iPhone user but use Windows on your computer or laptop, you'll know that to transfer files from laptop to iPhone, even if it's just a few pictures, can be a great hassle. So if you have some photos on your laptop and you want to know how to transfer photos from laptop to iPhone, you've come to just the right place. In this post, we'll be taking a look at seven different methods you can use to transfer photos from iPhone to laptop or vice versa. If you want to know which one will be the best for you, make sure to read till the end so you don't miss out on any crucial information.
How to Transfer Photos from Laptop to iPhone via EaseUS MobiMover
EaseUS MobiMover Pro is a popular software for data transfer between your iPhone and your computer. It can transfer a variety of media, including not only photos but also movies, music, contacts, messages, and more. So, if you want to transfer photos from a laptop to your iPhone, using EaseUS MobiMover will be your best shot.
In addition to data transfer between a computer and an iDevice, this iPhone data transfer tool also allows you to share files between an iDevice an external storage device connected to your computer. Thus, you can also import photos from SD card to iPhone or transfer videos from iPhone to external hard drive.
Here's a guide on how you can use this tool:
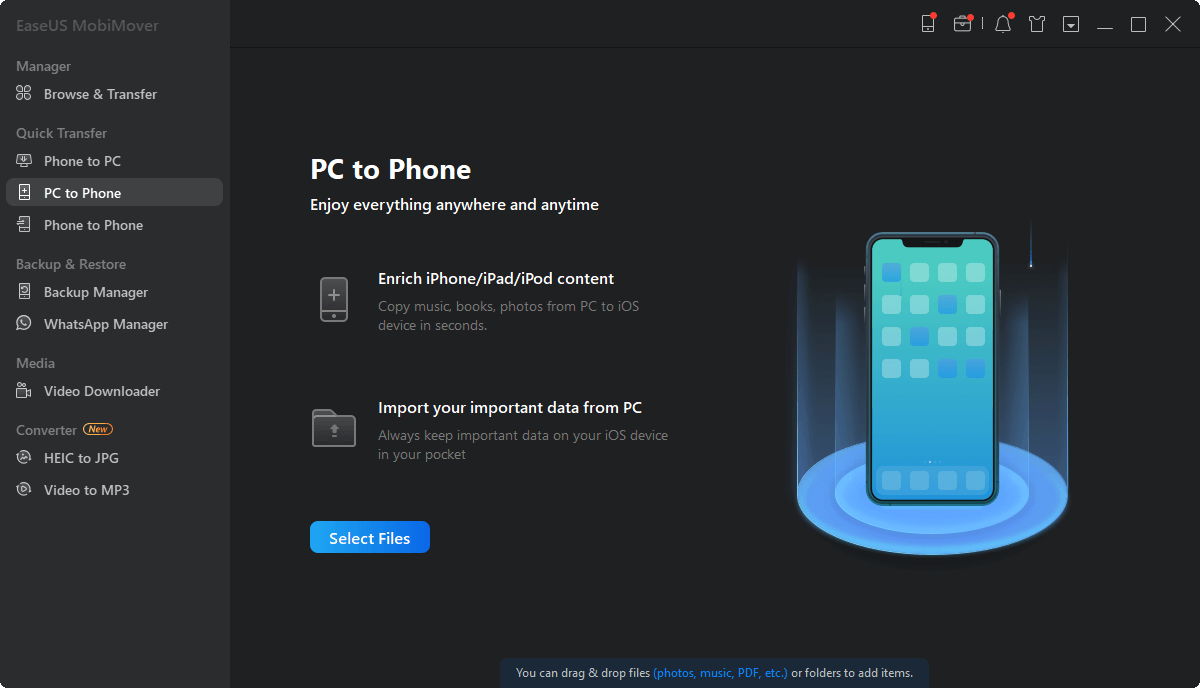
Step 1. Use a USB cable to connect your iPhone to your laptop running Windows 7 or later. Run EaseUS MobiMover, choose the "PC to Phone" and click "Select Files" on the screen.
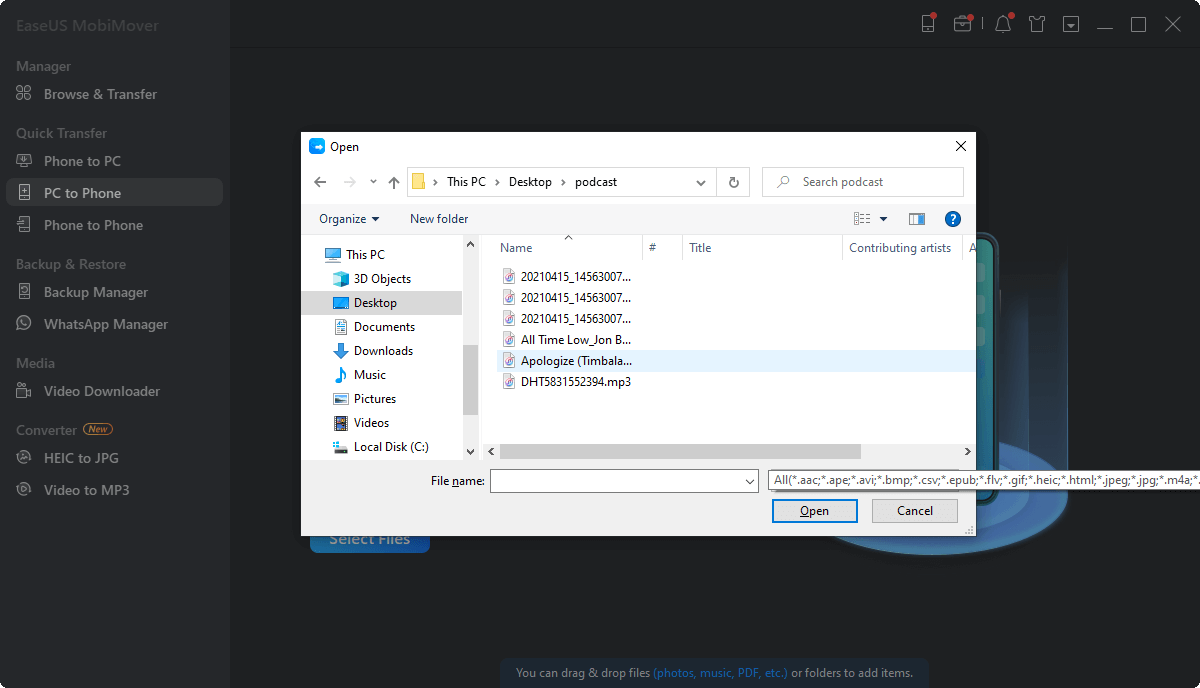
Step 2. In the new window, go to your computer to add files to transfer from the laptop to your iPhone. Then, click the "Open" button to continue.
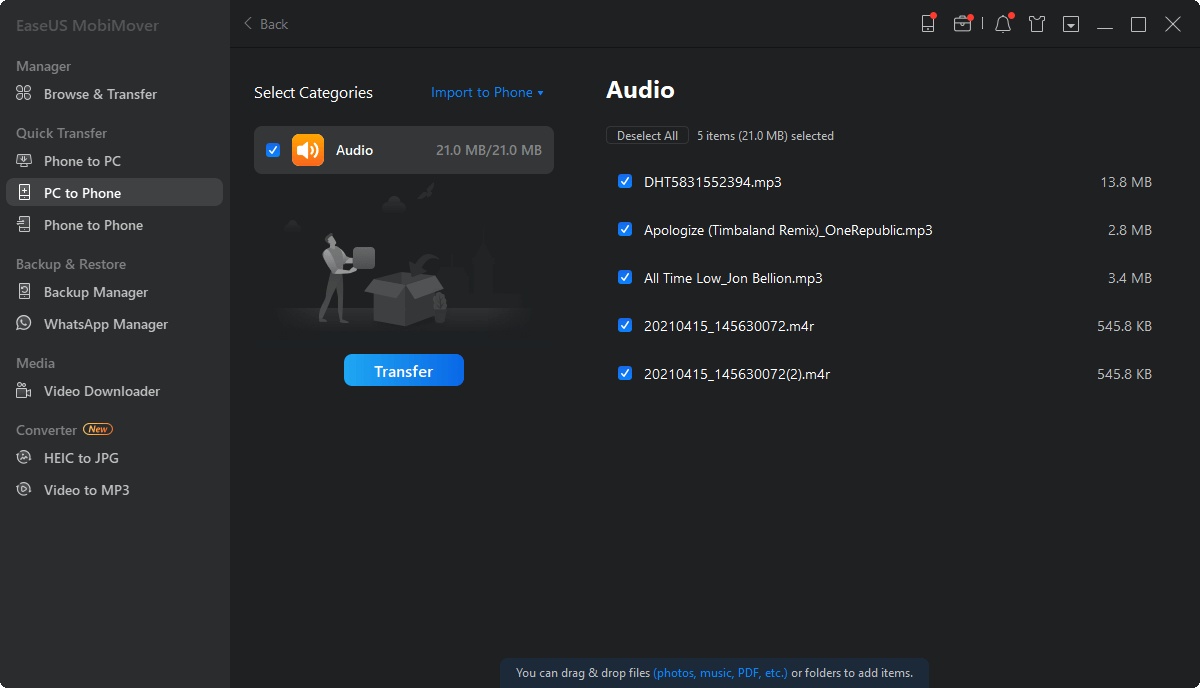
Step 3. You can click "Add Contents" to load more photos or do it by drag-and-drop. MobiMover will load all the supported files. You can transfer them all or only keep "Pictures". Next, click the "Transfer" button to start to transfer photos from laptop to iPhone.
Whenever you need to transfer photos from PC to iPhone without iTunes, you can try this method. If you are also interested in how to transfer photos from iPhone to external hard drive, click here for details.
How to Transfer Photos from Laptop to iPhone via Google Photos
Using Google Photos is one of the easiest methods to transfer photos from a laptop to your iPhone. If you want to use EaseUS MobiMover, you should consider using this method–particularly if you already use Google Photos on your iPhone. Just follow these steps to move your pictures to your iPhone with this method.
Step 1. Get Google Photos on iPhone
First of all, you'll need to install the Google Photos app from the App Store and log in using your Google account. If you already have Google Photos on your device, you can skip this step and head on to the next one.
Step 2. Upload Photos from Laptop
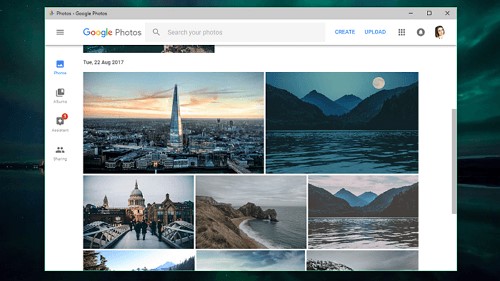
Now, fire up your favorite browser on your laptop and open Google Photos from Google Apps. Then, upload all the photos you want to access on your iPhone here. Ideally, you should have all your photos uploaded to Google Photos so you can access them wherever and whenever you want.
Step 3. View the Photos on iPhone
All the photos that you uploaded on Google Photos from your laptop can now be accessed on your iPhone's Google Photos app. To transfer them to your iPhone's storage, simply tap on the menu icons (three vertical dots) for the required images and Download them.
![upload photos]()
How to Transfer Photos from Laptop to iPhone via Email
Another method you can use to transfer photos from a laptop to iPhone is to do it through email. Though not commonly used, it is an effective method so long as you only have a few images to transfer. Here's how you can do this:
Step 1. Open Your Email
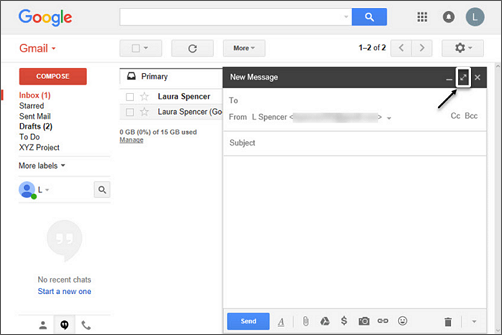
Log in to your email account on your laptop and start composing a new email. In the receivers tab, enter your email.
Step 2. Include Photos as Attachment
Now, click on the Attachments icon, and select the photos you wish to transfer to your iPhone.
Step 3. Send the Email
Once you've attached your images to the email, hit the send button. Now you'll have these photos always accessible in your email Inbox.
Step 4. Download the Photos on iPhone
Now open the email app on your phone, and open the email you've just sent yourself. From here, you can easily download the images on your iPhone and access them on both of your devices.
![open your email]()
How to Transfer Photos from Laptop to iPhone via iCloud Photos
The next option we will be discussing on how to transfer photos from laptop to iPhone is to use iCloud. You can use iCloud to move your data, including photos, to your phone using the following steps.
Step 1. Log in to iCloud on Laptop
The first step is to log in to iCloud on your laptop. You can either do this by going to www.icloud.com on your browser or by downloading iCloud for Windows on your laptop. In either case, use your credentials to log in to your iCloud account.
Step 2. Upload Photos to iCloud
Once you've logged in to iCloud, go to the Photo Library and click on the upload icon. Here, you can choose the photos you want to upload and send them to iCloud storage.
Step 3. Enable iCloud Photos on iPhone
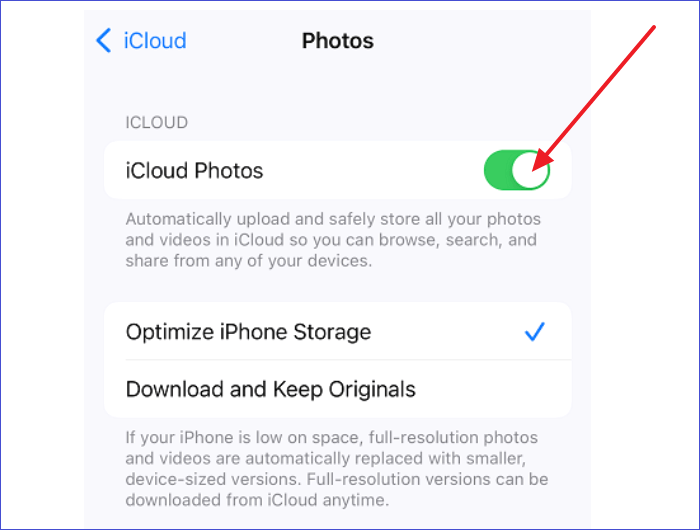
Now, go to Settings on your iPhone, and tap on your profile. In there, you'll need to tap on iCloud and then tap Photos on the next page. Here, you'll see an option titled iCloud Photos with a toggle switch next to it. You'll need to enable this option. By doing this, you'll be able to access your uploaded photos on your iPhone as well.
Step 4. Download Photos to iPhone Storage
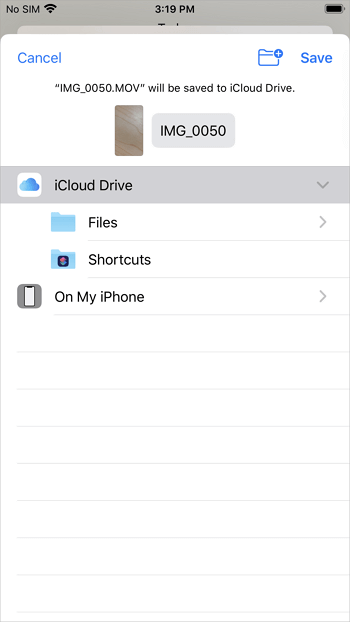
If you wish, you can also download your photos from iCloud to your iPhone's internal storage. To do that, you simply need to open a picture in your Photos app and select Save to Files, and then specify the storage folder/location where you want the images to be stored.
![icloud photos on]()
You can follow the same steps to transfer photos from iCloud to iPhone when you need to.
How to Transfer Photos from Laptop to iPhone via iTunes
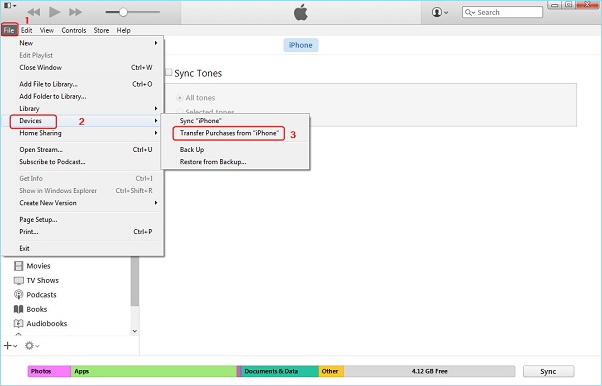
Now we come to the method traditionally used to transfer files from laptop to iPhone using USB cable via iTunes. You can transfer your photos from a laptop to an iPhone pretty easily with this method. All you need to do is to follow these steps:
Step 1. Launch iTunes on Your Laptop
If you already have iTunes installed on your laptop, then launch the app. Otherwise, you'll need to download it from Apple's official website first.
Step 2. Connect iPhone to the Laptop
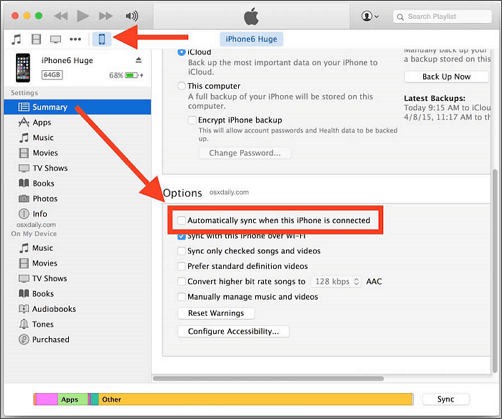
After you launch iTunes, connect your phone to the laptop using a USB cable. Now, click on the phone icon in the iTunes window. You'll see your iPhone being displayed here.
Step 3. Sync Your Photos
Now, select the photos you want to transfer to your iPhone in the Photos tab, and hit Sync. After this, the photos on your laptop will also be accessible on your iPhone.
![sync your photos]()
How to Transfer Photos from Laptop to iPhone via Google Drive
You can also transfer your photos from a laptop to your iPhone by using Google Drive, which is one of the best and easiest ways you can transfer your photos between devices. If you want to use this method, these are the steps you'll need to follow:
Step 1. Upload Photos on Drive
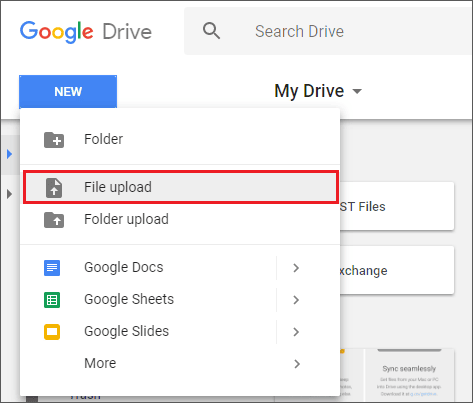
Go to Google Drive on your laptop, and upload the photos you wish to transfer by clicking on the New button. You can choose to simply upload the photos or create a folder to keep them organized. We recommend the latter approach for ease of use.
Step 2. Install the App
Now, install the Google Drive app on your iPhone by downloading it from the App Store; and logging in with your Google account. If you already have the app on your phone with your account logged in, you can skip this step and head on to the next one.
Step 3. Download the Photos on iPhone
Now, go to the photos you just uploaded from your laptop, and download them to your iPhone storage. Now you can access those photos whenever you want. And as the cherry on top, you can keep those photos in your Google Drive in case you need to download them again in the future.
![upload files]()
How to Transfer Photos from Laptop to iPhone via Dropbox
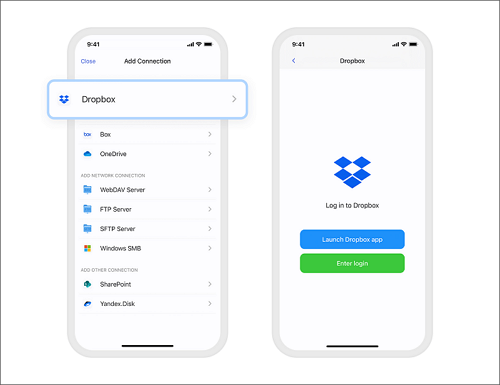
The last method for transferring photos from a laptop to iPhone that we'll discuss today is to use Dropbox. The steps required for using this method to move your pictures to your iPhone's storage are explained here:
Step 1. Upload Photos to Dropbox
To upload your selected photos to Dropbox, you can either use the Dropbox app installed on your laptop or go to www.dropbox.com. Once you've uploaded your photos, you can head on to the next step.
Step 2. Install the Dropbox App on iPhone
The second step in this method is to install the Dropbox app on your iPhone and sign in with your Dropbox account.
Step 3. Download your Photos from Dropbox
Now, you can download the photos you wish to have on your iPhone from Dropbox by selecting the photos and tapping the download icon.
![dropbox]()
Conclusion
To summarize this post, you can use a number of different methods if you want to transfer photos from a laptop to iPhone. These methods can be both wired and wireless, and some of these might be more suitable for your case than others. For best results, we recommend you use EaseUS MobiMover, but you can also use the other options we've listed, like Google Photos, Google Drive, iCloud, iTunes, Dropbox, Email, etc. All of these methods are great if you want to move your photos from a laptop to iPhone, so make sure to choose whichever option suits you best.
FAQs on How to Transfer Photos from Laptop to iPhone
Here are some of the most frequently asked questions about how to transfer photos from laptop to iPhone.
1. How to Transfer Photos from a Laptop to iPhone Without Using iTunes?
There are a lot of ways you can transfer photos from a laptop to an iPhone, even if you don't use iTunes. We recommend you use EaseUS MobiMover, but you can also use Google Photos, iCloud, Google Drive, Dropbox, etc.
2. Can I Transfer Photos from a Windows Laptop to iPhone Wirelessly?
Yes, you can easily transfer photos from a Windows laptop to iPhone wirelessly in quite a few ways, e.g., EaseUS MobiMover, Google Photos, Email, Google Drive, iCloud, Dropbox, etc.
3. How to Transfer Photos from a Laptop to an iPhone With No Quality Loss?
To ensure the transfer of your photos from a laptop to an iPhone without losing any quality, you can use EaseUS MobiMover. If you don't want to use that, you can use Google Drive, Dropbox, iCloud, etc., for this purpose too.
NEW
HOT
