Sometimes when you connect your iPod to iTunes, you may encounter the problem that iTunes does not recognize your iPod. If, unfortunately, you are experiencing this problem, follow this guide to learn why this happens and how to fix this issue.
| Solution |
Effectiveness |
Difficulty |
| 1️⃣Update driver software |
High - It helps Update the Driver to make it run well. |
Moderate
●●○
|
| 2️⃣Enable the services related to iTunes |
Moderate - It is to make some services accessible on the computer. |
Moderate
●●○
|
| 3️⃣EaseUS MobiMover |
High - It is an iTunes alternative that can handle almost all data management jobs like transferring data |
Easy
●○○
|
Why Is My iPhone, iPad, or iPod Not Showing Up in iTunes?
Many factors might lead to this issue. These factors include but are not limited to - your iPod is too old, and the latest version of iTunes might not support it, or you've set your computer to disable the recognization of your device, or your iTunes runs improperly due to some unknown reasons. Anyway, many reasons might be responsible for this issue. Whatever the case is, learn how to solve this problem by reading the following post.
Basic Solutions to iTunes Not Recognizing iPod
Before adopting any one of the solutions to fix iTunes not recognizing the iPod issue, first make a copy of your music on iPod. You can either back it up with iCloud or transfer music from iPod to computer for safekeeping. If you've done that, let's start to fix this issue by following these solutions.
Solution 1. Update driver software
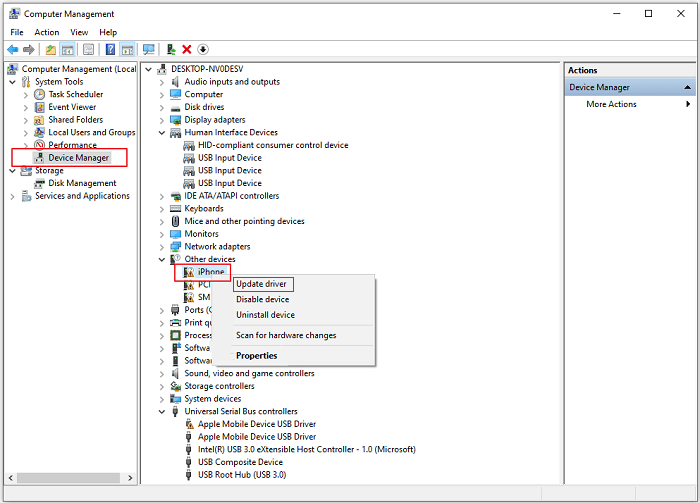
Step 1. Right-click on "This PC" > Choose "Manage" > Choose "Device Manager" > Find "Other devices" (also called "Portable devices" on some computers) > Right-click your iPod's name > Choose "Update Driver."
Step 2. Choose "Browse my computer for driver software" > Choose "Let me pick from a list of device drivers on my computer" >Choose "Digital Media Devices" > Click on "Next" > Click "Have Disk..."
Step 3. Click on "Browse" > "This PC" > "Local Disk" > "Program Files" > "Common Filles" > "Apple" > "Mobile Device Support" > "Drivers" > Double click on that .inf file.
Step 4. Click on "OK" > Confirm your choice by clicking on "OK."
Step 5. Go back to the "Update Driver Software" page, click "Next."
Step 6. Open iTunes and go to see if it recognizes your iPod.
![Update the driver software]()
Solution 2. Enable the services related to iTunes
Step 1. On your computer, close iTunes.
Step 2. Right-click on "This PC" > Choose "Manage" > Choose "Services and Applications."
Step 3. Double click on "Services" > Choose "Standard" from the bottom of the screen.
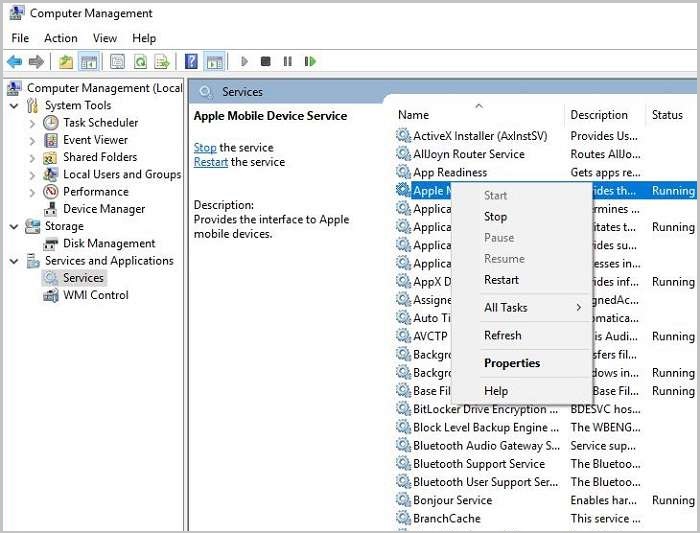
Step 4. Then, you'll see a list that contains many data. From where find "Apple Mobile Device Services" and right-click it, and then choose "Properties."
Step 5. Change the Startup type to "Automatic" > Click "Apply" > Click "Start."
Step 6. Wait for Windows to apply your option, and then click "OK."
Step 7. Find "Bonjour Service" and apply the same process (Step 4 - Step 6) to it.
Step 8. Restart iTunes and see if it works.
![Choose Properties]()
Solution 3. Sync iPod to Computer with an iTunes Alternative
If your iPod still not showing on iTunes after applying the solutions mentioned above, you can try using some iTunes alternatives to handle data management tasks instead. Here we recommend this popular iTunes alternative - EaseUS MobiMover to you. EaseUS MobiMover can handle almost all data management jobs like transferring data between two iOS devices or between an iOS device and a computer, backing up your device, deleting or editing iOS data from your computer, downloading videos from any sites, etc.
You can use it to manage files and transfer data from one iPhone to another. If your needs for data management are included, download it on your computer and start manage iPod data.
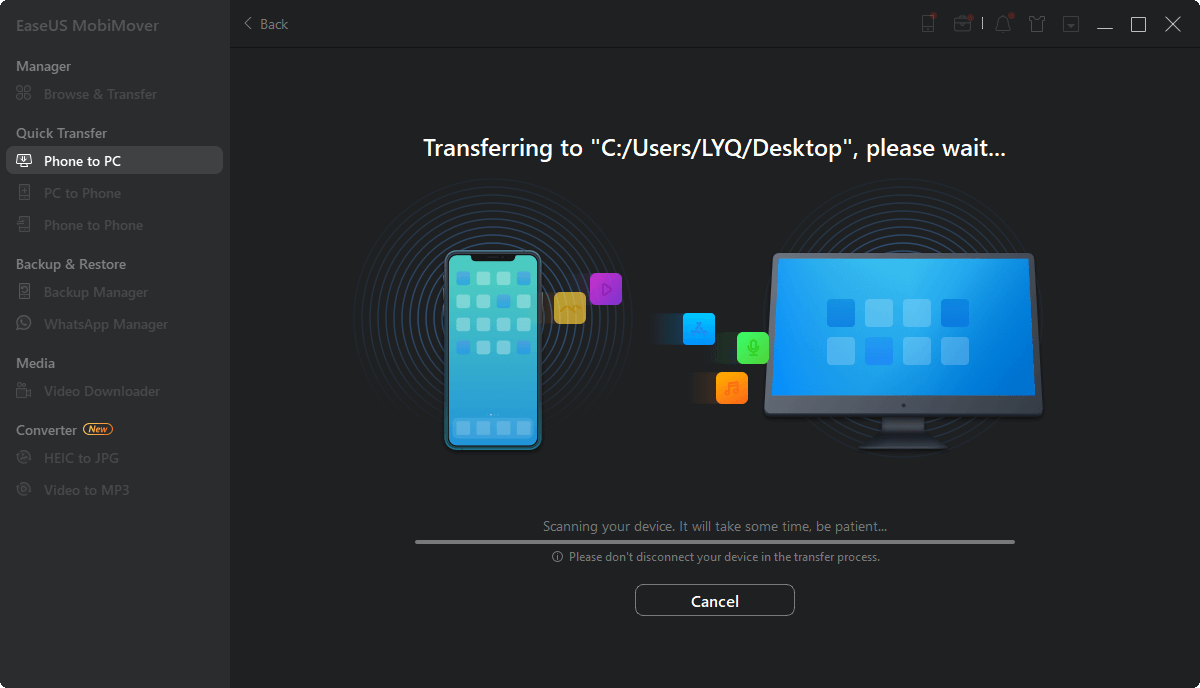
Step 1. Connect your iPhone to your computer running Windows or Mac OS systems with a USB cable > Start EaseUS MobiMover > Click "Phone to PC" > Click "Next."
Step 2. Choose the type of files you wish to export > Customize the destination for exported iPhone data > Click "Transfer" to copy iPhone files to the computer at a fast speed.
Step 3. When the transferring finished, you can view, edit, keep or delete the content as you like.
Additionally, you can freely choose one or more categories instead of the whole data, like just copy photos from iPhone to PC.
The Bottom Line
That's a wrap! As you can see, there are two main solutions to fix the problem that your iTunes can't recognize iPod. iTunes often goes wrong due to various reasons. If you don't want to meet various iTunes problems, your best choice is to use an iTunes alternative like EaseUS MobiMover to handle your data management task.
FAQs on How to Fix iPhone, iPad or iPod Not Recognized by iTunes
Here are some of the FAQs that will help you find answers related to this topic.
1. Why doesn't my computer recognize my iPhone iPad or iPod?
You can disconnect your device and other USB devices and accessories from your computer. Then reconnect your device only.
2. Why is iTunes not detecting my iPhone?
Ensure that your phone is unlocked, iTunes has the latest update, and the iPhone is permitted to trust your computer. Restarting the computer and iPhone is also advised. Additionally, make sure the USB cable is in good condition.
3. How do I force iTunes to recognize my iPad?
Here are something you can do. For example, you can update the software on all devices, restart your devices, or try a different port, cable, or computer.


 NEW
NEW HOT
HOT