There are many methods out there to copy photos from Windows 10 to your iPhone, starting with iTunes and ending with various cloud solutions and third-party transfer tools. If you're now looking for a way to transfer photos from Windows 10 to iPhone, this guide is for you. In this guide, we collect some workable ways to pass your photos from Windows to iPhone. Plus, if you want to get these transferred photos back to your iPhone, apply the bonus tip to do it.
Tip 1. How to Transfer Photos from Windows 10 to iPhone Without iTunes
iTunes is considered as the default way to sync data from computer to iPhone, be it PC or Mac. However, an inevitable flaw of using iTunes is that it will replace the existing content on your iOS device with the synced content. That means it will cause data loss on your iPhone. Therefore, many users want to copy photos from Windows 10 to iPhone without iTunes.
Luckily, in addition to using iTunes, there are many other practical ways available to transfer pictures from Windows PC to iPhone, iPad, or iPod. There are three of them:
Method 1. Transfer Pictures from Windows 10 to iPhone with Free iPhone Transfer Software
"How do I transfer photos from PC to iPhone using USB?"
If you have the same question as the one shown above, you will like the free iPhone data transfer software - EaseUS MobiMover. It works well to transfer photos, videos, music, ringtones, books, contacts, and more between your iPhone and Windows 10 PC or between two iDevices, without the installation of iTunes.
Whether you want to transfer photos from iPhone to PC or vice versa, you can get things done easily with this tool.
To transfer photos from Windows 10 to iPhone:
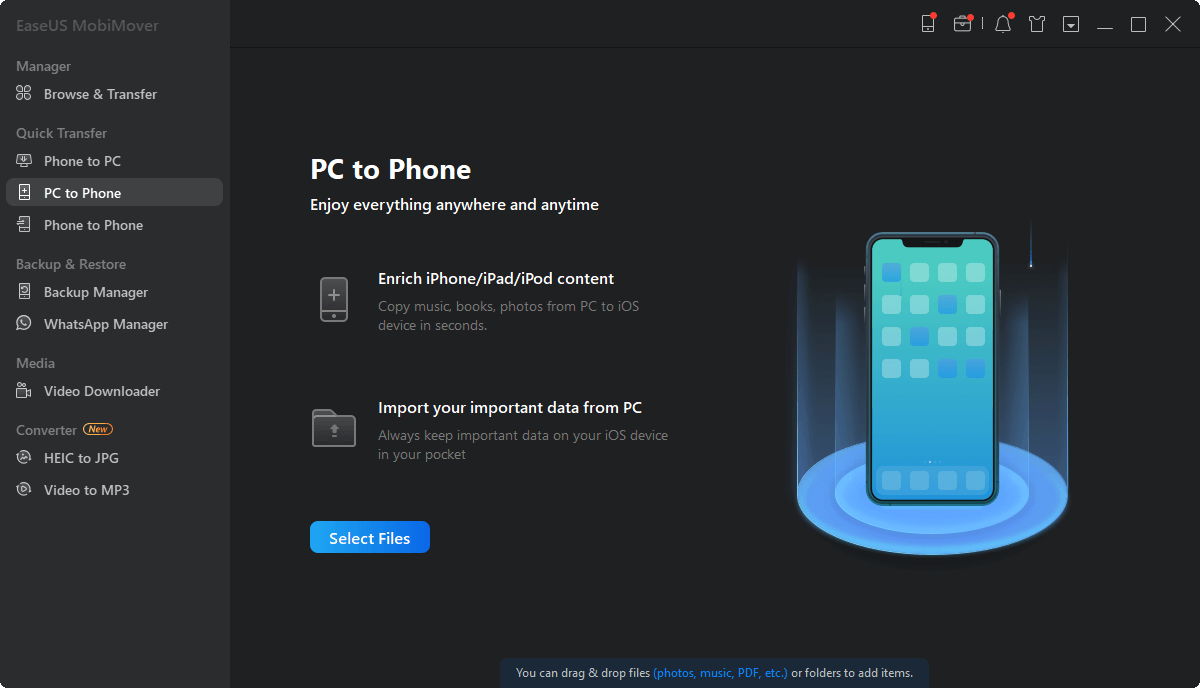
Step 1. Use a USB cable to connect your iPhone to your Mac/PC. Run EaseUS MobiMover, choose "PC to Phone" mode and click "Select Files" to move on.
Step 2. In the new window, go to your computer to choose photos to transfer. Then, click the "Open" button to load the files.
Step 3. You can click "Add Contents" to import more data. If the folder you've selected contains other file types except for photos, MobiMover will load them all. You can choose to transfer "Pictures" only or with other files together. Finally, click the "Transfer" button to transfer photos from computer to iPhone.
Other than being an iOS data transfer tool, EaseUS MobiMover also performs well as a free video & audio downloader. If you need to download YouTube videos to iPhone or download SoundCloud music to your computer, it will help, too.
Method 2. Sync Photos from Windows 10 to iPhone with iCloud Photos
Don't want to use a USB cable? Here is iCloud to help. With iCloud Photos enabled, you are able to sync photos and videos across your devices that use the same Apple ID account.
Make sure you have sufficient storage in iCloud and your devices are under stable network connections. Afterward, follow the steps below to learn how to transfer photos from Windows 10 to iPhone (or iPad) in two ways using iCloud.
If you have installed iCloud control panel on your PC:
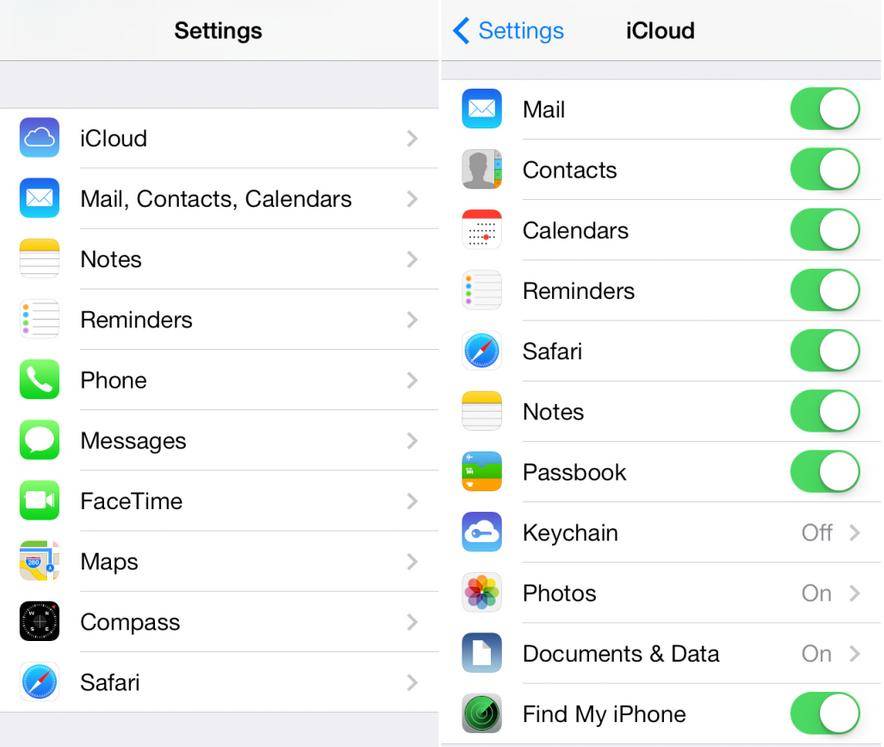
Step 1. On your iPhone, go to "Settings" > [your name] > "iCloud" > "Photos" and turn on "iCloud Photos".
Step 2. On your Windows PC, open iCloud for Windows.
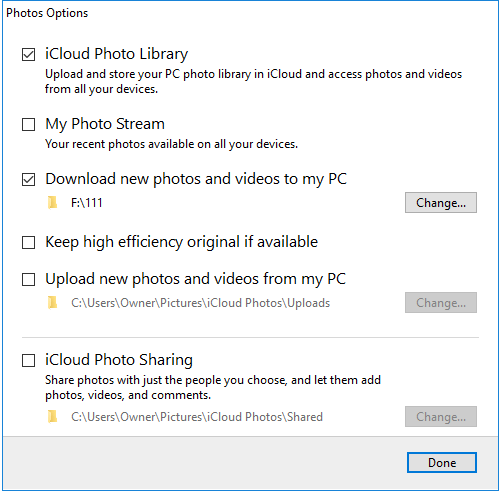
Step 3. Click "Options" next to the Photos option and enable "iCloud Photo Library".
Step 4. Turn on "Upload new photos and videos from my PC" and remember the folder shown underneath.
Step 5. Copy the photos you want to transfer to the folder to upload the items to iCloud storage.
Step 6. Go to the Photos app on your iOS device and you will see the pictures from your computer.
![How to transfer photos from Windows 10 to iPhone without iTunes]()
If you don't want to install iCloud for Windows:
Step 1. Turn on "iCloud Photos" on your iPhone.
Step 2. On your PC, go to iCloud.com and sign in with the Apple ID account you use on your iPhone.
Step 3. Choose "Photos" and click the "Upload" icon to upload the photos that you want to transfer to your iPhone to iCloud.
Step 4. Go to the Photos app on your iOS device to check the pictures.
![How to transfer photos from PC to iPhone with iCloud]()
Method 3. Transfer Pictures from PC to iPhone with Google Photos
iCloud is not the only cloud service you can apply to transfer photos from PC to iPhone. Other popular services like Dropbox, OneDrive, and Google Photos are also helpful to copy photos and videos and more from computer to iPhone or iPad.
Let me show you how to transfer photos from Windows 10 to iPhone without iTunes using Google Photos.
Step 1. Go to visit Google Photos on your Windows PC and log in with your account.
Step 2. You can either click "Create" > "Album" to create a new album to save the photos or select "Upload" > "Computer" to upload photos directly.
Step 3. Afterward, click "Add photos" > "Select from computer" to add new photos to Google Photos from the folders on the PC.
Step 4. On your iPhone, go to the App Store and download Google Photos.
Step 5. Sign in with the account you use on Google Photos on your computer.
Step 6. Select and download the photos to your mobile device.
![How to transfer photos from Windows 10 to iPhone with Google Photos]()
Tip 2. How to Transfer Photos from Windows 10 to iPhone Using iTunes
If you don't mind the data loss or there are no files existing on your iPhone, transferring photos to your iPhone from PC using iTunes is also a workable way.
Step 1. Connect your iPhone to your PC with a USB cable and wait for iTunes to launch automatically.
Step 2. Unlock your device and trust the computer. If required, enter your iPhone passcode to continue.
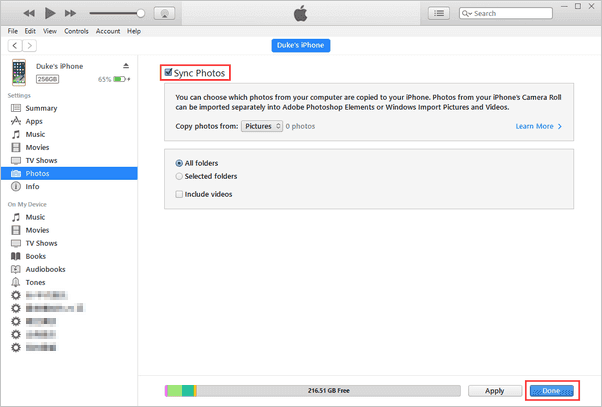
Step 3. In iTunes, click the "Device" icon in the top left corner.
Step 4. Choose "Photos" in the left panel and check "Sync Photos".
Step 5. Select the photos you want to transfer from the option "Copy photos from".
Step 6. After the selection, click "Apply" to start syncing photos from Windows 10 to iPhone. When it has done, go to the Photos app on your iOS device to check the transferred items.
![How to transfer photos from Windows 10 to iPhone with iTunes]()
Bonus Tip. Transfer Photos from iPhone to PC Windows 10
If you find that the pictures you transfer to iPhone from Windows are not the items you really want to transfer, you have the chance to get them back. Of the methods for this purpose, the above 4 methods are included. Apart from them, there are two additional options: email and cloud service. Both are not the optimal choice, but in case that none of the above methods works, they're still worth a mention. To learn how they work, you can check this detailed guide to transfer photos from iPhone to PC.
The Bottom Line
Isn't it easy to transfer photos from Windows 10 to iPhone? Actually, all the ways above are also applicable to copy photos to iPhone from a PC running earlier Windows versions or from a Mac. Apply the one that fits your needs most to transfer pictures from PC to your iPhone with ease.