The full guide on how to use and manage voice memos on iPhone. Or you can transfer Voice Memos from iPhone to computer for backup.
How to Record Voice Memos on iPhone
Recording a voice memo on an iPhone is quite easy. All you need to pay attention to is to avoid the noises around you when you record and don't forget to save it on your device when it's done.
Step 1. Go to "Voice Memos" App on your iPhone.
Step 2. Click the red "Record" button on your screen to begin the recording.
Step 3. Tap on the "Record" button again to stop recording. Then you can click the "Play" button to play the voice memo you have recorded.
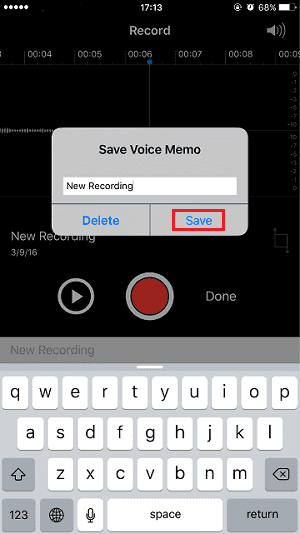
Step 4. Click "Done" on the right side of the red button, set the name for your voice memo and tap on "Save" to keep the voice memo on your iPhone.
![How to record a voice memo on iPhone]()
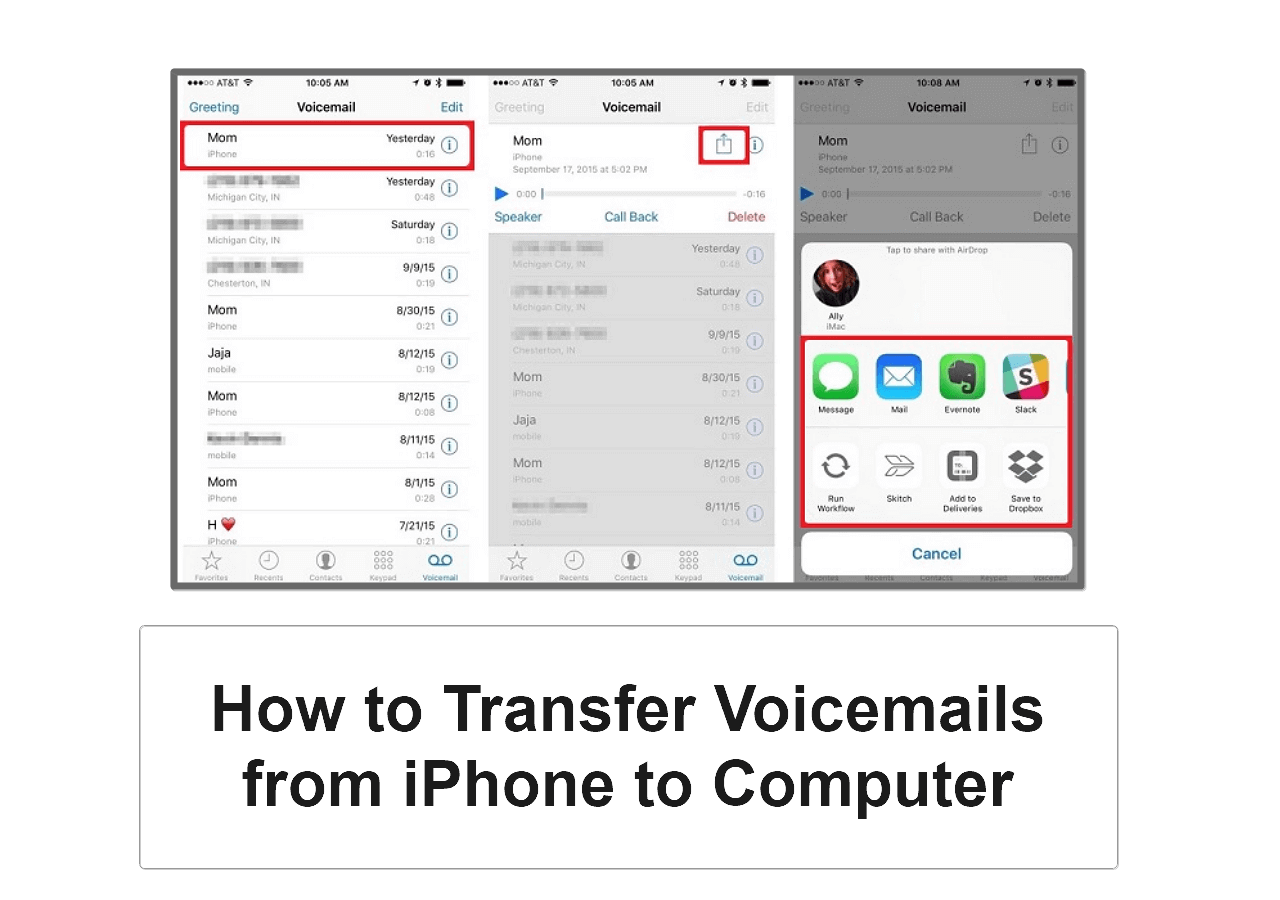
If you are also interested in how to transfer voicemails from iPhone to computer, click below for more information:
How to Share Voice Memos on iPhone in 4 Ways
There are various ways for you to share a voice memo on your iPhone. For example, you can send voice memos on iPhone to computer, transfer voice memos via email, or share voice memos from iPhone to social media apps like Instagram.
| 🔍Fix |
💻Effectiveness |
| 1️⃣EaseUS MobiMover Pro |
an iPhone data transfer tool to transfer various data. |
| 2️⃣Social Sharing |
share the file to Facebook, Instagram, WhatsApp, ect. |
| 3️⃣Email |
send this file as an attachement by Email. |
| 4️⃣AirDrop |
transfer files using AirDrop between two Apple-powered devices. |
Method 1. How to Send a Voice Memo from iPhone to Computer
Transferring voice memos from iPhone to computer is a good choice to make a backup of your audio files. Besides, after you download voice memos from iPhone to computer, you can edit the audio as well. To send voice memos on iPhone to computer, be it a Mac or PC, you can apply the iPhone transfer software - EaseUS MobiMover Pro. It helps to:
- Access and manage iDevice content from a computer
- Transfer files between an iPhone/iPad/iPod and a computer
- Share data from one iPhone/iPad/iPod to another
What's more, it also works well as a video downloader that enables you to download online video and audio files to your computer or iPhone/iPad/iPod via URL.
Here's how to send a voice memo on iPhone to computer:
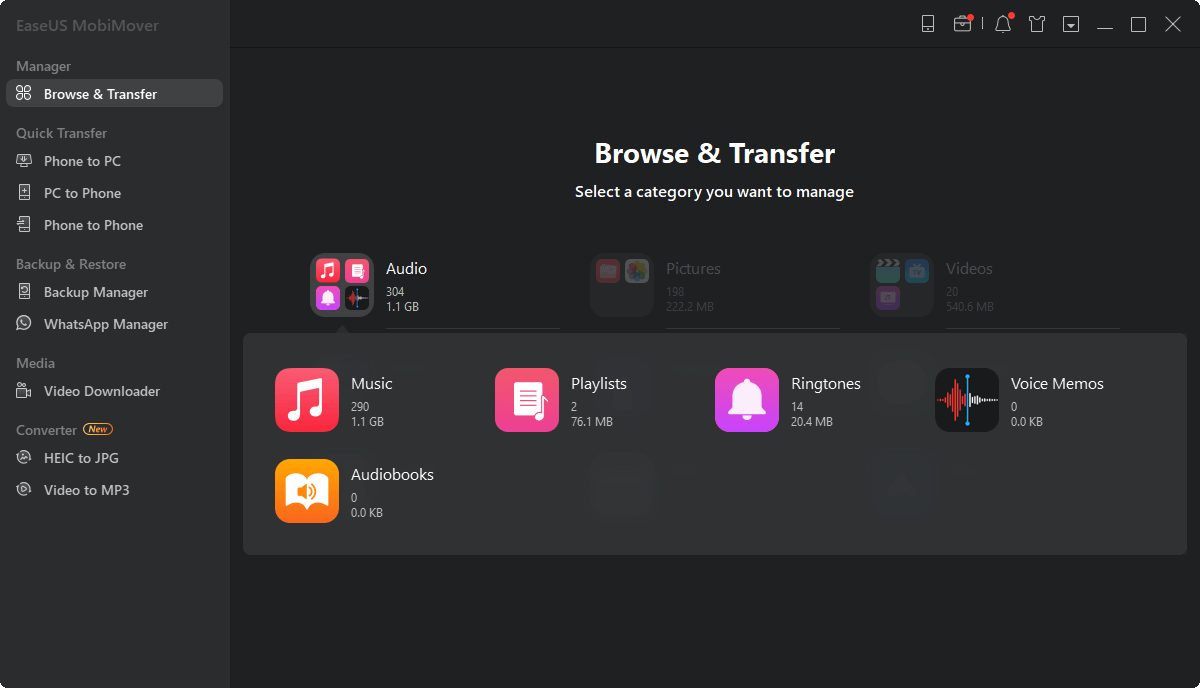
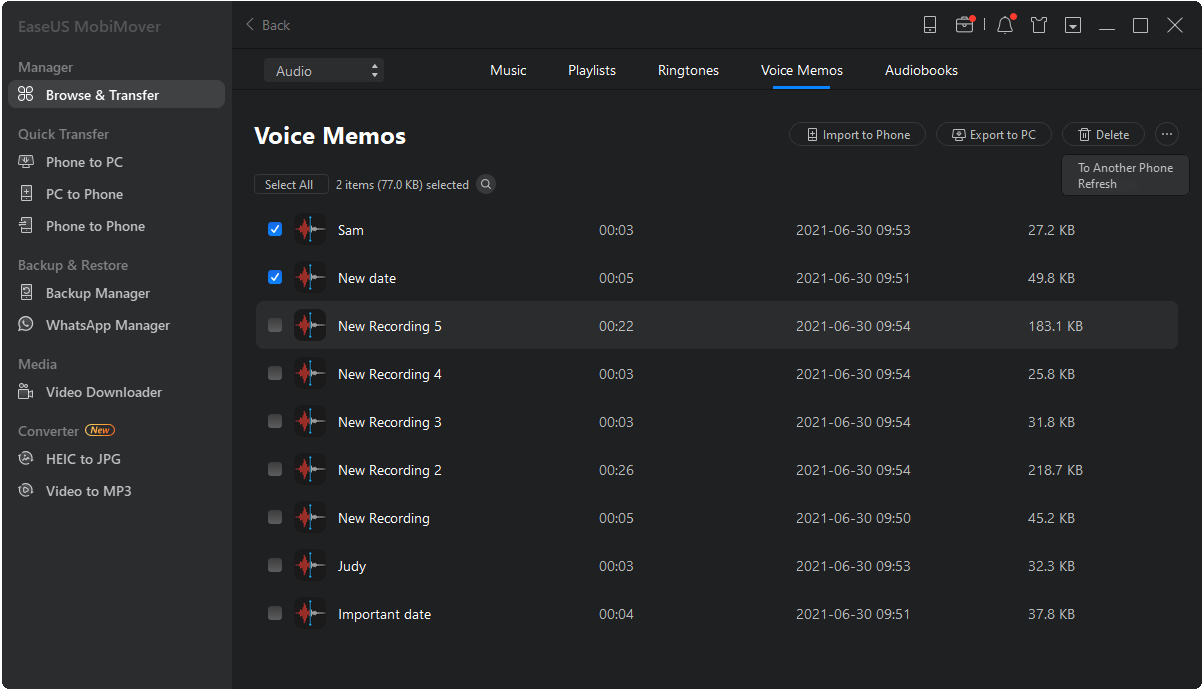
Step 1. Have your iPhone connected to the computer > Launch EaseUS MobiMover > Click "Content Management" on the main screen of EaseUS MobiMover > Click "Audio" > Select "Voice Memo."
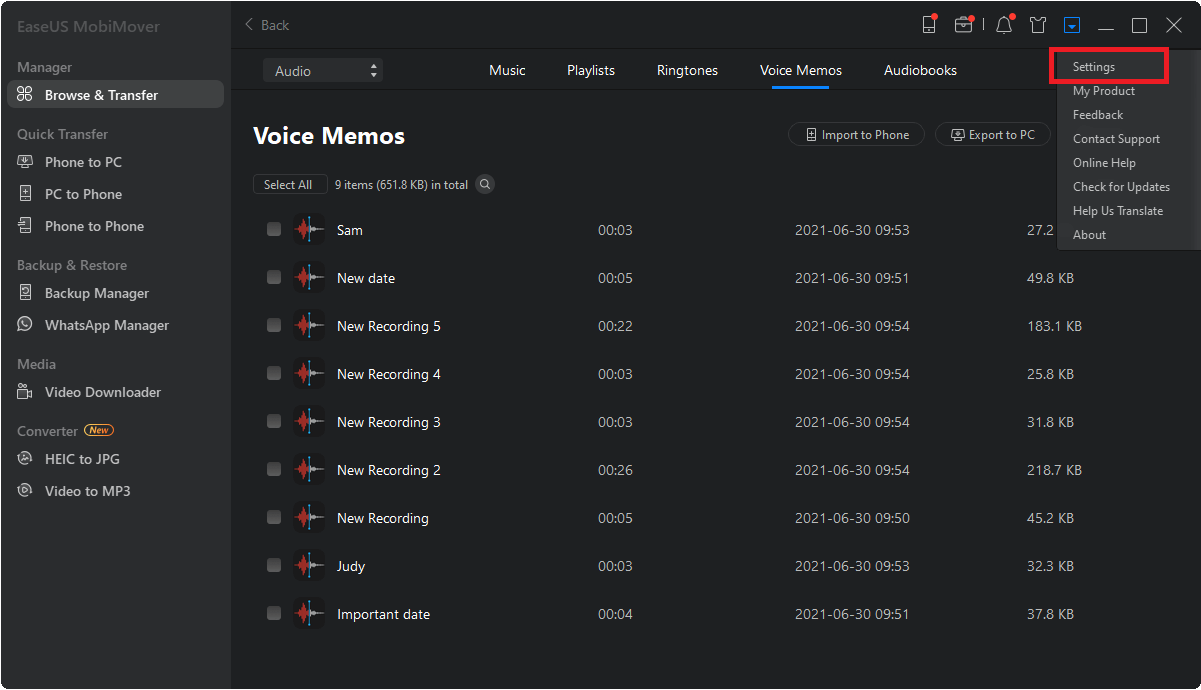
Step 2. From the listed voice memos, select your desired items > Click the "Settings" button to set a location on your PC to house the transferred items.
Step 3. Click "Transfer to PC" to start tranferring. Please don't disconnect the connection between your iPhone and the PC until the process accomplishes.
Method 2. How to Share Voice Memos from iPhone to Facebook, Instagram, WhatsApp...
After you record a voice memo, you may want to share it on social media or send it to others via messaging apps. If so, follow the steps below to learn how to do it.
To share voice memos from iPhone to Facebook/Instagram/WhatsApp:
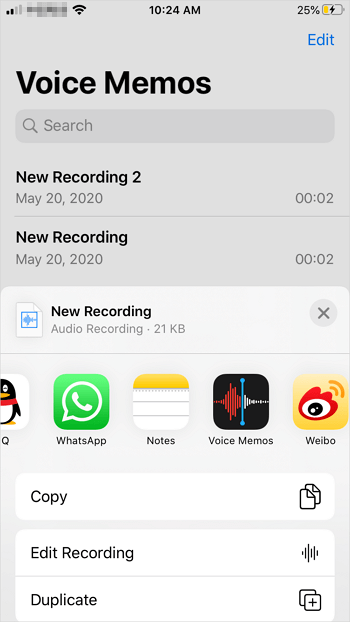
Step 1. Go to the "Voice Memos" app and tap the item you want to share.
Step 2. Tap the "More" button and choose "Share".
Step 3. Choose an app according to your need.
![How to share voice memos on iPhone]()
See? It's quite easy to share voice memos with your friends or families.
Method 3. How to Send Voice Memos from iPhone to Email
If you want to send a voice memo from iPhone to Android, using an email could be a good choice. Via email, you will be able to share voice memos from an iPhone to any other device that can receive an email. The steps to send voice memos from iPhone using email are quite similar to the steps in method 2. The only thing you need to change is to choose "Mail" in the last step.
Method 4. How to AirDrop Voice Memos on iPhone
Are you going to transfer voice memos from iPhone to another Apple device? If you are looking to export voice memos from iPhone to another iDevice or Mac, using AirDrop is also one of the solutions. AirDrop is a file-sharing service that allows you to share photos, videos, contacts, voice memos, and more between two AirDrop-supported devices. Whether you want to AirDrop contacts from iPhone to Mac or send voice memos from iPhone to iPad, it will help.
Step 1. Turn on AirDrop on your devices.
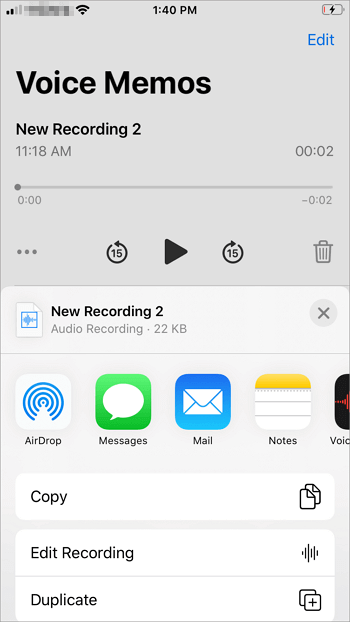
Step 2. Open the "Voice Memos" app and tap the recording.
Step 3. Tap the "More" button and choose "Share".
Step 4. Tap "AirDrop" and choose the target device.
Step 5. On the target device, click "Accept" to start receiving the voice memo from your iPhone.
![How to send a voice memo from iPhone using AirDrop]()
How to Delete Voice Memos on iPhone
At one time or another, you may want to remove unwanted recordings from your device. To delete a voice memo from your iPhone, tap the "Edit" button in the Voice Memos app, select the items you want to remove, and tap "Delete" in the lower-right corner of the screen.
The Bottom Line
If you need to use the Voice Memos app often, it's necessary for you to learn how to use and manage the recordings on your iPhone from this guide. By the way, you can also store your iPhone recordings to iCloud to make a backup and share them across all your iCloud devices. Hope this guide could be useful to you.
FAQs on How to Send a Voice Memo on iPhone
In this section, you will get the specific answers to frequently asked quetions by EaseUS users recently.
1. Can I send a voice recording through email on iPhone?
Yes, of course. If you need to share a voice recording file to your friends, you can send her/him an Email with this MP3 file. It is not recommended to send large voice Memos from iPhone to Email, because the file size decides the transfer spped.
2. How to send voice message on iPhone iOS 16?
Apple allows users to send voice Memos on iMessage or send a voice recording in a text message. You can refer to the Apple's officail guidance: How to Send and Receive Audio Messages on iPhone.
NEW
HOT
