What Is AirDrop
AirDrop is an ad-hoc service released alongside OS X 10.7 Lion and iOS 7 that enables you to share photos, videos, contacts, documents, and more between two AirDrop-supported devices, including iPhone, iPad, iPod Touch, and Mac.
Thus, with the help of AirDrop, you can not only AirDrop from iPhone to Mac but also AirDrop from Mac to iPhone or from iPhone to iPhone.
How to Use AirDrop on Mac and iPhone
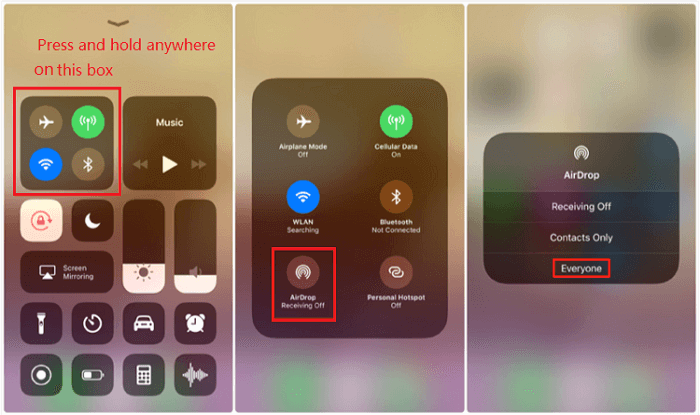
AirDrop uses both Wi-Fi and Bluetooth to work. Thus, you need to make sure the target device is within both the Bluetooth and Wi-Fi range. To enable AirDrop on your iPhone, you first need to turn on these two options and then switch on AirDrop. While on Mac, AirDrop will be enabled automatically after you turn on Wi-Fi and Bluetooth.
More specifically, to turn on AirDrop on iPhone:
Step 1. Open the Control Center on your iPhone to turn on Wi-Fi and Bluetooth.
Step 2. Tap the AirDrop icon and choose "Contacts Only" or "Everyone".
![How to turn on AIrDrop on iPhone]()
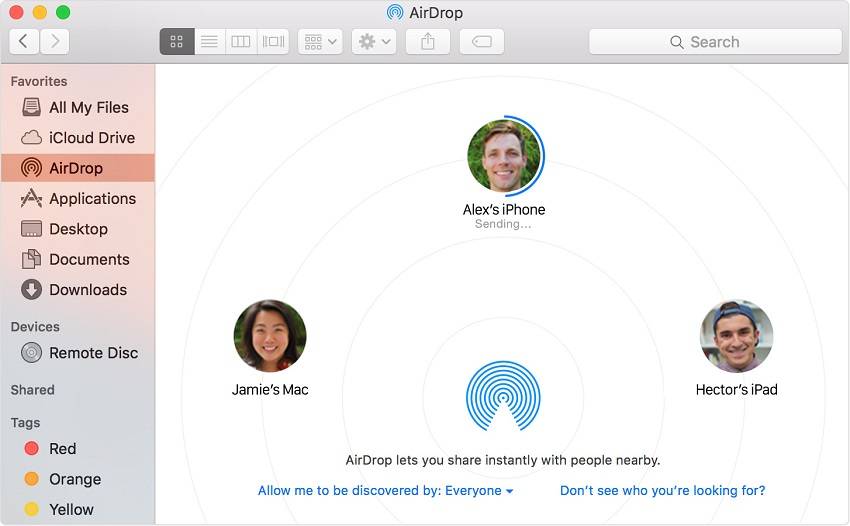
To turn on AirDrop on Mac:
Step 1. Open Finder and choose "Go" > "AirDrop".
Step 2. If Bluetooth is disabled currently, click the "Turn on Bluetooth" button to enable the service.
Step 3. Set the option "Allow me to be discovered by" as "Contacts Only" or "Everyone".
![How to turn on AirDrop on Mac]()
How to AirDrop from iPhone to Mac
With AirDrop enabled on both the source device and target device, you can now start sending photos, videos, contacts, and more from your iPhone to Mac or vice versa using AirDrop. Here I will show you how to AirDrop photos, videos, and contacts from your iOS device to Mac.
To AirDrop photos from iPhone to Mac:
Step 1. Go to the "Photos" app on your iOS device and choose the photos and videos you want to share.
Step 2. Tap the "Share" button and choose the device name of the Mac.
Step 3. On your Mac, click "Accept" in the AirDrop window to start receiving the photos and videos from your iPhone.
![How to AirDrop photos from iPhone to Mac]()
To AirDrop contacts from iPhone to Mac:
Step 1. Go to the Contacts app on your iOS device.
Step 2. Click the contact you want to transfer and choose "Share Contact" > [your Mac's name].
Step 3. On your computer, click "Accept".
![How to AirDrop contacts from iPhone to Mac]()
Bonus Tip: How to Transfer Files from iPhone to Mac Without AirDrop
If you want to transfer files from your iPhone to Mac or vice versa, you can also use a free iPhone data transfer tool, like EaseUS MobiMover. With this tool, you will be able to:
- Transfer files from iPhone to Mac and vice versa
- Transfer data between iOS devices
- Access and manage iDevice content from a computer
It allows you to transfer files including photos, videos, music, ringtones, voice memos, contacts, messages, books, and more. Besides, since EaseUS MobiMover also serves the function of a video downloader, you can apply it to download YouTube videos on Mac if you need to.
To transfer files from iPhone to Mac:
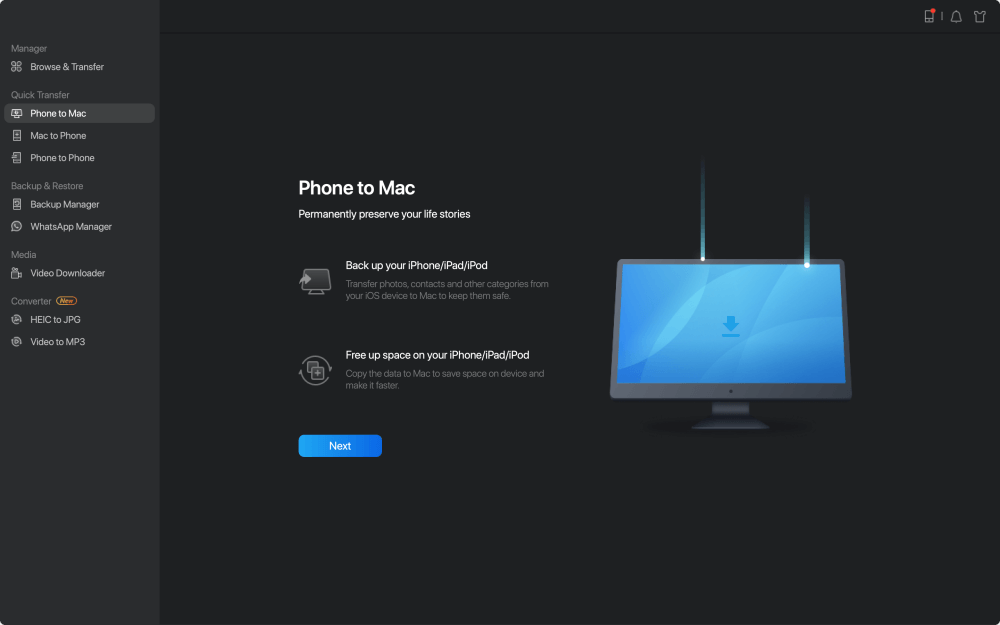
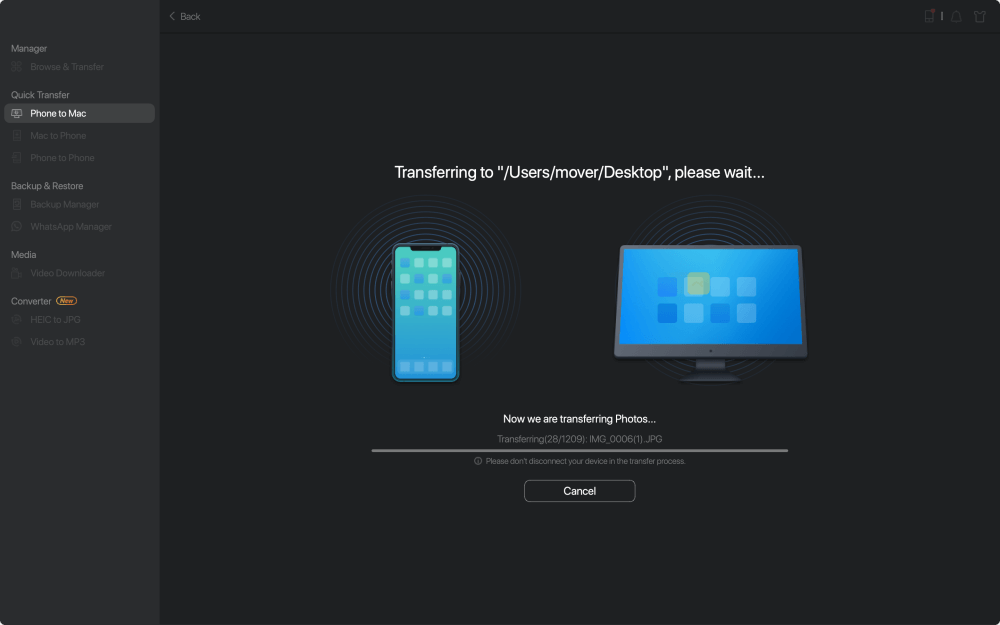
Step 1. Launch EaseUS MobiMover for Mac on your computer > Connect your iPhone to your Mac > Unlock your iPhone and click "Trust" in the prompt asking for your permission > Choose "Phone to Mac" option > Click "Next" to move on.
![How to transfer contacts from iPhone/iPad to computer - Step 1]()
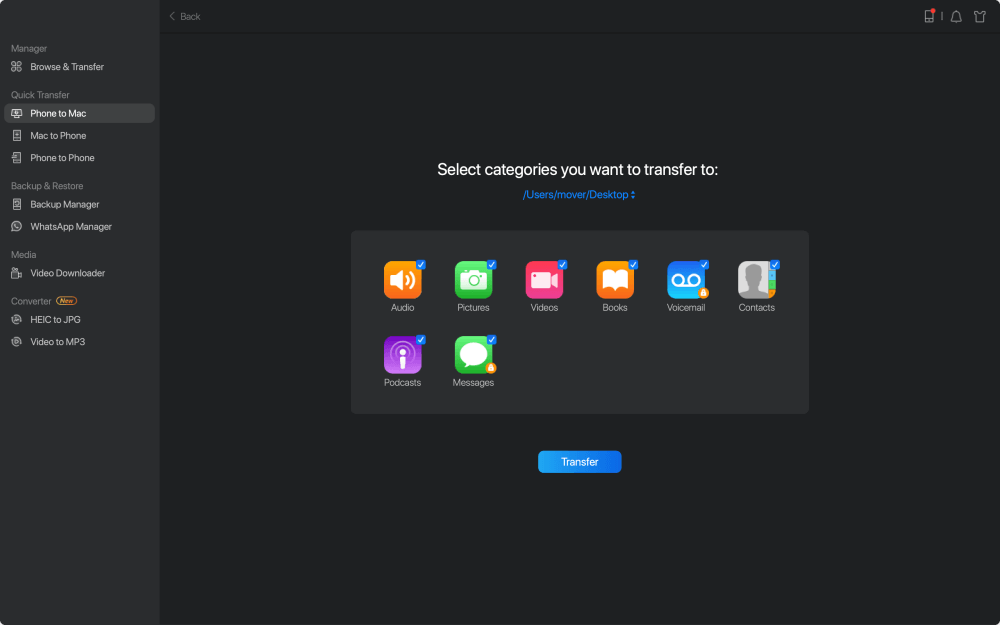
Step 2. Check 'Contacts" > Click the default storage path to set a custom path where you want to store these contacts > Click "Transfer" to start transferring from your iPhone or iPad to your Mac.
![How to transfer contacts from iPhone/iPad to computer - Step 2]()
Step 3. When the transfer process has finished, you can go to view the contacts on your Mac. (Depending on your settings, the contacts will be saved as an HTML, CSV, or VCF file on your Mac.)
![How to transfer contacts from iPhone/iPad to computer - Step 3]()
The Bottom Line
Now you know how can you AirDrop from iPhone to Mac with a few simple clicks. AirDrop makes it easy to share files between two devices that support AirDrop. However, it isn't available on computers running Windows. Thus, if you need to transfer files from iPhone to PC, you will need the help of third-party tools like EaseUS MobiMover.
For more data transfer tips, refer to the guide on how to transfer files between iPhone and Mac.

