With the Retina display embedded, iPad is a greater tool than ever to record and watch videos, movies, and TV shows. However, the video files are very large in general, and too many videos can quickly run out your iPad space. Therefore, you may need to transfer some of the videos to your laptop or a mobile hard disk to free up space if you don't want to delete them directly. Today, in this post, we will provide you the best solution - EaseUS MobiMover Pro to transfer videos from iPad to laptop without using iTunes anymore, which can't allow you to view and manage files.
How to transfer videos from iPad to laptop with EaseUS MobiMover
EaseUS MobiMover is the top 100% virus-free iPhone data transfer software in the world that enables you to transfer files from iPad to PC. You can export various kinds of iOS files from iPhone/iPad to the laptop/PC running with Windows 7/8/10. And the supportable files are contacts, messages, notes, calendars, voice mails, books, Safari bookmarks & history, photos, audios, and videos. For transferring and managing videos on iPad, MobiMover can
1. Help you transfer different iPad video files to the laptop with ease, such as movies, photo video, TV shows, music videos and home video.
2. Allow you transfer iPad videos in these formats: MP4, MOV, M4V, WMV, RM, MKV, AVI, FLV
3. Let your transfer videos from computer to iPad without covering any existing data.
4. Provide ultimate iPad data management methods to quickly delete multiple or all videos from iPad to free up space.
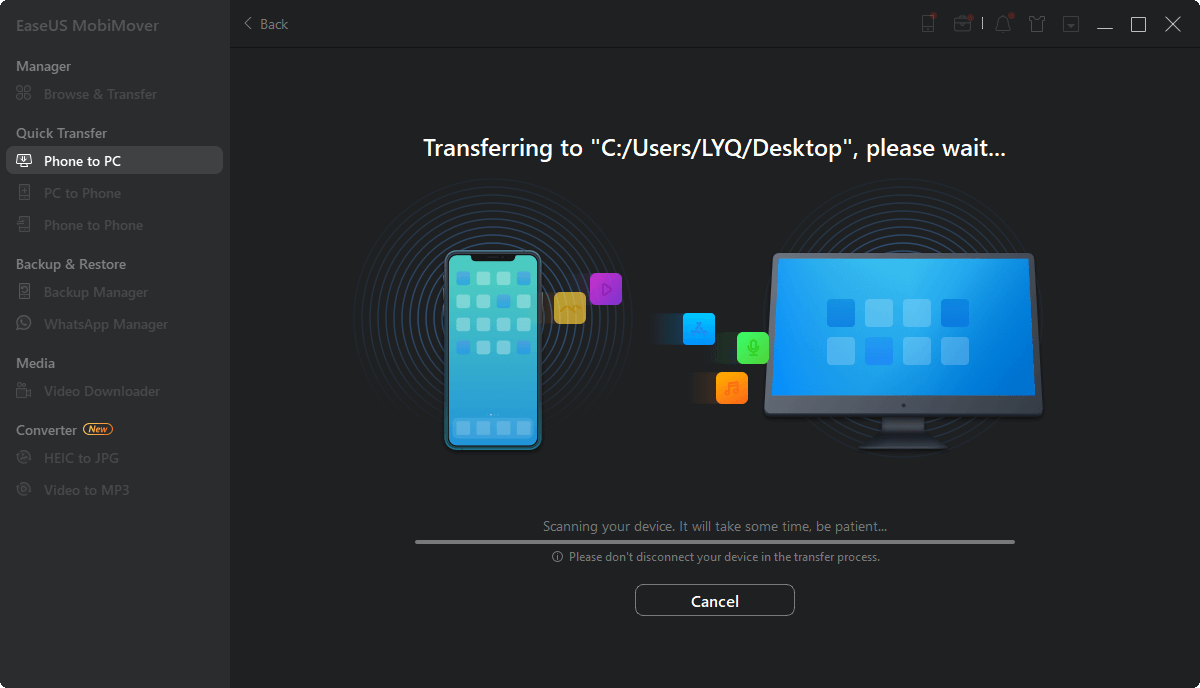
Step 1. Connect your iPhone or iPad to your laptop with a USB cable and start EaseUS MobiMover. Make sure you have clicked "Trust" on your iDevice and then go to "Phone to PC" > "Next".
Step 2. Select "Videos" and click "Transfer" to start transferring videos from your iPhone/iPad to your laptop. If you prefer to transfer specific items, go to "Content Management" > "Videos" instead. (The transferred files will be saved on the desktop by default. If you need to change the storage path, click the path in the screen and set a custom path.)
Step 3. When the transfer process has finished, go to the folder you have selected to check the items.
 NEW
NEW HOT
HOT