"How do I get all the music from an old iPod to my MacBook? When I hook it up, it says it will erase all data on the iPod."
- A user from the Apple Community
Do you have the same requirement as the user's mentioned above? If you do, here are some simple and quick tips for transferring music from your iPod to your Mac, whether it's an old iPod Classic, Nano, Shuffle, or new iPod touch. More importantly, these ways won't erase all your current data.
Now, let's check out these tips one by one.
Part 1. How to Transfer Music from an iPod to a Mac Without iTunes
When transferring music from an iPod to a Mac, the first method that comes to mind must be using iTunes. We don't deny that iTunes used to be a great media files manager, but it is not always the best option for some reasons like:
- iTunes only supports transferring purchased music
- iTunes doesn't allow you to move specific songs selectively
- Different iTunes versions apply to different iPod models, which would make the transferring process confusing.
- Before transferring music with iTunes, you need to manually prevent iTunes from syncing with your iPod if you don't want to erase your current data.
After knowing these shortcomings of iTunes, do you still want to use iTunes? If you don't, just use this iOS data transfer tool to transfer iPod music instead. EaseUS MobiMover works perfectly with almost all iPhone, iPad, and iPod models and computer systems.
It enables you to transfer both purchased and non-purchased music from your iPod to a Mac/PC selectively. The transferred music won't cover your current data. Asides from music, other media files like photos, videos, and audio files are also supported by EaseUS MobiMover. It also allows you to add music to iPod without iTunes.
Now, let's download EaseUS MobiMover on the Mac and start transferring.
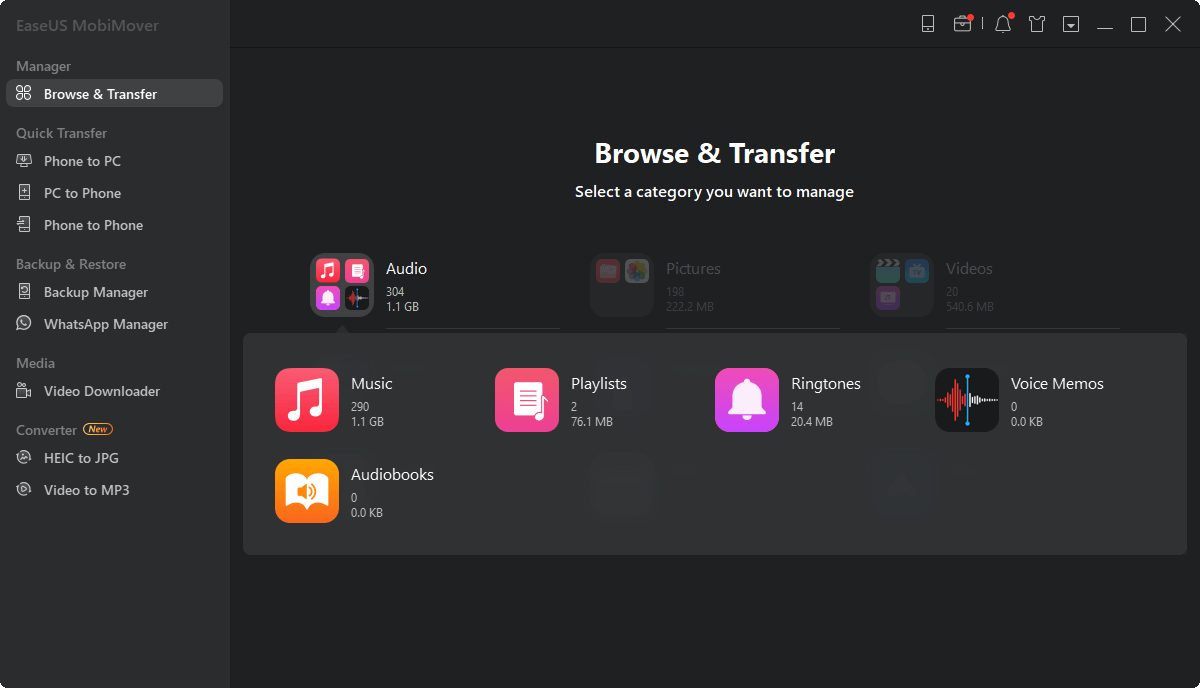
Step 1. Connect your iPod to your computer running Windows 10/8/7. Run EaseUS MobiMover, and click "Audio" > "Music".
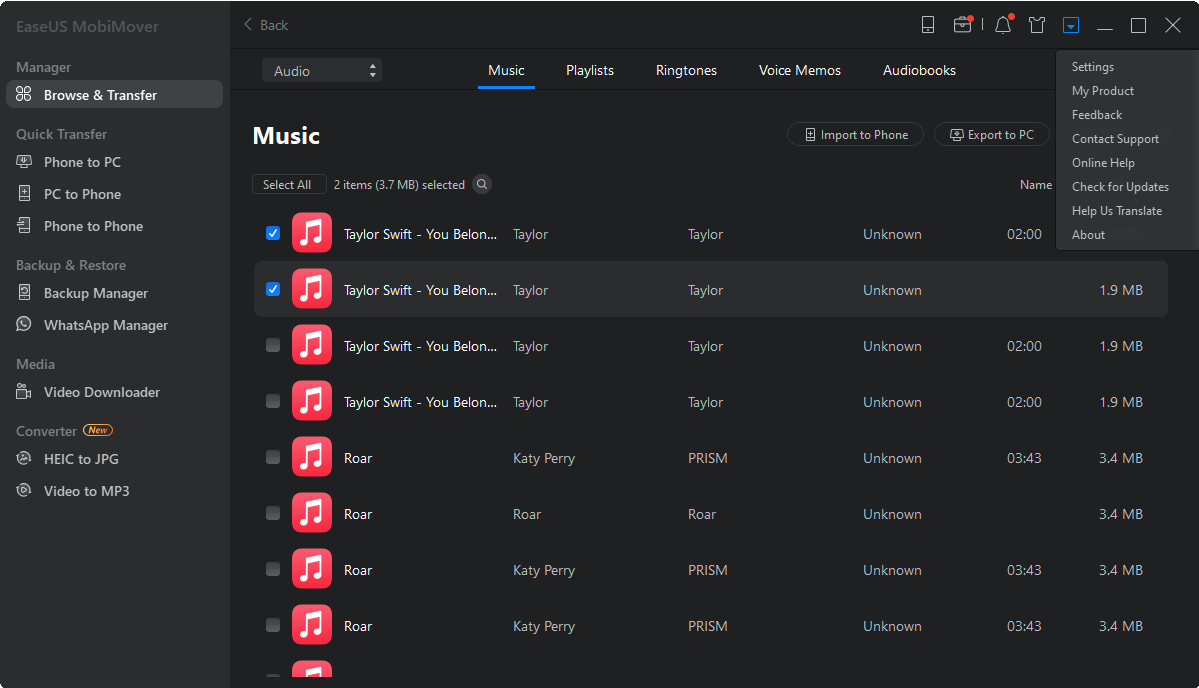
Step 2. Click "Settings" in the upper left corner to customize the path to save exported music on your computer. If you don't make a change, MobiMover will store exported files on your desktop.
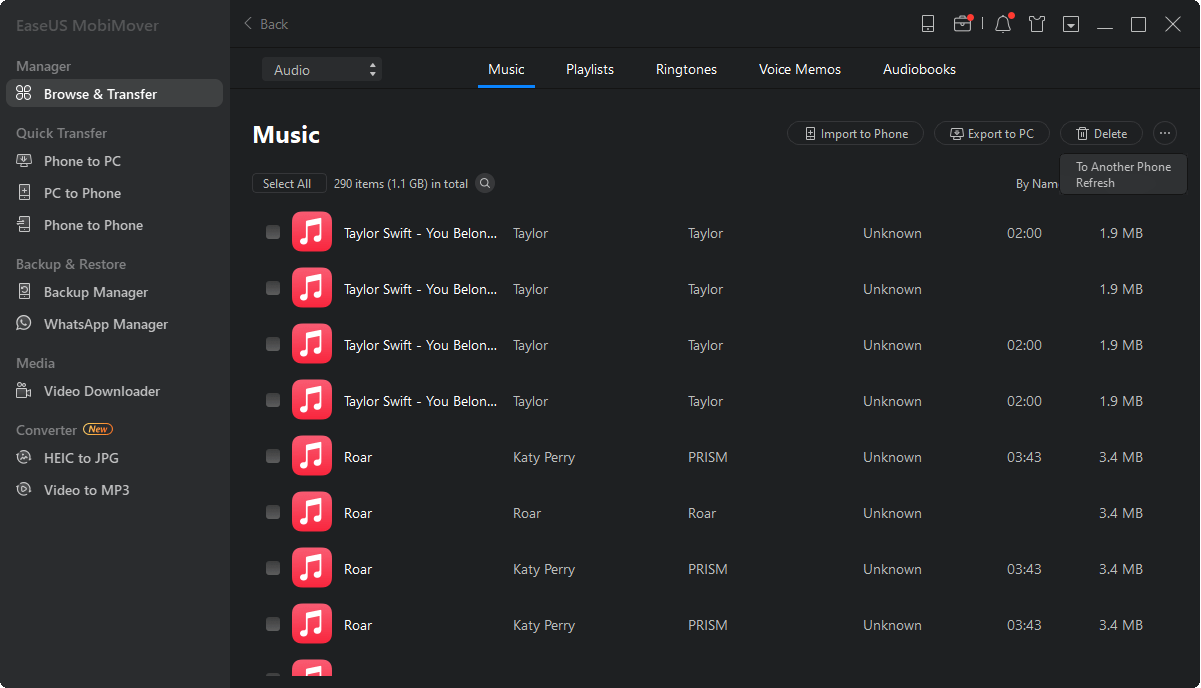
Step 3. Choose the music you want to move and click the "Transfer to PC" button to start the transfer process instantly. When the transfer completes, check the files at the destination.
Since EaseUS MobiMover also supports iPhone, you can follow the same steps to copy music from iPhone to Mac when needed.
Pro Tips: If you want to transfer music from your iPod to the external hard drive on your Mac, you can directly plug your external hard drive into your Mac and drag and drop the transferred music to it.
Want to know more about EaseUS MobiMover? Check out the following list of its key features.
- Transfer files from your iPhone, iPad, and iPod to your PC or Mac, or vice versa
- Move data between two iOS devices without hassle
- Batch convert HEIC pictures to JPG
- Convert any video to MP3
How to Copy Music from iPod to Mac via iTunes
If you prefer Apple's default way to move iPod music to your Mac, then iTunes is your best option. Depending on your iTunes version, there are two different ways to extract music from your iPod to your Mac via iTunes. Before using either of the two ways, you'll need to disable the syncing process if you don't want to lose existing music.
Now, let's start with the latest iTunes version.
If you're using an iTunes 7 or later: (Directly jump to Step 4 if you don't want to disable the syncing process)
Step 1. Open iTunes on your Mac, click on the "Preference," and select the "Devices" tab.
Step 2. Check the box next to "Prevent iPods, iPhones, and iPads from syncing automatically."
Step 3. Select "OK" and close iTunes. (Note: If you're using a Finder, you should uncheck "Automatically sync when this iPhone is connected" after opening the device in Finder.
Step 4. Click on the "Account" from the top menu bar of your Mac, select "Authorizations" > "Authorize This Computer" > "Authorize."
Step 5. Connect your iPod to your Mac using a USB cable.
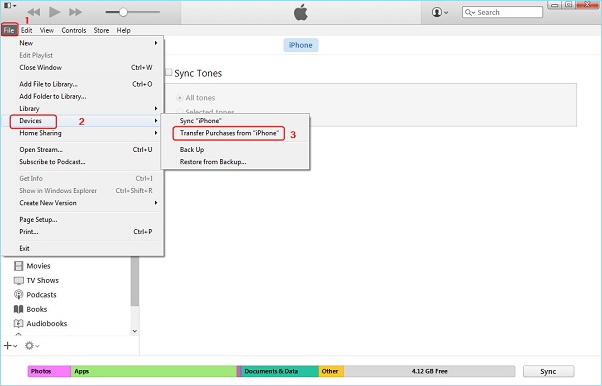
Step 6. Select "Files" > "Devices" > "Transfer Purchases From [device]." Then, your iPod will be transferred to your Mac.
![Transfer purchased music from iPod to Mac]()
If you're using an iTunes older than iTunes 7: (Ignore the Step 1 if you don't want to disable the syncing process)
Step 1. Hold down the Command + Option keys when connecting your iPod to your Mac until you see your iPod appears in iTunes.
Step 2. Connect your iPod to your Mac and double-click the iPod icon on your desktop.
Step 3. Open the iPod Control folder, and then open the Music folder.
Step 4. Drag and drop the Music folder to a new folder on your Mac. Give the folder a new name.
Step 5. Go to iTunes, click on the "File" menu, and select "Add to Library."
Step 6. Select the new folder you create and select "Open."
Bonus Tip: How to Transfer Music from iPod to Computer Windows 10
The above introduced two methods also can be used to transfer music from iPod to Windows computer.
In Conclusion
This guide can quickly transfer music from your iPod to your Mac. In this post, we introduced two approaches, of which using EaseUS MobiMover is more recommended because it can transfer both purchased and non-purchased music from your iPod to your Mac. Apart from music, other popular iOS data like contacts, messages, videos, and more are also supported.
If you don't want to lose data, you can also use it to back up your iPod quickly and safely.
NEW
HOT
