Your taste for music changes. That's why the songs you loved before may become unfavored now. For the music you don't like anymore, removing them from your device is necessary to free up its space. Given that, I'd like to show you how to delete songs from an iPod or iPod touch using four proven ways. Whether you want to remove pieces from your iPod but keep them on the computer or delete them forever, you will find the solution you need here.
How to Delete Songs from iPod/iPod Touch Directly
Undoubtedly, the most straightforward way to delete music from an iPod is to use the built-in apps on the device. Both the Music and Settings apps allow you to remove songs from the device. The difference is that Music lets you delete songs from the iPod selectively, while Settings lets you get all pieces off the devices simultaneously. Specify your need and apply the corresponding steps to remove music from your iPod.
To delete specific songs from an iPod using Music:
Step 1. Open the Music app on your iPod.
Step 2. Go to the "Library" tab and choose "Songs."
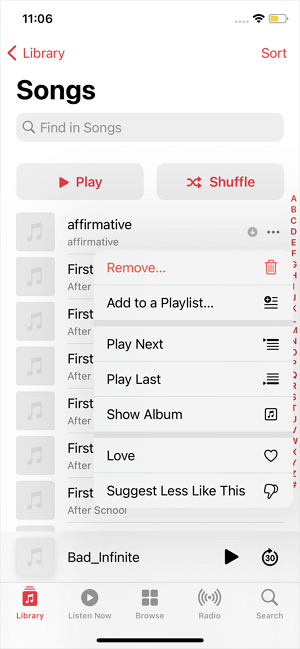
Step 3. Click the "More" icon next to the song you want to delete.
Step 4. Tap "Remove" > "Remove Download" or "Delete from Library" to continue.
![How to delete songs from iPod via the Music app]()
To delete all songs from iPod use Settings:
Step 1. Open the "Settings" app.
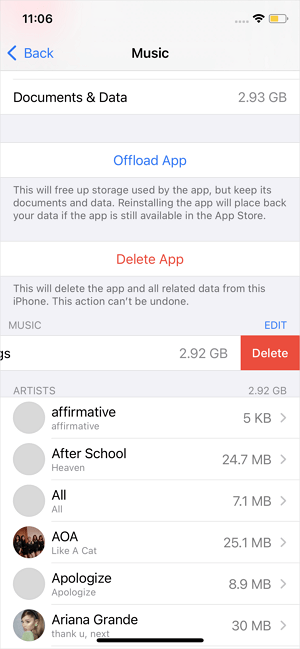
Step 2. Tap "General," then tap "iPod Storage."
Step 3. Scroll to "Music," then tap it.
Step 4. Swipe left on "All Songs."
Step 5. Tap "Delete."
![How to delete songs from iPod via the Settings app]()
How to Delete Music from iPod/iPod Touch Flexible
Generally, using the Music or Settings apps could fulfill your needs in most situations. But there are also times when you need to download specific songs simultaneously, which can't be done with Music or Settings since Music deletes songs one by one and Settings removes the whole music library. That's when you should choose a more flexible option, e.g., using the iPhone transfer software - EaseUS MobiMover.
It is an iPhone transfer tool and an iOS content manager that can help you transfer files to or from an iPhone/iPad/iPod and manage iOS content by deleting, editing, or adding items.
You can select all or specific songs to remove when deleting songs from an iPod. Besides, you can transfer music from your iPod to the computer first if you think you need them again someday. Other than music, EaseUS MobiMover also supports photos, videos, ringtones, voice memos, contacts, messages, books, and more. Don't hesitate to give it a try.
To delete music from an iPod or iPod touch:
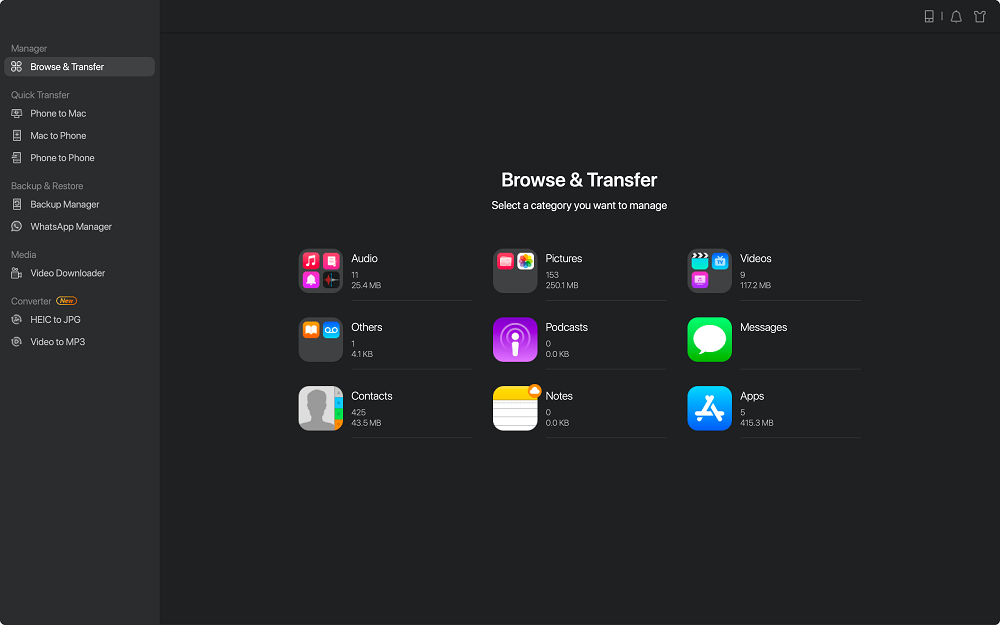
Step 1. Launch and run EaseUS MobiMover for Mac on your computer > Connect your iPhone to your Mac, start EaseUS MobiMover > Go to choose the "Content Management" on the left side of the screen > "Audio" > "Music."
![How to delete music on iPhone/iPad - Step 1]()
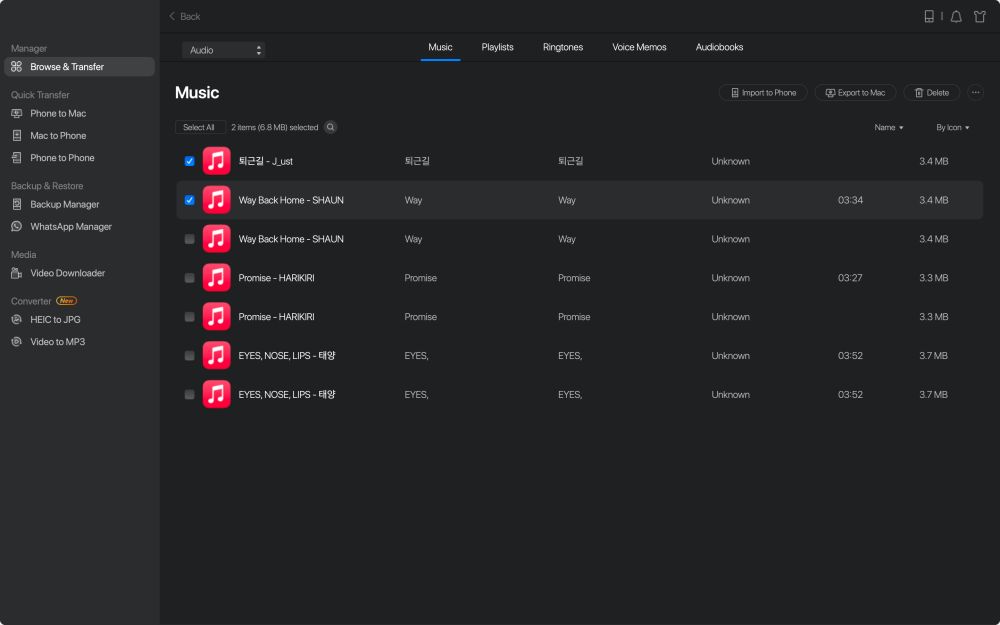
Step 2. Select the music you want to delete. (You can either choose to delete all items by clicking the "Select All" or delete specific items by choosing a single item) > Click the trash icon.
![How to delete music on iPhone/iPad - Step 2]()
Step 3. Then a new window will pop up asking for confirmation. Click "Yes" to delete music on your iPhone in seconds.
![How to delete songs on iPhone - Step 3]()
After the deletion, you may need to put music on the iPod to enrich your music library again. If you do, follow the guide to do it without hassle.
How to Delete Music from iPod or iPod Touch Selectively
iTunes is a media player and an iOS content manager developed by Apple. It has features like syncing data from a computer to an iPhone, iPad, and iPod and deleting iDevice content from the computer. Therefore, removing songs from an iPod or iPod touch is also a practical solution. If you decide to delete songs from your iPod but keep them in iTunes, follow the steps below:
Step 1. Connect your iPod/iPod Touch to your computer and launch "iTunes."
Step 2. Click the iPod/iPod Touch icon in the interface and click "Summary" in the left panel.
Step 3. Choose "Manually manage music and videos" from the options.
Step 4. Tap on "Music" in the left panel.
Step 5. Select the songs you want to remove and then click "Delete."
![delete-songs-from-iPod-but-keep-in-iTunes]()
How to Delete Music from iPod or iPod Touch Completely
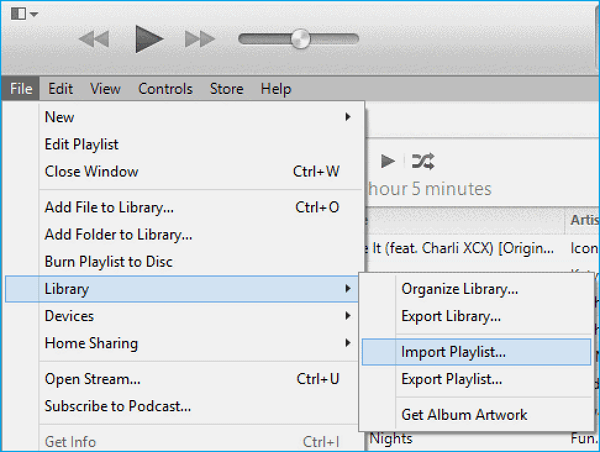
The last way is a workable but not recommended way to delete iPod music. If you prefer to delete music from both your iPod and the iTunes library, you can remove music from the iTunes library and then sync it with your iOS device. As you can see, it's an indirect way to get things done. If you don't mind, follow the steps below to delete songs off your iPod:
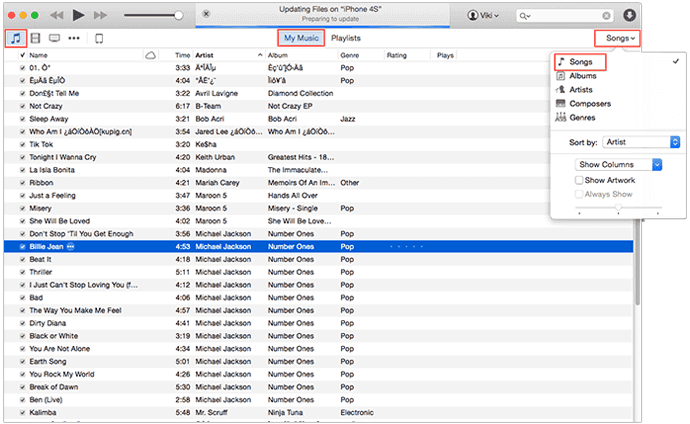
Step 1. Launch the iTunes on your computer, tap the "Music" mark > select "My Music" > choose the songs you want to delete from the list > tap "Delete from Library" to remove them.
Step 2. Connect your iPod to the computer, tap the device icon > click "Music" under "Settings" > select "Sync Music" > select the checkbox next to different items based on your needs > click "Apply."
![delete-songs-from-iPod=and-iTunes-library]()
What to Do If You Cannot Remove Songs from the iPod
"I deleted music from my iPod using iTunes, but I found that the music remains on my iPod. It is weird. What happened?"
If you have encountered the same problem, you may haven't turned off "Sync with this [device] over Wi-Fi" on iTunes. It will automatically sync iTunes with your iPod when your device is plugged into power and connected to the same Wi-Fi with iTunes. Just have a check and turn it off to avoid automatic syncing.
The Bottom Line
It's pretty easy to delete songs from an iPod. Generally, you can get it done using the device directly. But to manage your iDevice content better, you should apply a professional iOS content manager. Such a tool performs well to transfer files between an iDevice and a computer or between two iDevices and delete/edit/add files. It will be pretty helpful when you are looking to sort out your device content.