Adding music from iTunes to iPhone 7/7 Plus is one of the many ways to enrich your iPhone music library. Thus, some of you may want to know how to transfer music from iTunes to iPhone to put music on your iOS device.
However, if you use iTunes to transfer music from computer to your iOS device, it is inevitable that the existing media files like music, TV shows, movies, and books will be replaced by the newly synced content. Thus, you may be not willing to use iTunes in order to avoid data syncing.
Given that, I will show you both how to transfer music from iTunes to iPhone and how to put music on iPhone without iTunes.
| Workable Solutions |
Step-by-step Troubleshooting |
| Part 1. Transfer Music with iTunes |
Connect your iPhone 7/7 Plus to your computer and wait for...Full steps |
| Part 2. Transfer Music Without iTunes (No Data Loss) |
Connect your iPhone to your computer and launch...Full steps |
Part 1. How to Transfer Music from iTunes to iPhone 7/iPhone 7 Plus
With iTunes, you can either sync music to your iPhone automatically or manually copy items to your device. Thus, there are two tips for you to add music from iTunes to iPhone 7/7 Plus.
Before you sync iTunes music to your iPhone, I'd like to stress that iTunes transfers songs to your device by syncing. That means if you transfer music from iTunes to your iPhone, you will lose the existing music, movies, TV shows, books, and tones on your iPhone. If that's undesirable for you, follow the next part to learn how to put music on the iPhone without iTunes.
To sync iTunes music to iPhone automatically:
Step 1. Connect your iPhone 7/7 Plus to the computer with a USB cable.
Step 2. Unlock your device and trust the computer. If asked, enter your iPhone password as required.
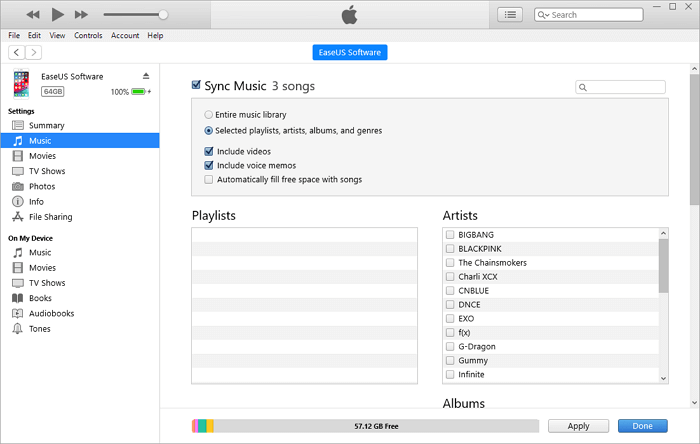
Step 3. Click the device icon and choose "Music". (Check what to do if iPhone is not showing up on PC.)
Step 4. Check the option "Sync Music" and choose "Remove and Sync" in the new iTunes window.
Step 5. Select to sync the "Entire music library" or "Selected playlists, artists, albums, and genres" from iTunes to your iPhone.
Step 6. After the selection, click "Apply" > "Sync" to start transferring music from iTunes to your iPhone.
Step 7. When the syncing is over, you can check the songs on your iPhone by going to "Music" > "Library" > "Songs."
![How to transfer music from iTunes to iPhone 7]()
To manually transfer songs to iPhone using iTunes:
Step 1. Connect your iPhone 7/7 Plus to your computer and make sure iTunes is running.
Step 2. Unlock your iOS device and trust the computer.
Step 3. In the iTunes window, click your iPhone icon and choose "Summary" from the left panel.
Step 4. Check "Manually manage music and videos" in the "Options" section and click "Apply" to save the settings.
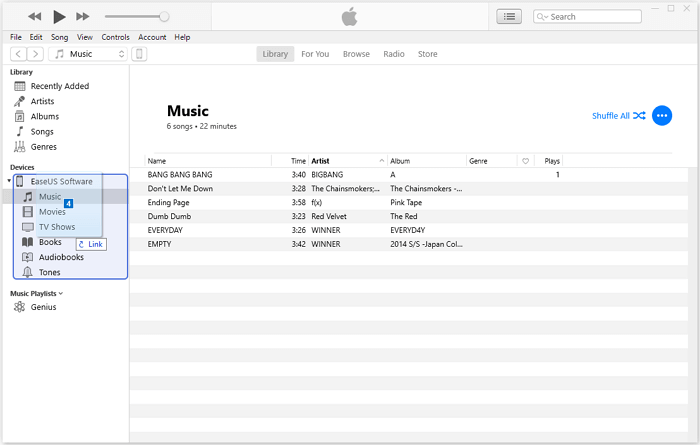
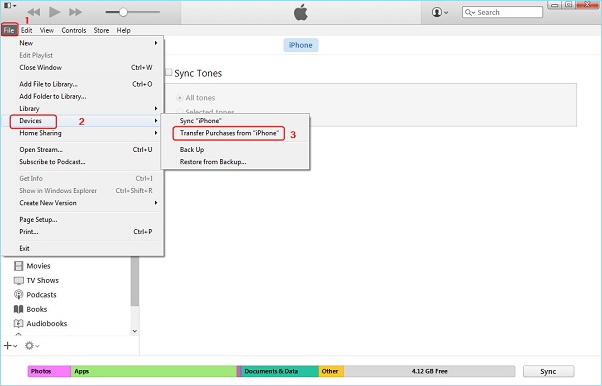
Step 5. Go to "Devices" > "Music." Open the folder that contains the songs, select the items you want to sync, and then drag and drop them to the left panel or to the center of the window. (You can also drag and drop songs from iTunes library to your device.) That's all about how to transfer music from iTunes to iPhone using iTunes to transfer songs, especially purchased songs manually.
![How to transfer music from iTunes to iPhone manually]()
Part 2. How to Put Music on iPhone 7/7 Plus Without iTunes
As mentioned, if you don't want to lose the existing files on your iPhone 7 or iPhone 7 Plus, you should use iPhone transfer software like EaseUS MobiMover instead of iTunes.
Unlike iTunes, such a tool won't remove the files currently on your device. Whether you want to transfer music from computer to iPhone or transfer photos to iPad, it won't cause data loss. Besides, there are more things you can do with EaseUS MobiMover. For example:
- Transfer files between an iPhone/iPad/iPod and a computer
- Transfer data from one iPhone/iPad/iPod to another
- Access and manage iDevice content from a computer
- Download online video & audio files to computer or iPhone/iPad/iPod using URL
To put music on iPhone 7/7 Plus:
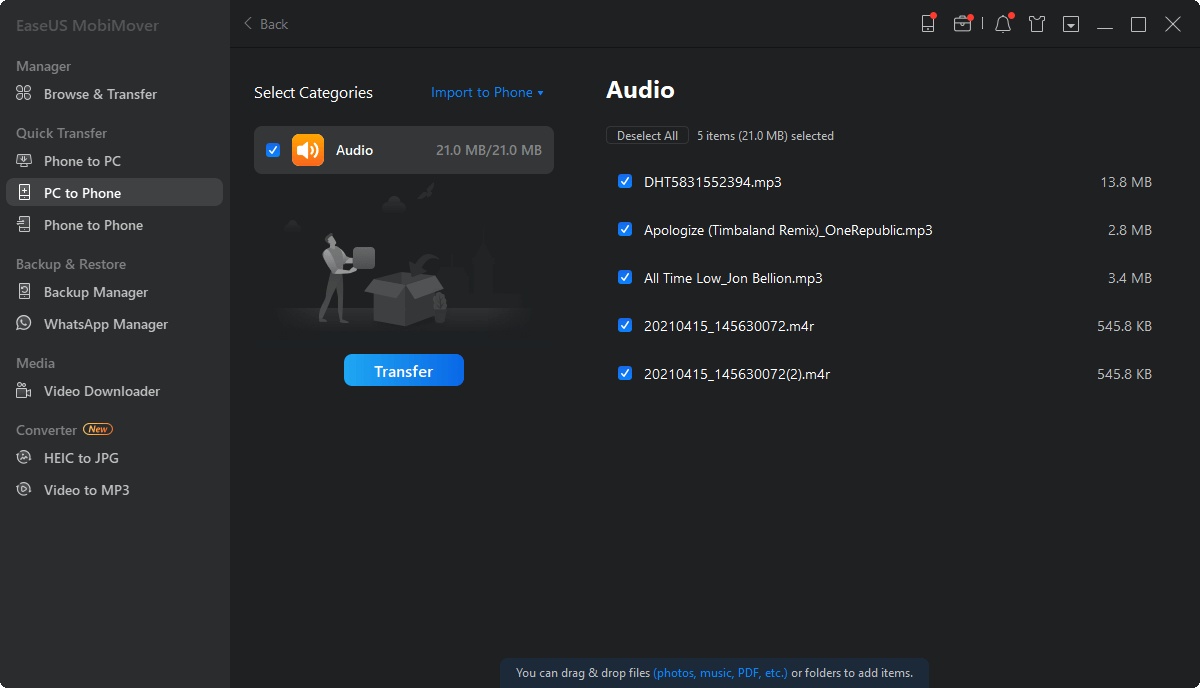
Step 1. Connect your iPhone X, iPhone 8, iPhone 7 to your computer and run EaseUS MobiMover.
Allow EaseUS MobiMover to access your iPhone by clicking "Trust" on the phone and "Allow" on the program.
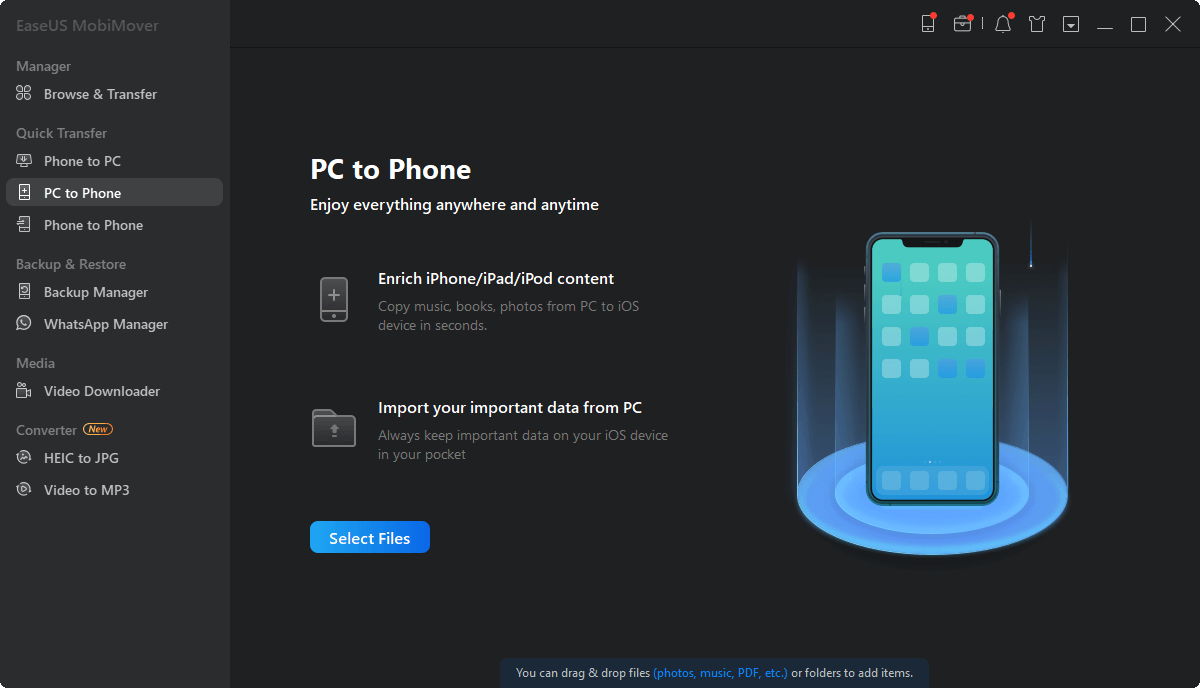
Select the transfer mode - "PC to Phone", click "Select Files" to continue and move to the next step.
If you are a Mac user, you need to install and use EaseUS MobiMover Free for Mac and put music to iPhone X/8/7 with the same steps.
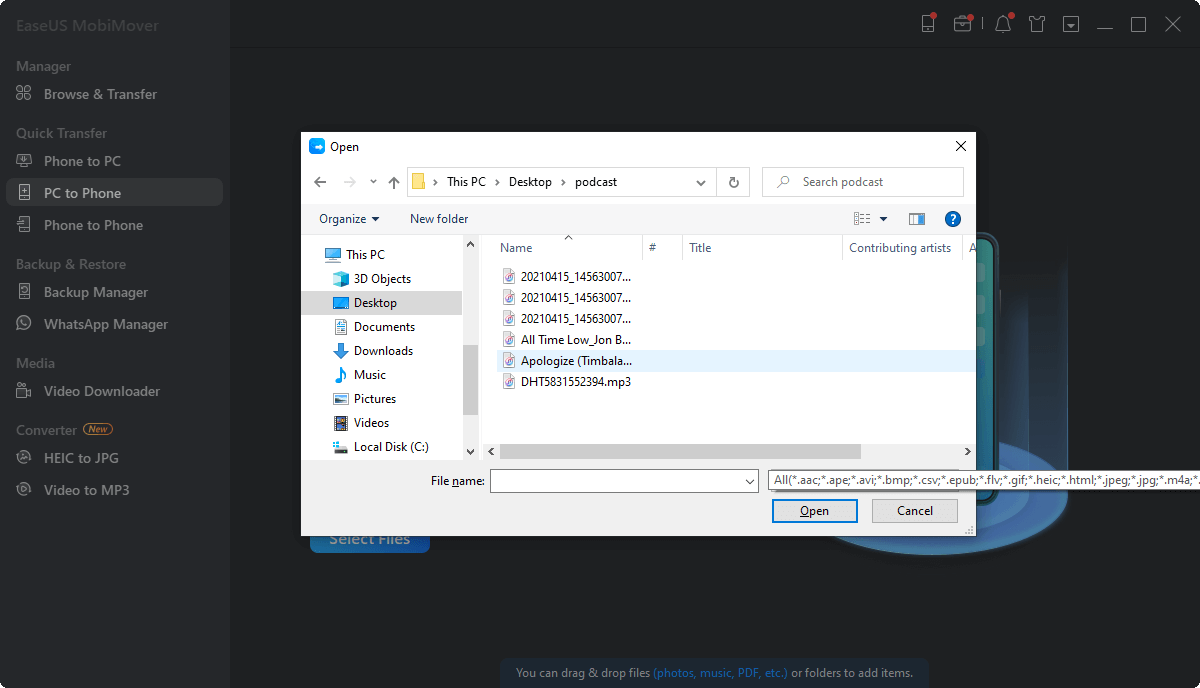
Step 2. Browse saved music files on your PC and click "Open" to confirm.
Step 3. Check the Audio box, all selected music files will be classified there, and click "Transfer" to start the transferring.
If you need to add items to transfer, drag and drop them on this window before clicking the Transfer button.
When the process finishes, open the Music app on your iPhone X, 8 or 7, you'll be able to check and play all the transferred music files.
In addition to transferring music from computer to iPhone, you can also download music to iPhone directly from the device.
The Bottom Line
Honestly, although iTunes is the official way to sync data from computer to iPhone/iPad/iPod, a tool like EaseUS MobiMover is necessary if you need to transfer files like photos, videos, music, ringtones, contacts, and books to or from your iDevice often. Most importantly, it won't cause data loss on your iPhone, iPad, or iPod. Don't hesitate to give it a try.

