Applies To: iPhone XS/XS Max/XR, iPhone X, iPhone 8/8 Plus, iPhone 7/7 Plus, iPhone 6/6s or other iPhone/iPad in iOS 11/10/9/8
When it comes to transferring music from Windows 10 to the iPhone, you have two options. First, you need to know how to transfer music from iTunes to iPhone using the iTunes software. This is the default transfer way offered by Apple, but it will erase all of your current data on the iPhone. If this is not what you want, you can use EaseUS MobiMover to get the job done. No iTunes or Internet is required. All it needs is a Windows/macOS computer and your device. For more details, you can read this step-by-step instruction.
PAGE CONTENT:
- Option 1. A Quick and Easy Way to Transfer Music from Windows 10 to iPhone
- Option 2. Sync Music from Windows 10 to iPhone with iTunes
- Bonus Tip. How to Transfer Music from iPhone to Windows 10
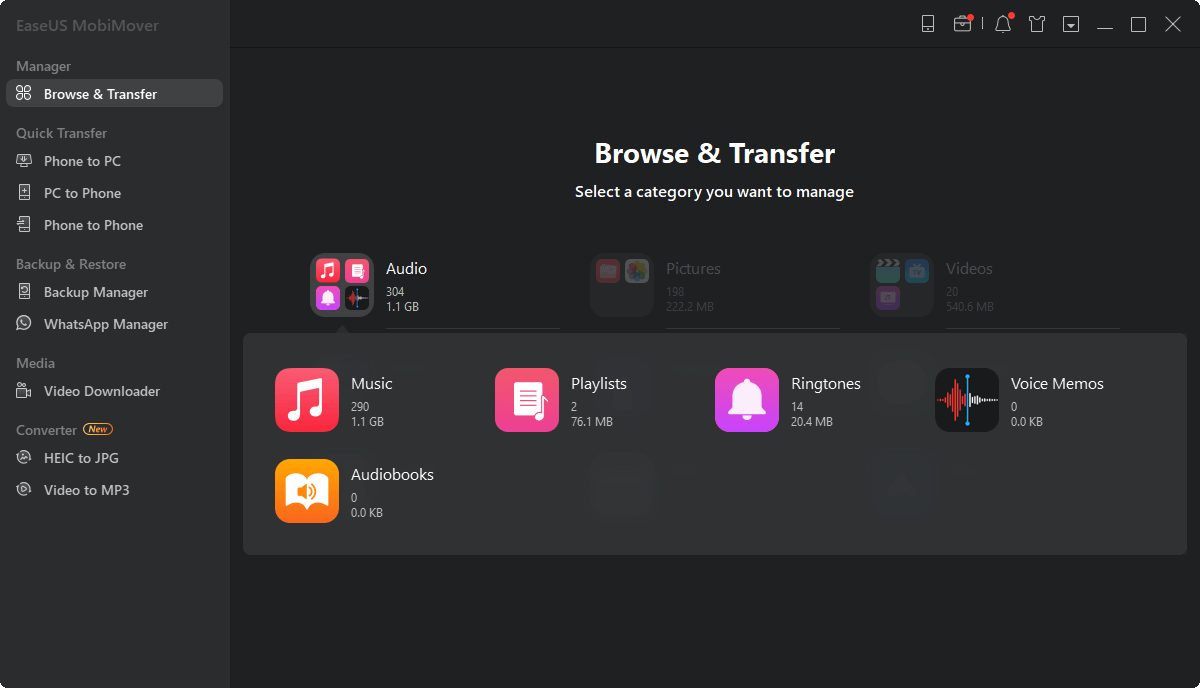
Option 1. A Quick and Easy Way to Transfer Music from Windows 10 to iPhone
As a versatile iOS data transfer tool, EaseUS MobiMover can help you transfer music, photos, videos, contacts, messages, and more other files from Windows 10 to iPhone or vice versa. It's pretty speedy, at around 30 M per second, which means you can transfer 5-8 songs per second. Obviously it is fast enough to transfer large files, especially media files between a computer and an iOS device or between two devices. For example, you can transfer photos from the computer to the iPhone with one click.
Apart from fast transfer speed, ease of use is another great feature of this application. With only three steps, you can move all of your music between a computer and an iOS device. Undoubtedly, this feature is good for users who are novices on the computer.
Beyond that, it has many additional features like iOS data management, video download, and iOS screen unlock worth exploring. Now, you can download it on your computer and start to transfer music from Windows 10 to the iPhone.
Step 1. Connect the iPhone to your Windows 10 computer and launch EaseUS MobiMover.
Enable EaseUS MobiMover to access your iPhone by clicking "Allow" on the program and tapping "Trust" on your iPhone.
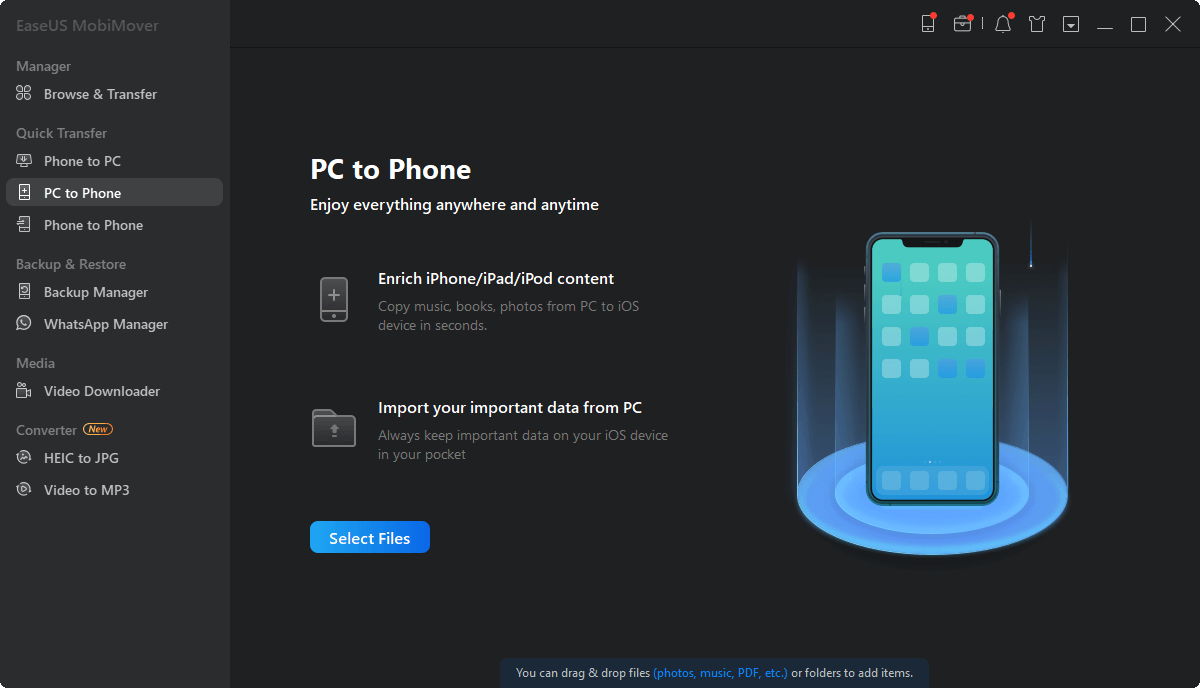
Select "PC to Phone" as the transfer mode and click "Select Files" to continue.
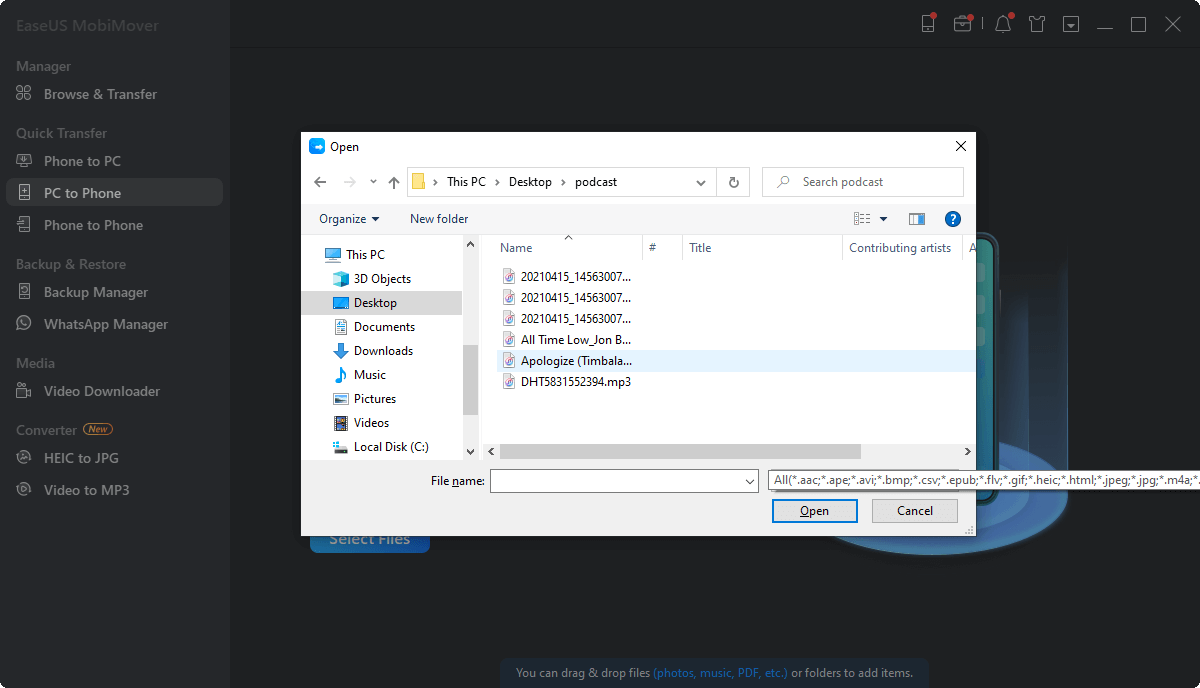
Step 2. Browse to select saved music on your computer and click "Open" to continue.
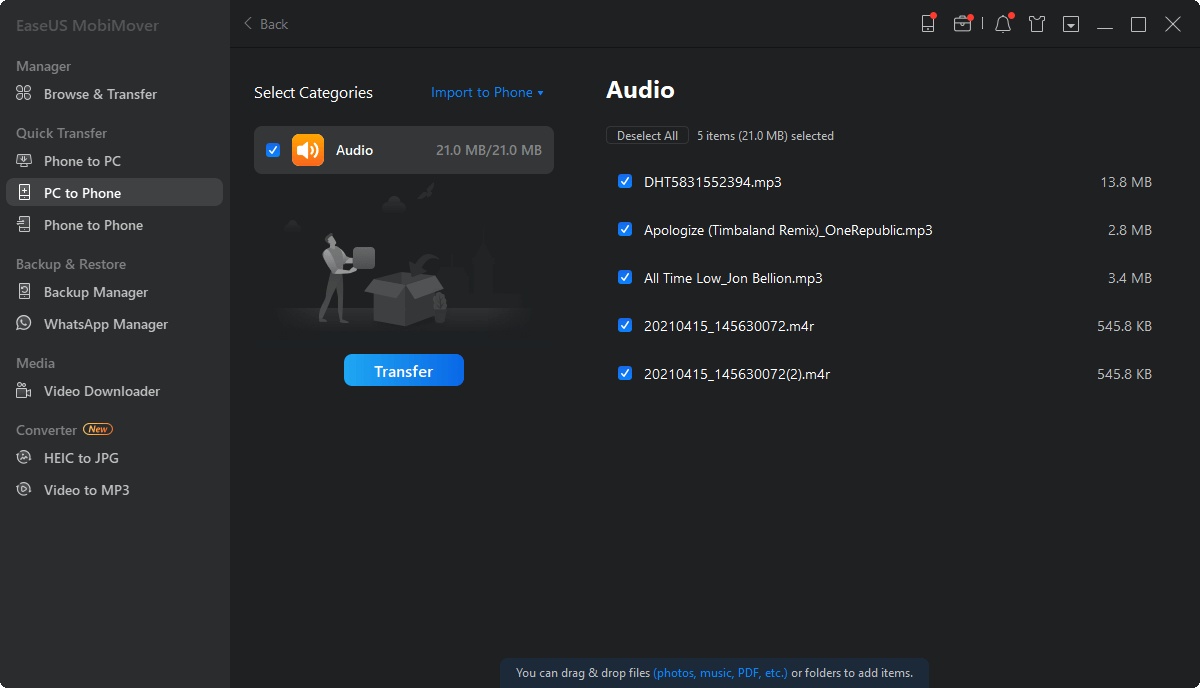
Step 3. Confirm the selected music files on your PC and click "Transfer" to start transferring music files from Windows 10 PC to your iPhone.
When the process finishes, go to the Music app on your iPhone to check the files.
Option 2. Sync Music from Windows 10 to iPhone with iTunes
Syncing music between computers and the iPhone is another way you can use to transfer music. But in this way, you can only transfer purchased music, non-purchased songs are not included. Even worse is that synced data will replace all of your current data. If you don't want to lose data, then you can either use Option 1 or back up your iPhone before using this method.
Here is how to transfer music from computer to iPhone with iTunes.
Step 1. Launch iTunes on your computer. And then connect your iPhone, iPad, or iPod touch to your computer with a USB cable.
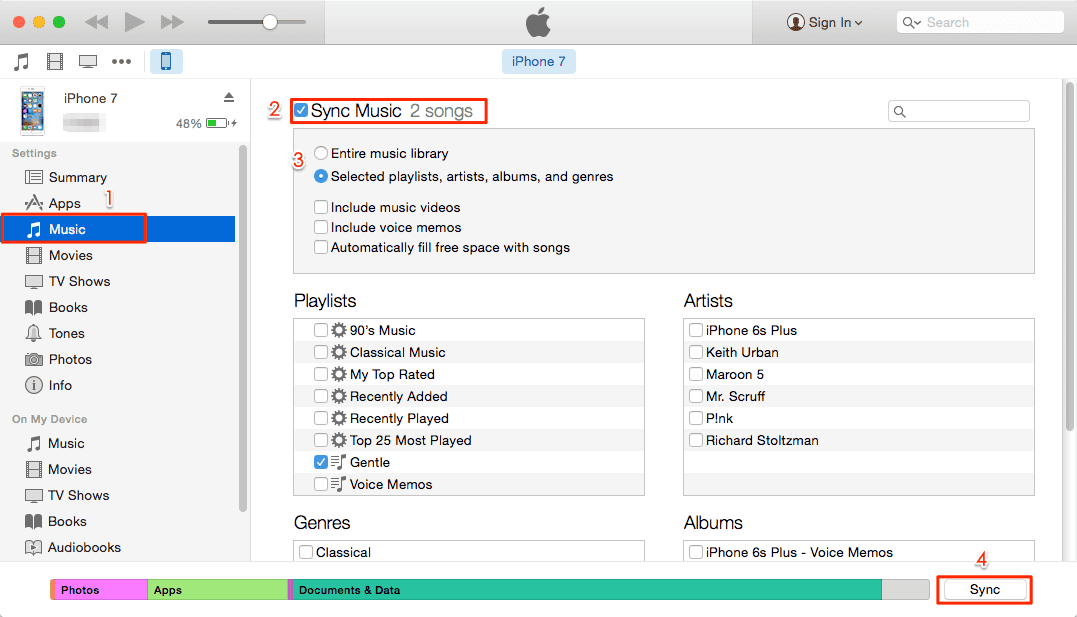
Step 2. Click the device button ( an iPhone that locates near the top-left of the window), then click "Music" in the left-side menu. If iTunes fails to connect your iPhone, check these solutions to fix the "iTunes couldn't connect this iPhone" issue.
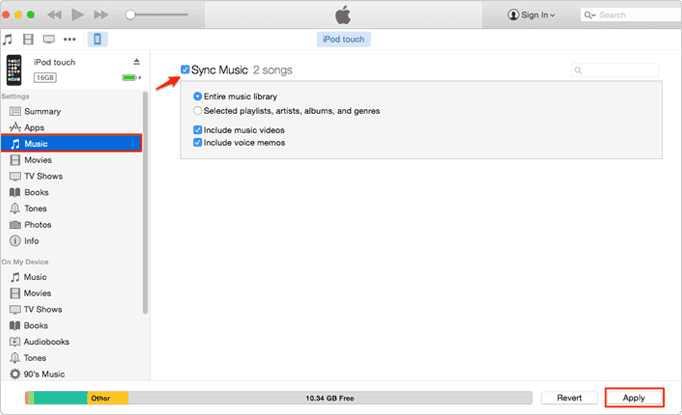
Step 3. From the right page, tick the box next to "Sync Music." (You can repeat the process for Movies, TV Shows, and Photos if you need it)
Step 4. Then, click "Apply" > "Sync." After that, all music will be synced to your iPhone.
![Sync Music from Computer to iPhone]()
Bonus Tip. How to Transfer Music from iPhone to Windows 10
As mentioned above, MobiMover enables you to transfer files between an iOS device and a Windows computer, which means you can not only import music from Windows 10 to your iPhone but also transfer songs from iPhone to your Windows 10 PC. Follow the steps below to learn how to do it within minutes.
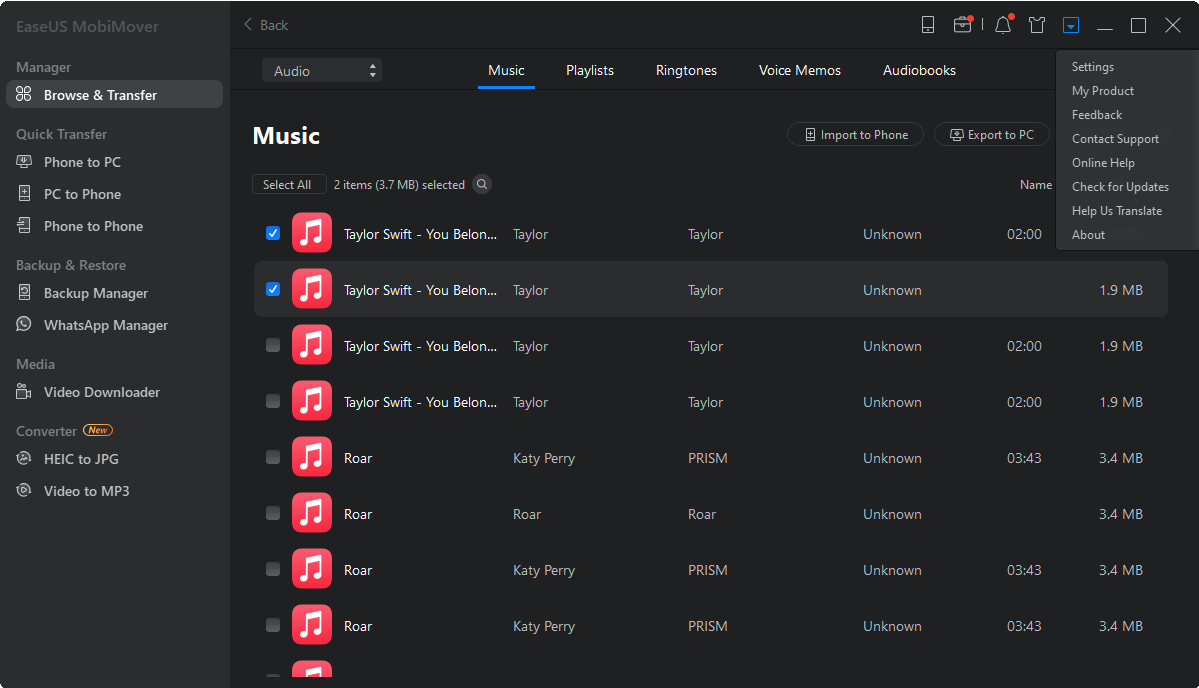
Step 1. Connect your iPhone to the Mac/PC and run EaseUS MobiMover > Tap "Trust" on your device to allow this program to access your iPhone > Select "Content Management" > Click "Audio" > Select "Music" to continue.
Step 2. Click "Music" to select desired music files on your iPhone > Click "Settings" at the right top corner to choose a safe location on your PC for saving these files.
Step 3. Click "Transfer to PC" and start the transferring process. When the transferring process finishes, you can check and play the transferred music files on your computer.
The Bottom Line
Both iTunes and EaseUS MobiMover can be used to transfer music from the computer to the iPhone. Whether your computer is running Windows 10 or other versions, you can use the two methods mentioned above to move songs from the computer to iPhone 6/7/8/X or iPhone XR/XS/XS Max. Of the two options, Option 2 is better since it can transfer both purchased and non-purchased music. More importantly, it won't erase anything from your iPhone.