Smartphones are an integral source of communication. As our data is secured on iPhones, it is important to ensure that devices are seamlessly synchronized. If your iPhone is not syncing with iTunes, it affects the process of transferring files from iPhone to PC or vice versa. Whether you're encountering issues due to connectivity or software glitches, you need a solution to continue data transfer. This article mentions the ways to solve iPhone not syncing issues in iTunes. Following the steps, you can ensure that your iPhone is perfectly synchronized with iTunes.
Why Didn't My iPhone Sync with iTunes?
To solve the iPhone not synchronizing with iTunes issues, it's essential to explore the reasons behind this. Here are some common reasons that affect the syncing process.
- Outdated iTunes Version: You're using an older version of iTunes that is incompatible with your iPhone.
- USB Connection Problems: Faulty or damaged USB cables, ports, or hubs can disrupt the connection between your iPhone and the computer.
- Device Authorization: If your computer is not authorized to trust your iPhone, it may restrict synchronization.
- Corrupted iTunes Library: A corrupted iTunes library file can lead to syncing issues.
- Insufficient Space: If your iPhone or computer is running low on storage, it can impede the syncing process.
- Security Software: Antivirus or firewall software on your computer may block the iTunes connection.
- iOS Updates: Using an outdated iOS version can affect compatibility with iTunes, leading to syncing problems.
- iTunes Account: If you're signed in with different Apple IDs in iTunes and iPhone, it can lead to syncing difficulties.
- Hardware Issues: Physical issues with your iPhone's port or computer's USB port can disrupt syncing.
How to Fix iPhone Not Syncing with iTunes
If your iPhone isn't syncing with iTunes, there could be multiple reasons. Here, we've compiled some solutions to resolve this issue.
1. Reconnect your iPhone to iTunes
Use a reliable connecting cable and create a strong connection. Here are the steps to reconnect your iPhone to iTunes:
Step 1. Unplug the USB to disconnect your iPhone from your computer.
Step 2. Examine the USB cable for any visible damage or wear. If you have another USB cable, prefer an Apple-certified cable.
Step 3. Connect your iPhone to PC using the new or verified cable.
Step 4. Ensure your iPhone is unlocked and the home screen is visible.
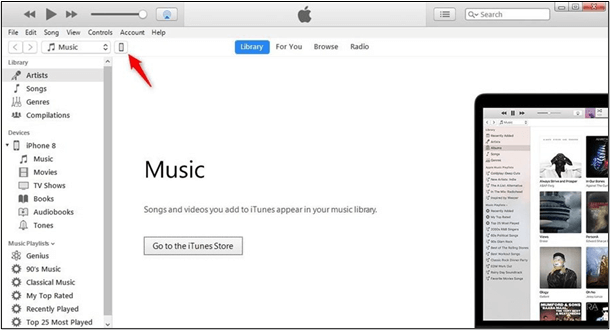
Step 5. Once your iPhone is connected, open iTunes on your computer.
![open itunes in computer]()
Step 6. Your device should appear in iTunes. Click on your device to select it.
Step 7. Sync iPhone with iTunes now.
2. Restart your iPhone and iTunes
If your iPhone is not syncing with iTunes, try restarting both your iPhone and iTunes. It can resolve the minor glitches causing the problem.
Step 1. Unlock your iPhone and ensure it is not connected to your computer.
Step 2. Power off your iPhone and press the Power and Home buttons to restart it.
Step 3. Close and reopen iTunes on your computer.
Step 4. Reconnect the devices via USB cable.
Step 5. Proceed with the synchronization process.
If you want to know more information about this, you can take "how to force restart iPhone 13" as an example.
3. Reauthorize your computer in iTunes
If your iPhone is not syncing with iTunes, try reauthorizing your computer within iTunes. It can help ensure that your computer is properly authorized to access your purchased content.
Step 1. Open iTunes and sign in with the Apple ID.
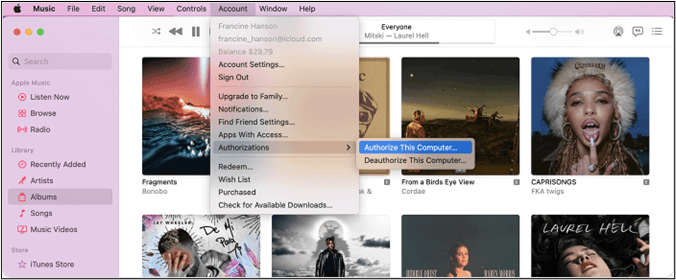
Step 2. In the iTunes menu, click on "Account."
Step 3. Select "Authorizations."
Step 4. Choose "Authorize This Computer."
![authorize this computer iTunes]()
Step 5. iTunes will verify your authorization.
Step 6. Start sync.
4. Sync iPhone with iTunes over Wi-Fi
If you're experiencing an iPhone not syncing with iTunes issues, try to sync your iPhone with iTunes over Wi-Fi sync.
Step 1. Connect both your devices to the same network.
Step 2. Use a USB cable to connect your iPhone to your computer.
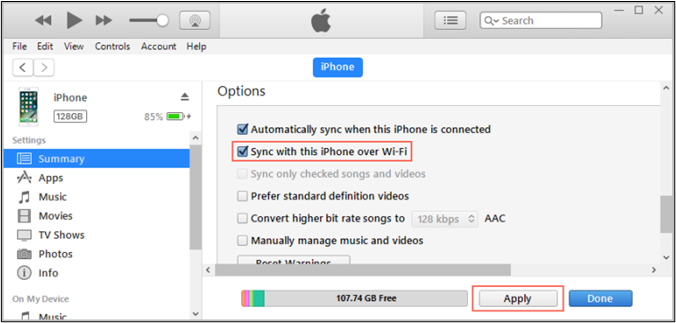
Step 3. Select your iPhone in iTunes.
Step 4. In "Options," enable "Sync with this iPhone over Wi-Fi."
![sync with this iphone over Wi-Fi]()
Step 5. Tap "Apply."
Step 6. To use wireless sync method, make sure your iPhone is charging. Wi-Fi syncing starts automatically during charging.
5. Consolidate iTunes media files
If your iPhone is not syncing with iTunes because of media file issues, one solution is to consolidate your iTunes media library. It ensures that all your media files are accessible for syncing.
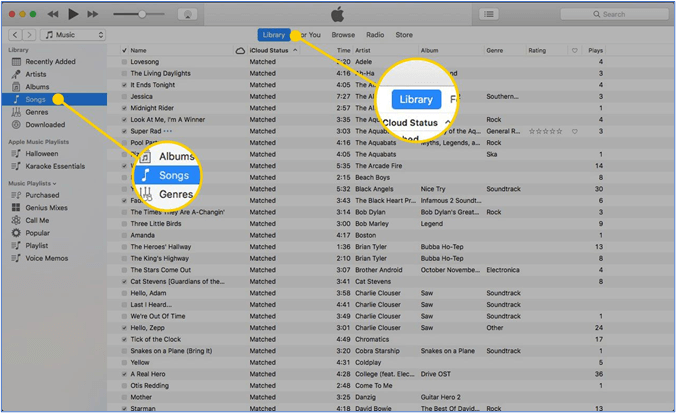
Step 1. Open iTunes and click "File."
Step 2. Select "Library."
Step 3. Choose "Organize Library."
![consolidate files]()
Step 4. Check the "Consolidate files" box and click "OK."
Step 5. iTunes will begin copying all media files used in your library to the iTunes Media folder.
6. Create a new iTunes library
If you're experiencing persistent syncing issues between your iPhone and iTunes, creating a new iTunes library can help.
Step 1. Close iTunes.
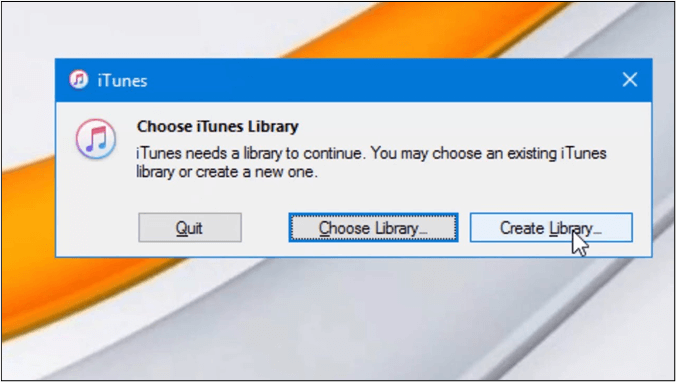
Step 2. Press and hold the `Shift` key and double-click the iTunes icon. It will show options to create a new iTunes library or choose an existing one.
Step 3. Select "Create Library."
![create library]()
Step 4. Choose a location to save the new library. You can create a folder to keep your libraries organized or save it in the default iTunes folder. Click "Save."
Step 5. A new, empty iTunes library will open.
Step 6. In "File," select "Add Folder to Library."
![add folder to Library]()
Step 7. Open the "iTunes Media" folder. iTunes will begin importing your media files into the new library.
7. Check for updates
To ensure seamless sync, check if iTunes and your iPhone are up-to-date.
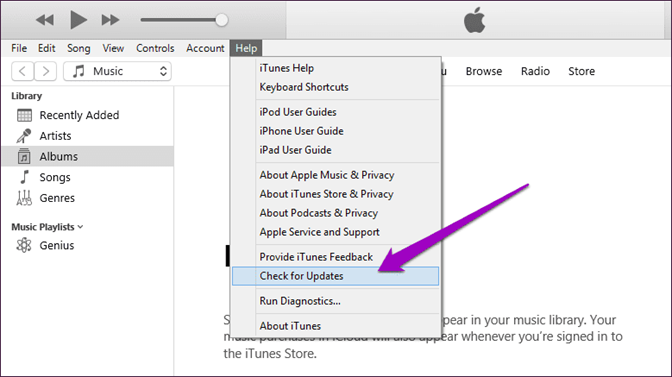
Step 1. Open iTunes on your computer.
Step 2. In "Help," select "Check for Updates."
![check for updates]()
Step 3. Install the updated version of iTunes.
Step 4. On iPhone, open "Settings."> "General"> "Software Update" to find any updates available.
![software update]()
Click here to know how to update iPhone to iOS 17.
8. Update the System Drivers
Updating your system drivers is a solution to fix iPhone syncing issues.
Step 1. Connect your iPhone to your computer.
Step 2. Click "This PC" and open "Manage." It will open the Computer Management window.
Step 3. Click on "Device Manager."
![open device manager pc]()
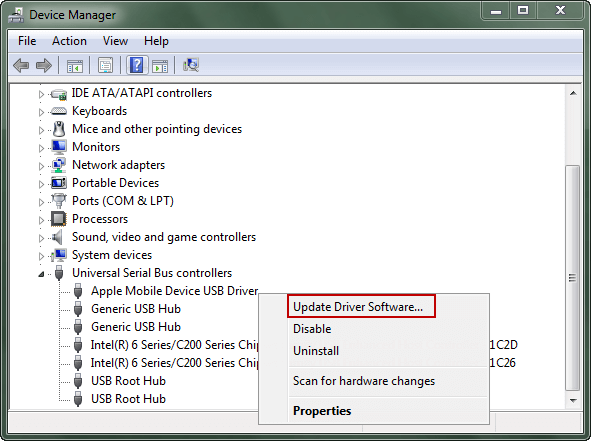
Step 4. Tap "Portable Devices."
Step 5. Tap on your iPhone's name and select "Update driver Software."
![update driver software]()
Step 6. Choose "Search automatically for updated driver software."
Step 7. Follow the on-screen instructions.
Step 8. Disconnect your iPhone and restart your computer. Connect iPhone to iTunes and start syncing.
Best iTunes Alternative to Sync iPhone to Computer
When iTunes doesn't work as expected, having a reliable alternative is essential. EaseUS MobiMover stands out as a highly efficient and user-friendly iTunes alternative that simplifies data transfer between your iPhone and computer.
MobiMover has an intuitive interface and allows users to transfer any type of data. For example, you can transfer Voice Memos from iPhone to computer easily and quickly. Its multi-platform compatibility makes it an all-in-one solution. EaseUS MobiMover provides a seamless and efficient data transfer experience, bypassing iTunes limitations. Whether you want to back up your iPhone data or manage content on your device, MobiMover offers a user-friendly solution.
- Comprehensive Data Transfer: EaseUS MobiMover allows users to transfer various types of data between their iPhone and computer.
- Diverse Compatibility: EaseUS MobiMover is compatible with Android, iOS, Windows, and macOS, making it accessible to a wide range of users. You can transfer data from iPhone to Android or vice versa.
- Quick and Secure Transfers: EaseUS MobiMover ensures that your data moves swiftly and quickly. Moreover, it maintains data integrity during transfers and keeps your information secure.
- Multiple functions: MobiMover is also a video download to download YouTube videos to PC or download videos from other sites.
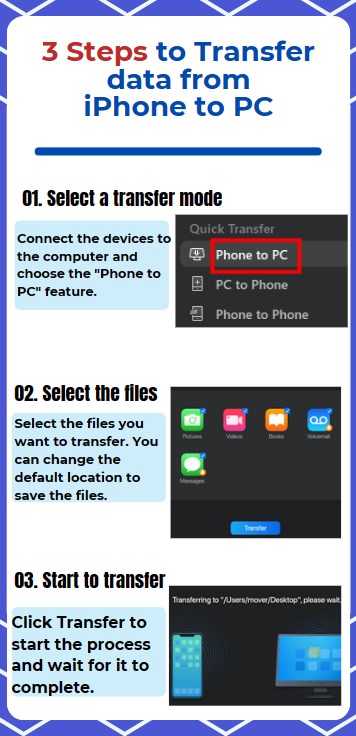
You can download EaseUS MobiMover first and then transfer data from iPhone to computer with the following steps:
![mobimover transfer data steps]()
Final Words
The article provided a comprehensive guide with instructions to help you with iPhone not syncing with iTunes. By following these solutions, you can get your iPhone syncing smoothly with iTunes. The troubleshooting steps cover a range of potential issues so you can find the one that works for your specific situation. One of the best ways to get out of the issue is to use a reliable iTunes alternative like EaseUS MobiMover. Its quick data transfer, high compatibility, and efficient data management will help you transfer data easily.
FAQs on How to Fix iPhone Not Syncing with iTunes
IPhone not syncing with iTunes can significantly affect the data transfer process. Here are some FAQs to help you simplify the process.
1. How do I force my iPhone to sync with iTunes?
Follow the steps to manually synchronize your iPhone with iTunes:
Step 1. Connect your iPhone to your computer using a USB cable.
Step 2. Open iTunes.
Step 3. Choose the type of content to sync and select it.
Step 4. Click Apply to start the sync.
2. Why can't I import music from iTunes to my iPhone?
If you can't import music from iTunes to your iPhone, there might be several reasons.
- Make sure your computer is authorized for the iTunes Store.
- Ensure that the songs are in a compatible format, I.e., MP3 or AAC.
- Check if there's enough storage space on your iPhone for the new music.
3. How do I reset my iTunes sync?
To reset your iTunes sync settings, follow these steps:
Step 1. Open iTunes.
Step 2. Connect your iPhone to your computer using a USB cable.
Step 3. Click on your device icon.
Step 4. Choose the type of content.
Step 5. Uncheck the Sync box for that content.
Step 6. Click Apply. It will reset your sync settings.
Share this post with your friends if you find it helpful!
 NEW
NEW HOT
HOT