Today, protecting and backing up our data has become increasingly important. This is especially true for photos, which serve as carriers of our cherished memories. This guide will show you how to transfer photos from iCloud to external hard drive on Windows PC and Mac, ensuring that your memories are safely preserved. Meanwhile, we will also mention how to help you transfer photos from PC or Mac to your iPhone if you have carelessly deleted some valuable images on your iPhone and won't get them back.
Method 1. Move Photos from iCloud to External Hard Drive with Software [Mac & PC]
iCloud Photo Library on your iPhone/iPad or Mac can automatically upload and store the entire library in iCloud to aces photos and videos from all your devices. However, as we all know, there is only 5GB free for iCloud at the very beginning and the photo library can quickly eat up space. Therefore, many users will choose to transfer photos from iCloud to external hard drive to free up iCloud space.
To transfer or backup iCloud Photos to external hard drive, the most common solution involves first downloading the images to your computer and then transferring them to the external hard drive. However, here we find a reliable and easy photo transfer tool that lets you directly move photos from iCloud to an external hard drive on your PC.
It's EaseUS MobiMover. With that reliable software, you don't need to export photos from iCloud to a computer. Instead, you can transfer these pictures seamlessly from iCloud to an external hard drive or USB drive with one click.
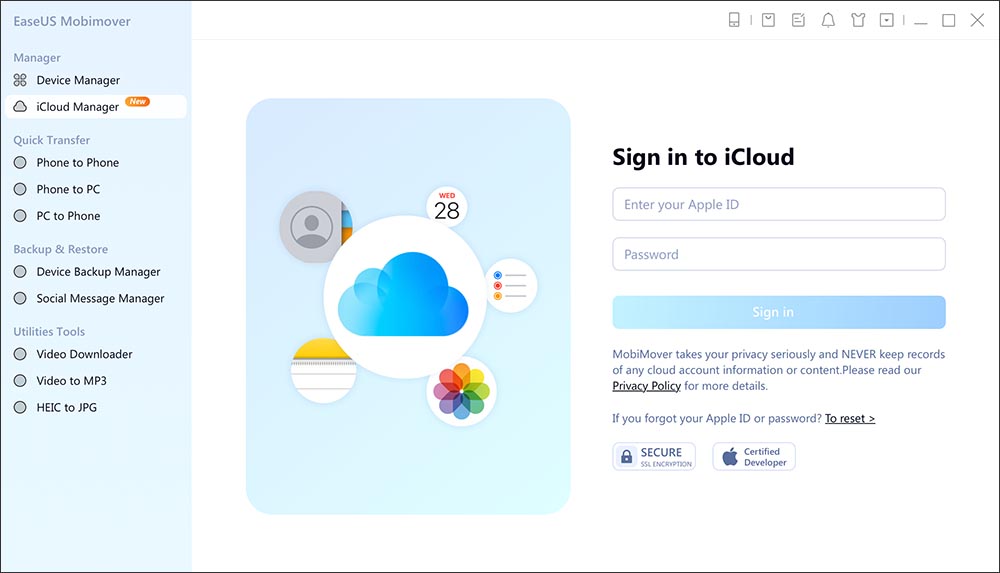
Step 1. Launch EaseUS MobiMover on your Windows/macOS computer and click "iCloud Manager" to continue. Enter your Apple ID and password in the right panel to log in.
![click iCloud Manager to sign into your iCloud account]()
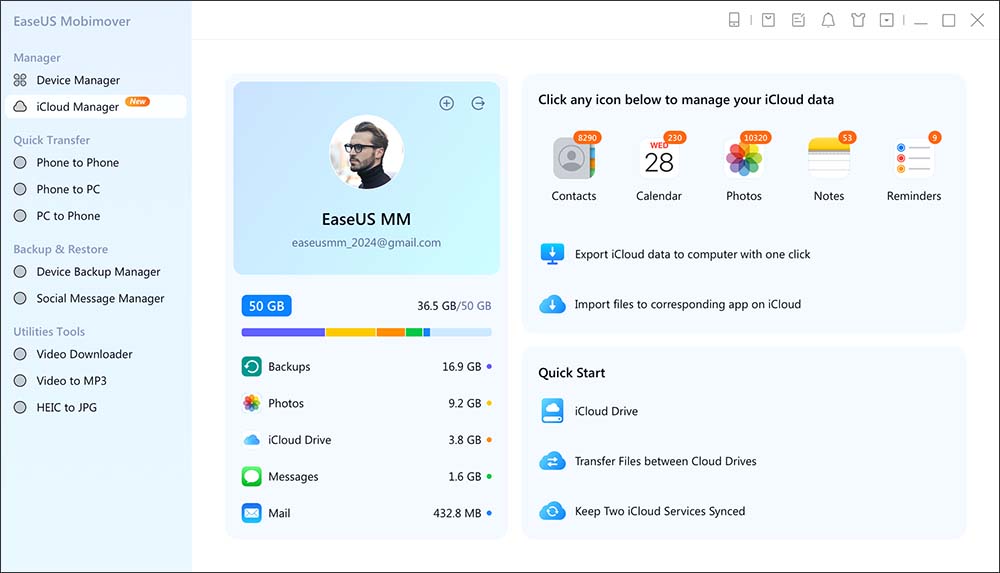
Step 2. Once you sign in, you can see everything that stored in iCloud or iCloud Drive. From the right panel, click "Export iCloud data to computer with one click" to start.
![view everything in iCloud]()
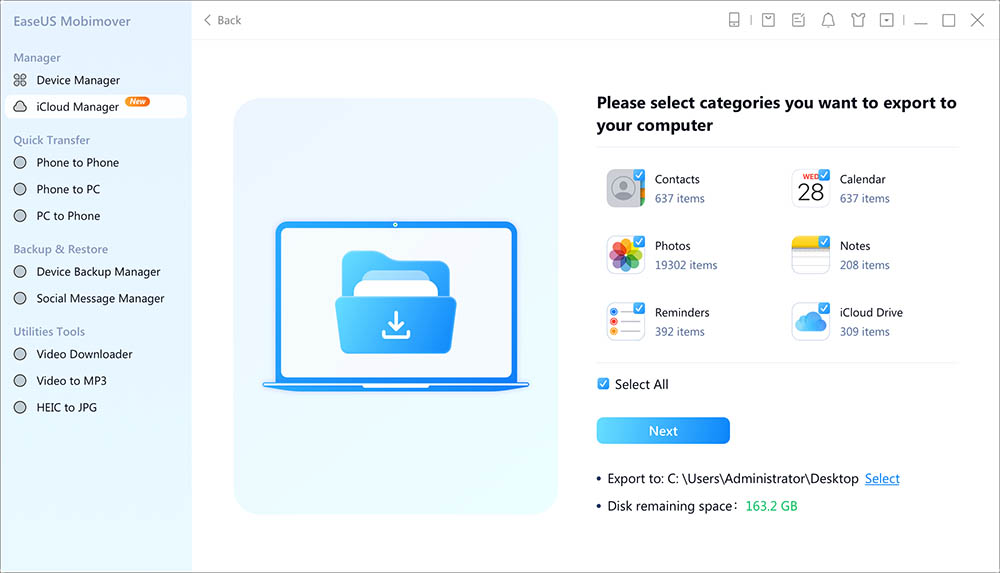
Step 3. Now select the categories that you want to export from iCloud to your computer. Here you can transfer contacts, photos, notes, calendar, reminders, and iCloud Drive files to your computer from iCloud. You can customize the exporting path. The path of Extranl Hard Drive or USB Flash Drive are both suported. When you're done, click "Next" to continue.
![select data that you want to transfer]()
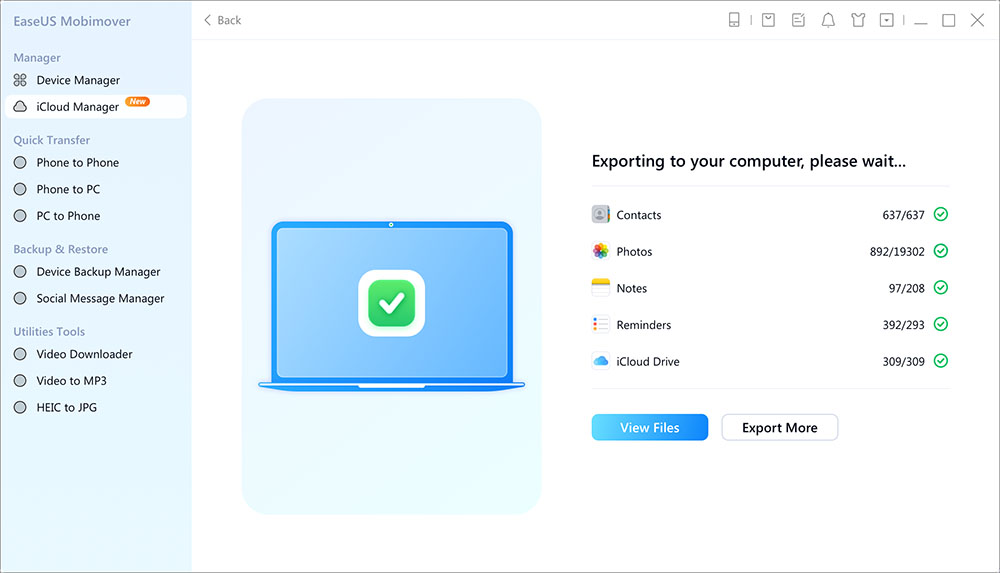
Step 4. Wait a few minutes, and the process will be completed successfuly. You can view these files now on your computer or continue saving more files from iCloud to your PC or Mac.
![the transfer process is completed]()
(*Note that it's 100% safe to log into your iCloud here cause this software won't store or remember your Apple ID credentials or information on your iCloud.*)
Method 2. Download iCloud Photos to External Hard Drive Seamlessy via iCloud.com [Mac & PC]
Transfer photos from iCloud to PC or Mac is easy by following tips below. Except for pictures downloading, you also can delete all iCloud photos if you don't need them anymore instead of saving them to another place.
Step 1. Open a browser on your PC or Safari on Mac, and go to www.icloud.com.
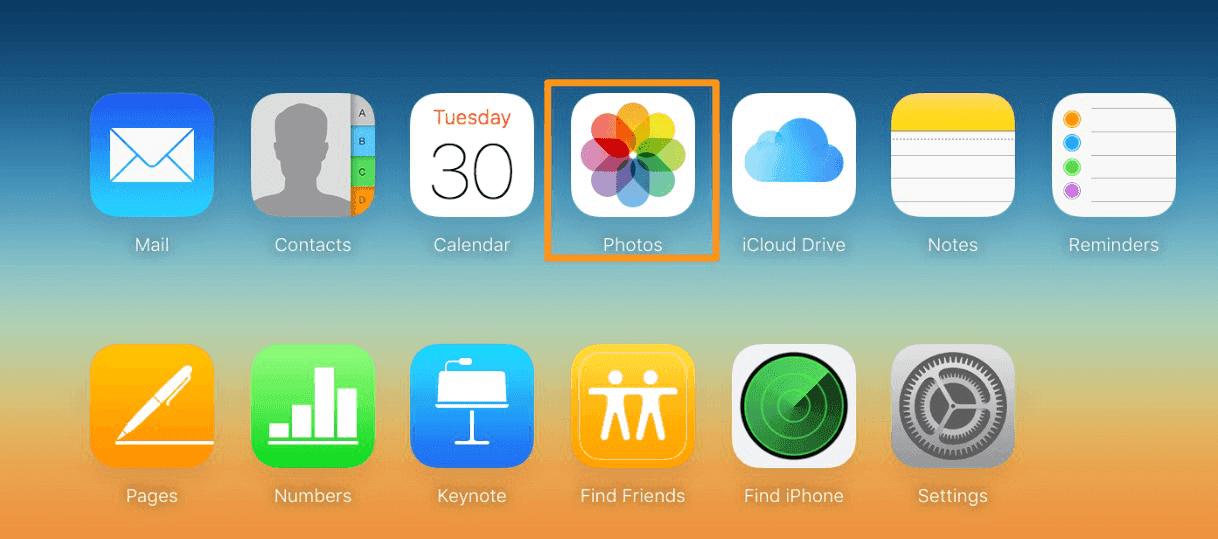
Step 2. Log into your Apple ID account username & password and access the main interface like below.
![access-icloud-photos-pc]()
Step 3. Click on Photos in the main interface. Then, choose All Photos album.
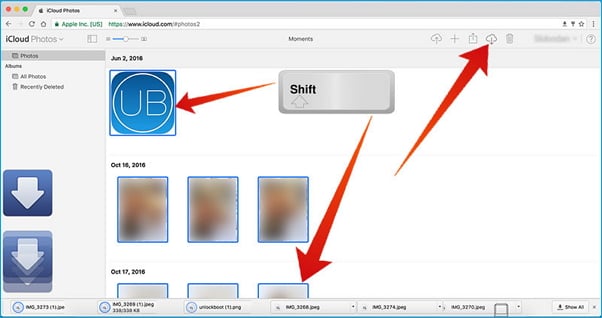
Step 4. Press Ctrl on your PC or Command on Mac and choose multiple or total photos in iCloud.
Step 5. Go to the right upper corner and click the Download button in cloud shape and click Download to save the photos on your Windows PC or Mac.
![download photos from icloud]()
Step 6. After you have downloaded the photos from iCloud on your Windows PC or Mac, you can start to transfer photos from iCloud to USB flash drive or transfer them to your external hard drive. Just plug your external hard drive into your computer via a USB cable.
Step 7. Find the photo files saved from iCloud and copy them to your external hard drive with ease.
📝Note that if you want to move iPhone photos to external hard drive, you can refer to: How to Transfer Photos from iPhone to External Hard Drive for more information.
When you need to transfer photos from iCloud to iPhone, you'll need to turn on iCloud Photos on your mobile device instead.
Method 3. Transfer Photos from iCloud to External Hard Drive Using the Photos App [Mac Only]
Downloading iCloud Photos to external hard drive on Mac is a straightforward process. Follow these steps to complete the transfer:
Step 1. Open the Photos app on your Mac. Ensure that it is set up to sync with your iCloud account under Photos > Preferences > iCloud. Select the photos you want to transfer. You can select individual photos, multiple photos by holding down the 'Command' key while clicking, or entire albums.
Step 2. Once selected, go to the File menu, choose 'Export', and then 'Export Photos'. Choose the desired file format and quality for your photos.
Step 3. Save the exported photos to a known location on your Mac, such as the desktop or a specific folder.
Step 4. Plug your external hard drive into your Mac using the appropriate USB or Thunderbolt cable.
Step 5. Wait for the drive to appear on your desktop or in the Finder sidebar under 'Locations'.
Step 6. Open a new Finder window and navigate to where you saved the exported photos on your Mac.
Step 7. Open a second Finder window and navigate to your external hard drive.
Step 8. Drag and drop the photos from their location on your Mac to your external hard drive.
Step 9. After the transfer is complete, right-click on the drive icon on the desktop or in the Finder sidebar, and select 'Eject' to safely disconnect the hard drive from your Mac.
Bonus Part: How to Transfer Photos from Mac/PC to iPhone
If you have deleted some important photos from your iPhone and want them back. You can choose to use the EaseUS software to help you transfer files from PC/Mac to iPhone, including photos, music, contacts, videos, playlists, ringtones, and books. Besides, EaseUS MobiMover also allows you to transfer photos from iPhone to PC/Mac at one lick and sync data between two iOS devices without any intermediate operations.
Download and install EaseUS MobiMover on your computer by clicking the download button below, then follow the steps to copy photos from computer to iPhone within minutes.
FAQs on How to Move Photos from iCloud to External Hard Drive
If you still have some doubts or questions, you might as well view the following questions and answers related to transferring photos from iCloud or iPhone.
1. How do I export my entire iCloud photo library?
To export your entire iCloud photo library, you can use the following steps:
- Access iCloud on your computer by going to iCloud.com.
- Sign in with your Apple ID and password.
- Click on the "Photos" icon.
- Select all the photos you want to export by clicking on the first photo, holding down the Shift key, and clicking on the last photo.
- Click on the download icon (a cloud with an arrow pointing down) to download the selected photos to your computer.
- The photos will be downloaded in a .zip file format. You can extract the files and save them to a folder on your computer.
2. How to transfer photos from iCloud to USB?
To transfer photos from iCloud to a USB drive, you can follow these steps:
- Access iCloud on your computer by going to iCloud.com.
- Sign in with your Apple ID and password.
- Click on the "Photos" icon.
- Select the photos you want to transfer to the USB drive by clicking on them.
- Click on the download icon (a cloud with an arrow pointing down) to download the selected photos to your computer.
- Connect your USB drive to your computer.
- Locate the downloaded photos on your computer and copy them to the USB drive by dragging and dropping them into the USB drive folder.
- Safely eject the USB drive from your computer once the transfer is complete.
3. How to free up iCloud storage?
To free up iCloud storage, you can:
- Delete unnecessary files.
- Manage iCloud backups.
- Optimize iCloud Photo Library.
- Delete large message attachments.
- Manage app data.
- Upgrade iCloud storage plan.
Conclusion
Transferring photos from iCloud to an external hard drive, whether on a Mac or a PC, is a practical way to ensure that your digital memories are safely backed up and easily accessible offline. The process involves a few key steps that are relatively straightforward regardless of the operating system. Here EaseUS MobiMover is highly recommended to download or save pictures from iCloud Photos to computer or external hard drive seamlessly.
NEW
HOT
