Have synced the calendars from your previous iPhone/iPad to iCloud and now want to sync them back to your new iPhone X, iPhone 8 or iPhone 8 Plus in iOS 11? If you are reading this article, you are probably facing the "iCloud calendar not syncing with iPhone" issue when you try to sync iCloud calendars to your iPhone. If that's the case, don't hesitate to learn how to cope with the problem from the possible solutions introduced in this article. For fixes to other common iPhone problems like "Can't download Apps on iPhone/iPad", go to iOS & Mac Topics to get what you need.
![Fixes to iCloud Calendar Not Syncing to iPhone in iOS 11]()
Fixes to iCloud Calendar Not Syncing to iPhone X/8/7 in iOS 11
Tip 1: Check Apple ID on your iPhone
To sync iCloud calendars to your iPhone successfully, you need to sign in to iCloud (in iCloud.com or on your iPhone) with the same Apple ID. On your iPhone in iOS 11, go to Settings > [your name] and see whether the Apple ID is in accordance with the Apple ID on your other devices.
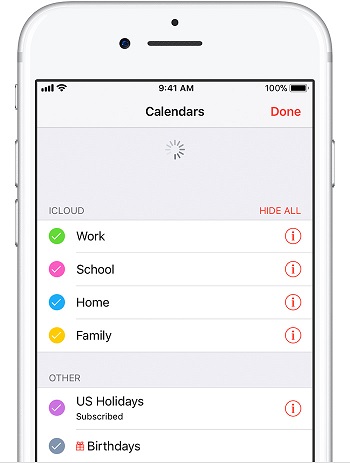
Tip 2: Check iCloud Calendars settings
If your iCloud calendars are not syncing to your iPhone, you first need to guarantee that you have turned on iCloud Calendars on your device. Go to Settings > [your name] > iCloud to switch on Calendars option. If you have turned it on already, toggle it off and then turn it on again.
The two tips above should be carefully checked if you want to sync files between devices using iCloud. Problems like "iPhone contacts not syncing" may also be caused by wrong Apple ID and settings.
Tip 3: Refresh the Calendars App
Refresh the Calendars App on your iPhone in iOS 11 if you find the iCloud calendars are not synced with your iPhone.
- Open Calendars App on your iPhone X or iPhone 8 in iOS 11.
- Click Calendars at the bottom of your iPhone screen.
- Perform a pull-to-refresh on your device.
Tip 4: Check your calendar settings
Find the iCloud calendars not syncing with your iPhone completely? This is probably because you don't set up your iPhone calendar correctly. Go to Settings > Calendar > Sync and choose to sync All Events to your iPhone.
Bonus Tip: How to back up your iPhone data to PC
Calendars are not the only things that matter on iPhone, and using iCloud is not the only way to view and access your iPhone data on PC, with EaseUS MobiMover Free, the FREEWARE for iOS data transfer and file management, you can transfer data from your iPhone to PC and then view it whenever you want, which is just one of the many things MobiMover can do for you. MobiMover supports the data transfer between two iOS devices (iPhone/iPad in iOS 8 or later) or between iOS device and computer. In addition to contacts, other files including messages, notes, photos, videos, audios, and more can also be transferred via MobiMover. Follow the steps below have a try.
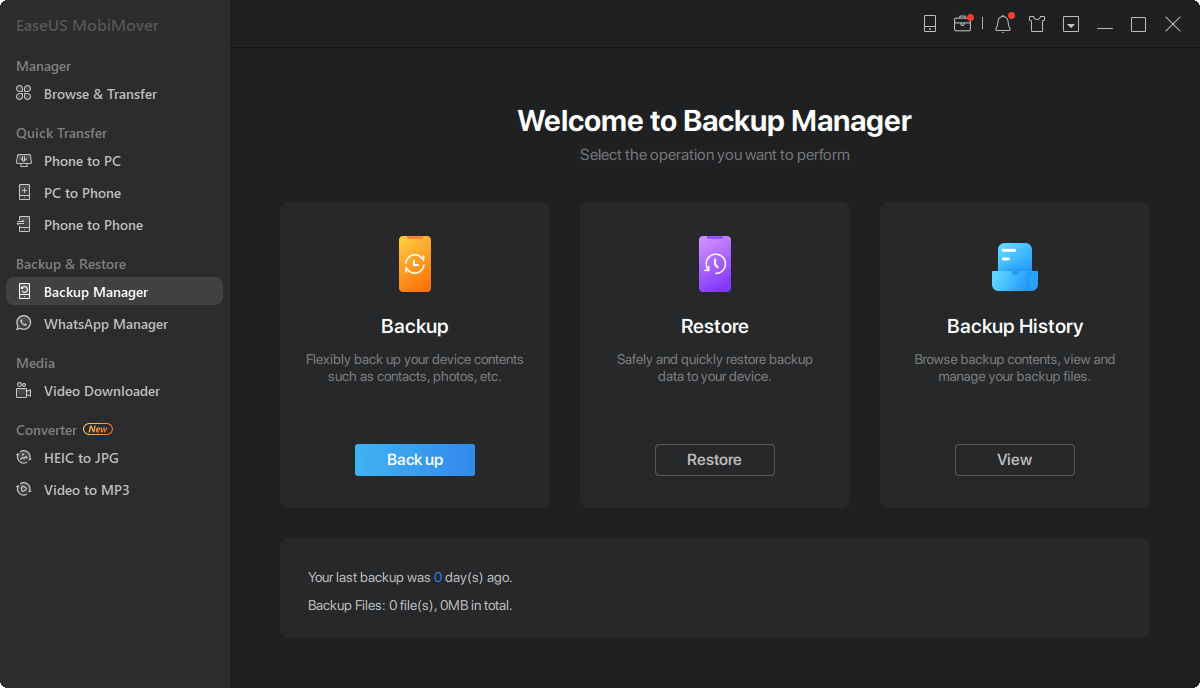
Step 1. Connect your iPhone to your PC running Windows 7/8/10 with a USB cable. Tap "Trust" on your iPhone screen if asked. Run EaseUS MobiMover and navigate to "Backup Manager" > "Back up".
Step 2. All the supported categories are selected by default. Click "One-Click" backup to start backing up your iPhone to PC.
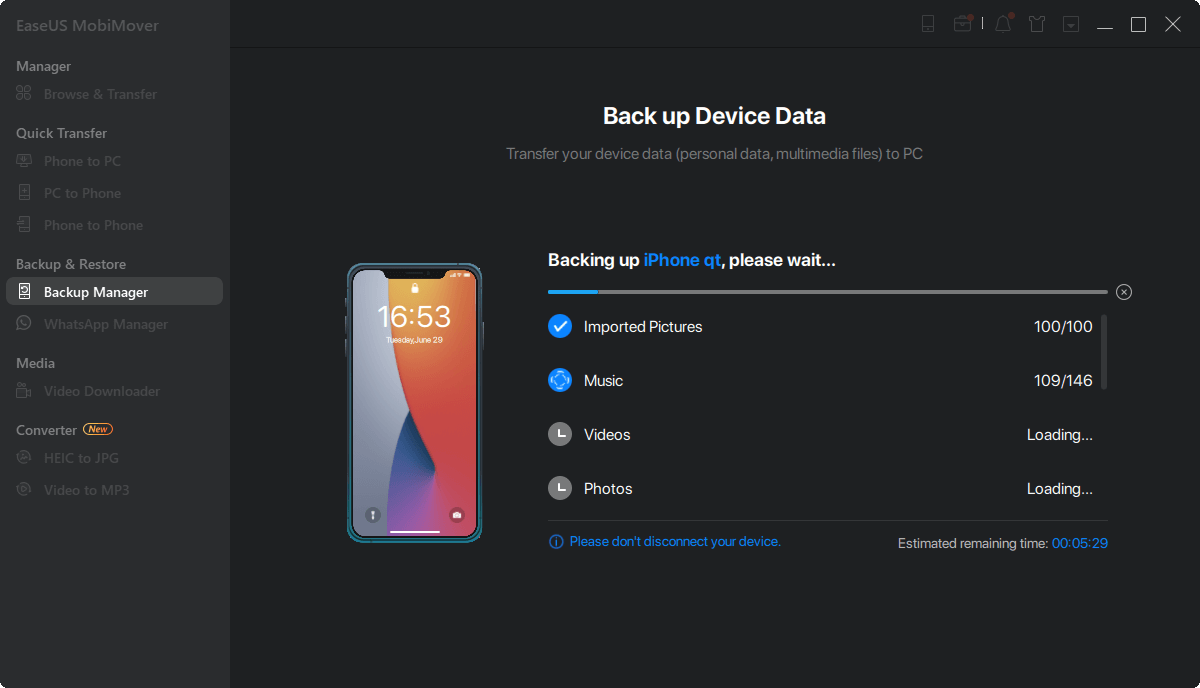
Step 3. Wait patiently until the backup process completes.
 NEW
NEW HOT
HOT