eSIM on an iPhone comes with great utility. It frees you from buying, carrying, and swapping a physical SIM. Besides this, its virtual nature adds another layer of high-end security that ends the chances of being lost or stolen.
It's pretty easy to activate an eSIM on your iPhone and requires only a few steps. However, when it comes to the question of "How to transfer eSIM from one iPhone to another, " things are not so straightforward. To help you out, this guide will reveal different practical methods. Also, there is a bonus tip for you to transfer iOS content from one iPhone to another.
Essential Items to Know Before Transferring eSIM to New iPhone
Before we jump straight into the step-by-step methods, it's essential to know the following items.
📖Understanding eSIM. eSIM is a virtual SIM with no physical chip you can get and activate through a cellular network provider. Although the iPhone allows you to install eight or more eSIMs, only two can be active simultaneously. All the remaining eSIMs will remain inactive. eSIM to SIM is like email to mail.
📱Compatible iPhone Models. Apple introduced the eSIM on the iPhone XS, iPhone XS Max, and iPhone XR. Now, it's available on all the predecessor models till the latest iPhone 15 series.
🔗Wi-Fi Connection. From the iPhone 14 series, Apple completely snubbed the physical SIMs and introduced eSIM-only iPhones. Moreover, a stable Wi-Fi connection is also necessary to activate an eSIM on your iPhone.
🌍Geographical Constraints. Except for China Mainland, Hong Kong, and Macao, all the other regions have eSIM-only iPhones from the iPhone 14 series. China Mainland, Hong Kong, and Macao are still limited to physical SIMs.
How to Transfer eSIM from One iPhone to Another (During Setup)
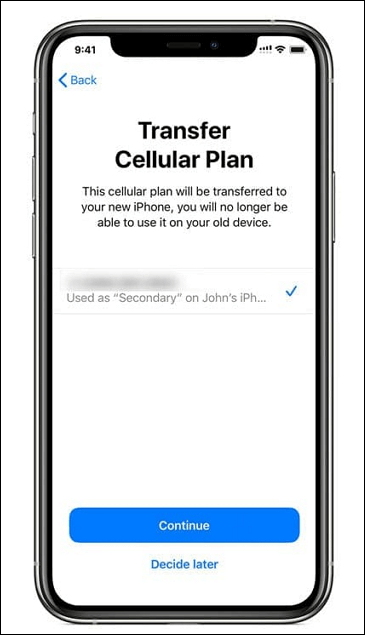
There are three different methods to transfer eSIM from one iPhone to another. The first one is applied while setting up the iPhone at the start. You probably get a message while setting up your new iPhone about transferring your cellular service plan. If you receive this message, you're good to transfer eSIM from one phone to another during setup. However, it's worth noting that only a few cellular networks offer this feature. If you get the message, apply the following steps to transfer your eSIM from your previous iPhone.
Step 1. When you add your Apple ID to your new iPhone, you see all the numbers available on the display. First, select the number you wish to transfer and tap "Continue."
![Transfer eSIM from One iPhone to Another During Setup]()
Step 2. After this, follow the on-screen instructions to transfer your cellular services to your new iPhone.
Step 3. While performing this activity, make a call on your new phone to check its cellular connectivity. Once confirmed, you can remove the services from your previous iPhone. Besides this, the iPhone also automatically disables cellular services on the older iPhone after activating them on the newer one.
How to Set Up iPhone X in Detailed Steps
Have you bought the newly released iPhone X and want to set it up? If so, read this blog post and learn how to set up and activate your iPhone X following the detailed steps provided in this blog post. Read more >>
How to Transfer eSIM from iPhone to iPhone (After Setup)
It's completely fine if you didn't receive the message or forgot to transfer your cellular services to your new iPhone while setting it up. You can still transfer eSIM from iPhone to iPhone. Here's the step-by-step guide to transfer eSIM after setup in detail.
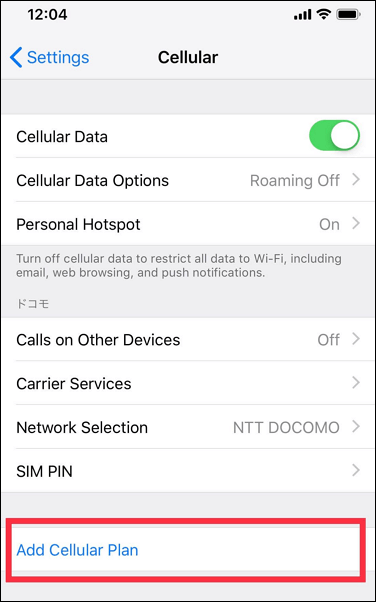
Step 1. First, open the "Settings'' and choose the "Cellular" Option. Inside this, select "Add Cellular Plan."
Step 2. If your eSIM plan from the previous iPhone is listed, tap the "Add Cellular Plan" button at the bottom of the display.
Step 3. After this, take your older iPhone and check if there is a message asking you to transfer your eSIM phone number to your new iPhone.
Step 4. Upon getting the message on the older iPhone, tap "Transfer" to get your cellular services on your new iPhone.
![Transfer eSIM from One iPhone to Another After setup]()
How to Transfer eSIM to New iPhone via Bluetooth (iOS 16/17)
Apart from the above two methods, Apple introduced a new feature on iOS 16 and iOS 17 that enables you to transfer cellular services from one iPhone to the new iPhone 15/14 via Bluetooth. Apply the following steps to transfer eSIM to the new iPhone via Bluetooth with iOS 16/17.
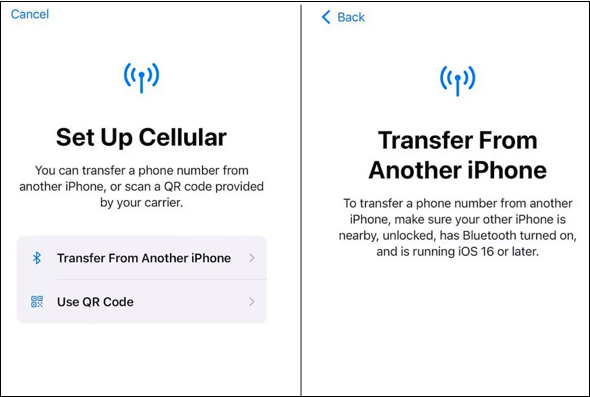
Step 1. First, open the "Settings" and find "Set up eSIM" to proceed with the following process.
Step 2. Inside this, you'll get to see two options. Here, you need to select "Transfer from another iPhone."
![Transfer eSIM from One iPhone to Another via Bluetooth]()
Step 3. After this, follow the given instructions to transfer eSIM from another iPhone via Bluetooth.
While performing this activity, make sure the other iPhone should be:
- nearby
- unlocked
- Bluetooth turned on
- running iOS 16 or later
Bonus: Transfer iOS Content from One iPhone to Another
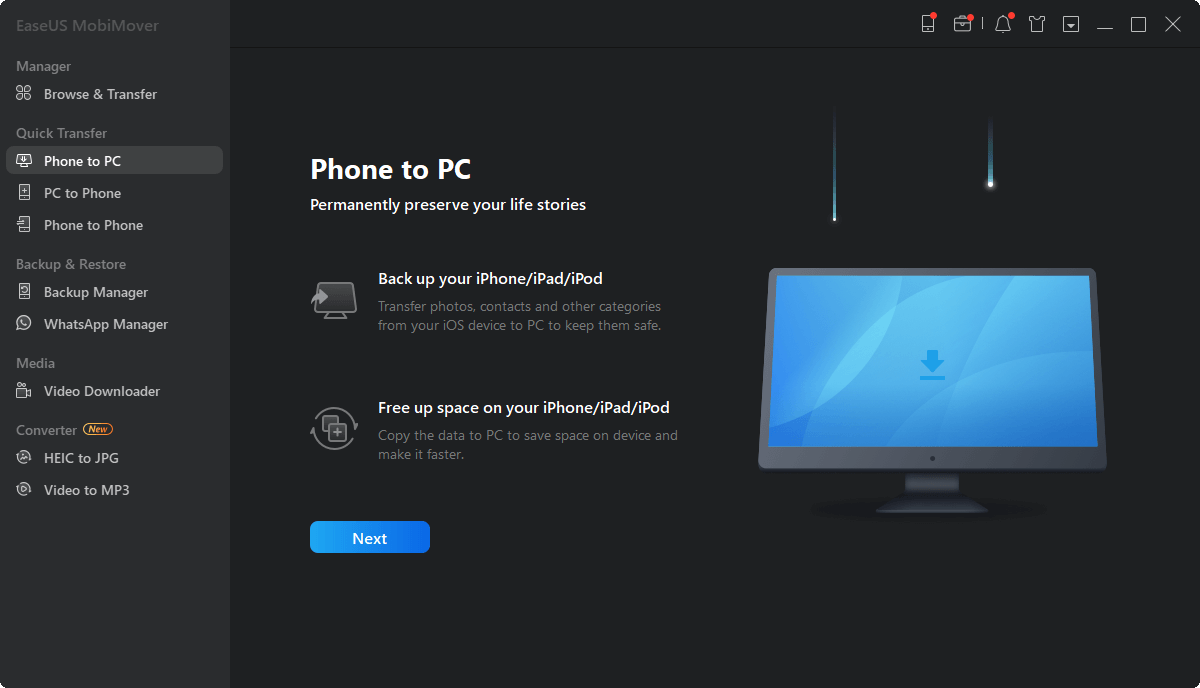
Apart from transferring eSIM from one iPhone to another, iPhone users might also worry about transferring all the content they had on their previous iPhone to their new iPhone. If you're one of them, there's no need to worry, as there is one application that can help you in this regard. You can use the EaseUS MobiMover application, which has all the features of a high-end data transfer tool to move data from one iPhone to another. Its notable features include:
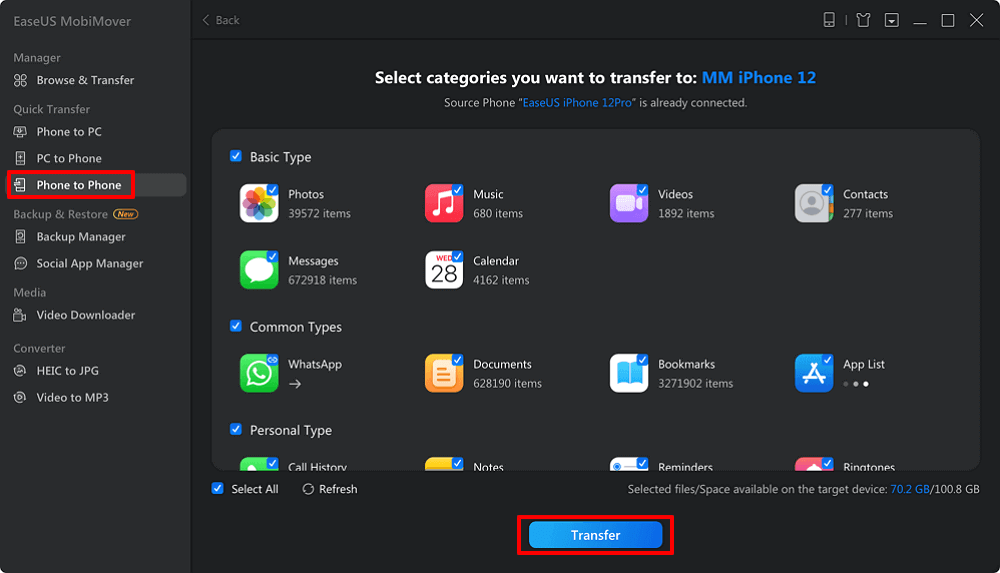
Here's the step-by-step process to use the EaseUS MobilMover app for transferring data from one iPhone to another.
- Connect the iOS devices to your computer, launch EaseUS MobiMover, and click "Phone to Phone" > "Next."
- Select one or more categories that you want to move to the other iPhone, and click "Transfer."
- The app will take a few minutes to transfer all the selected files from one iPhone to another.
![MobiMover]()
Move Your eSIM from One iPhone to Another iPhone Now!
Apple offers multiple options to transfer eSIM from one iPhone to another. You can perform this activity while setting up your new iPhone and even after the setup. Besides this, Apple recently introduced eSIM transfer via Bluetooth with its iOS 16 release. All of these methods allow you to get your cellular services on your new iPhone within a few minutes.
Transfer eSIM from One iPhone to Another FAQs
Some FAQs on the topic of How to transfer eSIM from one iPhone to another iPhone.
1. How much time does it take to transfer eSIM from one iPhone to another?
It only takes a few minutes, usually less than 10 minutes, to transfer eSIM from one iPhone to another iPhone.
2. How do I get a QR code for eSIM?
First, open the "Settings" and find "Set up eSIM" to proceed with the following process. Inside this, you'll get to see two options. Select "Use QR Code" to get a QR Code for eSIM.
3. Why did my eSIM not transfer to my new iPhone?
There could be a software glitch if your eSIM didn’t transfer to your new iPhone. If you ever face this issue, try updating the iOS version to resolve this problem.
