Emojis have actually been available in OS X for quite some time and is widely used in a majority of text messages, emails, social posts and even the YouTube videos. Emojis are improved gradually and make the social contacts more funny and easy. But for some new Mac users, they may don't know how to get emojis on Mac or how to use emojis on Mac. Don't worry, here comes this well-designed post to help you to get and use emojis on MacBook with ease. Keep reading to see how.
Part 1: How to get and install emojis on Mac
To install and get new emojis on your Mac, you can go to Macmoji GitHub repo, then choose and download the emojis on your Mac.
Step 1: Find and click "Clone or download" button on your right hand, then click "Download ZIP" to begin to download the emojis ZIP.
Step 2: Extract the contents when the ZIP has been downloaded on your Mac.
Step 3: Go to "System Preferences" > "Keyboard" > "Text".
Step 4: Open the file containing the extracted contents of the ZIP file and drag the emoji substitutions.plist file into the text substitutions field.
Also see: How to get emojis on iPhone 8/X if you want to install new emojis on your iPhone.
![how to get emojis on mac]()
Part 2: How to use emojis on the Mac
It's easy to use emojis when you are sending messages/iMessages.
Step 1: Position the cursor in any text field you'd like to insert an emoji.
Step 2: Press the "Command and Control" keys on your keyboard. Then press the spacebar.
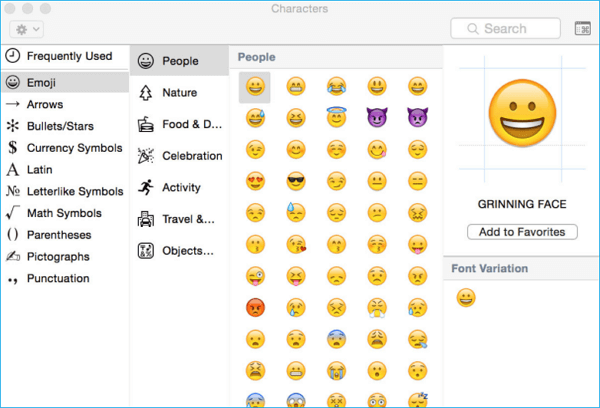
Step 3: Click on the Emoji icon in the sidebar on the left side of the Character window to choose an emoji from the categories of "Smileys & People", "Animals & Nature", "Food & Drink", "Activity", "Travel & Places", "Objects", "Symbols", and "Flags".
Step 4: Double-click on the emoji you'd like to use and it'll be inserted into the target position.
![how to use emojis on mac]()
Part 3: How to transfer data between Mac and iPhone
If you are both Mac user and iPhone user, you may find that you often need to transfer files between Mac and iPhone. If so, you can't miss a FREE iOS data transfer tool that is compatible with Mac and Windows PC, EaseUS MobiMover Free. With MobiMover installed on your computer, you can not only transfer data between Mac and iPhone but also transfer files between two iOS devices (iPhone/iPad in iOS 8 or later) like transferring photos from iPhone to iPhone.
- What can MobiMover transfer or manage for you:
-
Photos: Camera Roll, Photo Library, Photo Stream, Photo Videos
Videos: Movies, TV shows, Music Videos
Audios: Music, Ringtones, Voice Memos, Audiobooks
Others: Contacts, Notes, Messages, Voice Mails, Books, and Safari Bookmarks
With MobiMover, you can either transfer all the files listed above from iPhone to Mac at once or transfer some category selectively. You can also transfer several kinds of files from Mac to your iPhone with simple clicks. This steps below will show you how to transfer all data from iPhone to Mac. Don't hesitate to have a try.
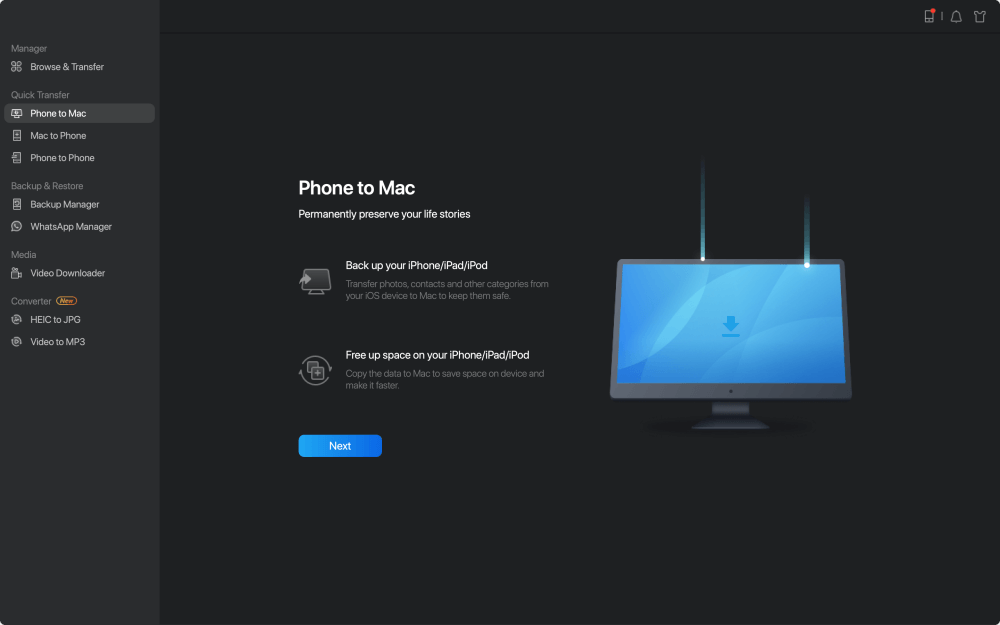
Step 1. Connect your iPad to your Mac with a USB cable and tap "Trust This Computer" on your iPad if you are asked > Run EaseUS MobiMover for Mac and choose the "Phone to Mac" on the main screen > Click the "Next" to continue.
![how to transfer data from iPhone to Mac - step 1]()
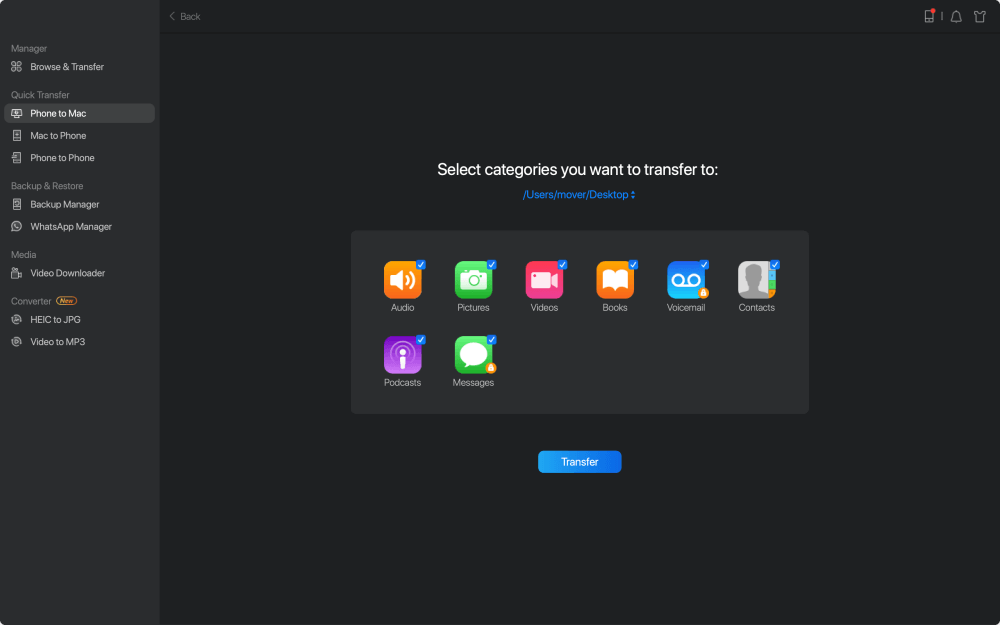
Step 2. Then, MobiMover automatically reads and loads all the supported data on your iPad as the screenshot shows below. You are free to send them all or selectively export one data type at a time. Besides, you can set the destination for saving exported iPad files on your Mac. If you don't customize it by yourself, MobiMover will send them to a desktop folder named by Exported by MobiMover.
![how to transfer data from iPhone to Mac - step 2]()
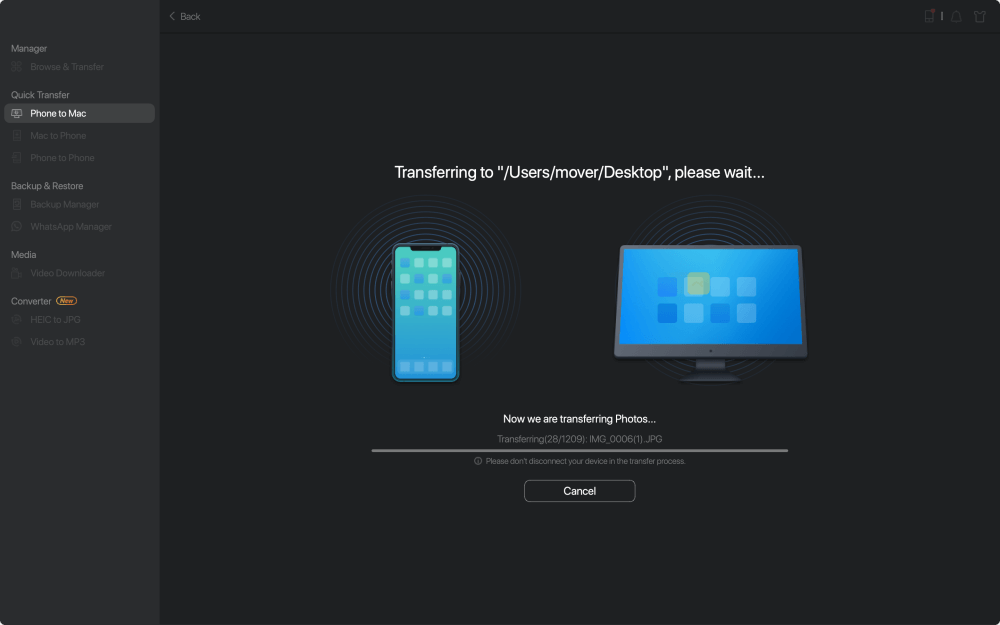
Step 3. Click the "Transfer" to import data from iPhone or iPad to Mac. When the process has completed, you can view, edit, or delete them as you want on your Mac.
![how to transfer data from iPhone to Mac - step 3]()

 NEW
NEW HOT
HOT