AirDrop is a powerful feature on Mac, iPhone, iPad, and iPod Touch, which can help you send files like photos, videos, documents, locations and more between Mac and iOS device or between iOS devices. Given the usefulness of AirDrop, this article is written to detail the simple steps about how to turn on AirDrop on iPhone 8, iPhone 8 Plus, iPhone X or other iPhones running iOS 11 and how to switch on AirDrop on Mac. Read on to get more.
There are the things you need to know before you turn on and use AirDrop on your iPhone and Mac.
- AirDrop requires both WiFi and Bluetooth connections to work.
- Put your AirDrop-supported devices close enough to make the Bluetooth connection possible.
- The files you want to share need to be supported by AirDrop.
- It will take a long time if you have large files to transfer.
Thus, if you have problems like "Bluetooth not working" on your iPhone or Mac, AirDrop will fail to send files between the devices.
Part 1: How to turn on and use AirDrop on iPhone 8/iPhone X in iOS 11
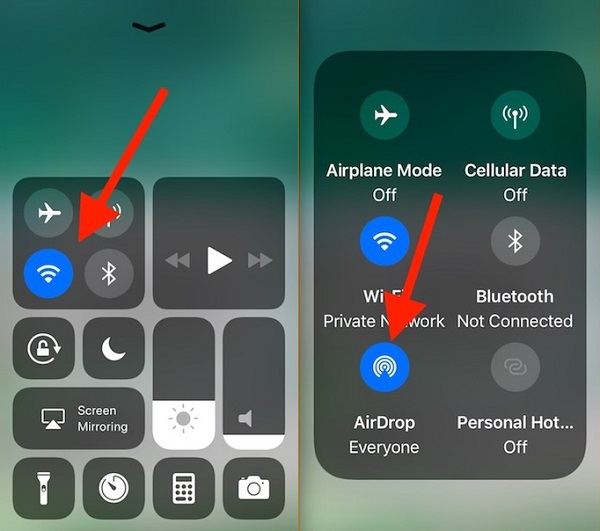
Step 1: Open Control Center on your iPhone 8/iPhone X in iOS 11 by swiping up from the bottom of your iPhone screen.
Step 2: Press deeply on the module where Airplane Mode locate in.
Step 3: Tap on AirDrop and set your iPhone to be discovered by Contacts Only or Everyone. (If you haven't turned on WLAN and Bluetooth yet, turn them on now.)
Step 4: To send files from iPhone to other AirDrop-supported devices, go to the App which contains the items you'd like to send, find the item/items, click the Share button and choose the name of the device you want to share files with from the AirDrop section.
![How to turn on AirDrop on iPhone 8/iPhone X in iOS 11]()
Part 2: How to turn on and use AirDrop on Mac
The way to turn on and use AirDrop on Mac is different from the way to turn on AirDrop on iPhone. Follow the steps below to learn how to make it.
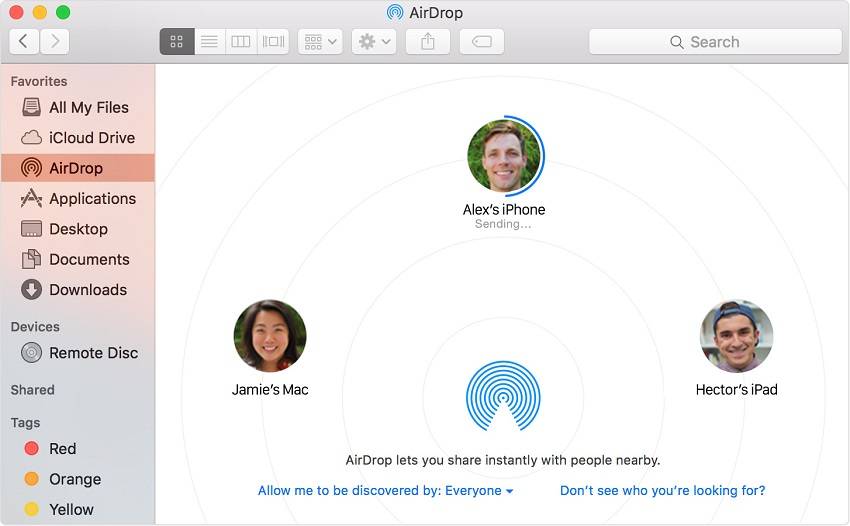
Step 1: Go to Finder > Go > AirDrop.
Step 2: Switch on both WiFi and Bluetooth to turn on AirDrop on your Mac.
Step 3: Set your Mac to be discovered by Contacts Only or Everyone.
Step 4: To send files from Mac to other devices using AirDrop, you can drag the items to the image of the recipients in AirDrop window and click Send or find the App which contains the files you want to share, click the Share button, select AirDrop, choose the recipient and click Done.
Easy, right? After reading this article, you have mastered the ways to turn on and use AirDrop on iPhone 8/8 Plus/X in iOS 11 and Mac. But what you need to know is that AirDrop can't always work properly on your device. When AirDrop isn't working on your iPhone in iOS 11, read the related article and learn how to fix it.
![How to turn on AirDrop on Mac]()
Part 3: How to transfer files between Mac and iPhone without AirDrop
It's no doubt that you cant transfer files between Mac and iPhone using AirDrop. It's also true that there are some limitations while using AirDrop. For example, the files you can transfer using AirDrop is quite limited and if you transfer massive items with AirDrop, it can be quite time-consuming. That's why I recommend EaseUS MobiMover Free, the completely free tool for iOS data transfer, for you here.
- What can MobiMover transfer or manage for you:
-
Photos: Camera Roll, Photo Library, Photo Stream, Photo Videos
Videos: Movies, TV shows, Music Videos
Audios: Music, Ringtones, Voice Memos, Audiobooks, Playlists
Others: Contacts, Notes, Messages, Voice Mails, Books, and Safari Bookmarks
With MobiMover installed on your computer (Mac or PC), you can transfer files between iOS devices (iPhone/iPad in iOS 8 or later) or between iOS device and Mac/PC without any cost. No matter you want to transfer items all at once or selectively, you can easily get things done with the help of MobiMover. Follow the steps below to learn how to transfer files from iPhone to Mac with MobiMover. If you want to do other things like save iPhone text messages to computer or put music to iPhone from Mac, you will learn how to make it after trying MobiMover following the steps below.
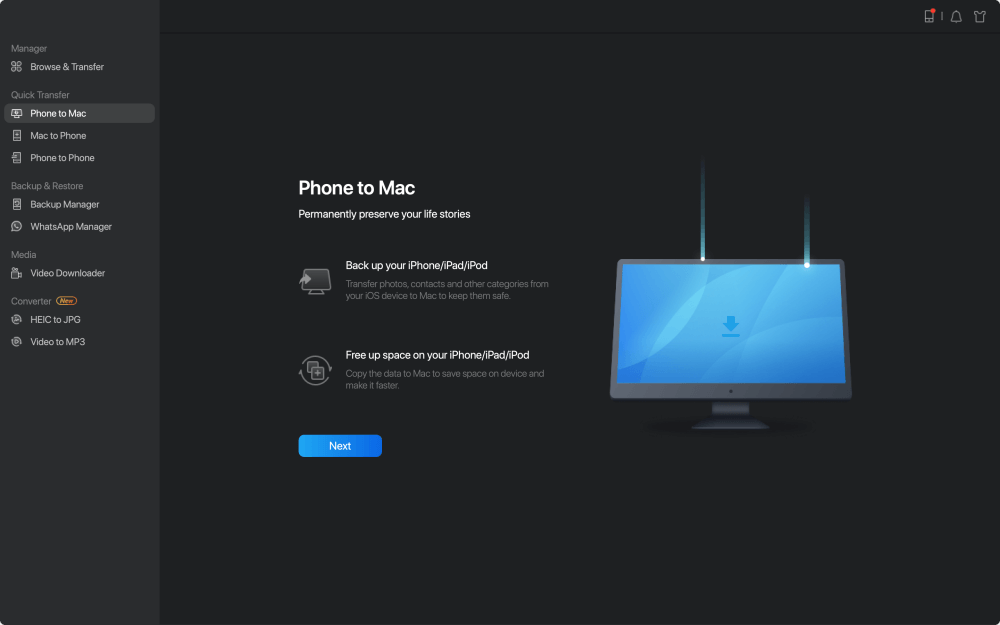
Step 1. Connect iPad to your Mac with a USB cable. Once connected, tap "Trust This Computer" on your device's screen. Open EaseUS MobiMover and select "Phone to Mac" on the main screen. Click "Next" to start transferring data from iPad to your computer.
![how to transfer files from iDevice to Mac - step 1]()
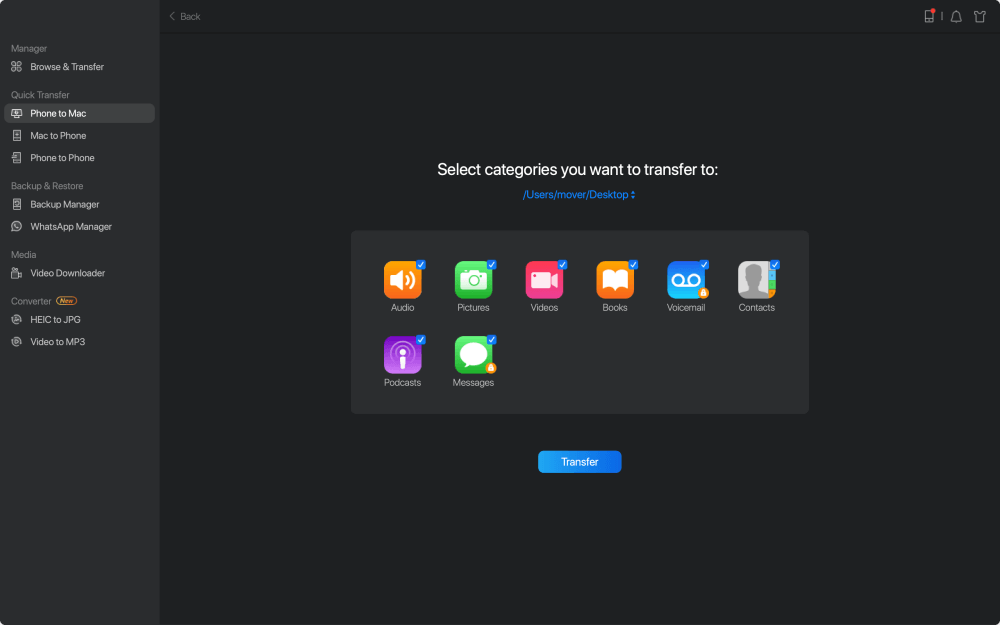
Step 2. MobiMover will read and load all the compatible files on your iPhone/iPad automatically. Choose Contacts/Messages/Pictures/Audio/Video or other specific types of apps to transfer. The transferred content is kept on Desktop by default, so you need to change the default location before clicking "Transfer".
![how to transfer files from iDevice to Mac - step 2]()
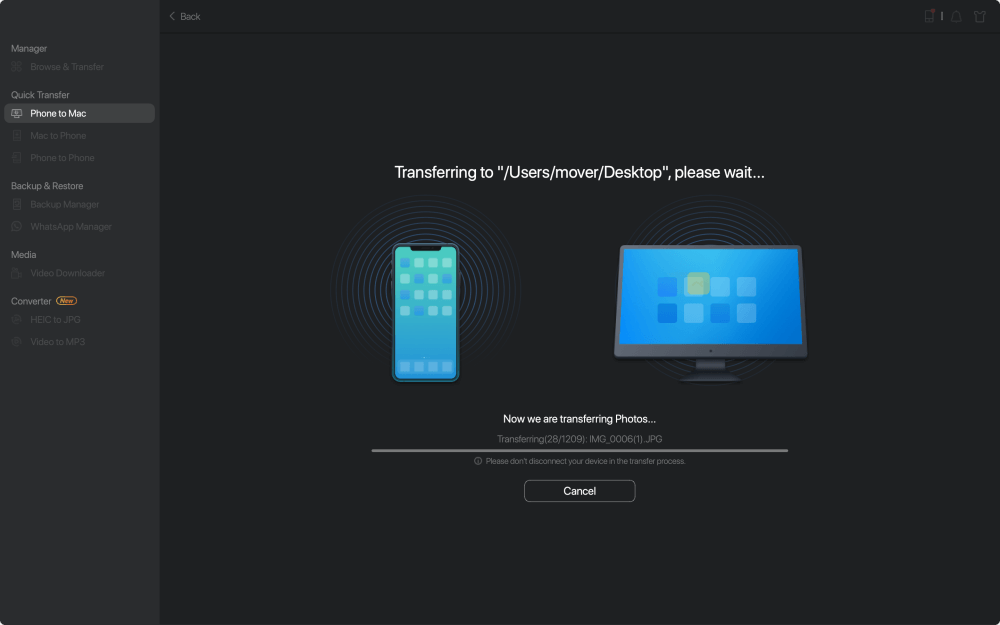
Step 3. MobiMover will immediately begin to transfer data from iPad to Mac without iTunes. Don't interrupt the USB connection during the course. When it completes, you can open and check the transferred content. Some files, like contacts and messages, are kept as .html files, so you need to use a web browser to open such a type of file.
![how to transfer files from iDevice to Mac - step 3]()
 NEW
NEW HOT
HOT