It's not a lie that iPhones have the most amazing cameras around. They allow you to capture memorable moments around you using photos or videos. However, amid all this fun, you may experience iPhone camera not working issue. This arises when your iPhone doesn't focus correctly hence taking blurry or shaky images.
As a result, the problem greatly affects the quality of your images. How can you solve this issue? What are the major causes? Read on as we discuss the eight fixes to the iPhone camera shaking problem and the main causes.
How to Fix iPhone Camera Shaking
If your camera constantly shakes when taking photos or recording videos, it may greatly affect their quality. The best option, therefore, is to find the possible solutions to the issue so that you start using your iPhone's camera as usual. This section will outline eight fixes to the iPhone camera shaking issue.
Read on to learn the detailed steps for each fix!
Fix 1. Clean the Camera Lens
The first (and most common) cause of the camera shaking issue is dust accumulation on the lens. This will greatly limit the functionality of your camera, including the auto focus aspect. As a remedy, you should try cleaning the lens using a soft fiber cloth. This will help clear any dust on your camera.
Don't use liquid cleaners since they may cause extra damage to your iPhone. If this fix didn't work for your iPhone, you could proceed to Fix 2.
![clean camera lens]()
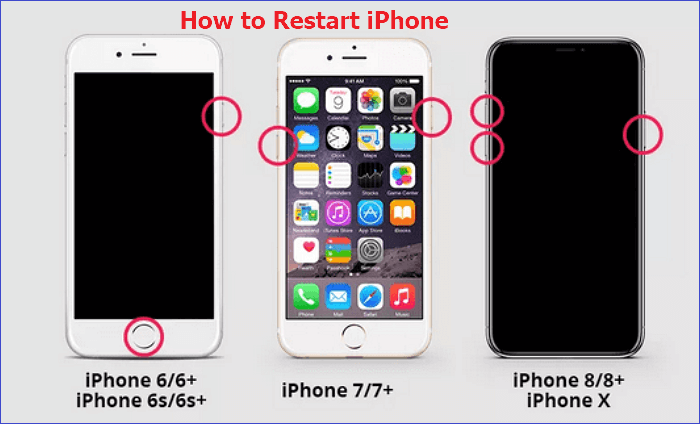
Fix 2. Restart Your iPhone
Sometimes, your iPhone camera may shake because of a bug or other underlying software issues. If the issue is minor, you can easily solve it by restarting your iPhone. Depending on your device model, you can perform a restart using the following steps:
Restart iPhone X, 11, 12, 13, or 14:
Step 1. Press and hold the Volume and Side buttons until you see the slider.
Step 2. Drag the slider to turn off your device. Wait for about 30 seconds.
Step 3. Press and hold the Side button until the Apple logo appears. Your iPhone will turn back on.
Restart iPhone 6, 7, or 8:
Step 1. Press and hold the Side button until you see the power-off slider.
Step 2. Drag the slider to power off your device. Wait for 30 seconds.
Step 3. To turn your iPhone back on, press and hold the Side button until you see the Apple logo. You've now restarted your device.
Restart iPhone 5 or Earlier:
Step 1. Press and hold the Top button till the slider appears.
Step 2. Turn off your device by dragging the power-off slider. Wait for about 30 seconds.
Step 3. Turn your iPhone back on by pressing and holding the Top button. Once you see the Apple logo, you can release this button, and your iPhone will restart.
![restart iphone]()
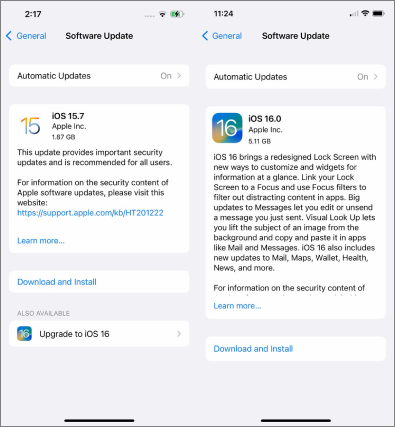
Fix 3. Update iOS on iPhone
If you're using an outdated iOS, your iPhone camera will likely shake because of software-related complications. Updating to a new iOS version fixes the bugs or errors causing your iPhone to misbehave. Apple regularly allows iPhone users to update their devices. Follow the steps below to achieve this:
Step 1. Open your iPhone Settings and click on "General."
Step 2. Navigate to "Software Update."
Step 3. Confirm if there's an available update for your iOS. Next, click on "Download and Install." This will install the latest iOS for your iPhone and possibly fix the camera shaking issue.
![download and install]()
Fix 4. Reset All iPhone Settings
You may also encounter the iPhone shaking camera issue if you've intentionally or unintentionally altered your device settings. Since you can't remember the specific change you made, the best option is to reset all settings. First, you'll need to back up all your data. Next, you can apply the following steps:
Step 1. Open iPhone Settings.
Step 2. Tap on "General."
Step 3. Go to "Reset" then "Reset All Settings." This will clear all the settings on your iPhone back to defaults.
![reset all settings]()
Fix 5. Restore iPhone via iTunes
If there's a bug causing your iPhone camera to slow down, you can try restoring your device via iTunes. iTunes is a very powerful tool that will erase all the data and settings on your iPhone hence fixing the software-related complications affecting your iPhone camera. Before performing a restore, ensure you've backed up your iPhone data.
Step 1. Launch an updated version of iTunes on your computer.
Step 2. Connect your iPhone via a lightning cable.
Step 3. Once iTunes detects your iPhone, click on it from the iTunes window.
Step 4. Next, click on the "Restore" option. Follow the onscreen instructions to complete the restore process. Once done, you can restart your iPhone and test whether the camera works well.
![restore iphone]()
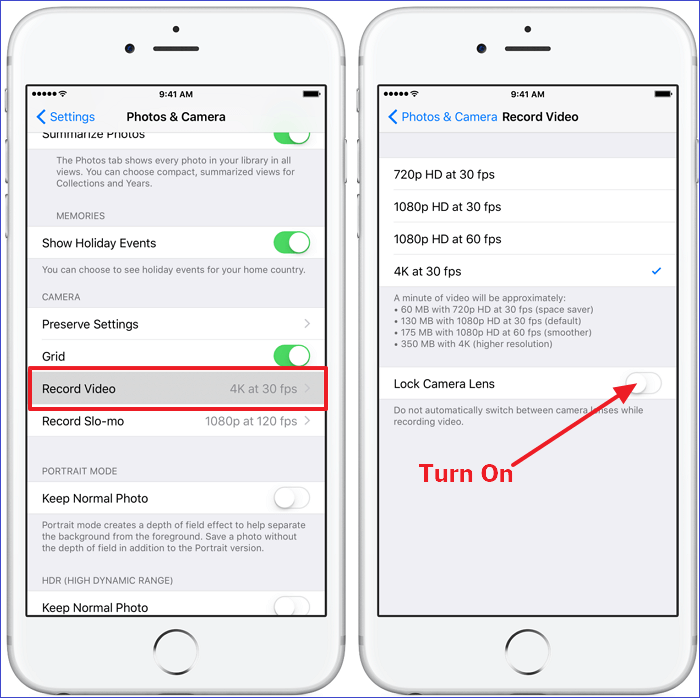
Fix 6. Activate Lock Camera
The Lock Camera feature is present on iPhone 13 and 14. When enabled, this feature prevents the iPhone Camera app from automatically switching cameras, causing the shaking problem. Once activated, the Lock Camera feature can help solve the iPhone camera shaking issue.
You can activate this feature by going to Settings>Camera>Record Video. Next, toggle on the button for "Lock Camera."
![activate lock camera]()
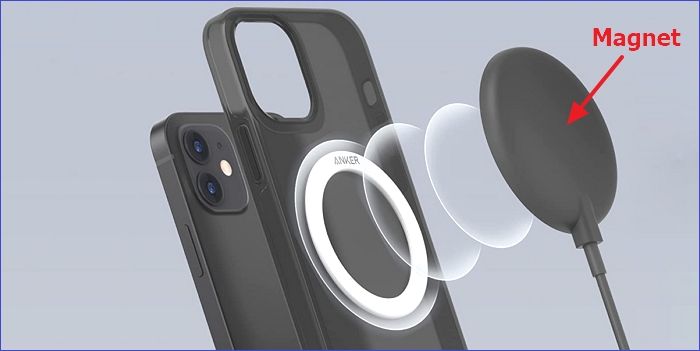
Fix 7. Attach Magnet to iPhone's Casing
Above your iPhone camera, there's a metal shield attached to it. At times, this shield may cause interference, causing your camera to shake because the gyroscope is not balancing as expected.
A recommended solution is placing a magnet at the back of your iPhone casing. This will possibly eliminate the interference caused by the metal shield, allowing your camera to work properly.
![attach magnet]()
Fix 8. Fix the iOS System Problem
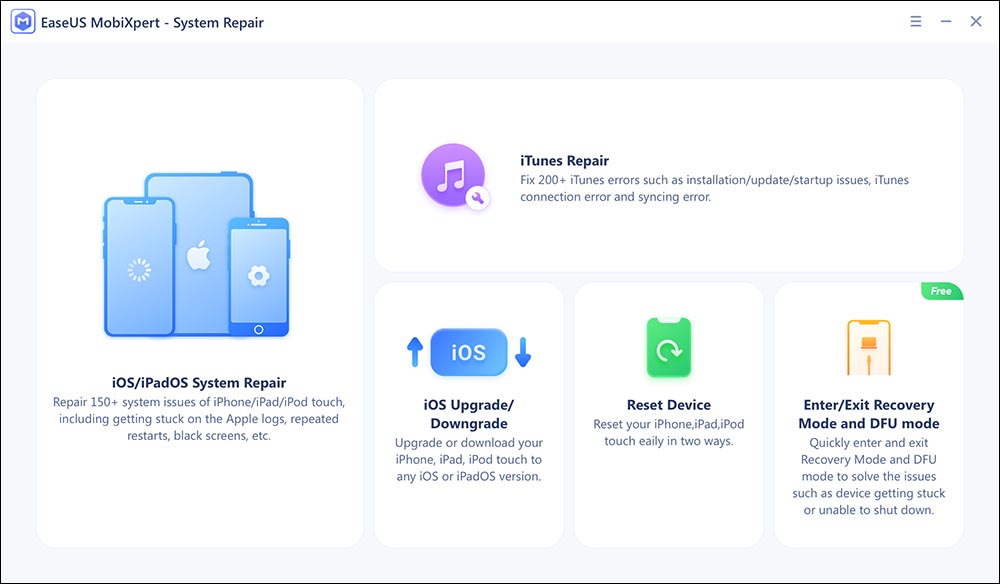
If you think this may be due to the iOS software problem, then you might want to a try a third-party iOS system repair tool to fix the software. Here I tend to recommend EaseUS MobiXpert. This iOS system recovry tool provides two repair options. It is suggested to try the "Standard Repair" option first. And if the operating system is severely damaged and the "Standard Repair" function doesn't work at all, then you are expected to try the "Deep Repair" feature.
Step 1. Launch EaseUS MobiXpert on your computer, choose "System Repair" from the Home page.
![MobiXpert hompage]()
Step 2. Then, choose "iOS/iPadOS System Repair" from the new screen.
![ios system repair]()
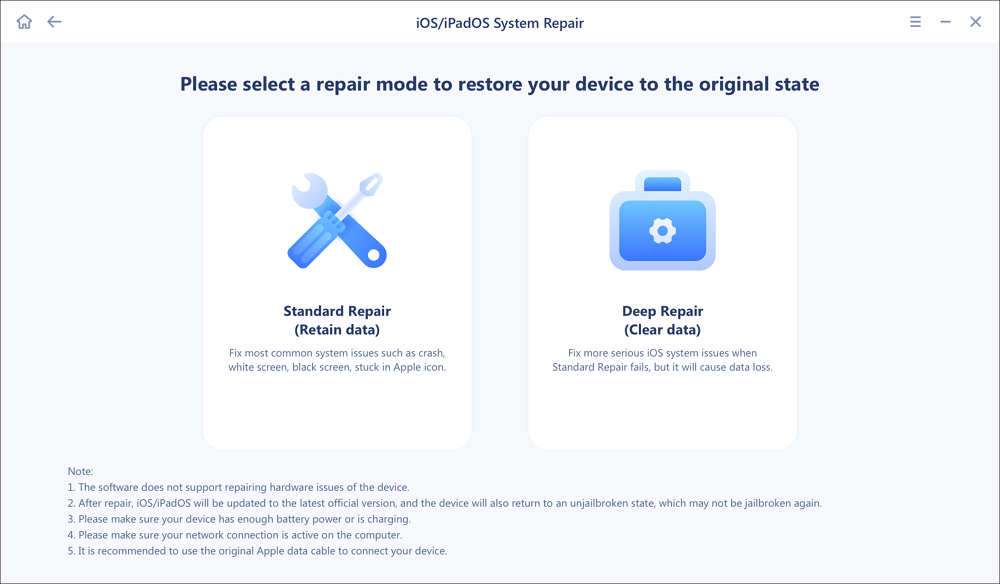
Step 3. Connect your iPhone or iPad to the computer and choose "Standard Repair." If you want a thorough repair, you can choose "Deep Repair."
![select repair mode]()
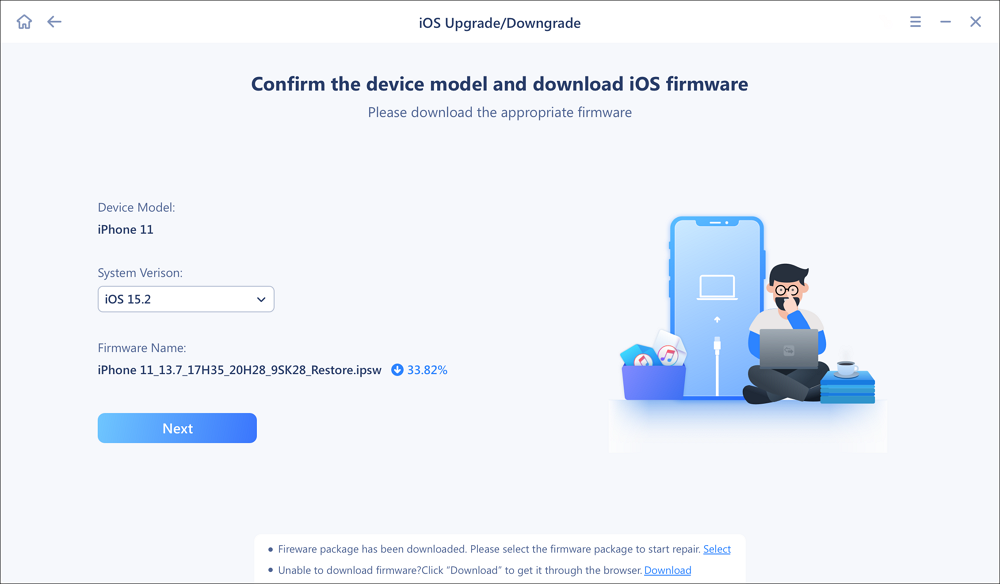
Step 4. Confirm your device model and click "Next" to move on. Then, EaseUS MobiXpert will download a firmware for you, which will take a while. If you have installed a firmware before using this software, you can directly click "Verify" to continue.
![verify firmware]()
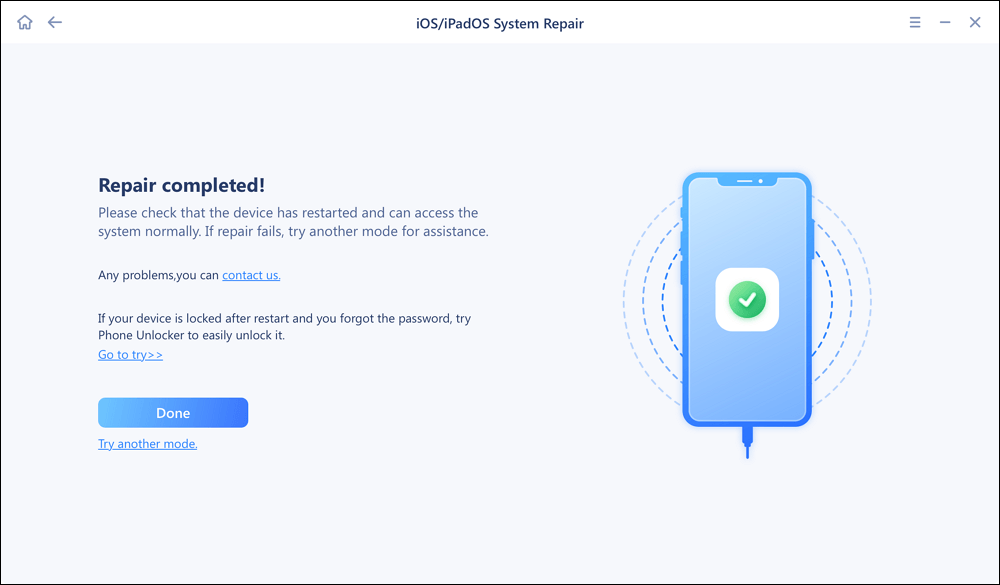
Step 5. Then, click "Repair Now" to start the repair process. After the repair completes, you can check your device and restart it for use.
Why Is iPhone Camera Shaking
Now that you know how to fix a shaking iPhone camera, it's important to know the issues behind this error. The most common causes of the shaking effect on your iPhone camera include the following:
Dirty Lens
The accumulation of dirt and other particles may prevent your iPhone camera from working correctly due to the blurred effect. As a remedy, wipe your lens using a soft fiber cloth.
Software Update Issues
Software-related issues are the major cause of camera shaking. These include bugs and virus attacks. Therefore, update your iPhone to the latest version to fix such issues. Also, you can restart your iPhone, reset your settings, or restore it via iTunes.
Interference from Metal Shield Above the Camera
There's a metal shield above your camera to hold it in place. Sometimes, this shield may cause some magnetic interference, making your camera shake. The remedy to this problem is to attach a magnet to the back of your iPhone casing.
Conclusion
You may encounter the iPhone camera shaking problem due to a dirty lens, software-related complications, or interference from the metal shield above your camera. This article has discussed the detailed fixes to this problem. Simpler fixes include cleaning your camera lens, restarting your iPhone, updating the iOS, or resetting all settings.
The more advanced fixes include restoring the iPhone via iTunes, activating the Lock Camera feature, or using a magnet. Ensure you try out each of these fixes to determine which one can easily solve your camera shaking issue. Also, don't forget to share this article with family or friends if they've experienced a similar problem.
FAQs on iPhone Camera Shaking
Below are common questions about how to fix a shaking iPhone camera.
1. What to Do When My iPhone Camera Stutters?
If your iPhone camera stutters, you can try cleaning it by removing the dirt on the lens using a soft fiber cloth. If the issue persists, you can restart your iPhone by pressing and holding the necessary buttons, depending on your device model.
2. How to Fix It When My iPhone Camera Is Shaking and Making Noise?
If your iPhone 13 or 14 camera is shaking or making noise, you can fix it by enabling the Enhanced Stabilization feature in your settings. You can achieve that using the following steps:
- Go to your iPhone Settings.
- Tap on Camera.
- Go to Record Video. Next, toggle on the button for Enhanced Stabilization.
3. How to Fix iPhone Camera Pulsing and Can't Focus?
A simpler solution to iPhone camera pulsing or failing to focus is to restart your device. If using iPhone X or later, you can restart it using the following steps:
- Press and hold the Volume and Side buttons until you see the slider.
- Drag the slider to turn off your device. Wait for about 30 seconds.
- Press and hold the Side button until the Apple logo appears. Your iPhone will turn back on.


 NEW
NEW HOT
HOT