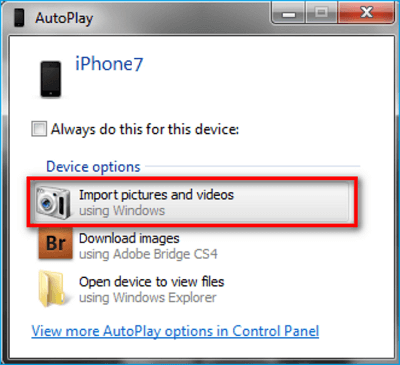
Hi, all. I am having a problem with the AutoPlay on my Windows 7. When I connect my iPhone 8 to the computer, I can’t see the option for "Import pictures and videos using Windows" when the AutoPlay pop-up automatically. I am looking for the effective solutions to fix this problem, but I have not managed to do it. Thanks for any suggestions in advance.
"Import pictures and videos using Windows" of AutoPlay is a useful feature on Windows 7/10 computer when users want to export photos from their camera or phones. However, the AutoPlay not working problem frequently occurs in daily usage. According to the complaints in Microsoft's Windows 7/10 forum, the issues are as follows:
- The AutoPlay dialog doesn't pop-up/display
- Photos import option disappear
- Pictures import goes wrong
- Pictures import works very slow
For the above points, we offer you all the possible solutions in the following texts. You can try them all or choose anyone based on your practical matter.
![how to fix autoplay not working on Windows 7]()
Quick fixes AutoPlay Import Pictures Not Working on Windows 7/10
Solution 1. Ensure AutoPlay is used for all media type and device
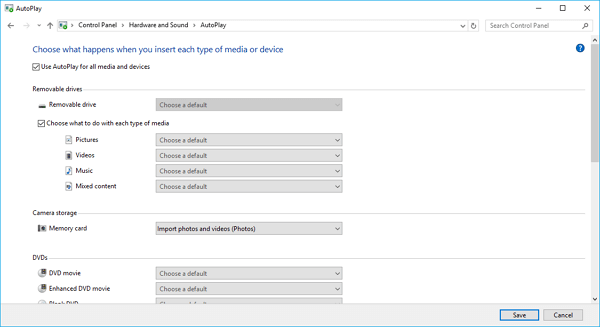
If the AutoPlay is missing or the picture import doesn’t show when you connect your removable devices, you can:
Go to Control Panel > Hardware and Sound > AutoPlay or Control Panel > search for AutoPlay. Check box for "Use AutoPlay for all media and devices". Then, choose Pictures, videos, Music, or any type of media you want.
![fix autoplay import pictures not working on Windows 7]()
Solution 2. Change your security settings for Pictures
Go to your computer, right click on the Pictures folder > Properties > Security > choose Full Control under Permissions for System.
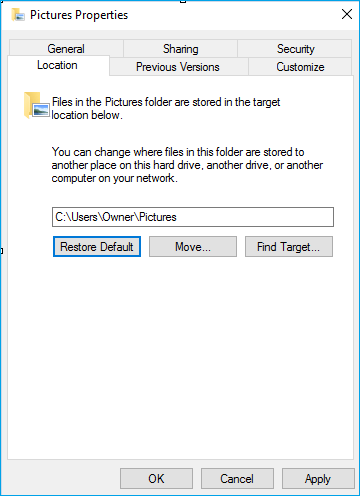
Solution 3. Restore default settings for Pictures
This method can fix the AutoPlay picture import nor working caused by improper settings.
Go to your computer, find Pictures > right-click and select Properties > Location > click Restore Default > Apply > OK.
![fix autoplay import pictures not working on Windows 7]()
Solution 4. Check your portable device settings
To import photos from your camera, you need to adjust the camera settings to MTP or PTP mode before connecting it to your computer. For Android or iPhone, when you plug your device into the computer with the USB cable, you need to follow the pop-up notice to finish the recognizing settings.
Solution 5. Disable the antivirus settings
Sometimes, the antivirus settings will conflict with the Windows 7 or Windows 10 and prevent you from import photos from portable device to your computer. Therefore, then problem happens, check your antivirus settings or even disable your firewall temporarily.
Solution 6. Transfer photos from iPhone to Windows 7/10 with a free tool
If you can’t solve the AutoPlay not working issue using the above methods, you can transfer your photos or videos from device to the Windows 7/10 manually with a simple tool. As the operating system closure feature, iPhone users are more likely encounter this question and can't import photos from iPhone to Windows 7/10 PC. At this time, you can refer to a free iPhone data transfer program, that is EaseUS MobiMover Pro. With this software, you can sync data between two iOS devices or between an iOS device to the computer(PC/Mac/laptop) as easy as one-click.
Following steps show you how to use MobiMover to move images from iPhone to PC on Windows 7/8/10. Other supported files are contacts, messages, videos, music, books, Safari bookmarks, voice memos, and more.
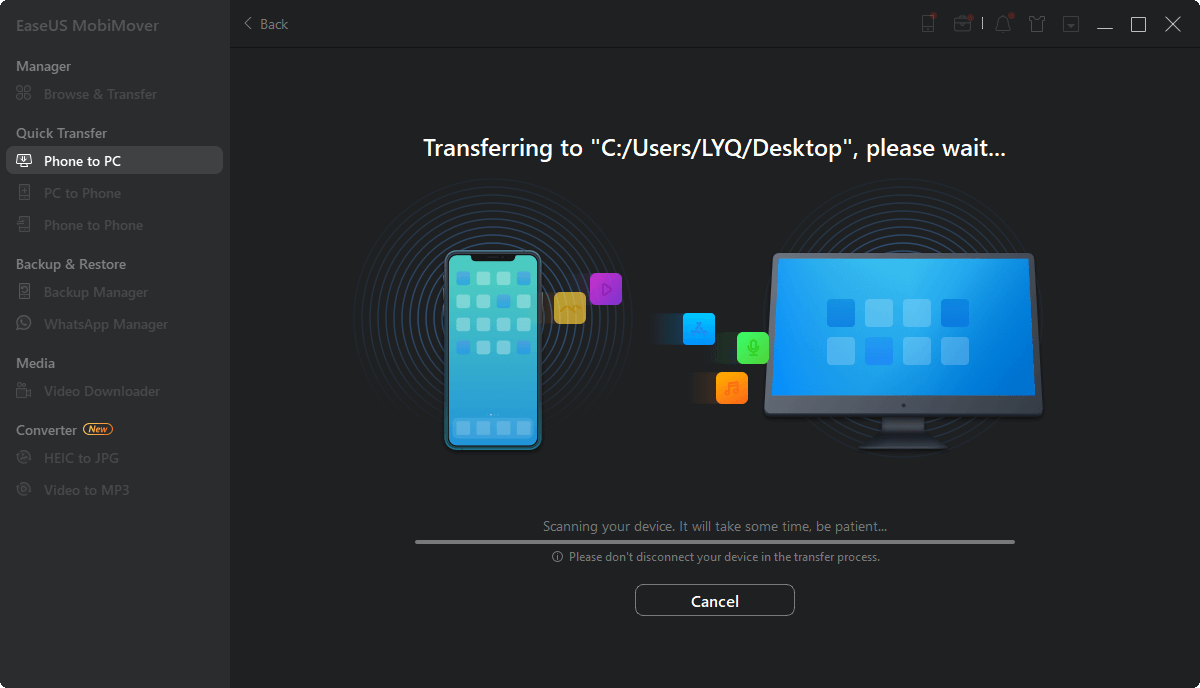
Step 1. Connect your iPhone to PC running Windows 7 or later. Run EaseUS MobiMover and click "Phone to PC" on the screen. Then, click the "Next" button to continue.
Step 2. Check the category/categories you want to transfer from your iPhone to PC running Windows 10/8/7. As you can see, you can copy other supported files together with photos from your iPhone to PC at once.
Step 3. Now, click the "Transfer" button to transfer the photos from iPhone to your PC in one-click. If you've customized the storage path, find the files there. If not, you can check them on your desktop.
Quite simple, right? In addition to the data transfer function, MobiMover is also good at iPhone file management and online video downloading.
For the content organization, you can delete all iPhone contacts at once, add ringtones to iPhone without iTunes, remove the whole music with a single click, etc.
For video downloads, you can use it to save any video from any website, like download YouTube videos to iPad directly, save Dailymotion videos to your PC/Mac from URL, and so on. Don’t miss this all-in-one iPhone data manager. It is worth trying. Above all, it’s completely FREE!


 NEW
NEW HOT
HOT