iPhone has been a great innovation introduced in the market since the last decade. While the device has been a haven for many technological advancements and innovations, there are multiple software issues reported against it. For different software issues and faults in devices, various tricks have been normalized among users. One trick involves using iPhone DFU Mode, which helps users restore their devices and make them new again.
This article will take up the discussion of iPhone DFU Mode and provide a comprehensive guide explaining how to use it. After reading this article, you will know how to manage your iPhone in DFU Mode.
What Is iPhone DFU Mode
DFU Mode on an iPhone, also known as Device Firmware Upgrade, involves the management of the firmware of the device, as stated by the name. It turns out as a great technique to restore an iPhone with the help of a computer. iPhones are put into the DFU Mode to put them into working order. Devices that are facing extensive working disorders and faults are managed through DFU Mode, which helps them in restoring the iPhone completely.
The iPhone DFU Mode performs similarly to the BIOS in Windows computers, taking users below the operating system and into the depths. Although moving into the mode does not change anything in the device, it allows the user to perform actions that can help them make multiple changes in the iOS device.
At times, users who wish to install older iOS versions consider putting their devices into the iPhone DFU Mode for quick and effective results. When an iPhone is put in the DFU Mode, it helps users access iTunes and Finder at comprehensively deeper levels, which is more than the standard accessibility.
How to Enter iPhone DFU Mode
If you are discovering the proper technique for entering the iPhone DFU Mode, this section provides proper directions. No matter what kind of iPhone model you are using, you can apply a professional tool to help you get the job done. EaseUS MobiXpert is such a multifunctional tool that can instruct you on how to enter the iPhone DFU mode. Also, if you want to exit DFU mode, the software can achieve the goal with one click. However, it can do much more than these:
Main Features
- As the name tells, MobiXpert is an expert in solving iOS system issues without data loss.
- It can fix iTunes syncing, connection, backup, and restore issues with several clicks.
- It can help you update to the latest iOS 17.
- If you are not satisfied with the iOS version, you can download it to the previous one without jailbreak.
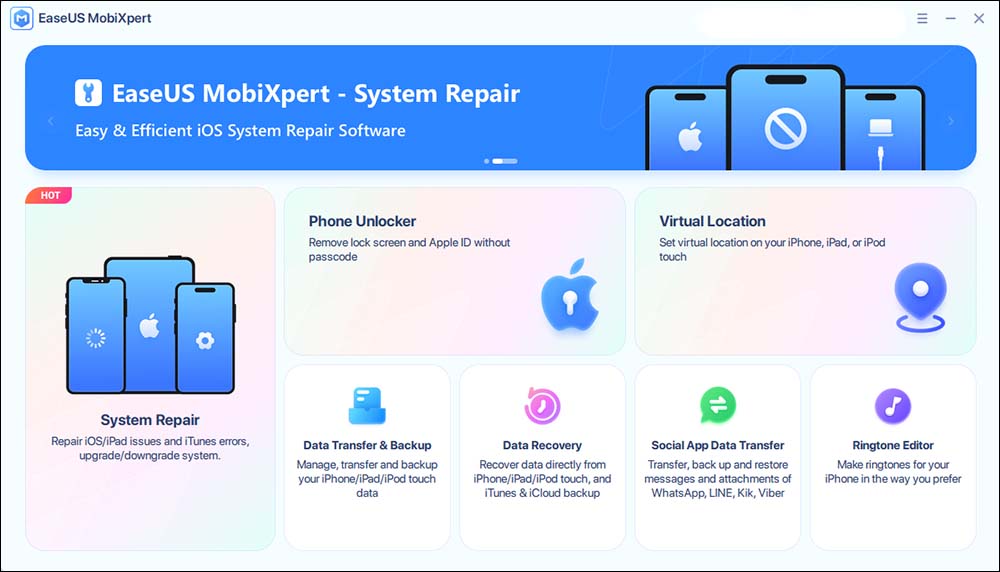
Step 1. Install and launch EaseUS MobiXpert on your computer. Connect your iPhone/iPad to computer. From the main interface, click System Repair.
![home page]()
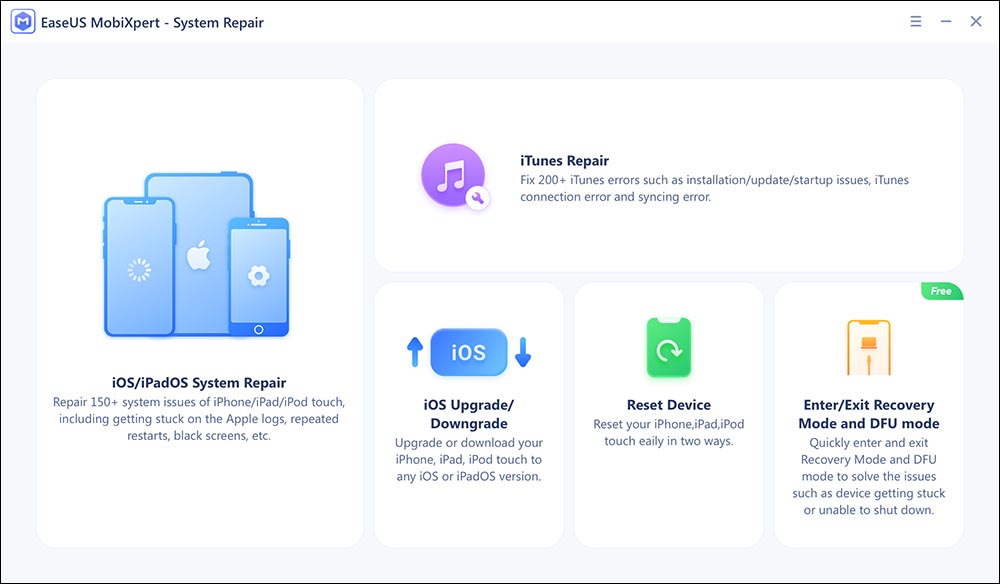
Step 2. Click iOS/iPadOS System Repair to get into DFU mode.
![ios system repair]()
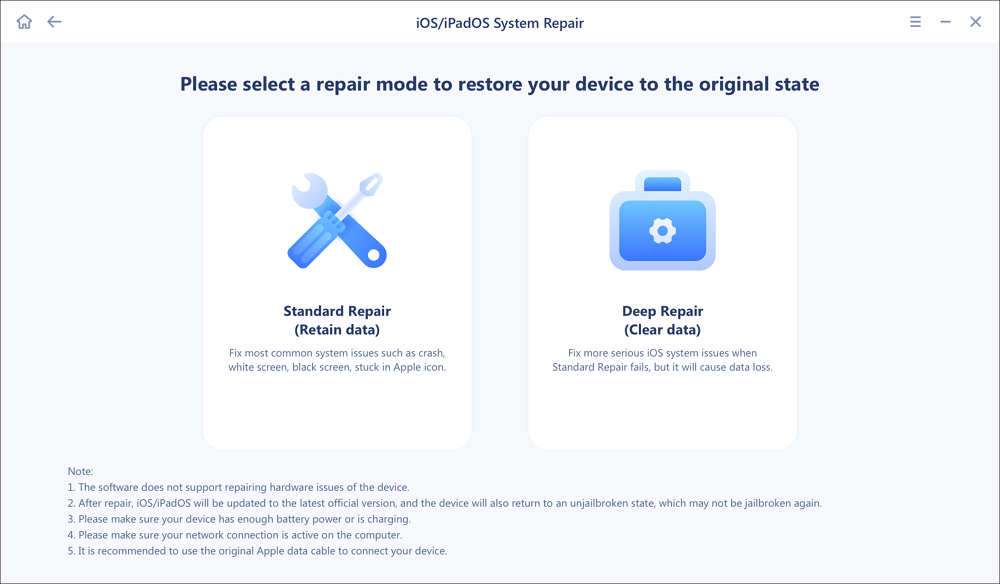
Step 3. Choose a mode to restore your device to the original state.
![select repair mode]()
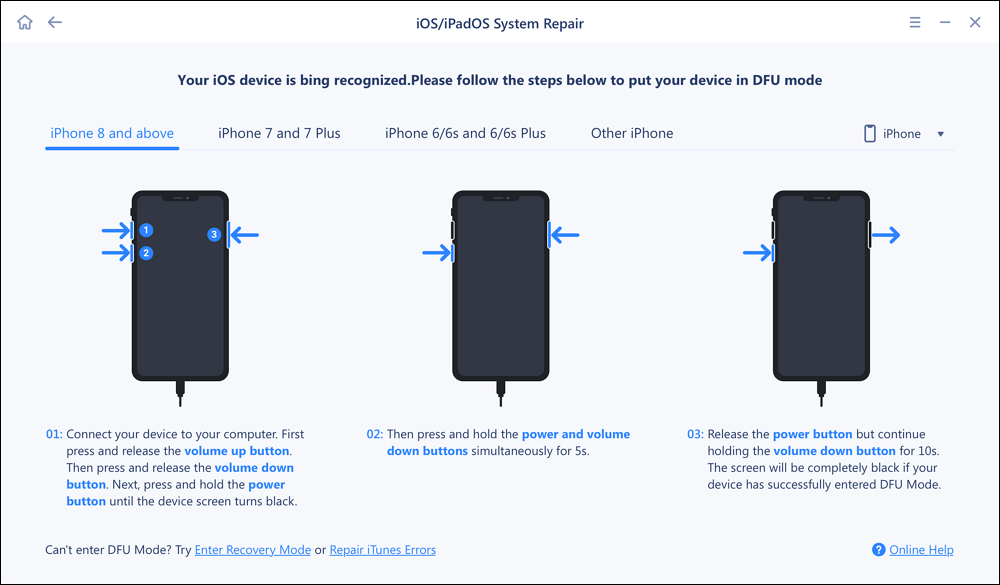
Step 4. After your device is recgonized, select your device and choose the correct device model. Then, follow the on-screen instructions to put your device in DFU mode.
![enter dfu mode]()
How to Exit iPhone DFU Mode
To exit the iPhone DFU Mode, you must force restart your iPhone. Doing this will put your device back to its normal state. The method of force restarting the iPhone is different for the models, which is presented below. Or, you can use EaseUS MobiXpert to one-click exit DFU mode.
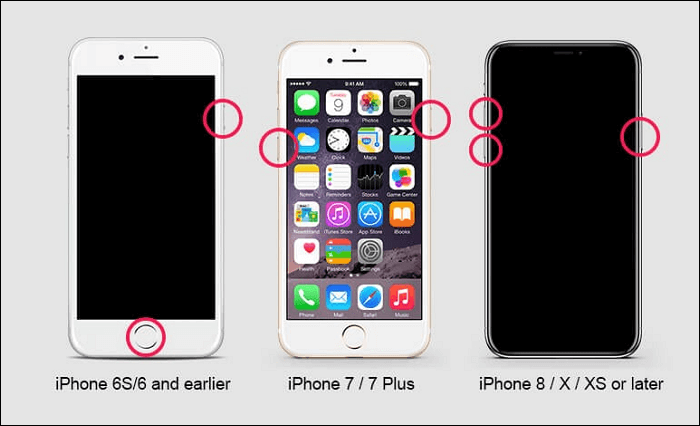
For iPhone 8 and Later Models: Press the "Volume Up" button and continue with the "Volume Down" button. Hold the "Power" button for a few seconds as you release it until the Apple logo appears on the screen.
For iPhone 7 and 7 Plus: To force restart, hold the "Power" and "Volume Down" buttons until the Apple logo appears on the screen.
For iPhone 6s and Earlier Models: Hold the "Power" and "Home" buttons simultaneously for a few seconds until the Apple logo appears on your iPhone's screen.
![power and home]()
What to Do When Stuck in DFU Mode
If you have discovered that your iPhone is not getting out of the DFU mode, you will have to try some quick remedies. Starting with the first one, it is better to use iTunes or Finder to restore your iPhone properly. The iPhone will restore, and it will restart normally for you. On the other hand, if you intend to avoid the loss of your data, you can try using the option of contacting Apple Support Centers. Or, more conveniently, use EaseUS MobiXpert to repair your iPhone system issues.
Step 1. Connect your iPhone to computer and launch EaseUS MobiXpert. Select System Repair from the main interface.
![MobiXpert hompage]()
Step 2. Click iOS/iPadOS System Repair.
![]()
Step 3. Select Deep Repair, which will clear your iOS/iPadOS data.
![]()
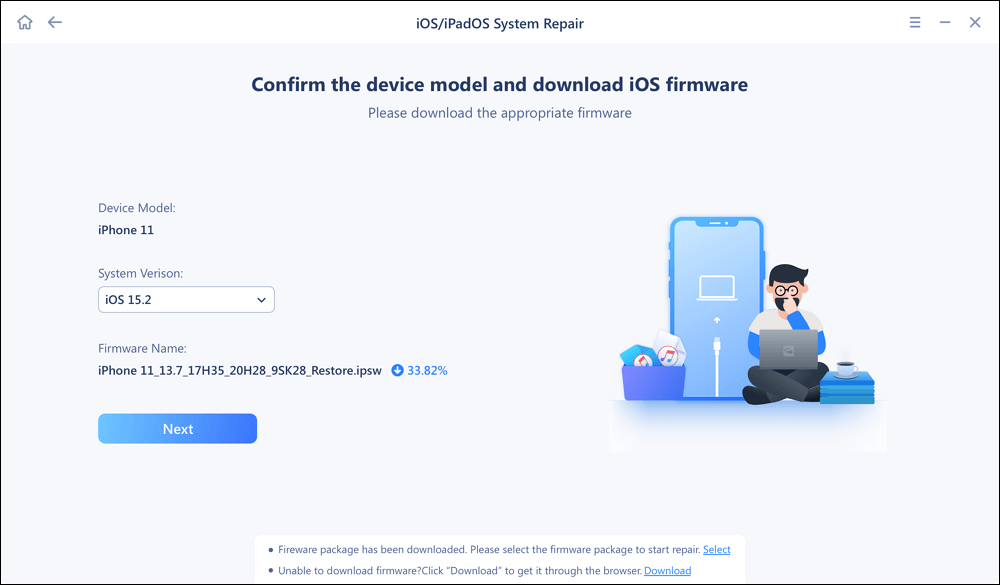
Step 3. Confirm your device model, select your system version, and click Next.
![]()
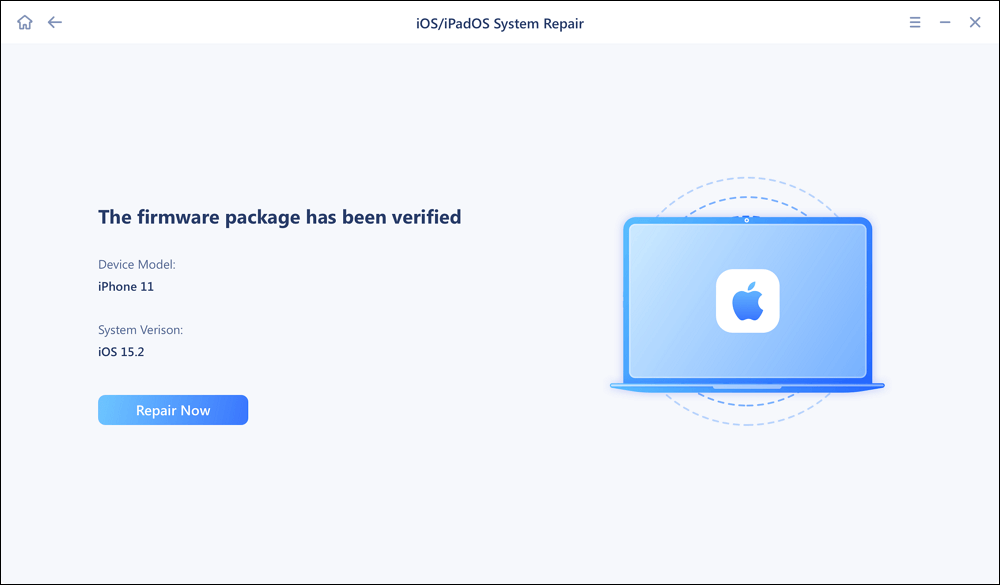
Step 4. Then, it will verify the firmware package. When the firmware is verified, click Repair Now.
![]()
Step 5. Next, you need to type "123456" in the box and click Continue to confirm your operation.
![]()
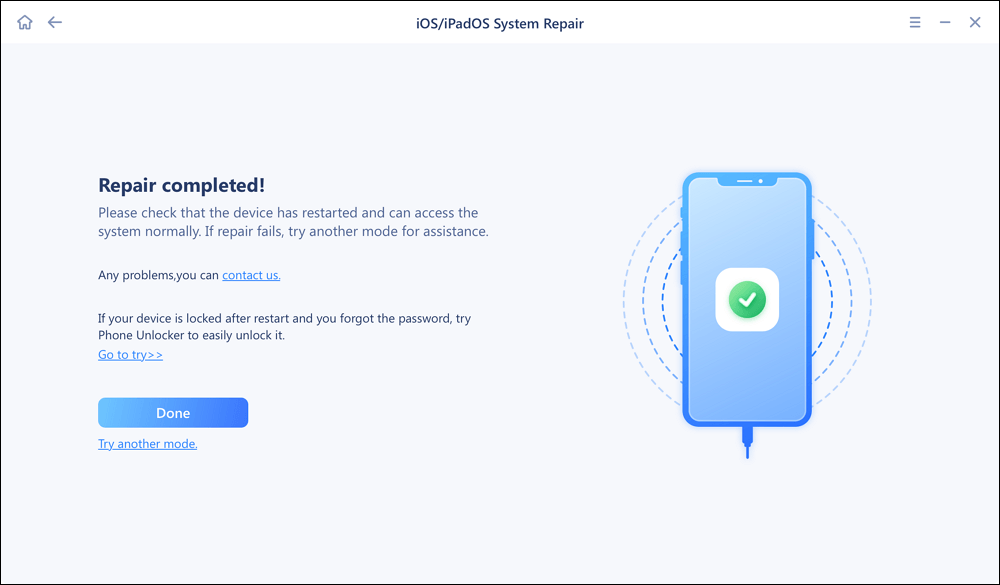
Step 6. EaseUS MobiXpert will repair your system automatically, which may take a few minutes. Click Done when repairing is completed. During the process, don't disconnect or operate your iPhone/iPad.
![]()
FAQs on iPhone DFU Mode
To get a better understanding of the iPhone DFU Mode, look into these questions for a clear overview of the process:
1. What is the difference between iPhone Recovery Mode and DFU Mode?
The iPhone Recovery Mode requires iBoot to restore the Apple device, whereas the DFU Mode bypasses the iBoot and processes against it. This makes the DFU mode more extensive and detailed than the Recovery Mode.
2. Does iPhone DFU delete everything?
Entering the iPhone DFU mode does not delete everything, but the system restoration procedures involved in the methodology delete everything from the iPhone. After using the DFU Mode to restore your iPhone, all data is erased.
3. How do I force my iPhone 11 into DFU Mode?
Only one dedicated way is available for entering the iPhone into the DFU Mode. If you cannot enter the DFU Mode, retry with the methods explained above in the article. Usually, problems involve the physical execution of the way, so you should carefully look into the process.
The Conclusion
This article has clearly explained the iPhone DFU Mode and provided insight into how one can enter the mode. With the details presented for every model, the reader has been made aware of the things they need to keep in mind when managing the DFU Mode.

 NEW
NEW HOT
HOT